NCECA was in full swing and I wasn’t there. So sad! So i did the next best thing… I attended through Instagram! Then I had the thought, What if I invited people that were posting at NCECA to call me for a short interview? So I tried it and it worked. These brave souls responded to my request and I got to talk to them while they were at NCECA.
Will Donovan is the founder of Donovan Pottery, where storytelling and craft collide to create fantasy-inspired ceramics. Passionate about blending history, literature, and art, Will explores how pottery can bring stories to life. Will also runs Mathom House, a brand championing craft, community, and creative storytelling.
How do you come up with the concept for your events? Do you do it alone or with a group and how do you brainstorm for them?
A couple of different ways we conceptualize events in collections is one I try to listen a lot. I pay attention to what is happening online and what people are interested in, participating in with social media, books, or stories. I am always paying attention to what I think people are interested in, in a big scheme of things and I try to create in a little way in the middle of that.
Once you have decided on your theme how do you go about planning your budget for something like this?
That’s a great question and I don’t know if I have a perfect answer for how to plan a budget for an event. What I probably should have in place is a better system for that. But I tend to err on the rule of cool and if I can I fund it.
The rule of cool. (laughter)
If it’s cool we will try to do it.
How many people do you bring into the planning process?
It’s a whole team endeavor wo we have at any one time between five and seven employees and staff that help us coordinate everything. And when we are coming up to an event it’s all hands on deck to make sure we have the pots, the food, the entertainment and the people who feel like they are a part of something that is happening and not disorganized chaos.
Do you have an agenda laid out for the day of the event?
We do. We schedule everything out as best we can with some flexibility to make sure that people coming to the event know what’s happening and when, but also the team can be prepared for anything that we need to make sure we are coordinating and doing.
How do you keep the event tight and in control?
There is always room for strange things to happen when you are trying to control something like an event that contains a lot of people. One of the ways we try to mitigate that is clear communication. Whether that is through the staff or through people that are attending. If people are coming we say, Hey, this is the scope of the event. Here are some important things that are happening at these times and we want to make sure that we are able to do them for you and that you are able to enjoy them. We tend to post a schedule of any moments that we want to make sure that people are aware of and that helps to make sure anyone in attendance can be a part of it.
On the day of the event how do you keep yourself involved with both the participants and “staff”, the event leaders?
I try to make myself as available as possible to attendees when it’s the day of the event because I know I am the front-facing person and the one people are most familiar with, so if they have questions or want to so hi, that’s mostly me. A lot of it is pre-delegation of making sure the team knows what’s happening, what their role is in it, and then mostly getting to enjoy the day.
What kind of evaluation do you do after the event about what could have been done better etc?
That’s a great question. We do two things. One is we make sure we publish and share the story of what happened either on social media or our newsletter list. And we invite feedback from all the attendees who went. And two, we have a debrief meeting with the team and we go over in the studio after the weekend is done and we just check in with each other and see what went well, what could have been better, and what we will improve on next time based on what we hear.
Aaron Raymond is a Canadian potter that started his pottery journey in March of 2024. He has learned everything so far from the school of YouTube and by watching videos on Instagram. Aaron’s work focuses on creating tiled designs on his work using both original designs or recreating tiled flooring from around the world. Aaron’s interest in handmade pottery began while living in Lisbon, Portugal, for 2 years from 2018 to 2020, and it was the intricate stone designs in the plazas and sidewalks of Lisbon that first transpired the idea of putting these designs onto clay.
I think I like, especially with pottery, that it’s never the same thing day after day. Every day you have something new to do in the process. Whether you are throwing or attaching handles it’s never the same thing over and over again.
Do you feel like you were a creative person your whole life?
A little bit. One of my first jobs was with my family’s business, a stone yard. We were splitting granite to make different shapes for homes. It was hard work but in a sense creative work that I enjoyed.
How do you keep your ideas fresh?
With this style I am doing the possibilities are really endless. With the amount of different tile work that is out there in the world I don’t have any shortage of ideas of things I want to try.
Where do you see yourself in one year?
I have a feeling it will be pretty similar just because I’ve had so much good response and people do want mugs and I just can’t make them that fast. So I think for the next while it will be very similar.
What has become your favorite studio tool?
I don’t even know what it’s called but you have probably seen it. A pottery clamp.
Another Canadian potter made that I believe, right?
That’s right and I forget her name off the top of my head but it allows it to spin freely without the handle getting in the way. Which is great for glazing.
How would you define creativity?
Being able to put what you have in your mind to something, whether it be on the page, in a painting, on clay. Whatever comes to your mind to be able to put that out into the world.
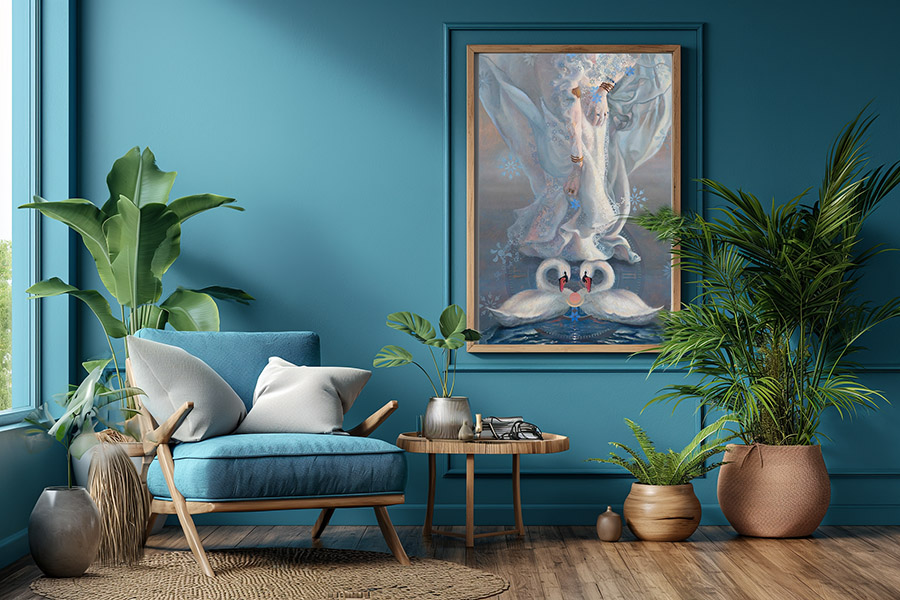
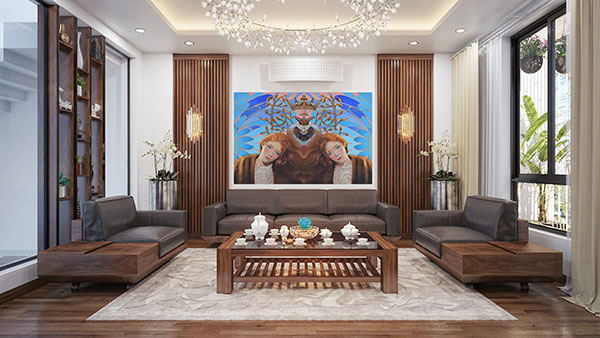
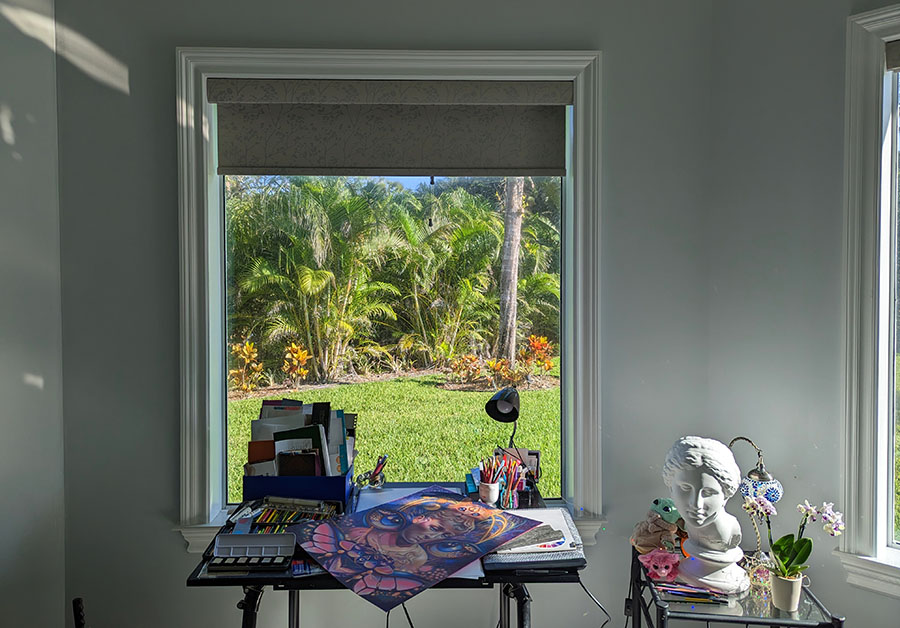
The right art display can transform an ordinary room into a personal museum. Whether you’re showcasing family photos, collected paintings, or your creative works, a well-planned home gallery adds character, style, and mood to your living space. But how exactly do you create the right space for a gallery? Do you need a room with many windows, or is artificial light better? What should the layout of the room look like? Let’s break down the essential steps to create an impressive art display that fits your home, lifestyle, and budget.
Pick the Perfect Space
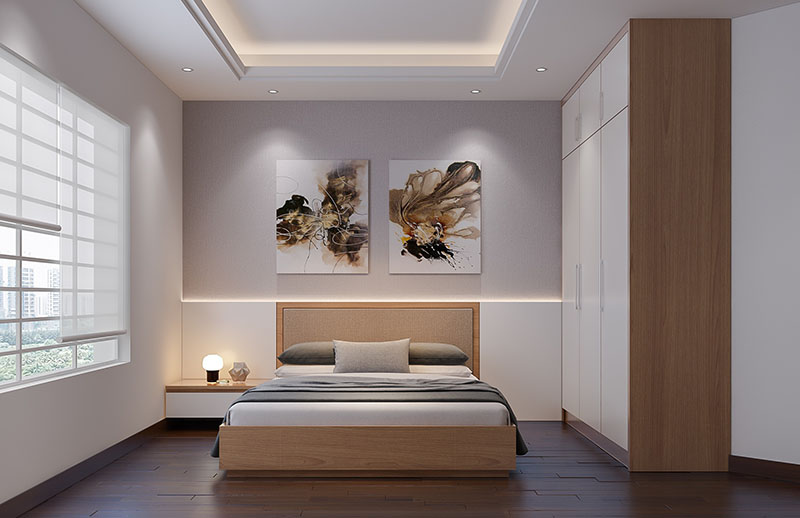
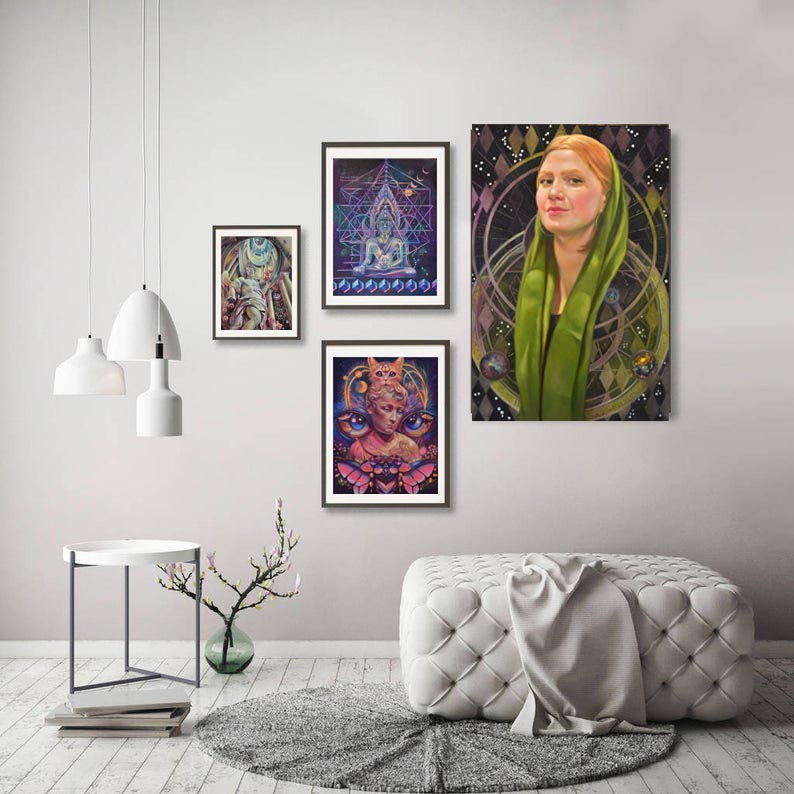
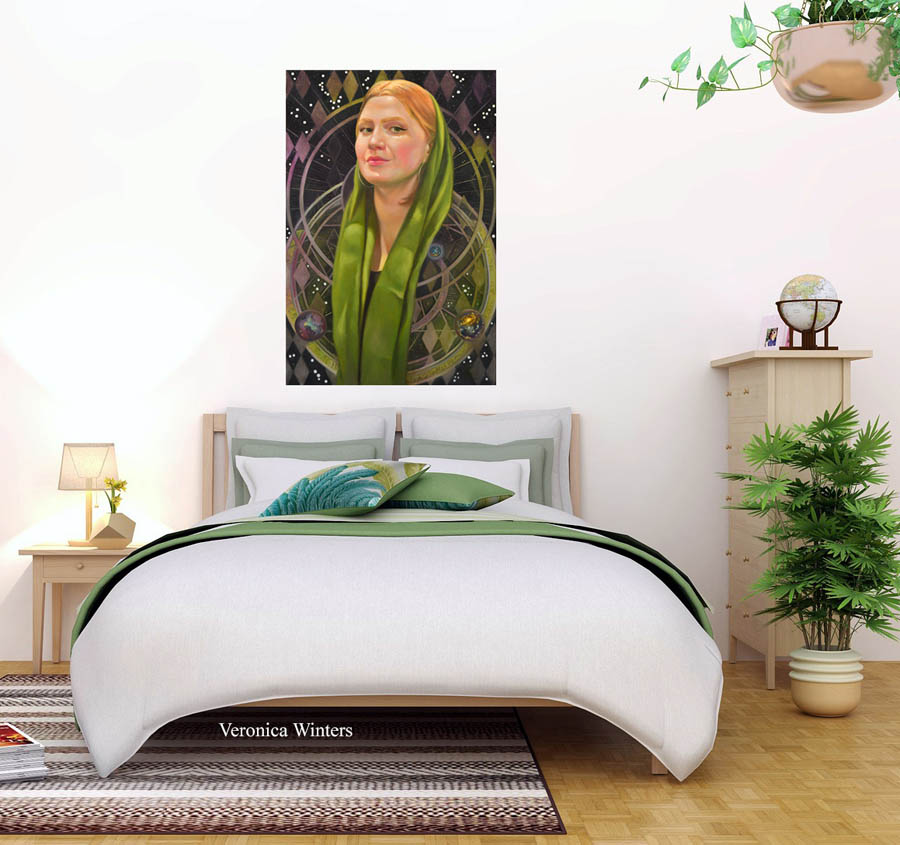
The first step is choosing the right location for your gallery. While many homeowners automatically think of the living room, consider other spaces that could work better. A wide hallway, home office, or even a dedicated spare room can serve as an excellent gallery space. Your bedroom could have a large, empty wall. The office space might have a long, narrow wall that’s grey and boring unless you put art into it. The key is finding an area with enough wall space and natural traffic flow.
Look for rooms with minimal furniture and clean sight lines. To display art beautifully at home, you need to make it possible for viewers to focus on the art without visual distractions. Also, consider how people move through the space — a gallery shouldn’t block normal traffic patterns or create awkward bottlenecks where you bump into the art with your shoulders.
Don't hang big art where is not enough space between art and the viewer to see it properly. Don;t hang art too close to the kitchen's oven or cooking stove as hot vapors may damage the art in the long run.
Before you start hanging artwork, assess the walls. Older homes often need wall repairs or fresh paint. Fix any cracks, holes, or uneven surfaces. Color your walls in a light, neutral hue like light grey or beige. A smooth, clean wall surface makes your art look more professional and protects your pieces from damage.
Light It Right
Proper lighting can make or break a home gallery. Natural light is beautiful but can damage artwork over time. UV rays fade colors and can crack canvas art. If your chosen space has large windows, consider installing UV-protective window film or light-filtering shades. In general, it’s best to display the art under diffused light that has minimal UV impact. I’m not a big fan of direct, artificial light that leads to uneven fading of any art.
For artificial lighting, you have several options:
Track lighting offers the flexibility to adjust individual lights as you change your display.
Picture lights mounted directly above artwork provide focused illumination.
Recessed ceiling lights create overall ambient lighting. This might be the best option to display art without creating damage to it.
Wall-mounted sconces add both function and style.
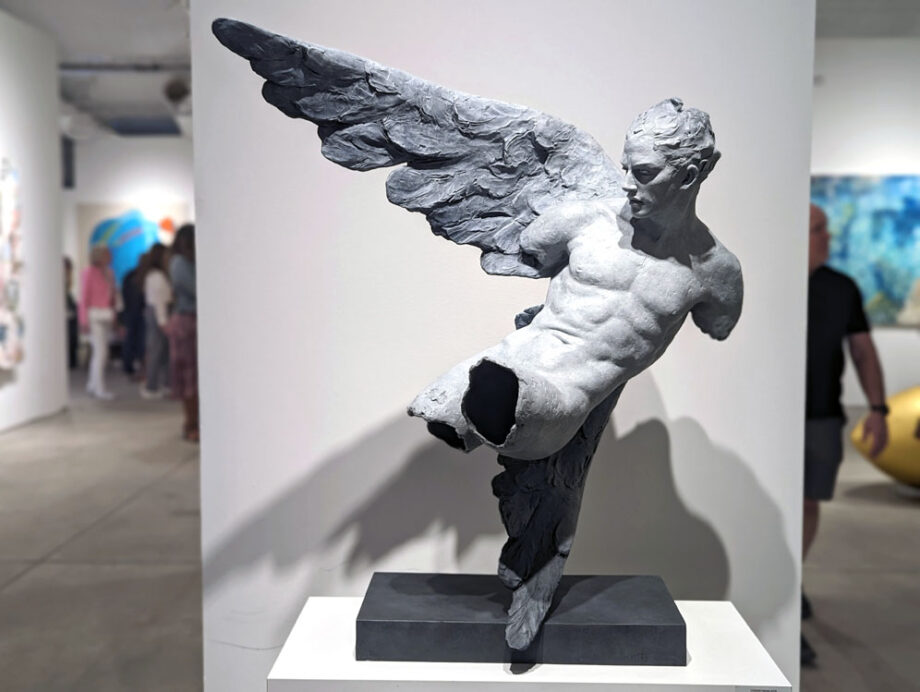
Coderch and Malavia, ALIS VOLAT PROPRIIS, sculpture display with track lighting at the Context Art Miami 2023
The color temperature of your lights matters too. Aim for bulbs rated between 2700K and 3000K for warm, natural-looking light that shows true colors. LED options now offer excellent color rendering while staying cool and energy-efficient.
If you display drawings (art on paper including watercolor), I strongly recommend the UV-protective, non-reflective plexiglass to protect art from damage. The thicker the plexiglass, the more exponential the protection is for art.
Installation and Layout
Before making any holes in your walls, plan your layout. Many professional installers use the paper template method: cut paper sheets to match your artwork sizes and tape them to the walls. This lets you experiment with different arrangements without damaging walls or artwork.
Consider these layout principles:
Keep larger pieces at eye level, roughly 57–60 inches from the floor to the center of the piece.
Allow enough space between works so each piece can “breathe.”
Group similar pieces together: by theme, color, or frame style.
Mix up sizes and orientations to create visual interest.
Leave room for your collection to grow.
Keep space small between art and sofa. Most people hang art too high above the sofa’s line.
Structural Considerations
Most home walls can support small framed art (under 16 inches long and light frame), but heavy pieces need special attention. Locate wall studs with a stud finder and use appropriate anchors for your wall type. In older homes, plaster walls may need different hardware than modern drywall. If you don’t do this, your heavy art may fall off of the wall, break the frame, and damage both its surface and the floor or furniture below it.
If you’re planning an extensive gallery, consider these structural updates:
Adding wall studs for heavy piece support
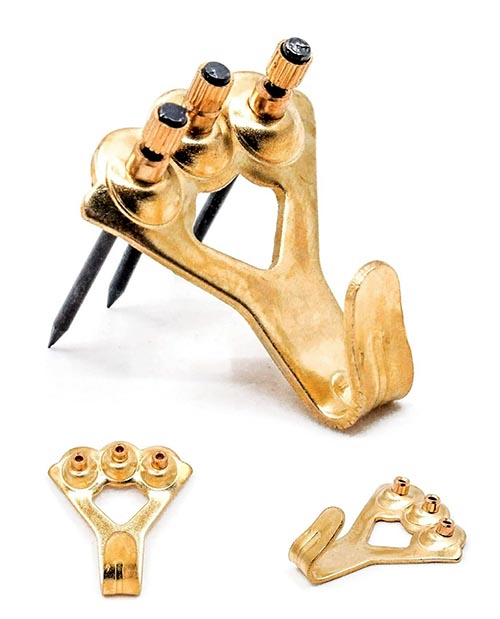
Purchasing heavy-duty hooks for big art display
Installing dedicated electrical circuits for gallery lighting
Building shallow display niches for three-dimensional art
Adding crown molding with integrated picture rail systems. This is an advanced method and a vast majority of homes don’t really need this for picture display.
Protection and Preservation
Your home environment affects artwork differently than a museum setting. Consider these factors:
Temperature fluctuations can damage certain materials, especially canvas.
High-humidity areas like bathrooms are ok for art made of metal but please don’t hang valuable paintings in your bathroom space no matter how big it is! Humidity and strong light deteriorate any art quickly.
Air vents can blow dust onto pieces.
Direct sunlight causes serious fading and deterioration. Don’t put too much light onto your wall art. Pick a wall that has enough natural light on it but no direct sunlight or electrical light!
You might need to upgrade your home’s climate control system or add a dehumidifier to protect valuable pieces. Installing quality air filters helps reduce dust and other airborne particles that can damage artwork over time.
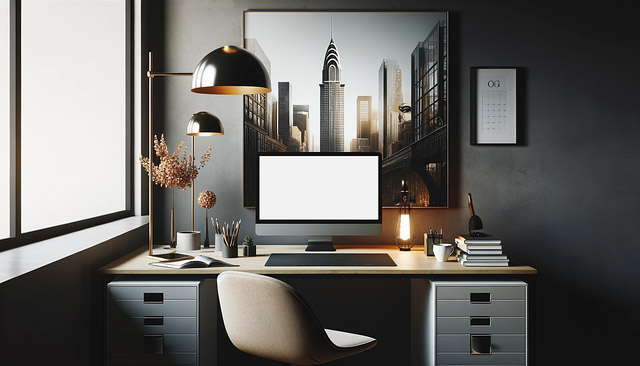
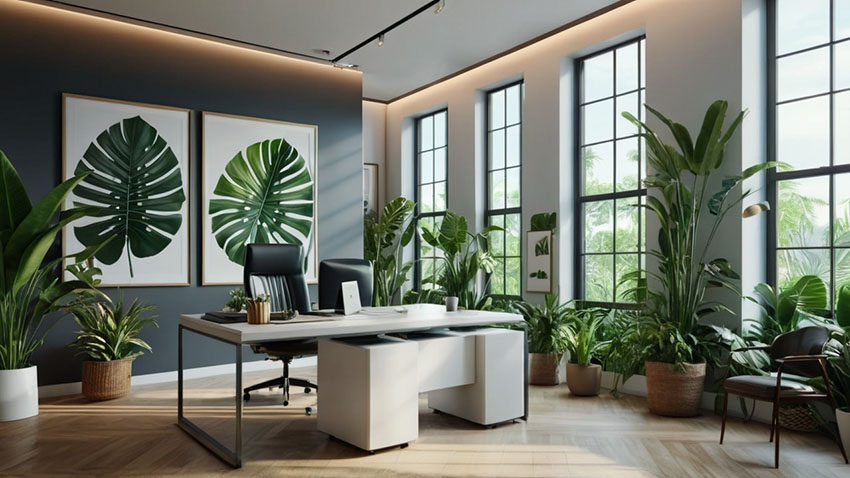
Besides creating a wonderful art collection at home, you can also become a trendsetter by displaying art in your office. If you’d like to create a unique environment in your business space, consider the following details.
1. Brand positioning
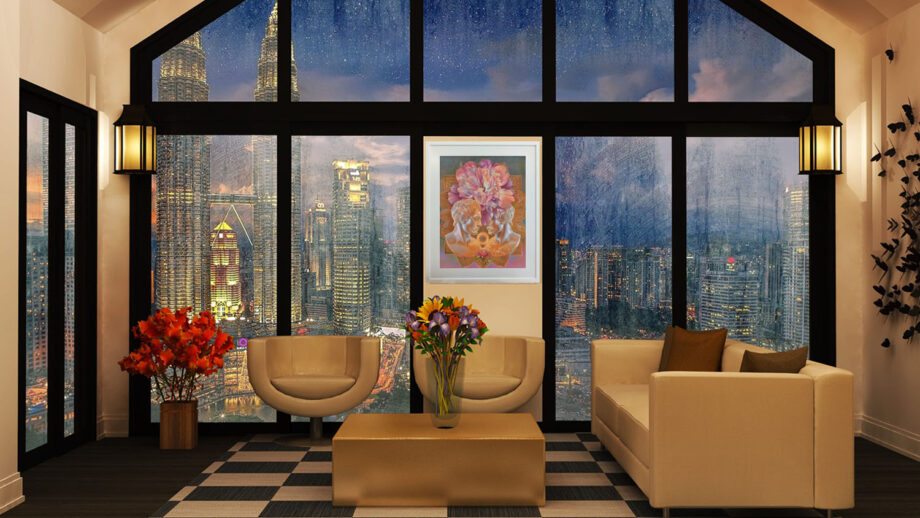
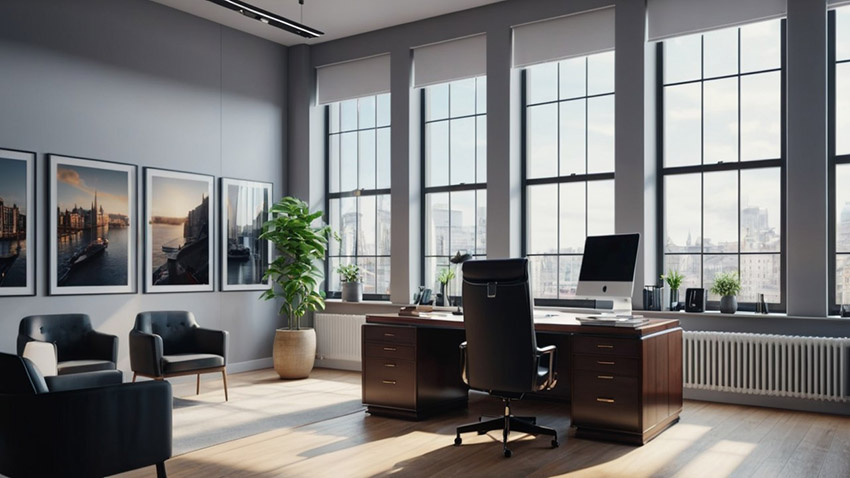
Your art collection can make your brand and space different from millions of boring office spaces. You can attract new clients by showcasing your unique, luxury space that sparks conversations and makes you and your business memorable! Many offices looks the same having no clear direction or authenticity. Contemporary art can help you stand out from a crowd.
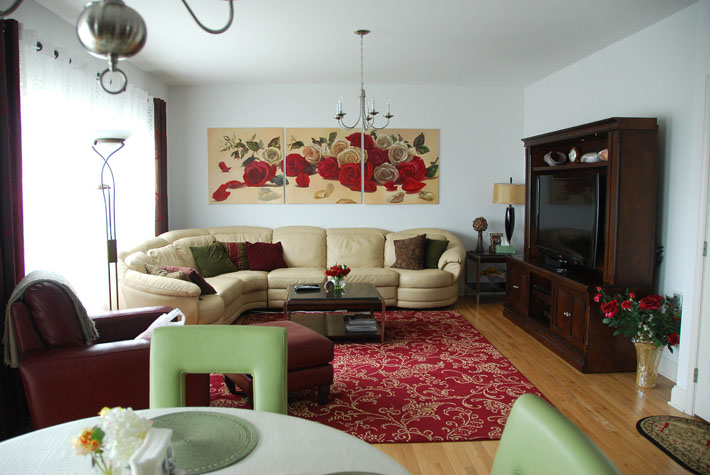
Describe your company using visual language so we can understand it without words. Bring art that relates to your business and matches in color. If you sell flowers, have floral art on the walls. If you’re in the real estate business, art with local scenery well. If you sell cars, have excellent, high-quality art or photos of rare cars on your walls. If you’re a law firm, you have many options keeping it either conservative or contemporary.
2. Visual comfort
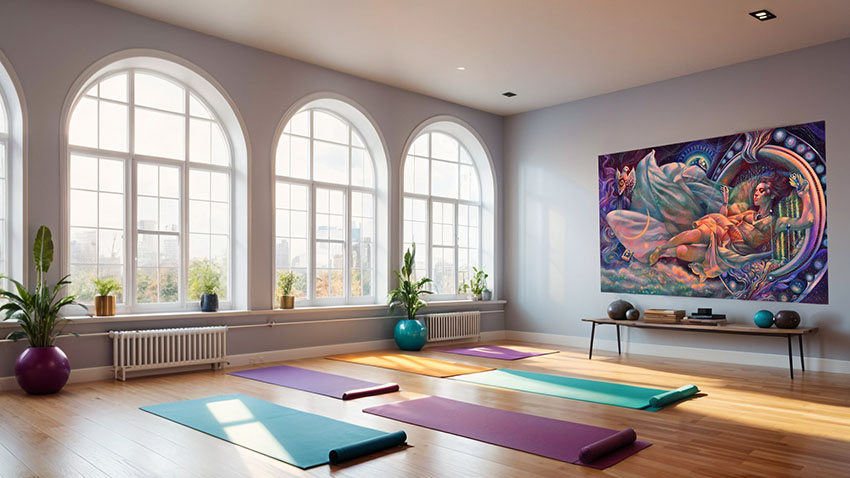
You can create a soothing productive environment with light and art pieces that distress workers. Office employees can improve focus by resting their eyes on art. It creates a positive energy flow. Art can make offices a safe and comforting space you want to come back to. Pay attention to how psychologists decorate their offices because their art often creates inner comfort and warmth. Art with green plants can match your interior or canvases with blue landscapes may be a perfect fit for your space. Think of a feeling you want to elicit, colors help you communicate that feeling.
3. Inspiring space
Your art wall displays can become an inspiring space your clients will want to come back to. Art encourages positive emotions, creative thinking, and a light or fun atmosphere in an otherwise boring workspace.
4. Cultivate culture & become a trendsetter
Give people more chances to talk about your business for free! Without buying expensive ads, a great art collection speaks for itself. Be the leader in your business by displaying memorable, high-quality art that gives people more chances to talk about your business! Invest in art that inspires us and holds value long-term.
How to find & fit original art in your office space
Finally, let’s talk about the most important and practical aspect of your art collection for office space. Before rushing to your local art fair to buy paintings, think of all 5 points I mentioned earlier: brand positioning, color, visual comfort, feelings you want to create, and trendsetting. Here are a few more things to consider.
The easiest thing to do is to create wall art displays designed around 1-2 colors (white-blue, green-yellow, or pastel colors of soft blue-lilac-pink, for example). Think of a specific color scheme to represent your brand in chosen artworks. Warm or cool? Light or dark? Red-white or gray-aqua? Vibrant or subdued?
Another simple idea is to hang landscapes/local natural scenery art or photographs. Many medical offices do just that. Hang big art at eye level to have a visual impact.
Think of the medium. Large-scale photography or canvas art?
Consider the wall size to choose the right art for your space. Most of the time people make the mistake of hanging art that looks too small on a huge wall. The result is that art gets ‘lost’ on the wall.
Have consistency in your art collection display. It needs to tie in together in color, type, theme. Abstract or representational? Bright or soothing? Figurative or floral? Framing should be consistent in style too!
If you feel intimidated by this work and need help organizing office space, check out local services that include interior designers, local artists, and art consultants. If you know a local artist you like, invite him or her to see the space to commission art for your space.
One of the rules in home and office decoration is to arrange art, furniture and plants around a single color. Make it two if you have to. Say, green-white. Color the walls in a neutral color (light grey), so any change in art would be ok for the wall space in your office.
Making It Work Long-Term
A home gallery will grow with you. Leave space to add new pieces, and don’t feel locked into your initial arrangement. Professional galleries regularly rotate their collections — you can do the same at home. This keeps the space fresh and lets you highlight different pieces throughout the year.
Consider practical matters like cleaning and maintenance. Leave enough space between pieces to dust effectively. Think about how you’ll reach higher artwork for cleaning or rearranging. If you’re installing track lighting, make sure you can access it for bulb changes.
If you hang art in office space, strongly consider foot traffic around your art. Some artsy hotels display original art in glass cases, large wall spaces can have canvas art displays in groups that have no direct reach to it. In other words, your customers shouldn’t bump into wall art displays constantly.
To sum up, creating a home gallery or a business space decoration takes planning and often some home modifications, but the result is worth the effort. A well-designed gallery space showcases your collection, adds personal character to your home, and lets you feel joy. Take time to consider all aspects — from wall preparation to lighting to preservation — and you will create a display space that works beautifully for years to come.
Are you looking for an easy way to do paper weaving with kids?
Are you not wanting to cut all those mats for your students?
In this tutorial, I will show you how to make a paper weaving the easy way – with a FREE template included. I thought I had posted about this template and technique but realized I never did. In a Facebook art teacher group, another member asked for a source to buy paper looms, which gave me the reminder that I wanted to have this template available for others to use. Then, I decided I needed to make a little tutorial to go along with it! This is a staple in my art curriculum and I do this with first graders every year in some form or another.
Choose a Paper Weaving Theme
Want to turn this into a Valentine’s project? Go for reds, pinks, and plenty of hearts! Feeling wintery? Try cool blues, crisp whites, and snowflake designs. Or, you can leave the color scheme and designs completely up to the kids. There are many fun ways to make this project unique.
Here is the FREE paper weaving template I am using in this video. (If you like what you see, be sure to follow me on TPT!) The template comes with written directions on how best to pick the settings on your printer. You will need to cut paper strips for your students to use. I usually cut strips around 1.5″ wide.
With this template, the kids are able to cut completely on their own with minimal help. I find that first grade and up works best for this project. Usually there is a child or two who may be confused and I try to encourage the peers who catch on quick to help out their neighbor.
Art Supplies Used:
Below is a list of some of the products I use in this video (as an Amazon Affiliate I receive a small amount of commission at no extra cost to you):
Heart Shape Stickers: from Michaels craft store in the seasonal section
If you’ve enjoyed this post, please do me a favor and “pin” it to save for later or share with a friend! Your support means a lot. If you have any questions at all, watch the video to see the process in action. Then, download the template which has more detailed specs for printing and using the template. If you still have questions, feel free to comment below and I’ll do my best to help you out!
Get a Free Guide for Easy Art Sub Activities!
If you like what you see on this blog, please sign up for my newsletter! I created a FREE Sub Tub art guide, with 10 easy activities you can leave for sub. By filling out this form you will get the download. Never stress about a sick day again!
Are you trying to incorporate art into your daily routine? Are you looking for ways to encourage creativity in your students? A timed collage prompt might just be something for you to try!
At the 2024 NAEA conference I went to a wonderful hands-on art workshop where we did timed collage prompts on index cards with art journaling artist Eric Scott!
• This idea can be used to encourage experimentation and play in your students- by setting a time limit, the students have to work creatively within those constraints.
• This idea can also be used to jump-start your own daily art practice, as it fits into a busy schedule.
The workshop I am going to tell you about today was the “Collage Magic” workshop by Eric Scott. Who is Eric Scott? I first learned of his work when I read Journal Fodder Junkies and Journal Fodder 365 years ago. As you may know, I am a huge fan of collage and art journaling and it is my preferred method of art making. Eric is also an art educator who works with kids.
Art journal page by Eric Scott
If you go to his website, you can read more about his art, but also get some free downloads with things like cartoon drawing guides, monster drawings and journal prompts. You can stay up-to-date with what he’s doing by following his SubStack or Instagram.
Timed Collages in the Collage Magic Workshop
In this workshop, we did a series of collages on index cards using simple (not precious) materials like construction paper and glue.
He set the timer for just a few minutes for each collage – any amount of time would work, but these were about 3-7 minutes each. We thought about using different techniques and cutting different shapes. Could you create interest by ripping or tearing? Another teacher near me created pop-ups, so we definitely got creative. With time constraints, it forces you to make quick decisions and not worry too much about the final results. It’s a way to let go of the critical voice in your head.
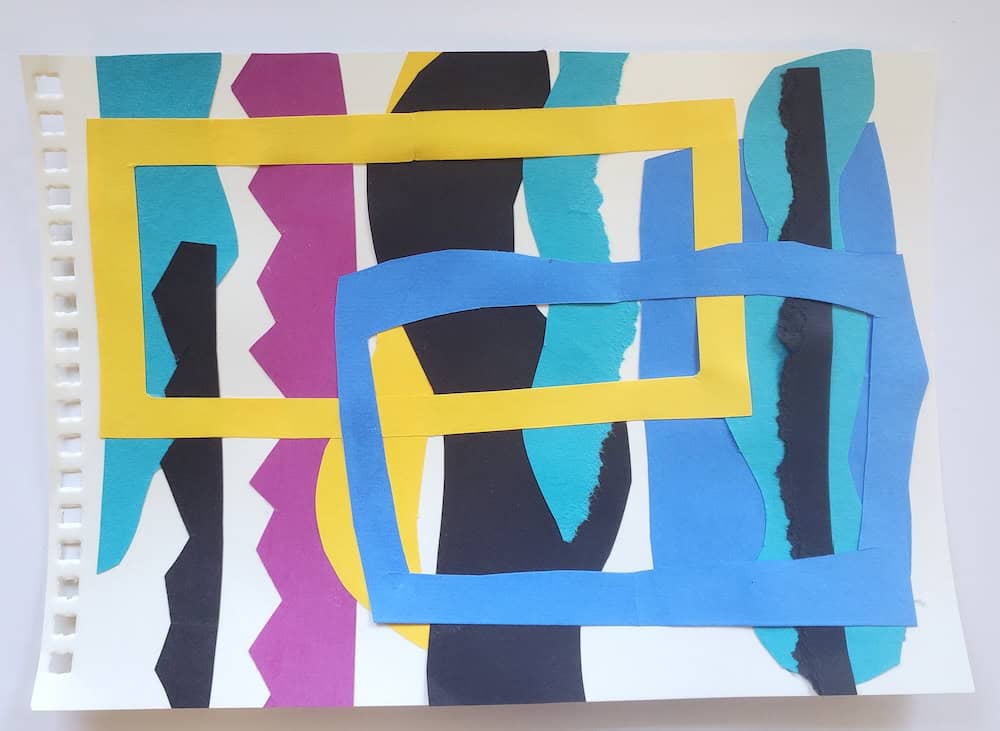
For this next set, we chose one color only to use and focused on creating interesting negative space. We had about 15 minutes to create all three cards.
For the last exercise, we made a culminating collage on larger 6″x8″ paper with a slightly longer time frame to create our collage. What I love about this idea is that there are so many different directions these collages can go and I’m sure your students will come up with a huge array of different results.
Creating a Daily Practice with Small Collages
One thing Eric talks about is creating a daily practice. This is SO hard to do when we are busy with so many other daily things on our to-do list. I have sadly fallen away from a consistent art journaling practice, but I know that I always feel better when I find the time to cut, paste and play. Now I am intentionally seeking out scheduled opportunities to make art, such as an art journaling meetup at a local art store. If it’s on my calendar and I paid for it, I’m more likely to go! Keep reading for more tips about creating a daily practice.
• One of his tips is to keep it smallwhen first starting, like using an index card for a collage. In the workshop, we made a series of collages in this size.
• Another tip is to use the cheap stuff– working on an index card doesn’t feel as precious as your expensive canvas.
• Makea routine for your art practice. If you can find a specific time of day to work on your art, it can help you be consistent.
• And lastly, leave it set up. If you have room for a dedicated workspace for your art, that helps because you already have your materials set up and ready to go.
Eric has committed to a daily practice of making a collage a day, with remarkable results! Just look at this stack of collages!
Here are a few of the striking collages Eric has made!
First of all, if you are an art teacher and have never attended an NAEA conference, you should try to do so at some point. You will be blown away with all of the amazing sessions and ideas shared. In addition, you get to try out and get samples of all the latest art supplies!
Second, if you are going, you should try out a “ticketed” workshop. The regular (included) sessions will give you loads of new ideas and things to think about, but the “ticketed” workshops are the place to have hands-on artmaking experiences in a smaller setting led by qualified art educators. I have gone to many ticketed workshops at past NAEA conference- such as a Lynda Barry drawing comics workshop and workshops about tooling foil, encaustics and mosaics. I try to pick 2 or 3 at every conference as it is fun to try new things that I haven’t experienced yet. Remember, you need to sign up for these ahead of time, as they do fill up!
Unfortunately I’m not going to be able to attend this year’s conference, but I’m planning ahead to Chicago next year, and since that is much closer and doesn’t require a plane ride, I will most likely be at the 2026 conference.
Final Thoughts
• Another great resource for daily creative inspiration is Daisy Yellow Art and her ICAD challenge. I participated in this challenge years ago and it was really fun.
• Artist Trading Cards are a twist on the index card idea, with an even smaller space to make art. I used to collect and trade these and have a huge binder full of them. (Idea for future blog post!)
Have you ever tried timed art prompts? What was your experience like? Let me know if you have any other good resources to share with this idea!
Related
Discover more from Art is Basic | Elementary Art Ideas
Subscribe to get the latest posts sent to your email.
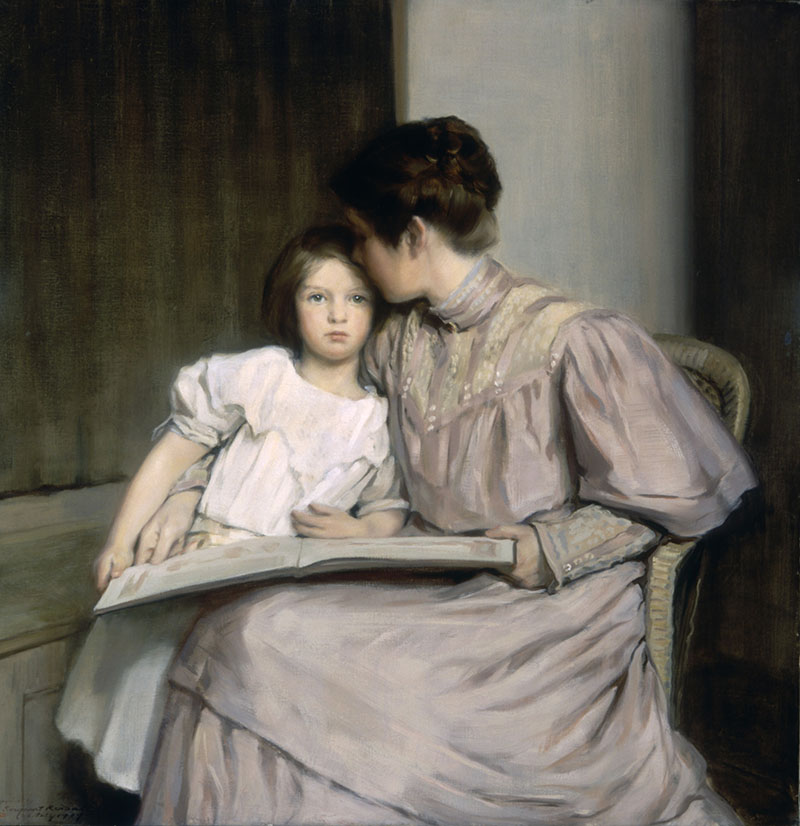
William Sergeant Kendall, art interlude, 1907, oil on canvas, American Art Museum at the Smithsonian
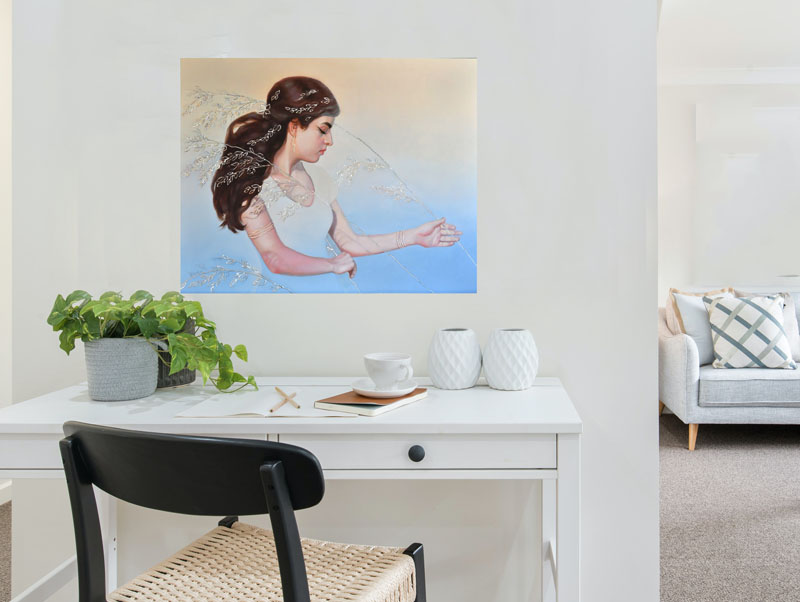
Art therapy emerges as a powerful healing technique that goes beyond traditional medical treatments. More than a simple creative outlet, it represents a profound journey of emotional and physical restoration. Individuals facing challenging life transitions discover unexpected solace through brushstrokes, sculptural forms, and creative expression. The human capacity to transform pain into beauty finds its most eloquent manifestation in artistic healing practices that have existed for centuries.
Art becomes a process of internal reconstruction, allowing individuals to externalize complex emotions, rebuild physical capabilities, and reclaim personal narratives. In this article, let us understand the power of healing through art as a therapy.
The Healing Power of Creative Expression
When words fail to capture trauma’s impact, art creates space for emotional processing. Art therapy helps individuals on the path of recovery externalize the feelings that might otherwise remain buried.
Studies from the American Congress of Rehabilitation Medicine show that creating art reduces cortisol levels. Additionally, viewing a beautiful painting can increase blood flow to the part of the brain associated with pleasure by up to 10%. This stress reduction contributes significantly to overall healing and pain management.
The physical act of creating art engages different neural pathways than those typically used in standard rehabilitation exercises. Painting, drawing, and sculpting involve fine motor control that helps rebuild dexterity after injuries. A 2025 study was published by Taylor and Francis on stroke patients who participated in museum-based art therapy. The intervention resulted in a decrease in depression scores going from 6.6 to 4.2.
Art creation offers a sense of control when physical limitations feel overwhelming. Somatopia states that engaging with color, texture, and form through scribbling provides sensory stimulation that can break through post-traumatic numbness.
Transformed Through Tragedy: Artists Who Found Their Voice After Injury
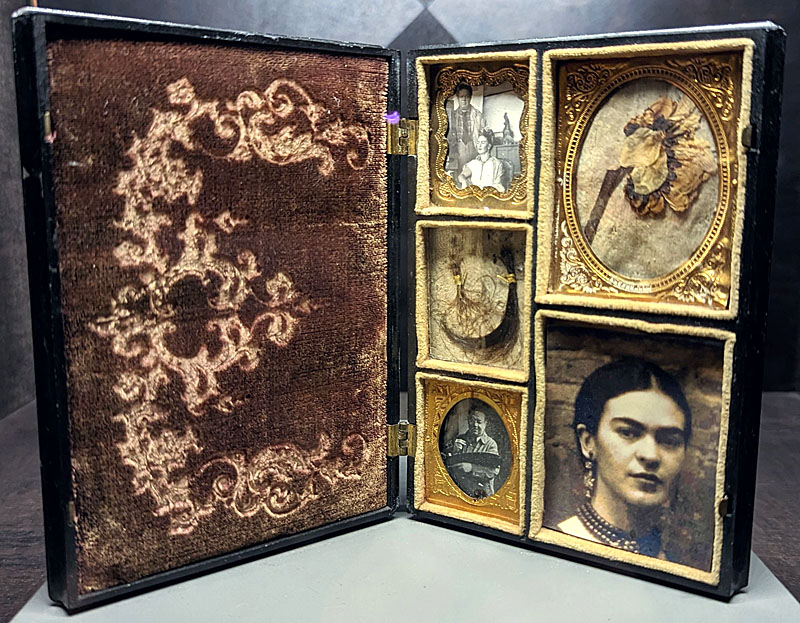
Frida’s book displayed in her museum in Mexico City.
Frida Kahlo’s artistic career blossomed following a devastating bus accident that left her with lifelong pain. Her intimate self-portraits exploring suffering and resilience continue to inspire countless injury survivors.
Kahlo once wrote, “I paint myself because I am often alone and I am the subject I know best.”
Contemporary artist Chuck Close reinvented his approach after becoming partially paralyzed from a spinal artery collapse. Unable to create his photorealistic portraits using previous methods, Close developed a grid technique that accommodated his physical limitations. His adaptation demonstrates how creative problem-solving can overcome seemingly insurmountable obstacles. Many lesser-known artists have similar stories of finding their creative voice while healing.
The Science Behind Art’s Healing Effects
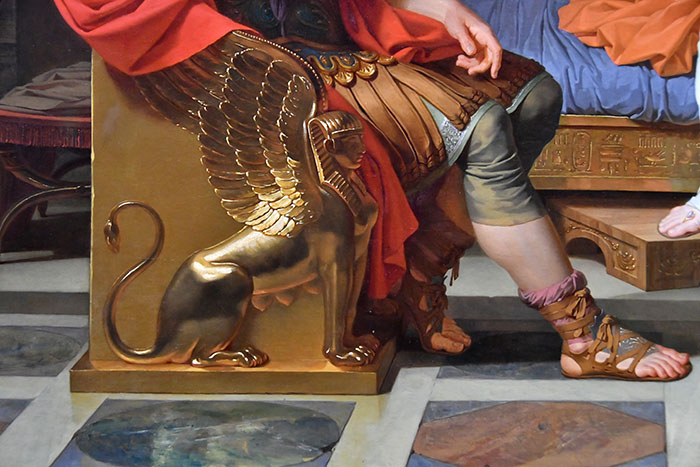
Scottish National Gallery, painting close-up showing the Sphinx. Traditional paintings display beautiful color harmonies that you can be inspired by to use in your art projects.
Neurological research confirms what many survivors intuitively discover through artistic practice. Brain imaging studies show increased activity in regions associated with pleasure, focus, and emotional regulation during creative activities.
As per a study by Wiley, 70% of people on the planet are estimated to face at least one traumatic event throughout their lifetime. Furthermore, post-traumatic stress disorder will affect about 1 in 11 persons globally. Interventions based on the visual arts can improve positive non-PTSD symptoms including post-trauma and quality of life.
In contrast to talk-only therapies, art therapy may foster curiosity, playfulness, and creativity. This helps individuals share traumatic experiences and results in a reduction in PTSD-specific symptoms such as avoidance.
As per Kids First, color psychology plays a role in emotional healing during art therapy sessions. There are different techniques of utilizing color in art therapy, they include:
Color Journaling: Individuals gain insights into emotional states and identify patterns in their moods and feelings over time.
Color Mapping: Allows individuals to visualize their emotional landscape, promoting greater self-awareness and understanding.
Color Meditation: Helps individuals focus their minds, reduce stress, and enhance emotional resilience, making it a powerful tool within art therapy.
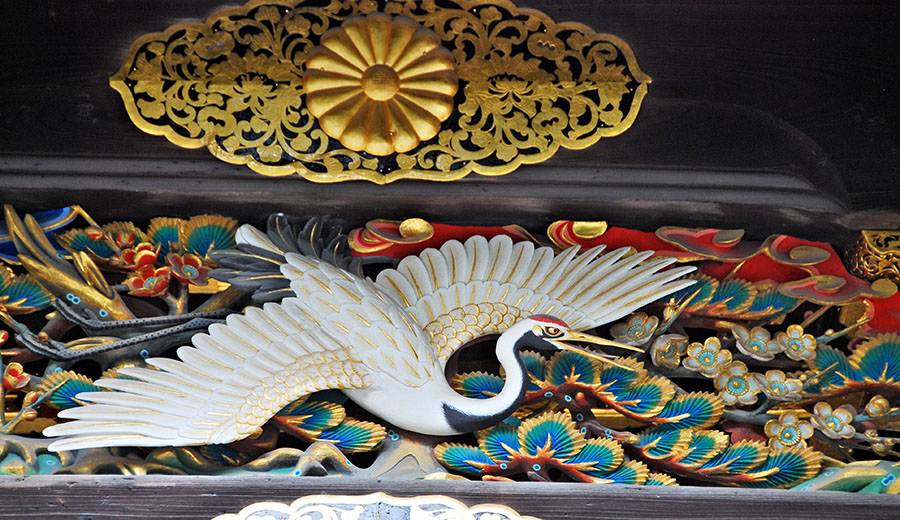
White crane, a closeup of a Japanese temple decoration.
Legal Considerations During Creative Recovery
The journey of healing through artistic expression often coincides with navigating complex legal matters. In instances such as personal injury, victims may often find themselves dealing with insurance claims and compensation issues.
In such situations, a personal injury attorney can manage these legal complexities while survivors dedicate their energy to therapeutic pursuits like art. Many who benefit from creative rehabilitation need to document their full recovery journey. This documentation helps establish the comprehensive impact of injuries beyond immediate medical expenses. Art therapy sessions, supplies, and related expenses may factor into recovery costs worth considering in legal contexts.
According to TorHoerman Law, the financial compensation sought by the injured is referred to as “damages.” They are mainly of two kinds: economic and non-economic. They involve lost wages, permanent disability, emotional distress, loss of property, medical bills, pain and suffering, etc.
The holistic approach to healing often requires professional guidance on multiple fronts. Just as art therapists provide specialized support for emotional and physical recovery, legal professionals handle paperwork and negotiations. This division of labor allows those healing to maintain focus on the creative processes that contribute to their well-being. For those incorporating art into their recovery journey, keeping detailed records of how creative practice affects their healing can prove valuable.
These records may demonstrate improvements in motor skills, emotional well-being, and overall quality of life, all factors that comprehensive case evaluations should consider.
Incorporating Art Into Your Recovery Journey
The process matters more than the product when using art therapeutically. Many participants worry about artistic quality, missing the fundamental benefit of expression itself. Recovery-focused art prioritizes emotional release and physical engagement over aesthetic outcomes. There are even methods that do not require any kind of artistic intervention if you are concerned about the outcomes of your artistic quality.
Known as the color visualization meditation, it is one of the simplest yet effective mindful methods. As per New Perspectives, all you have to do is pick two colors; one being the healing and the other being the releasing. Now, close your eyes and imagine the air you breathe in as the healing color, and the air leaving as the release color.
This technique combines mindfulness with creative visualization, requiring no artistic skill yet offering immediate comfort. Through creative expression, individuals discover new pathways to wholeness that complement traditional medical approaches.
Frequently Asked Questions (FAQs)
1. Why is community involvement important in art therapy?
Participating in group art therapy sessions fosters connection and reduces isolation during recovery. Whether through collaborative murals or poetry workshops, creative communities offer support, motivation, and shared experiences that help individuals heal emotionally and socially.
2. How can injury-related stress impact creative recovery?
Coping with physical pain and legal complexities can be overwhelming, making creative outlets essential. Many find that while recovering, seeking guidance from a personal injury attorney helps ease financial and legal stress. This allows them to focus on artistic healing without added burdens.
3. What forms of art therapy are most effective for personal recovery?
Different creative outlets work for different individuals. Music therapy calms anxiety, painting provides emotional release, and movement-based art like dance enhances physical rehabilitation. Experimenting with various forms helps people discover the best therapeutic approach for their healing journey. Beginning a creative practice during recovery doesn’t require artistic talent or experience. Many rehabilitation centers now offer art therapy programs led by certified professionals. These structured sessions provide guidance tailored to specific injuries and rehabilitation goals.
For those recovering at home, simple supplies like colored pencils and sketchbooks offer accessible starting points. Online communities provide support for beginners exploring art during recovery. Many websites connect injury survivors with resources and virtual workshops designed for various physical abilities.
This is a fun winter art project that allows students to use their creativity to make matching mittens, exploring symmetry and balance! I have been doing this art project for years and years and I keep returning to it every year because I think it’s great for fine motor skills and spatial awareness. It also strengthens their attention to detail as they work to make both mittens match perfectly.
I’m not sure where I originally learned about this art project, but it had to have been about 15-20 years ago. So many of these ideas floating around social media and the internet have been around forever! This is a good one and maybe you haven’t seen it yet. I like to do this with Kindergarten, but I think Pre-K could do a simpler version and older kids could make more detailed mittens.
Why do a Matching Mittens art project?
Objectives:
● Students will develop observational skills by carefully replicating patterns and lines in reverse.
● Students will explore symmetry and balance in art by creating matching mittens.
● Students will practice fine motor skills through tracing, drawing, and pattern-making.
● Students will explore creativity by making unique patterns and designs.
In this art project, students will make a pair of mittens that match. First, the students will design one mitten with patterns and lines. Then, they will copy that design onto the second mitten, but in reverse—like a mirror.
“If you draw a heart on the left side of one mitten, you will need to draw the same heart on the opposite side of the other mitten.”
“If you put a wavy line in the top of one mitten, the wavy line needs to go in the same spot on the other mitten.”
Teacher Prep for the Matching Mittens Art Project
● Print the mitten template onto card stock (thicker paper). (Amazon Affiliate links have been used for art supply links at no extra cost to you. The small commission earned goes towards maintaining this website.) You can use this as the drawing surface, or you can make them into reusable templates for your students to trace. I have one set of templates and reuse them every year. To do this, trace your mitten on to thicker poster board (I use “railroad board.”). Trace as many templates as you will need and cut them out. Students will then use these to trace on to their larger paper. They will trace it once, flip over the template and trace the other mitten. I do this step, because it is a good skill for practicing fine motor skills. But if you want to save time, you can just have the copies printed out.
Step One:
● Trace the mitten on to construction paper (I like Tru-Ray Construction Paper– 12” x18” paper). Flip the mitten over and trace the other mitten.
Step Two:
● Draw designs on one mitten, using markers or crayons. Emphasize coloring neatly and carefully.
Step Three:
● Then, copy the designs and patterns on to the other mitten, but in reverse, like a mirror. Some students may want to do one shape at a time, going back and forth between each mitten, which is totally fine! Others might like to finish one whole mitten first.
● Some kids might get stuck on the fact that it is very difficult to make an exact mirror image. Explain that they should try the best they can, but it’s okay if it’s not perfect! We are aiming for doing our best and it’s still going to look beautiful even if it’s not perfect.
To download the mitten templates, they are right here.
If you have any questions, feel free to leave a comment! Also, does anyone have any good book suggestions (besides the book The Mitten) that can go along with this project?
Related
Discover more from Art is Basic | Elementary Art Ideas
Subscribe to get the latest posts sent to your email.
I wanted to share a few awesome art supplies for kids that I either recently discovered or just really love. I’m always on the lookout to spice things up in the art room. I know some budgets are tight, but you can always buy one set for a whole table and then the kids can share them. I used to think I needed many sets of everything, but honestly sharing, manners and taking turns are very good skills to practice. Similarly, you can have some of the special art supplies in a central location and kids can choose to try them out during the class period. In the next few sections, I will share the art supply and why I love it. And I will also give you an example of a project you can try with this media.
Art supply links are Amazon associate links. As an Amazon Associate, I earn from qualifying purchases at no extra cost to you. The small commission earned goes towards maintaining this website to help other teachers.
I recently discovered these from a suggestion in a Facebook art teacher group. These beeswax crayons are like regular crayons, but are nice and smooth and give a solid coverage. They have vibrant colors.
One project you could do with these crayons is an abstract artwork and tie it in with the artist Kandinsky. He was a Russian artist who has many beautiful abstract works with brilliant colors, shapes and lines. Here is the artwork titled Composition IV.
And here is an example of an artwork using the Beeswax Crayons that your students could try to make. Using lines, shapes and colors inspired by the works of Kandinsky, create an abstract work with your own creative ideas.
I saw these on Instagram and couldn’t believe how bright the colors were- super bright, in fact. I had to try them out myself and they did not disappoint!
The name of this supply is Super Bright Flourescent Paint Daubers. They are just like any other paint dotters you may have tried, but they are definitely brighter.
Here was what I made playing around with these paint daubers. No filter on this picture!
I have several other blog posts about using paint daubers in art projects and you could easily substitute the regular paint daubers with the flourescent colors.
Speaking of flourescent colors, if you haven’t had neon paint to try out, it’s so fun! I try to incorporate neon paint in a few art projects a year. I like Sax Versa Temp for most of my tempera paint needs. Handy art is another brand I’ve tried. And I know some people like the flourescent tempera cakes.
One art project I like to do is have the students create their own alebrije. Alebrijes are colorful, fantastical creatures from Mexican folk art. They often mix different animals—real and imaginary—into one fantastical design. The idea came from artist Pedro Linares in the 1930’s after he had a fever dream filled with these wild creatures shouting “alebrijes!” He turned them into art using papier-mâché, and later, Oaxacan artists began carving them from wood.
Today, alebrijes are a big part of Mexican culture and are often linked to Día de los Muertos. They also became popular when they were featured in the Pixar movie Coco!
I saw an awesome exhibit of huge alebrijes when they were at an outdoor exhibit in the Chicago area. The size, creativity and patterns were amazing!
Speaking of Posca paint pens, kids just seem to love them. My older child really enjoys using them for drawings and kids will ask to use these special sets. I don’t recommend using them with younger kids as they tend to shake them too much and splatter paint out of them and they are expensive, so save these for your older students.
I’m a big fan of the Mungyo chalk pastels. I don’t know how I discovered them. I think I may have got them from an art resale swap or something, but I love the variety of colors and they are fairly inexpensive.
We use these Crayola Metallic markers a lot! Anything metallic is fun to add to your art supply stash.
I like to use these on the backgrounds of other artworks, especially on black paper. The silver and gold in this picture were definitely the Crayola metallic markers. Some of the other colors may have been the chalk markers or paint pens that I mentioned before. The project below was inspired by the artwork of Yayoi Kusama and her dotted pumpkin series.
These are some of my favorite fun art supplies to use with kids! Do you have any awesome art supplies I should try out? Share in the comments!