برچسب: Collage

  • Leaf & Fabric Collage – ARTBAR

    Leaf & Fabric Collage – ARTBAR


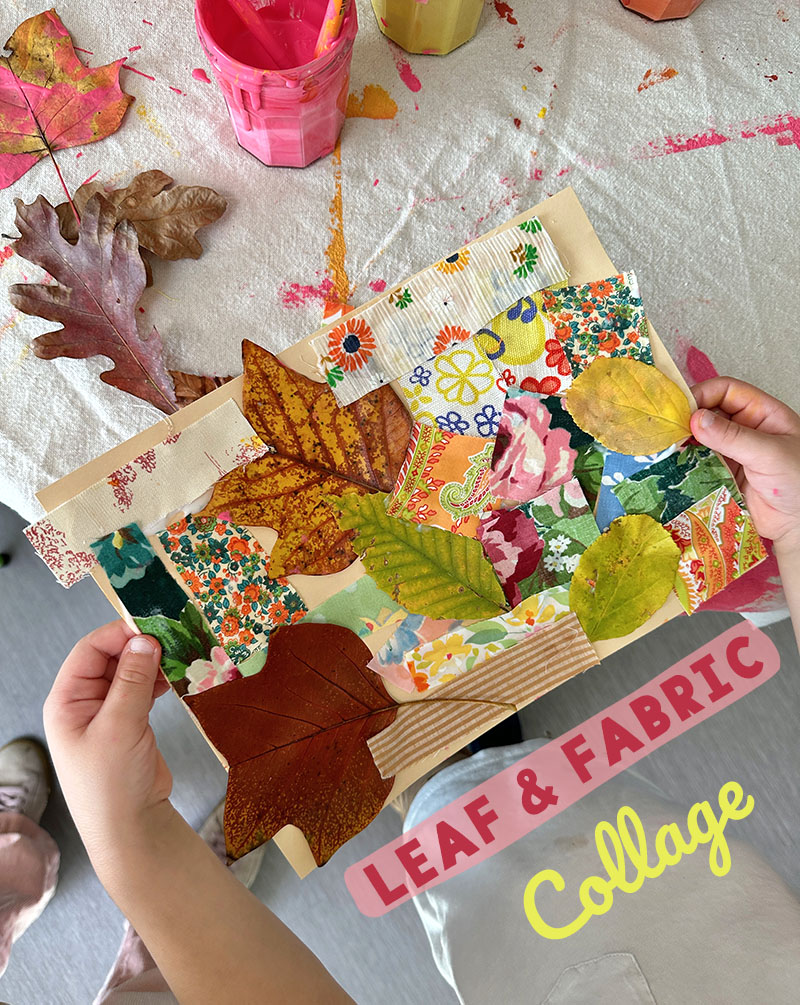
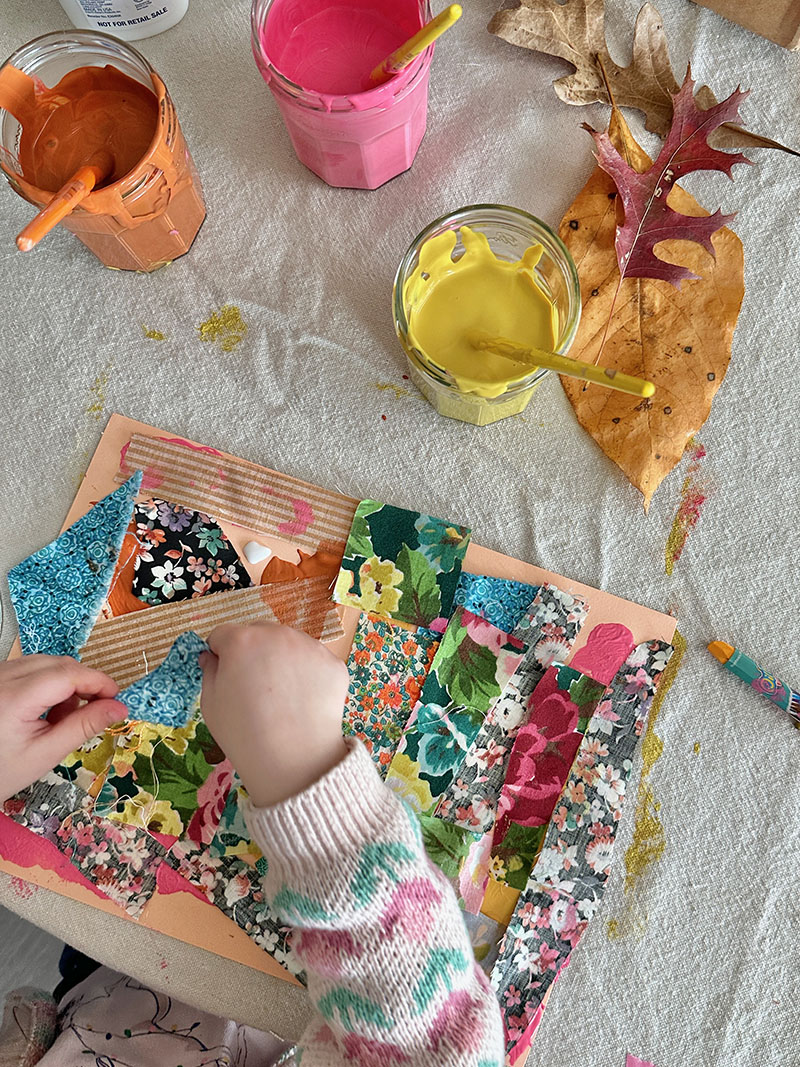
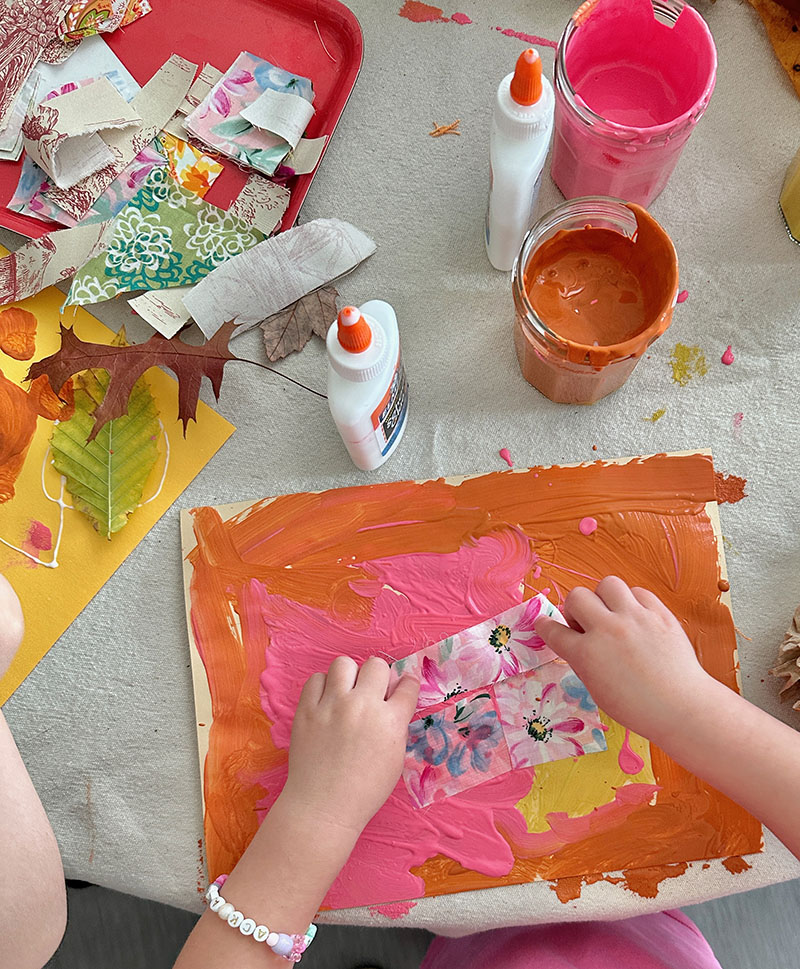
    We experienced another successful community art table! This time, I set out leaves with fabric scraps, tempera paint, glue, and colored construction paper. I had a prompt at the table, but children could use the materials however they chose. The results were pure magic. I love every single piece!

    Children make mixed media collage with leaves, fabric scraps, and paint.

    [ I am a participant in the Amazon Services LLC Associates Program, an affiliate advertising program designed to provide a means for us to earn small fees at no cost to you by linking to Amazon.com and affiliated sites. ]

    Here’s what you’ll need for Leaf & Fabric Collages:

    ~ Drop cloth or butcher paper to cover your table

    ~ Colored construction paper (I used sulphite paper in almond, pink, and gold)
    ~ Tempera paint (I mixed a muted yellow, deep orange, and bright pink)

    ~ Brushes

    ~ Fabric scraps (cut up from donated fabric and old clothing)

    ~ Leaves (collected the morning of so they were fresh)

    ~ Glue

    Table set up and ready for mixed-media collage with leaves, fabric scraps, tempera paint, and colored construction paper.

    Table set up and ready for mixed-media collage with leaves, fabric scraps, tempera paint, and colored construction paper.

    Setting up the table:

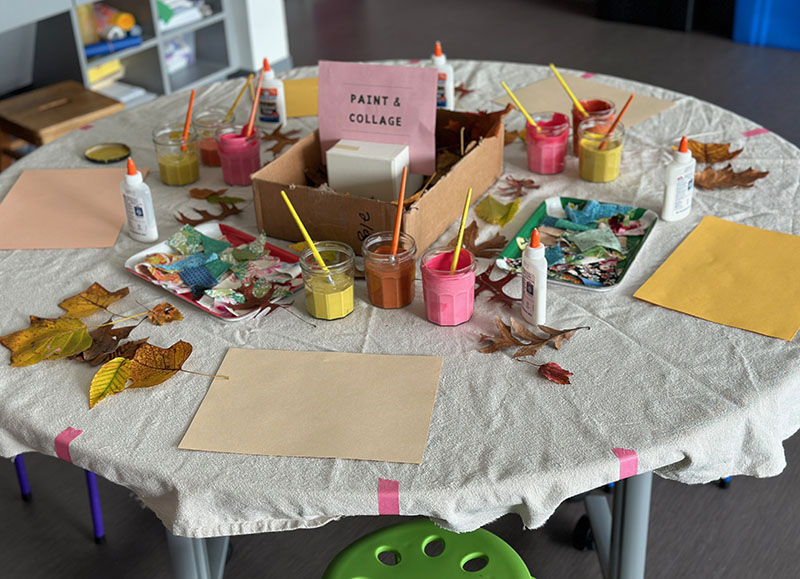
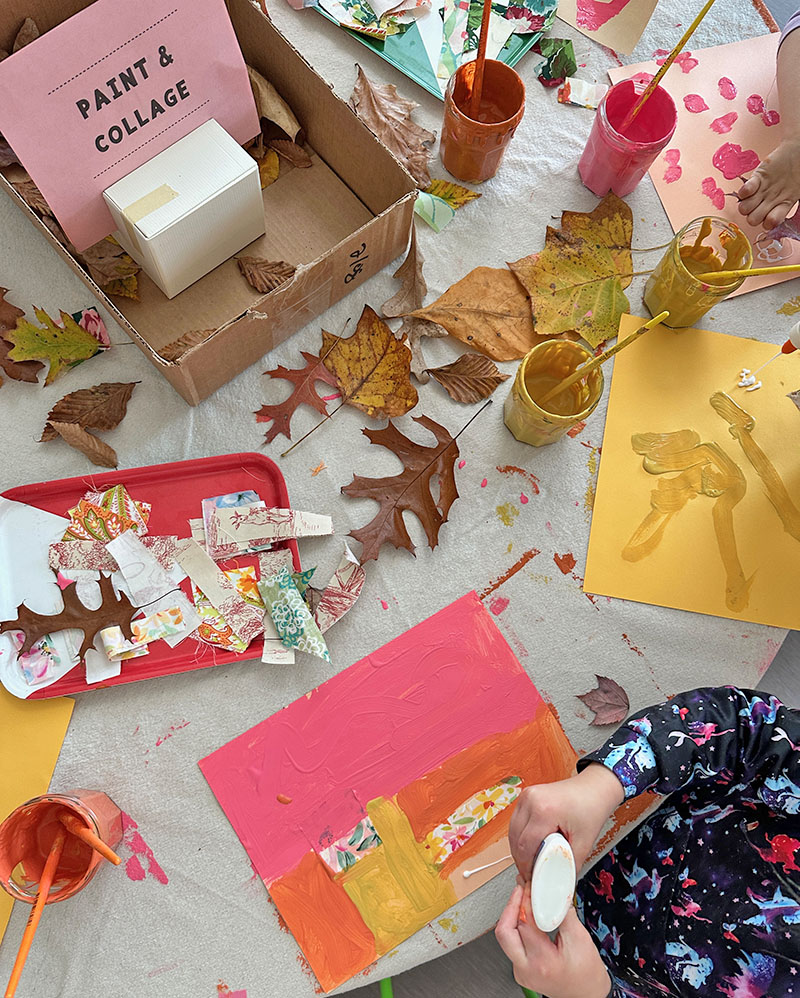
    I used a round table and made sure there were about 3 separate stations so children didn’t have to reach too far to get what they needed.

    1. Start by covering your table. I like using a dropcloth, it can absorb the paint a little if there are spills, and it can be washed and reused, so it saves on paper.

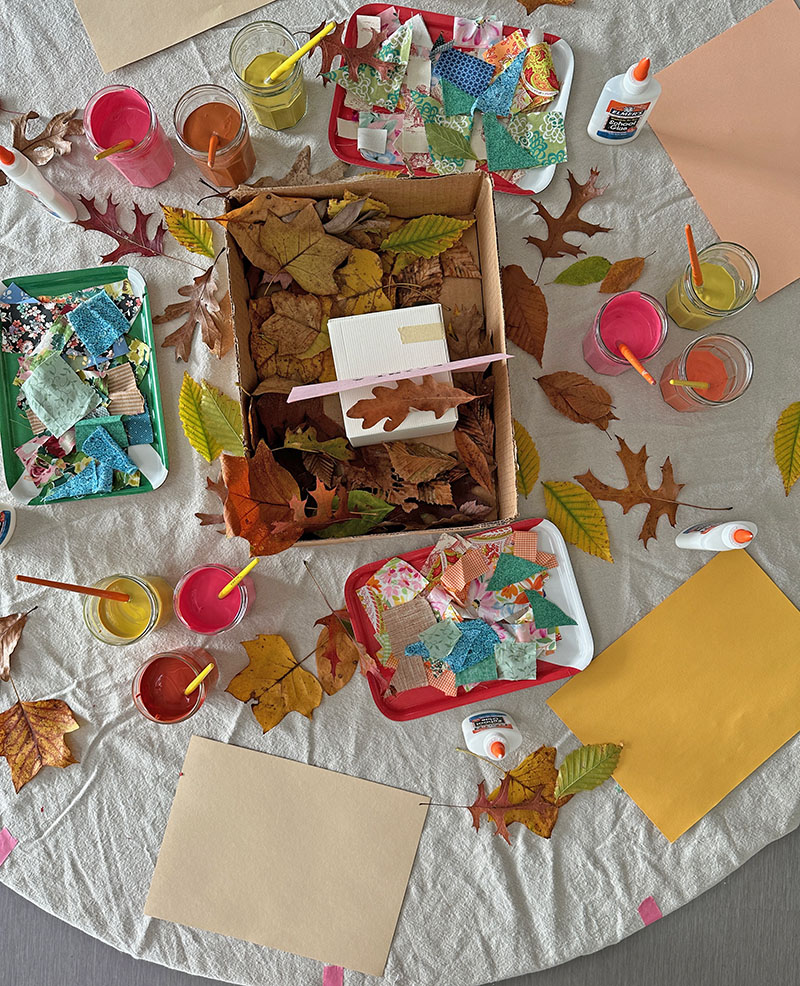
    2. Mix some warm colors. I added white and a dash of purple to the yellow to make it a little more muted and opaque. I mixed the orange with a dash of blue and a little white so make it more of a burnt orange. You can add a little red, too. And I added white to the neon pink. Add a brush or two to each jar.

    3. Set out a box of leaves and some trays of fabric scraps. And add some glue bottles, making sure that they all work. I used light, warm-colored construction paper instead of white so that even the most minimalist explorations would feel complete.

    A young child is painting with temperas and collage with leaves and fabric on colored construction paper.

    A young child is creating a collage with leaves and fabric on colored construction paper.

    Managing the process:

    1. The thing I love most about setting up an essentially self-serve art experience is watching how children will use the materials and in what sequence. When I used to have art classes in my house, I would have staggered this type of project. Meaning, I would have started with collage and then brought out the paint, or maybe vice-versa. This is because art class was an hour and I wanted to extend the experience for as long as possible. But I can admit that spacing the use of materials controls the experience to a certain degree, since children don’t have full autonomy over when to use the materials. With a community table where children and families come and go, I can’t space out the usage of the materials even if I wanted to, it would be too clumsy and take up so much of my time. I have up to 75 people in the room at one time with three different tables, so I need to set up a painting experience with the understanding that all the materials are out at once and children will have autonomy over their entire experience (that is, if a parent doesn’t control it). This first used to make me anxious, but now I love and embrace the outcomes and I don’t think I’ll ever go back!

    A young child is glueing leaves and fabric strips to her painted collage.

    2. The only thing I have to manage is making sure to restock the fabric scraps, add more paint (but I didn’t actually have to do that because even after 2 hours, the paint never ran out), and clean up the space quickly to add some fresh paper. The rest is just left to fate!

    Child painting with tempera paints on top of construction paper and leaves.

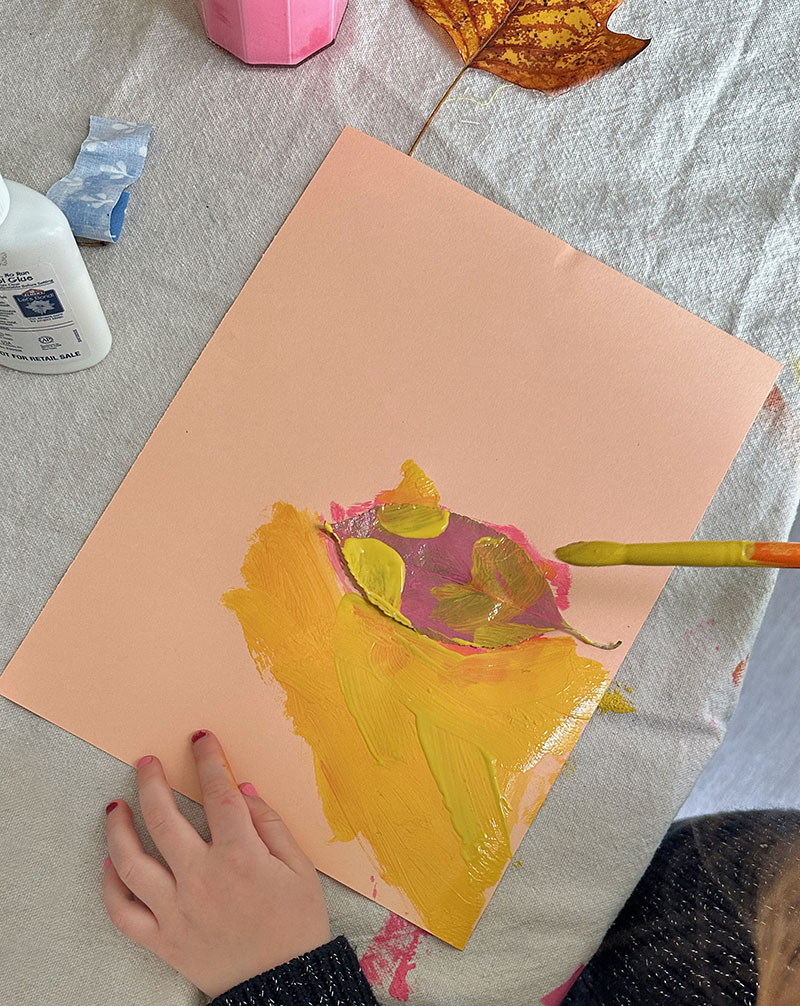
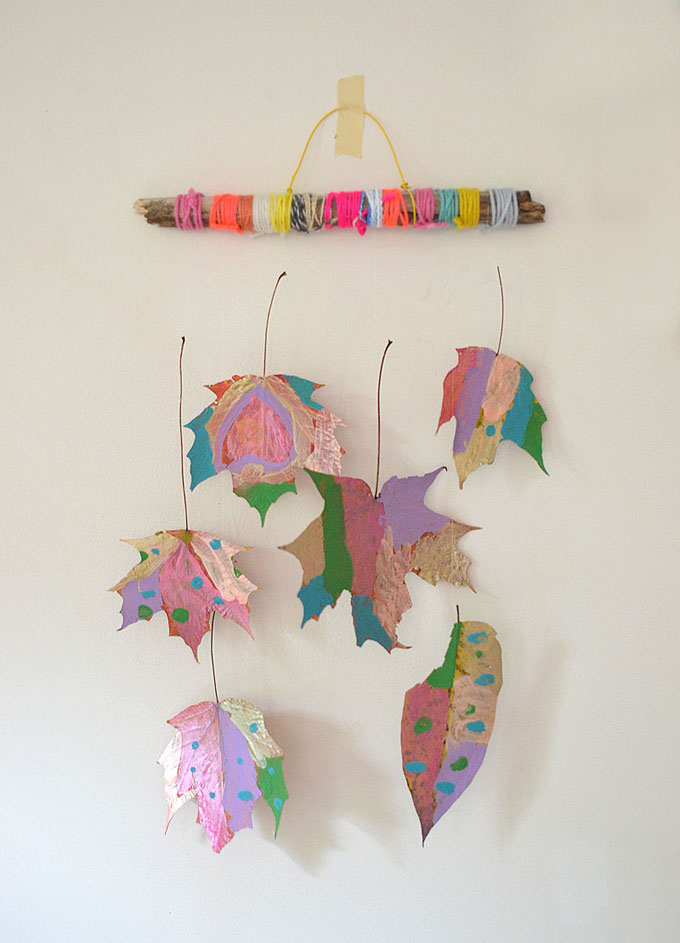
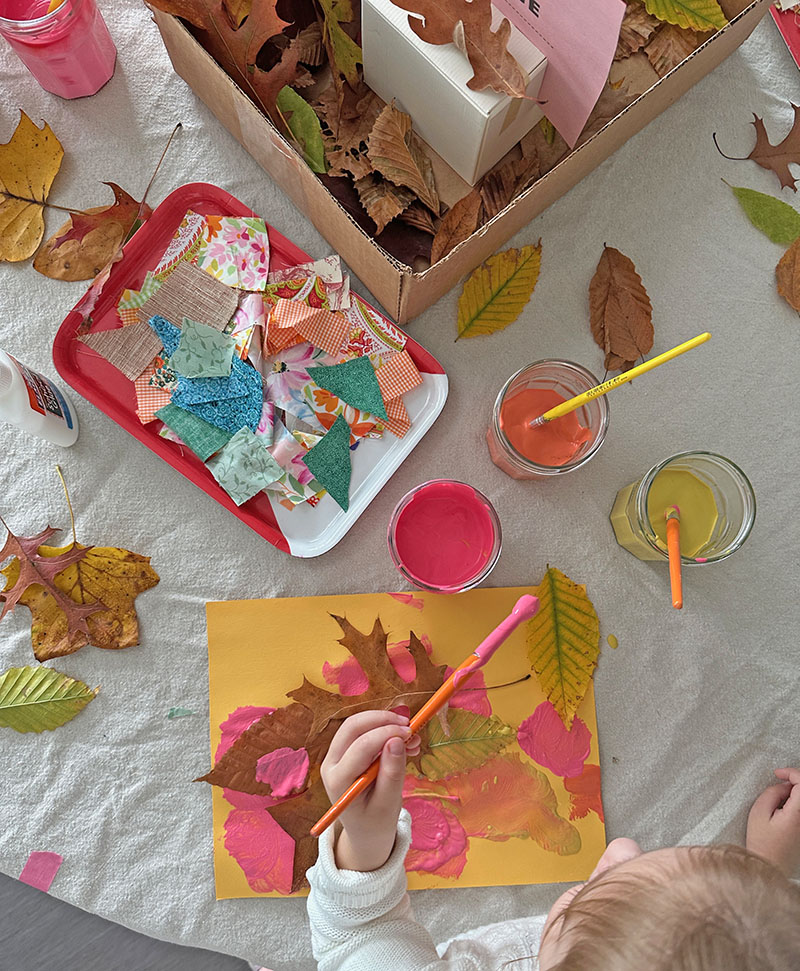
    3. I absolutely LOVE watching different styles emerge. This child had a very minimalist aesthetic. She started with this simple yet dazzling layout, adding yellow all the way around her painted leaf.

    The transformation of a child's mixed-media artwork using tempera paints, leaves, and fabric.

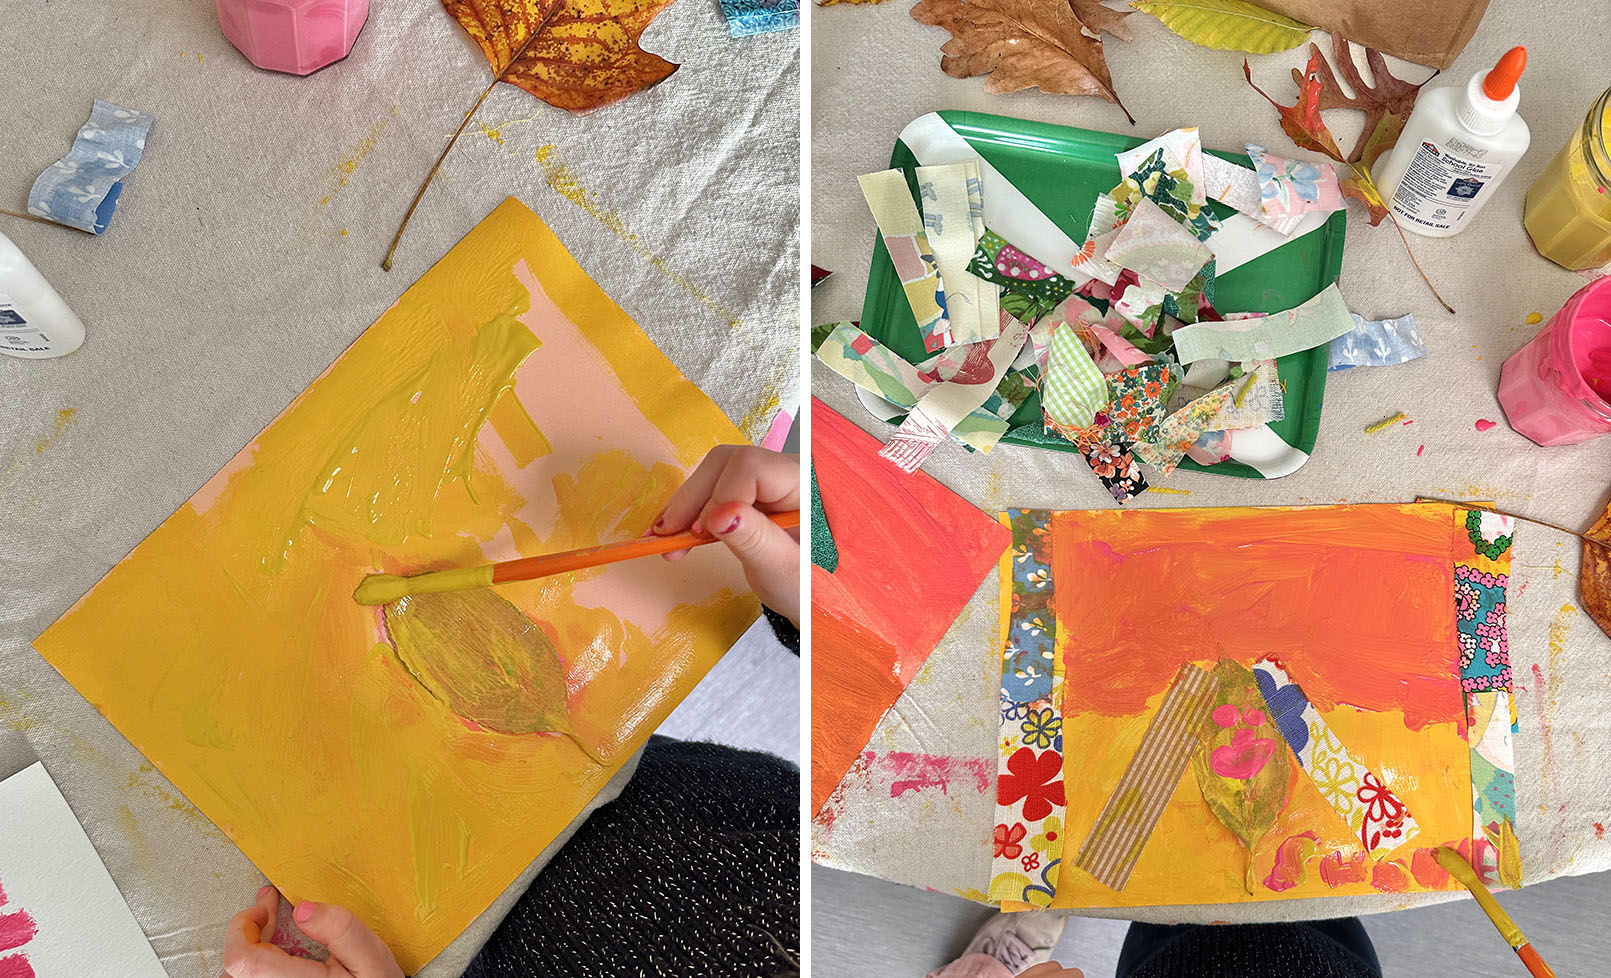
    Once all the yellow was added, she painted back over her leaf so it was just a monochromatic piece. Next time I cam pack she had added another color at the top, and made hair and a border from the fabric. It was fascinating to watch her iterate.

    Child adding fabric scraps to her painting, with leaves and glue on the table.

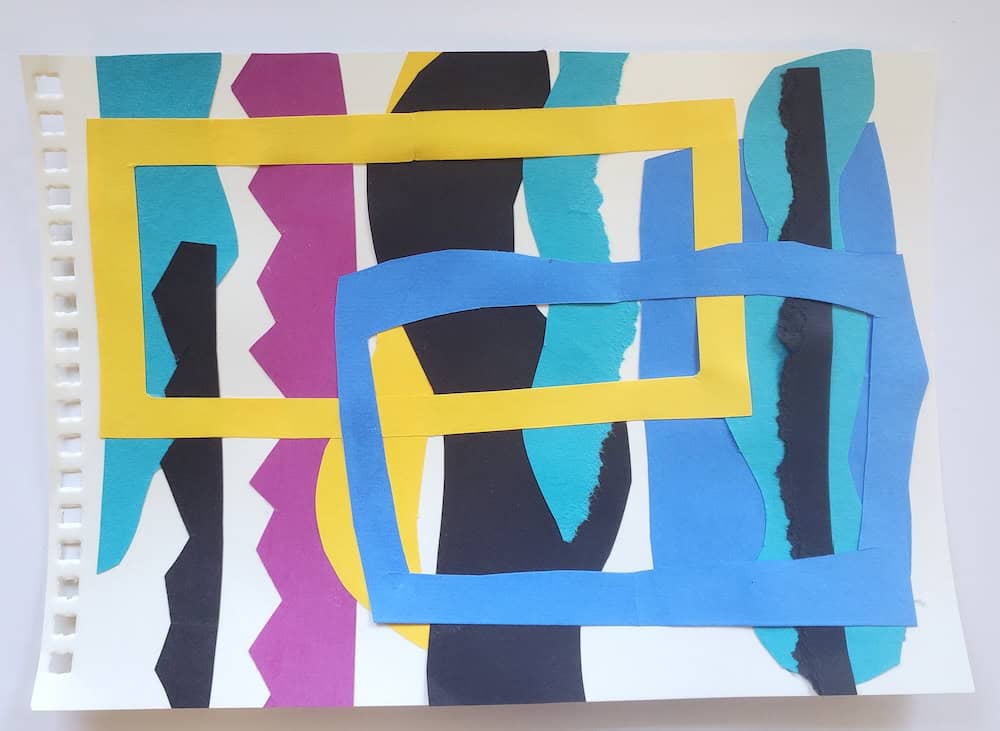
    We had other minimalists as well. This one really caught my eye.

    Child using glue to attach fabric scraps to her mixed-media collage.

    Mixed-media collage with tempera paint, finished on a table.

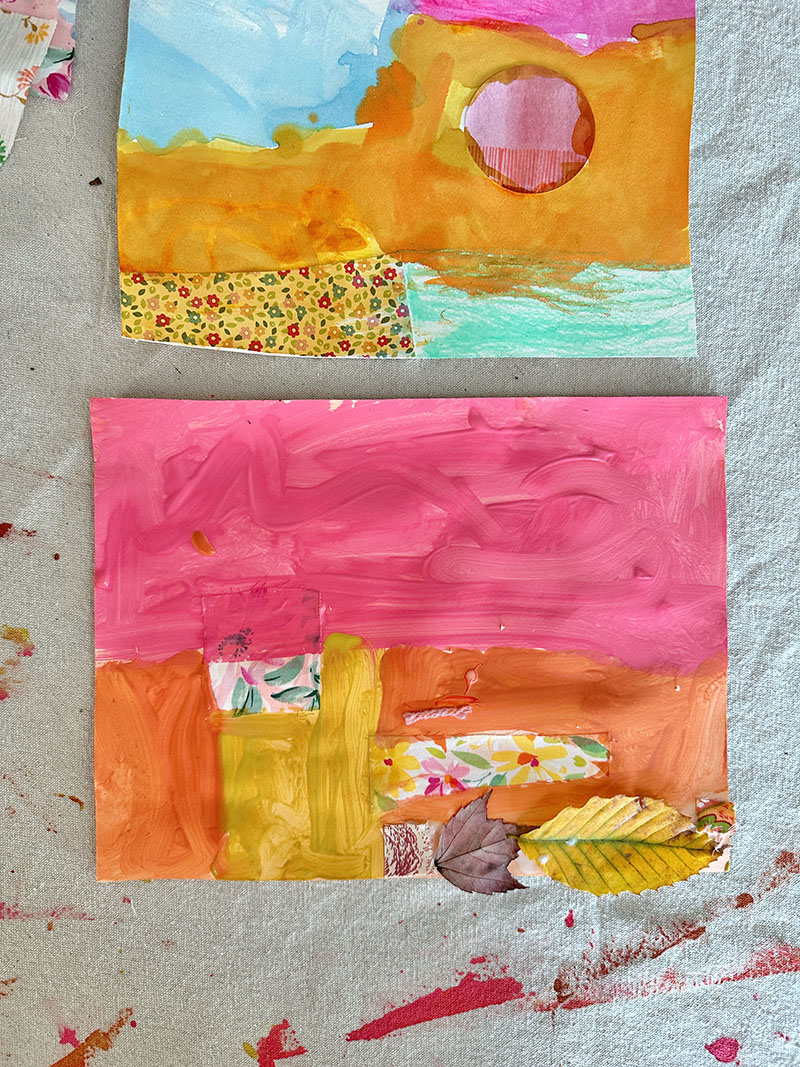
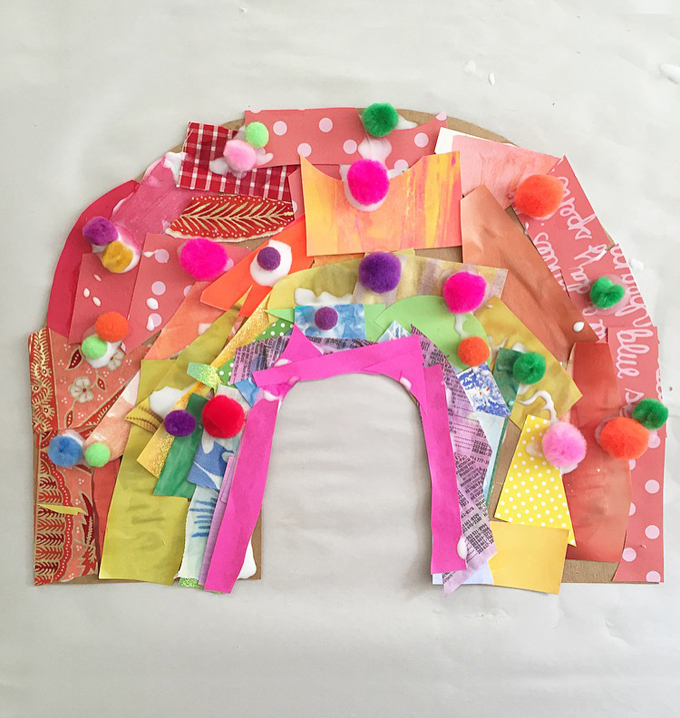
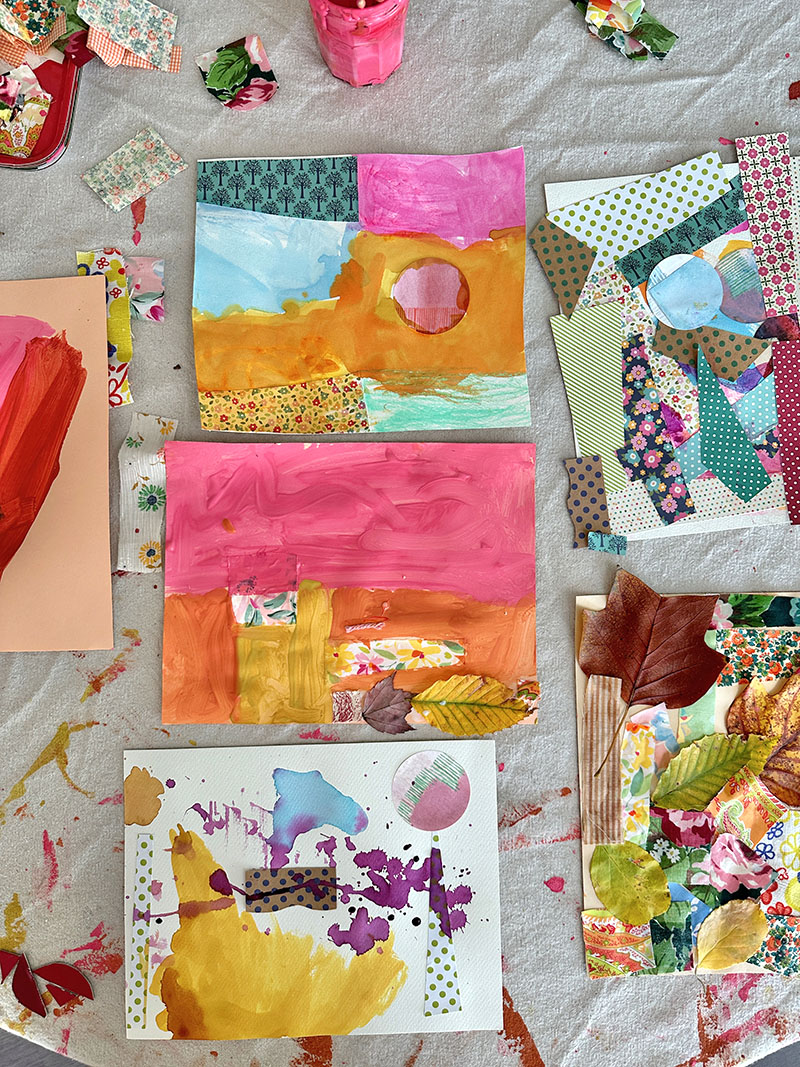
    And these were two of my very favorite pieces of the whole day. The control and purpose behind these mixed-media paintings are unreal! Frame worthy.

    Child paints with tempera paints on top of her leaf and fabric collage.

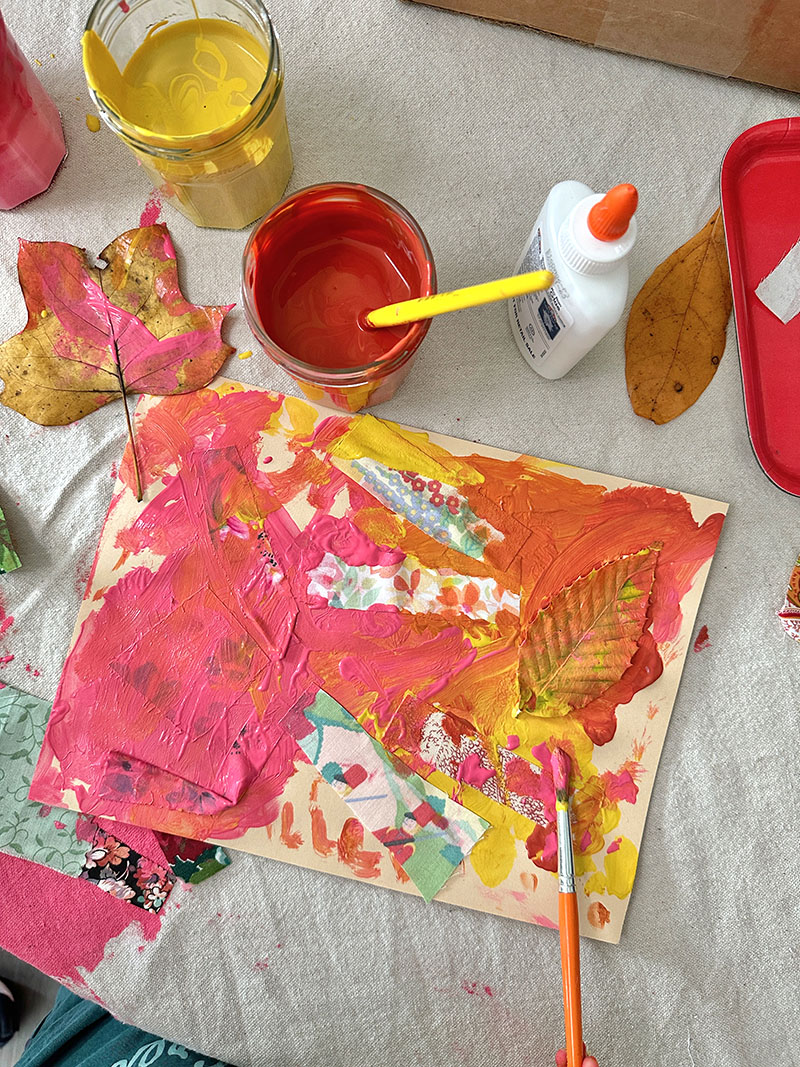
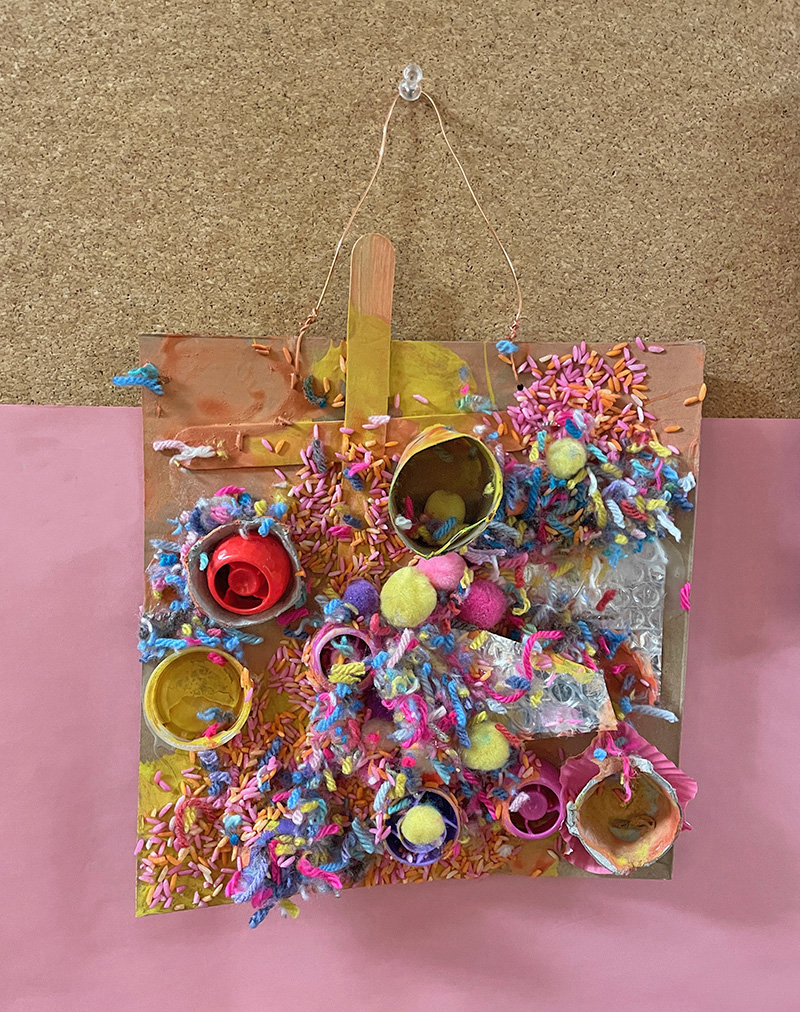
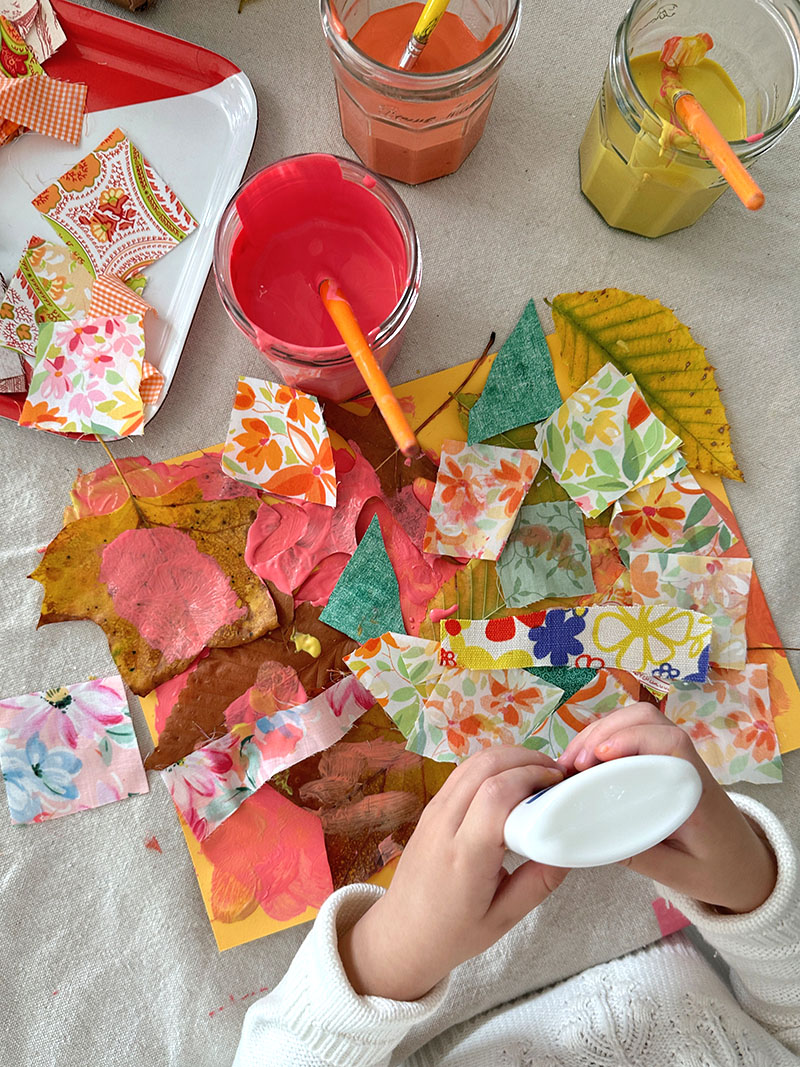
    This child was very young, maybe between 2 and 3 years old. Her parents were nearby but let her work mostly by herself, adding layers and layers of color and collage. I love it so much.

    Finished mixed-media collage using leaves and fabric on a table next to a tray of fabric scraps.

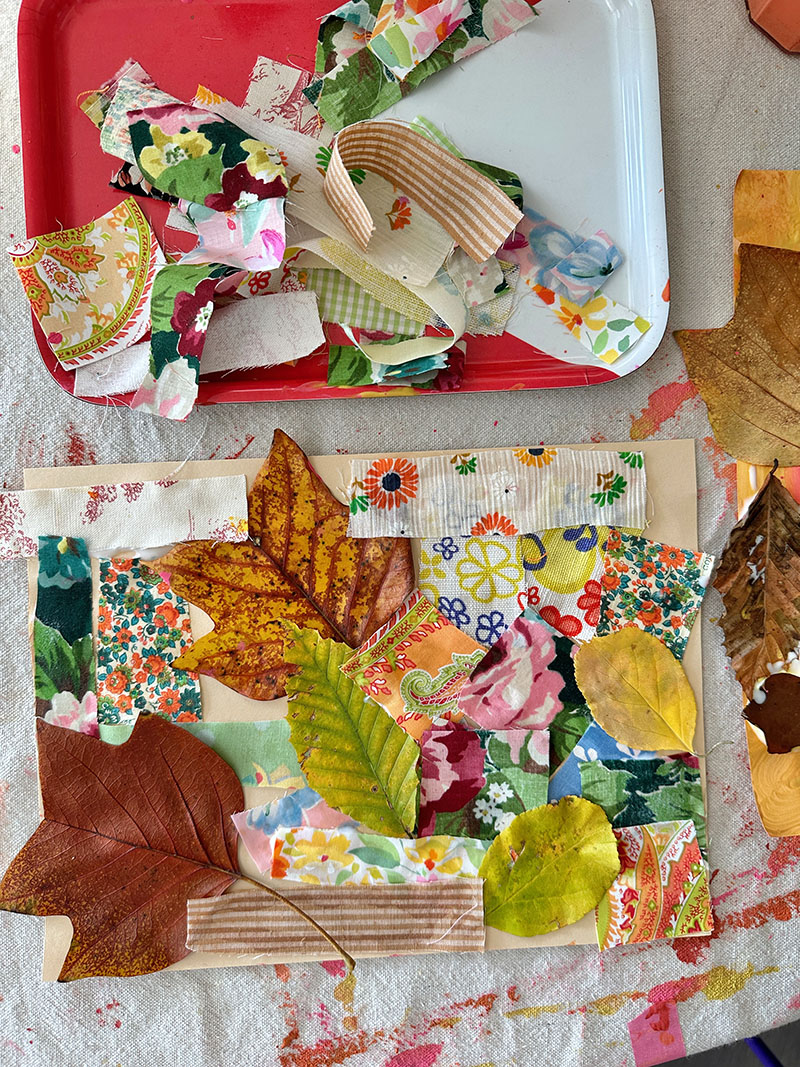
    This artist seemed to have a particular affinity for the textural collage pieces and didn’t want to add any paint. The colors and composition are so on point.

    Finished mixed-media artwork using tempera paints, leaves, and fabric scraps.

    4. Make sure you have a drying area nearby. We just used the floor. I would also suggest having a few pieces of flat, scrap cardboard available for the very wet paintings that needed to get home without too much mess.

    Finished mixed-media artwork created by young children using tempera paints, leaves, and fabric scraps.

    Finished mixed-media artwork created by young children using tempera paints, leaves, and fabric scraps.

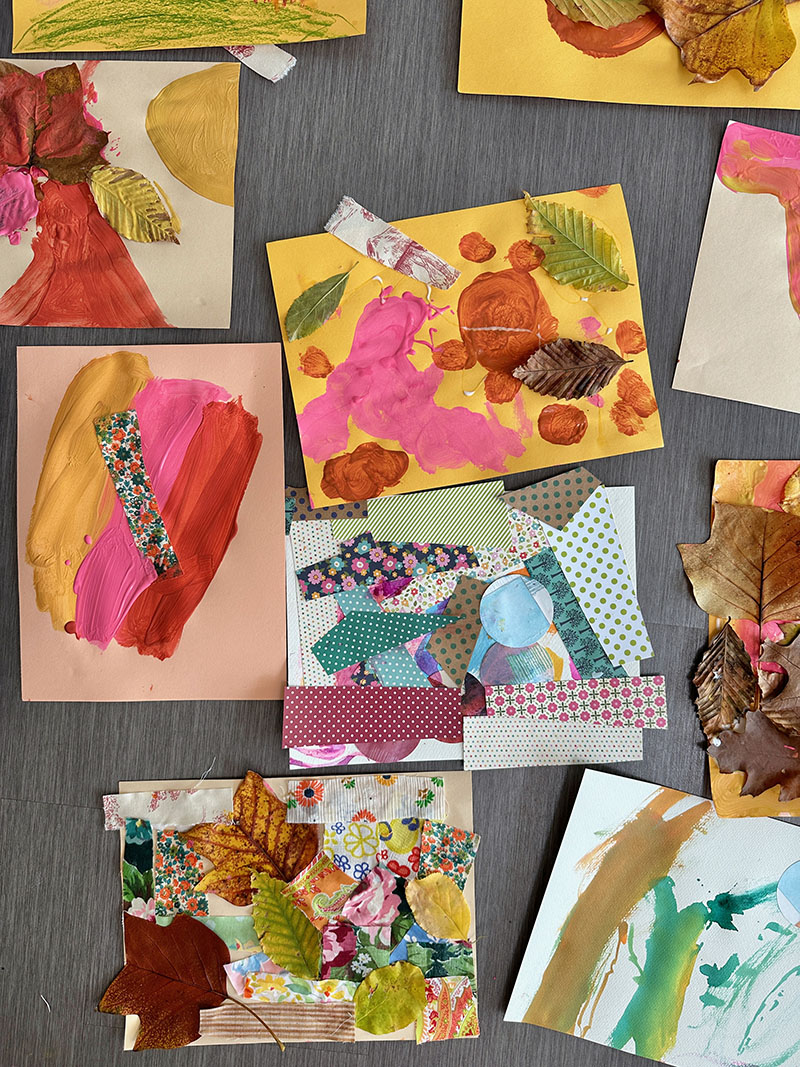
    5. What I learned from watching the children hard at work at this painting table was that they use core design elements so effortlessly and instinctively, such as color, texture, space, form, mark-making, and composition. It’s actually so inspiring!

    Let me know if you try this one, and tag me on Instagram @artbarblog if you do!

    xo Bar

    – – – – – – – – – – – – – – – – – – – –

    Did you like this post? Here are other collage and leaf ideas:


    Source link

  • Timed Collage Prompts with Eric Scott –

    Timed Collage Prompts with Eric Scott –


    Four colorful abstract paper collages, crafted under a timed art prompt, grace the white surface. They feature dynamic shapes in blue, pink, black, green, yellow, and purple.

    Encouraging Creativity with Timed Collage!

    Are you trying to incorporate art into your daily routine? Are you looking for ways to encourage creativity in your students? A timed collage prompt might just be something for you to try!

    At the 2024 NAEA conference I went to a wonderful hands-on art workshop where we did timed collage prompts on index cards with art journaling artist Eric Scott!

    • This idea can be used to encourage experimentation and play in your students- by setting a time limit, the students have to work creatively within those constraints.

    • This idea can also be used to jump-start your own daily art practice, as it fits into a busy schedule.

    The workshop I am going to tell you about today was the “Collage Magic” workshop by Eric Scott. Who is Eric Scott? I first learned of his work when I read Journal Fodder Junkies and Journal Fodder 365 years ago. As you may know, I am a huge fan of collage and art journaling and it is my preferred method of art making. Eric is also an art educator who works with kids.

    Art journal page by Eric Scott

    If you go to his website, you can read more about his art, but also get some free downloads with things like cartoon drawing guides, monster drawings and journal prompts. You can stay up-to-date with what he’s doing by following his SubStack or Instagram.

    Timed Collages in the Collage Magic Workshop

    In this workshop, we did a series of collages on index cards using simple (not precious) materials like construction paper and glue.

    He set the timer for just a few minutes for each collage – any amount of time would work, but these were about 3-7 minutes each. We thought about using different techniques and cutting different shapes. Could you create interest by ripping or tearing? Another teacher near me created pop-ups, so we definitely got creative. With time constraints, it forces you to make quick decisions and not worry too much about the final results. It’s a way to let go of the critical voice in your head.

    Four colorful abstract paper collages, crafted under a timed art prompt, grace the white surface. They feature dynamic shapes in blue, pink, black, green, yellow, and purple.

    For this next set, we chose one color only to use and focused on creating interesting negative space. We had about 15 minutes to create all three cards.

    Three abstract cutouts on paper: purple on the left, red in the center, and blue on the right. Each art piece features curved shapes on a white background, reminiscent of timed collage prompts for creative expression.

    For the last exercise, we made a culminating collage on larger 6″x8″ paper with a slightly longer time frame to create our collage. What I love about this idea is that there are so many different directions these collages can go and I’m sure your students will come up with a huge array of different results.

    Timed Collage: A vibrant paper cut-out composition features overlapping yellow and blue rectangles against a backdrop of wavy, vertical strips in black, blue, teal, and magenta.

    Creating a Daily Practice with Small Collages

    One thing Eric talks about is creating a daily practice. This is SO hard to do when we are busy with so many other daily things on our to-do list. I have sadly fallen away from a consistent art journaling practice, but I know that I always feel better when I find the time to cut, paste and play. Now I am intentionally seeking out scheduled opportunities to make art, such as an art journaling meetup at a local art store. If it’s on my calendar and I paid for it, I’m more likely to go! Keep reading for more tips about creating a daily practice.

    • One of his tips is to keep it small when first starting, like using an index card for a collage. In the workshop, we made a series of collages in this size.

    • Another tip is to use the cheap stuff– working on an index card doesn’t feel as precious as your expensive canvas.

    Make a routine for your art practice. If you can find a specific time of day to work on your art, it can help you be consistent.

    • And lastly, leave it set up. If you have room for a dedicated workspace for your art, that helps because you already have your materials set up and ready to go.

    Eric has committed to a daily practice of making a collage a day, with remarkable results! Just look at this stack of collages!

    Here are a few of the striking collages Eric has made!

    Three colorful paper collages featuring abstract patterns and a cartoonish monster rest on a speckled table, surrounded by glue sticks. This vibrant scene is a testament to the creativity inspired by collage prompts during an engaging art session.
    Three abstract art collages on a speckled surface, each featuring geometric shapes in vibrant colors: purple with circles, grayscale with a blue eye, and pink with green and orange lines. Perfect for timed collage prompts or sparking creative inspiration.

    A few more thoughts… NAEA Workshops

    Are you going to be attending the upcoming National Art Education Association Conference?

    First of all, if you are an art teacher and have never attended an NAEA conference, you should try to do so at some point. You will be blown away with all of the amazing sessions and ideas shared. In addition, you get to try out and get samples of all the latest art supplies!

    Second, if you are going, you should try out a “ticketed” workshop. The regular (included) sessions will give you loads of new ideas and things to think about, but the “ticketed” workshops are the place to have hands-on artmaking experiences in a smaller setting led by qualified art educators. I have gone to many ticketed workshops at past NAEA conference- such as a Lynda Barry drawing comics workshop and workshops about tooling foil, encaustics and mosaics. I try to pick 2 or 3 at every conference as it is fun to try new things that I haven’t experienced yet. Remember, you need to sign up for these ahead of time, as they do fill up!

    Unfortunately I’m not going to be able to attend this year’s conference, but I’m planning ahead to Chicago next year, and since that is much closer and doesn’t require a plane ride, I will most likely be at the 2026 conference.

    Final Thoughts

    • Another great resource for daily creative inspiration is Daisy Yellow Art and her ICAD challenge. I participated in this challenge years ago and it was really fun.

    Artist Trading Cards are a twist on the index card idea, with an even smaller space to make art. I used to collect and trade these and have a huge binder full of them. (Idea for future blog post!)

    Have you ever tried timed art prompts? What was your experience like? Let me know if you have any other good resources to share with this idea!


    Discover more from Art is Basic | Elementary Art Ideas

    Subscribe to get the latest posts sent to your email.


    Source link