برچسب: Ideas

  • Meaningful One-Day Lesson Ideas for when Time and Art Supplies Are Scarce

    Meaningful One-Day Lesson Ideas for when Time and Art Supplies Are Scarce


    The end of the school year is in sight, and the struggle is real. You’re exhausted, supplies are dwindling, and your students’ attention spans are shorter than ever. Sometimes you just need a meaningful one-day lesson to fill those final days. Try some of these low-prep, high-engagement lesson ideas that will keep your students focused on learning while making the most of those last precious moments in your art room.

    Keep reading for engaging one-day lesson ideas for when you are low on time and art supplies.

    hand holding broken pencils

    Portfolio Day 

    The end of the year is the perfect time to review the portfolios that students worked so hard on all year long. Students will select a few pieces that demonstrate the most growth. Then, students will write a brief artist statement describing their artistic progress and the choices that fueled that progress. Next, create a class gallery with one artwork per student. Arrange the selected works around the room or digitally in a slide deck. Finally, share the class’s work through a gallery walk or slideshow. Encourage students to drive the narrative with peer compliments and discussion prompts about key concepts.

    student taking a photo of their artwork

    Creativity Challenges

    Keep students creating and making right up to the last day with Creativity Challenge lesson ideas. Foster friendly collaboration and competition with minimal consumables. Continue the fun and stack your challenges for a full Creativity Challenge Week.

    student example with recycled materials

    Here are five exciting Creativity Challenges to add to your curriculum:

    1. Exquisite Corpse Drawing
      This classic Surrealist game sparks creativity and collaboration—and a lot of laughs! Students will complete each other’s drawings to reveal a wonderfully bizarre creature.
    2. Found Object Coloring Sheets
      Transform famous artworks or simple emojis into giant, collaborative coloring pages. Students then race to “color” the image using found objects from around the classroom, arranged within the lines. This activity promotes teamwork and observation skills.
    3. Upcycled Old Papers
      Give abandoned artworks a second life. Students empty their drawers and folders, ripping up old work and sorting the pieces by color. Use the scraps for papermaking, individual collages, or a large, shared piece. This activity encourages resourcefulness and is perfect for low-energy days.
    4. Photography Scavenger Hunt
      If you have access to electronic devices, explore photography to get students thinking about composition. Show examples of different photographic techniques and perspectives. Then, provide a list of prompts like bird’s-eye view, worm’s-eye view, forced perspective, action shot, macro shot, leading lines, rule of thirds, and symmetrical balance for students to capture. 
    5. One-Line Drawing
      This continuous line drawing game tests focus and control. Students draw a subject or scene without lifting their pencil from the paper. Encourage them to fill the page with a single, flowing line, capturing the essence of their subject in a unique and minimalist way.

    Art-iculate Game

    Try a fun, fast-paced art history review game. Reinforce art recognition and key concepts, all while encouraging teamwork. You’ll need a deck of at least 20 “artwork cards.” Print images of famous artworks onto index cards. Use the artist bios from FLEX Curriculum to build a deck of diverse artists like Frida Kahlo, Piet Mondrian, Yayoi Kusama, and many others.

    Divide the class into teams. Set a timer for one minute and have the first team select an “Artist Interpreter.” This student draws a card from the top of the face-down deck. Their mission is to describe the artwork for their teammates to guess without using the artist’s name and artwork title. For example, if the card shows Vincent Van Gogh’s The Starry Night, the student may say, “It’s an evening landscape with a big, swirling sky and a small village below. It has a blue color scheme, and the sky looks hopeful.” Each artwork that the team correctly guesses within the one-minute time period is worth one point. 

    Once the minute ends, add a trivia twist for bonus points. For each identified artwork, ask a trivia question. For The Starry Night, ask, “What art movement did Van Gogh belong to?” Each correct answer earns an extra point. Be sure to base your trivia questions on key concepts from the curriculum.

    stack of art history cards

    Don’t miss these other game ideas to sneak in learning up to the last day:

    As the final bell of the school year approaches, remember that you can still deliver engaging and worthwhile art experiences even when time and supplies are scarce. These one-day lessons provide opportunities for creativity, collaboration, and reflection. Finish the year strong and remind your students of all the ways they have grown as learners and creators. End the year on a high note and send them off with a sense of accomplishment and a lasting love for art!

    How do you make the most of the last few days in the art room?

    What are your go-to one-day activities for when supplies are running low?

    To chat about one-day lesson ideas with other art teachers, join us in The Art of Ed Community!

    Magazine articles and podcasts are opinions of professional education contributors and do not necessarily represent the position of the Art of Education University (AOEU) or its academic offerings. Contributors use terms in the way they are most often talked about in the scope of their educational experiences.

    Source link

  • Skip the Bisque: 4 Creative Project Ideas for Single-Fire Pottery Success!

    Skip the Bisque: 4 Creative Project Ideas for Single-Fire Pottery Success!


    Clay projects are magical! However, managing clay is one of the more labor-intensive tasks in the art room. You have to prepare the clay and slip, shift projects around as they dry, load the kiln, bump the temperature, cool it down, unload the kiln—and repeat. The process is beautiful but it demands time and effort. If you only have one day and a classroom full of energetic students, try single-fire pottery! This time-saving technique skips the bisque stage and lets you build and glaze in one class period. Bring the joy of clay to your students without sacrificing creativity or quality.

    Let’s explore how single-fire pottery can turn your art room into a hub of stress-free creativity!

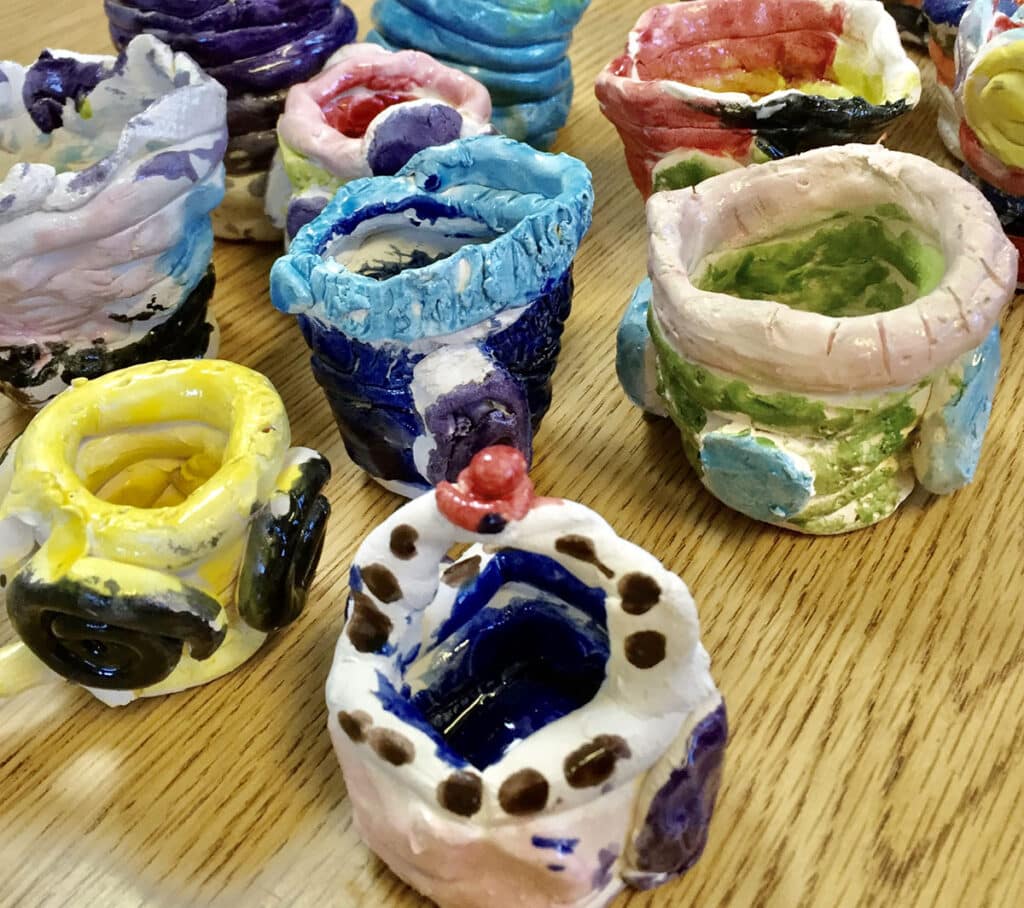
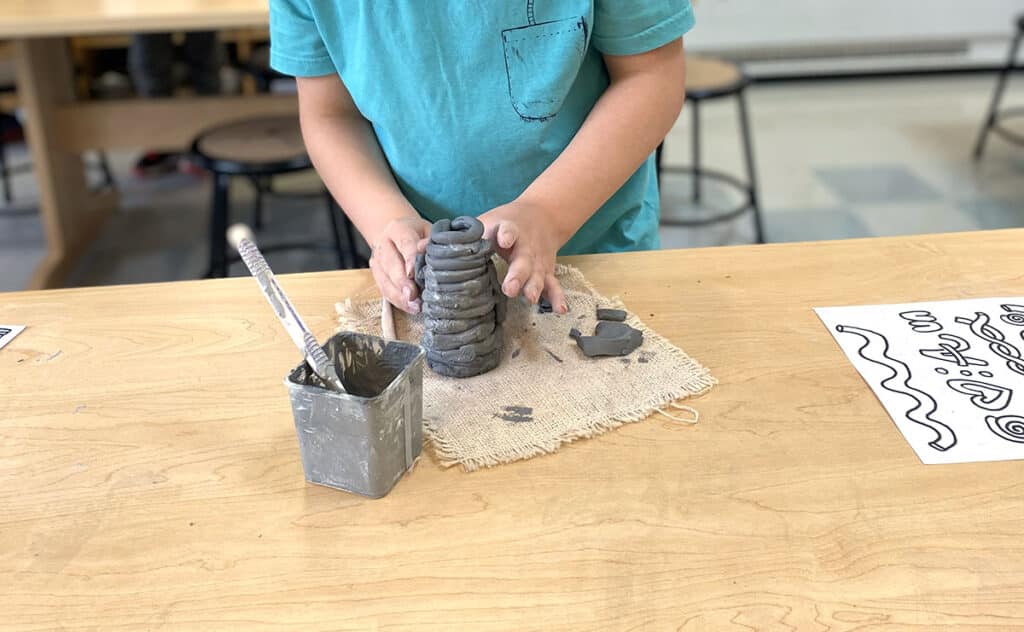
    student building a coil pot

    What is single-fire pottery and how does it work?

    Single-fire pottery lets students build and glaze clay pieces on the same day. This saves time and uses the glaze’s adhesive properties to your advantage. Normally, you probably warn students not to glaze the bottoms of their pieces to prevent sticking to the kiln. While you still want to do this, with single-fire pottery, use that stickiness to your strategic advantage and streamline the process! Glazing wet clay ensures pieces stay securely attached during firing.

    Important Tip:

    It’s crucial to match the cone of the clay with the cone of the glaze to ensure a successful single-fire process. If you’re using a low-fire (05) clay, pair it with a low-fire (05) glaze. Mismatched clay and glaze cones can lead to underfiring, glaze defects, or incomplete bonding. Always double-check your clay and glaze compatibility to prevent issues and achieve optimal results!

    Why try single-fire pottery?

    Single-fire pottery isn’t just about saving time. It can transform how you and your students experience clay and how you steward your budget and resources.

    Here are four reasons to embrace this innovative approach:

    1. Conserve Energy
      Firing once per project uses less energy, making this method more sustainable and environmentally friendly.
    2. Reduce Material Loss
      Because you handle pieces less often, single-firing minimizes the risk of breakage.
    3. Encourage Experimentation
      The wet glazing process introduces students to new techniques they can’t achieve with bisque-fired pieces.
    4. Simplify Planning
      With fewer steps, you can focus more on the creative process and less on logistics.

    How do I tell when it’s ready to fire?

    Drying single-fire pottery can be tricky without the color changes in the clay to guide you. For a reliable method, try the temperature test. Simply feel the clay with the back of your hand. If it feels cooler than your skin, it still contains moisture and isn’t ready for the kiln. When the clay matches your skin temperature, it’s ready to fire! When in doubt, it’s always better to give it more time. Waiting four weeks, even in humid conditions, is usually enough to ensure your clay is thoroughly dry and ready for the kiln!

    Are you ready to jump on the bandwagon?  Here are four one-day projects to get you started!

    1. Textured Landscape Tiles 

    clay landscape tiles

    Create clay landscape tiles that combine texture, layering, and glaze in one project. Start with a clay slab, trace a frame, sketch a landscape, and add texture. Glaze before adding elements like clouds, trees, and other small features. The glaze acts as the adhesive, eliminating the need for scoring and slipping. Glaze all the details and you’re done! Allow the tile to dry completely before firing for a vibrant, single-fired ceramic masterpiece.

    clay tile project in progress

    For a breakdown of this lesson, including a planning guide and process photos, check out the Ceramic Landscape Lesson in FLEX Curriculum

    2. Coil Pots

    glazed coil pots

    How many times have you pulled coil pots from the kiln only to find separated coils? Avoid this heartbreak by having students build their coil vessels and apply glaze immediately. Follow your basic coil lesson. Scoring and slipping between coils is optional but recommended for added security. Once students construct their pots, glaze immediately. The glaze acts as an adhesive, helping the coils stick together and stay intact through the firing process. No more half-ruined pots lingering in your kiln!

    coil pot in progress

    If you don’t have a go-to coil pot lesson, no problem! FLEX Curriulum’s Coil Pottery Lesson is jam-packed with student-facing resources to ensure coil success. 

    3. Trinket Dishes

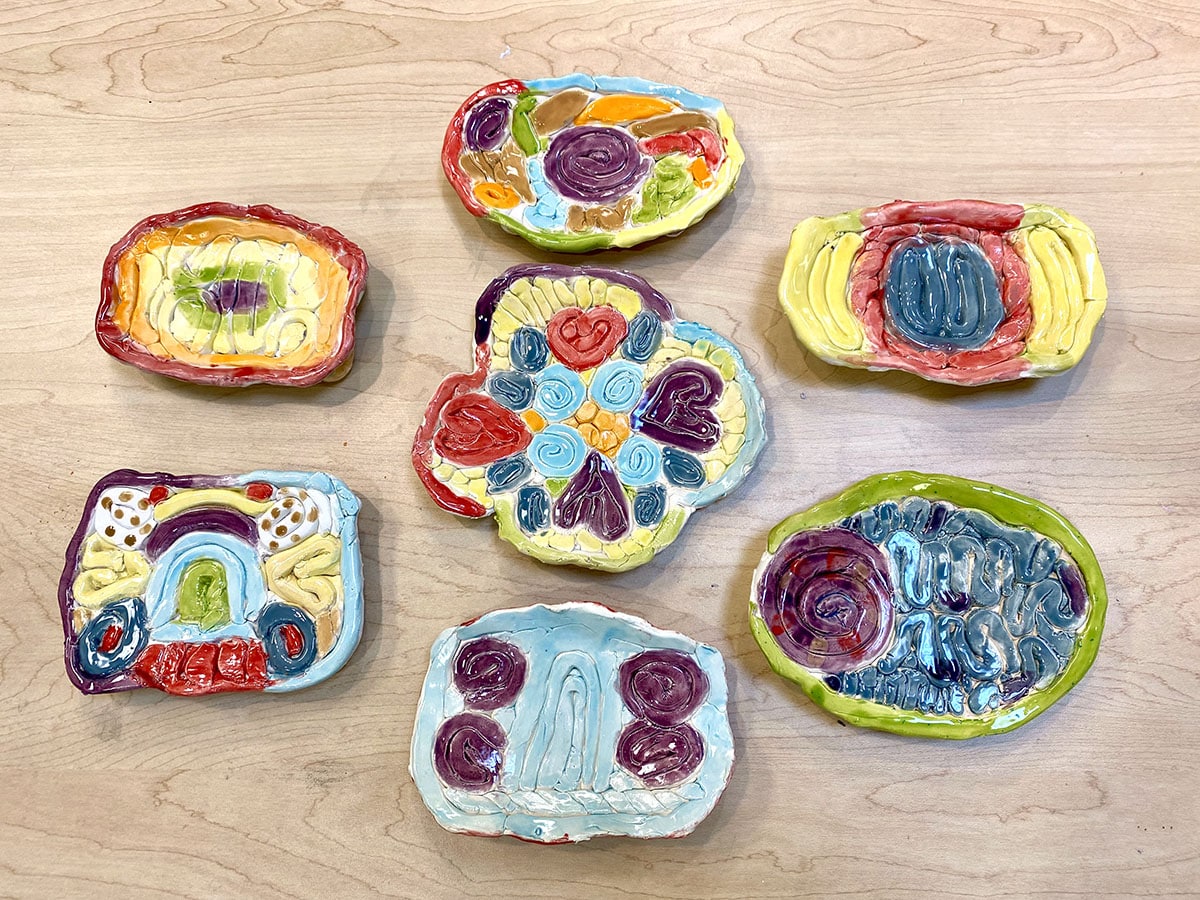
    coil trinket dishes

    Put a creative spin on your coil lesson by building out instead of up! Students start by outlining a dish shape on paper and then build outward from the center with coils, shaping and curling as they go. Roll one long coil and wrap it around the perimeter to keep everything contained. Smooth the bottom side of the dish, flip it over, and immediately apply glaze to the top. Glazing immediately prevents smaller coils from shifting during firing.

    Check out the Trinket Treasure Dish Lesson in FLEX Curriculum for step-by-step instructions and coil technique anchor charts! 

    4. Pet Pinch Pots

    pet pinch pot in progress

    Start with a basic pinch pot. Let students’ creativity transform it into a unique animal! Add features like legs, heads, tails, fins, or eyes to bring their animals to life. Glaze immediately. Scoring and slipping between pieces is optional since the glaze acts as the adhesive.

    how to make a pinch pot resource

    Head to FLEX Curriculum to explore student-facing resources, including a visual guide for how to create a pinch pot and assessments to help students reflect on their work and improve their techniques.

    Single-fire pottery is more than just a time-saver—it’s a creative shift that can redefine how you and your students experience clay. It simplifies the clay process, freeing up time, energy, supplies, and kiln usage. Single-fire pottery also creates stronger, more durable projects since the glaze acts as an additional adhesive. With fewer steps and more opportunities for innovation, take just one day to explore the magic of single-fire pottery.

    What are your student-favorite single-fire projects?

    To chat about ceramics with other art teachers, join us in The Art of Ed Community!

    Magazine articles and podcasts are opinions of professional education contributors and do not necessarily represent the position of the Art of Education University (AOEU) or its academic offerings. Contributors use terms in the way they are most often talked about in the scope of their educational experiences.


    Source link

  • Call for Art Exhibit Ideas

    Call for Art Exhibit Ideas


    Q: Does it cost anything to submit?
    A: No. But we also don’t pay a fee for your contribution.

    Q: What kind of art does this book cover?
    A: Original artworks and art prints. New media and performance art could also be included but not the focus of the book.

    Q: Does it only cover high-level exhibitions?
    A: We cover all the levels, especially events held by artists in their emerging phase, which makes them relatable. Both group shows and solo shows, both in the developed and developing countries are welcome. Ideally, this exhibition took place in the last two years.

    Q: Who can contribute to the book?
    A: Artists, art critiques, art dealers, curators, art lovers, basically anyone! You need to give at least one piece of advice to other fellow artists regarding showcasing their art, accompanied by at least three photos. You need to sign a contributor agreement in order to grant us permission to use your copyrighted materials. If the photo is taken by someone else (like a photographer), we also need a release form from the copyright holder.

    Q: How to contribute?
    A: Fill the form on our website. You can fill on the behalf of someone as long as you have their permission.

    Q: Would my contribution go into the book?
    A: Only the best examples that give the most value to other fellow artists will be included in the book. If it is not in the book, we would publish it on our social media or website.

    Q: Can my event appear under two different categories?
    A: Ideally a place only appears in one of the categories, not in both. For example, a book store gallery is both a book store and a gallery, but it would go into one of the chapters whichever one is more suitable.

    Q: How to maximize my chance of appearing in the book?
    A: Give accurate information and high resolution images.

    Q: I went to a museum and took some photos. Can I write about it as a reviewer without their permission?
    A: Writing about a public museum exhibition and including your own photos of the exhibit in a book can fall under fair use in many jurisdictions, depending on how you present the content and how the laws are applied. If you can’t clear the permissions, we can publish it on social media which is generally okay.


    Source link

  • Top 5 Christmas gift ideas for content creators, artists & photographers – Veronica Winters Painting

    Top 5 Christmas gift ideas for content creators, artists & photographers – Veronica Winters Painting


    Christmas time is the best time of the year. We want to give something special to our family and friends. I’d like to include unusual gifts for him and her here that are more than the art supplies section, although getting a box of great art supplies is a big Christmas gift!!! In this post, I’m going to include artful gifts for artists and photo/video enthusiasts, content creators, and alike. These products are not cheap but of good if not excellent quality and can serve you for years to come. You can buy them all on Amazon. Links are included below. Let’s dive in.

    https://www.youtube.com/watch?v=alMo5N4EShM

    Must-have Photo & video art studio equipment on a budget:

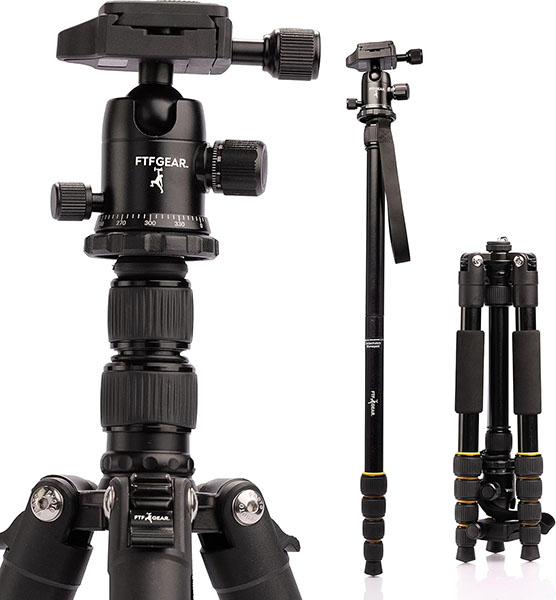
    #1 FTF Gear Compact Aluminum DSLR Camera Tripod and Monopod

    I like this tripod because it’s stable. There are so many tripods out there that are flimsy and not suitable for a DSLR camera. This one is. I also love that it’s so compact and portable! It fits in a very small bag that comes with it that I can take with me whenever I travel. It loads up to 20 lbs of weight and comes with a mount for your phone as well. It’s made of aluminum and weighs under 3 pounds. Center support can be converted into a stand-alone monopod. There is a hook under it that allows for the placement of additional weight like a backpack if you’re hiking and want to add more weight to the tripod to stabilize it even more. It stretches much higher than a regular tripod and can sit super low, almost at the ground level if you want to shoot something from a different perspective.

    The only thing I don’t like about this tripod is that it does take longer to set it up because of all the adjustable points in it. It takes a while to learn what knob to screw or unscrew. Otherwise, I’m glad I bought it for my studio. I can see that I’d been using it for many years.

    If FTF Gear Tripod is sold out on Amazon, I think that this one, K&F Concept 72″/184cm lightweight Camera Tripod, looks very similar to mine. It’s a bit cheaper too!

    #2 SanDisk 128GB Extreme PRO SDXC UHS-I Memory Card

    Even if you’re not a photographer, you can use these memory cards with your computer for storage. Just plug in, drag, and drop files from your computer to those cards. They come in different sizes and price varies quite a lot. 128 GB is under $25 and 1TB is $139. You can pick the size of the card on Amazon. SanDisk Cards work very well and I often travel with them. Just be mindful that they do stop working in a few years because of solar flare damage and other issues.

    Photo & Video Lighting:

    #3 Newkana LED Lamp

    This lamp will elevate your lighting experience because it features adjustable brightness, high-quality design, LED lifespan of up to 40,000 hours, gesture control, occupancy sensor (lights on when you sit down, off when you leave), night light, timer off, and auto-brightness adjustment. The desk light can be positioned at multiple angles. It can be placed way above the head to give a nice and even illumination. It has a stable base and is ideal for work at the desk, doing small painting, crafting, jewelry-making, or nail art.

    https://www.youtube.com/watch?v=BWyIfBFuoBw

    I made a separate video review of the Newkana LED desk lamp.

    #4 Lume Cube Bicolor Panel Mini LED Light for Professional DSLR Cameras

    This is a very small but powerful LED light lamp that fits in your pocket. It also mounts to a DSLR camera or any other mount that you have in your art and content creator studio. You can use it both inside and outside. It has a very nice, adjustable brightness and color temperature ranging from 3200K to 5600K. Its battery lasts for several hours but for extended use, simply plug it in and continue creating if you are out of battery time. This portable LED light comes with an extra light panel diffuser and shoe mount, designed for seamless integration with your LED video light. It charges via a USB port. I usually use it to have an additional light on my face or as a light for my Nikon to shoot outdoors at dusk.

    #5 VILTROX LED Photography Tube Light

    This is a very versatile colorful light that you can use all around your studio and beyond. The light is bright but adjustable. There are many settings and colors to choose from and I have lots of fun using it in my video and photography. It charges via a USB port and it can be mounted if needed. Its length is about 22.7 inches (57.8cm). It’s light to carry around in a soft bag. You can use it with the app but I normally set it directly. 

    Bonus: colored pencils box & art instruction books

    Prismacolor Premier colored pencils, I recommend a box of 36 or 72 colors. This is an official store page on Amazon where you can pick your favorite box.

    The Colored Pencil Manual is an art instruction book

    colored pencil manual veronica winters
    https://amzn.to/3xoJjbi

    How to Color Like an Artist is a coloring book that teaches you some awesome colored pencil drawing techniques.

    This wraps it up for now. I hope you just have found your favorite art gift!

    Check out art shop here: https://veronicasart.com/shop/


    Source link

  • Need Ideas For Winter Bulletin Boards?!?!


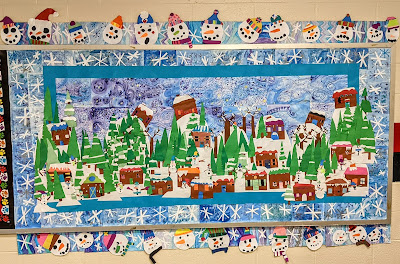
    Need ideas for winter bulletin boards?!?!  Here are several I’ve done over the years that might get some ideas cookin’ for you! I don’t do holidays because that is limiting for students and the length you allow something to stay up!  A winter board can be up till the end of February.  

    (I’m currently working on this year’s with my students!). 

    This is a great time to do a school wide collaborative project!  Every year I have my students create a different component for a large collaborative mural.  If I have any left over parts…I usually hang up smaller displays in other parts of the school.  The students are always so excited to try to find the part they created!  The project range from watercolor, collage, marker, colored pencil, crayon…and everything in between!!  You can make this work based on the supplies and space you have available to you at your school!

    \


    Source link