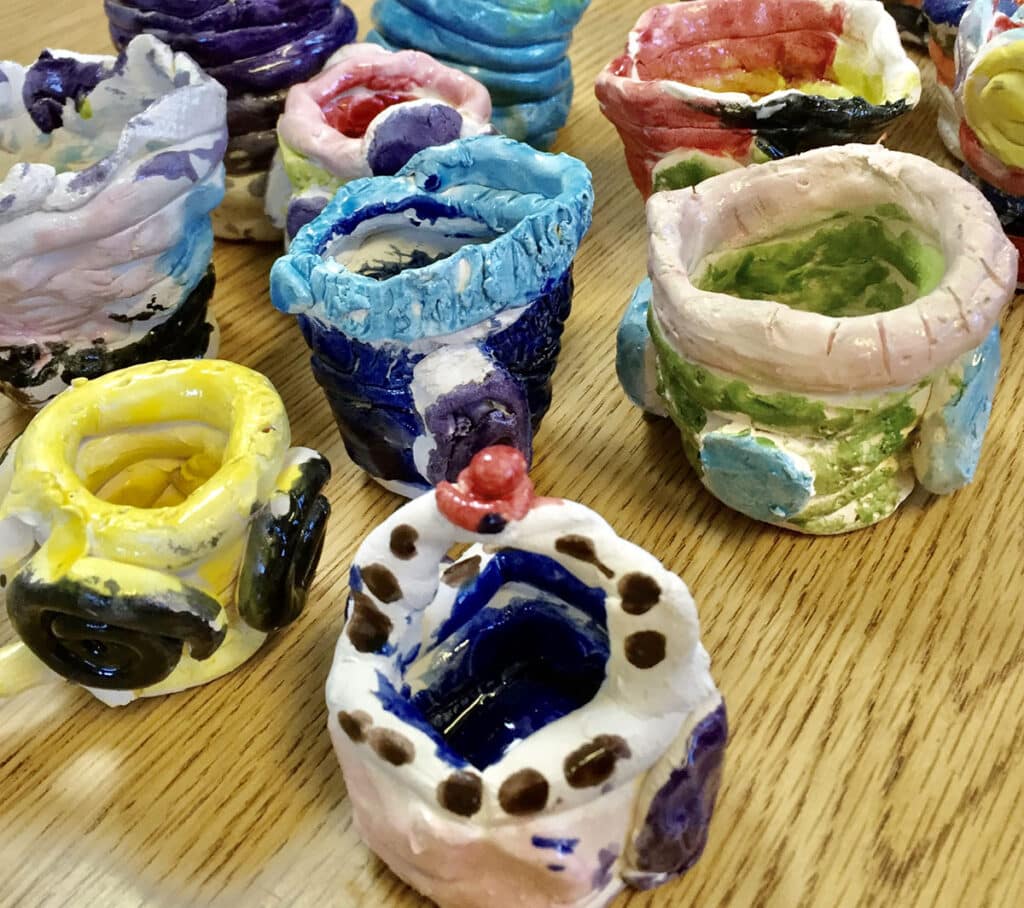
برچسب: Project

  • Skip the Bisque: 4 Creative Project Ideas for Single-Fire Pottery Success!

    Skip the Bisque: 4 Creative Project Ideas for Single-Fire Pottery Success!


    Clay projects are magical! However, managing clay is one of the more labor-intensive tasks in the art room. You have to prepare the clay and slip, shift projects around as they dry, load the kiln, bump the temperature, cool it down, unload the kiln—and repeat. The process is beautiful but it demands time and effort. If you only have one day and a classroom full of energetic students, try single-fire pottery! This time-saving technique skips the bisque stage and lets you build and glaze in one class period. Bring the joy of clay to your students without sacrificing creativity or quality.

    Let’s explore how single-fire pottery can turn your art room into a hub of stress-free creativity!
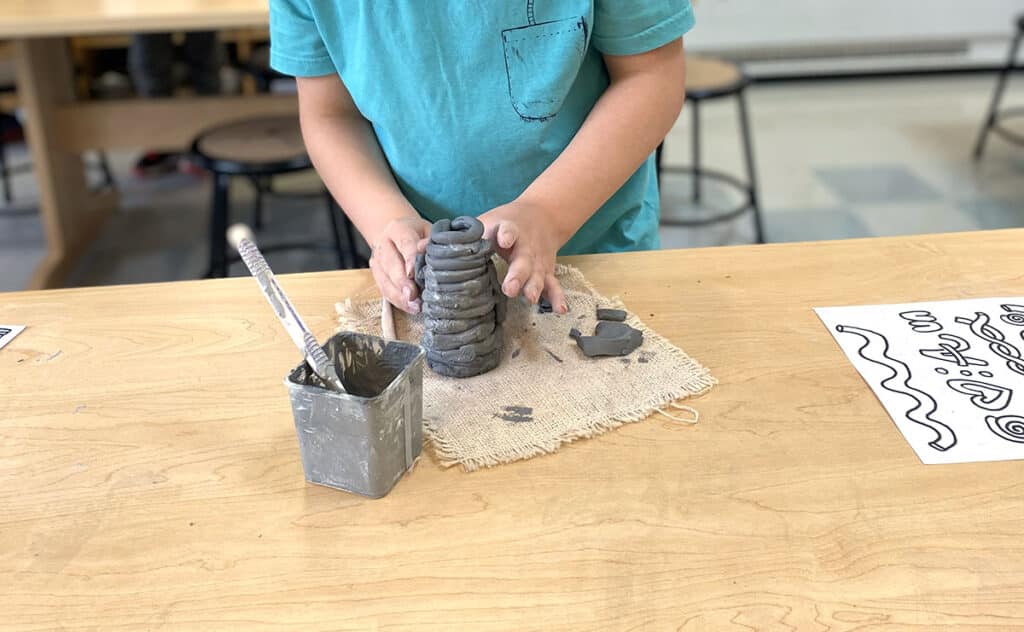
    student building a coil pot

    What is single-fire pottery and how does it work?

    Single-fire pottery lets students build and glaze clay pieces on the same day. This saves time and uses the glaze’s adhesive properties to your advantage. Normally, you probably warn students not to glaze the bottoms of their pieces to prevent sticking to the kiln. While you still want to do this, with single-fire pottery, use that stickiness to your strategic advantage and streamline the process! Glazing wet clay ensures pieces stay securely attached during firing.

    Important Tip:

    It’s crucial to match the cone of the clay with the cone of the glaze to ensure a successful single-fire process. If you’re using a low-fire (05) clay, pair it with a low-fire (05) glaze. Mismatched clay and glaze cones can lead to underfiring, glaze defects, or incomplete bonding. Always double-check your clay and glaze compatibility to prevent issues and achieve optimal results!

    Why try single-fire pottery?

    Single-fire pottery isn’t just about saving time. It can transform how you and your students experience clay and how you steward your budget and resources.

    Here are four reasons to embrace this innovative approach:

    1. Conserve Energy
      Firing once per project uses less energy, making this method more sustainable and environmentally friendly.
    2. Reduce Material Loss
      Because you handle pieces less often, single-firing minimizes the risk of breakage.
    3. Encourage Experimentation
      The wet glazing process introduces students to new techniques they can’t achieve with bisque-fired pieces.
    4. Simplify Planning
      With fewer steps, you can focus more on the creative process and less on logistics.

    How do I tell when it’s ready to fire?

    Drying single-fire pottery can be tricky without the color changes in the clay to guide you. For a reliable method, try the temperature test. Simply feel the clay with the back of your hand. If it feels cooler than your skin, it still contains moisture and isn’t ready for the kiln. When the clay matches your skin temperature, it’s ready to fire! When in doubt, it’s always better to give it more time. Waiting four weeks, even in humid conditions, is usually enough to ensure your clay is thoroughly dry and ready for the kiln!

    Are you ready to jump on the bandwagon?  Here are four one-day projects to get you started!

    1. Textured Landscape Tiles 

    clay landscape tiles

    Create clay landscape tiles that combine texture, layering, and glaze in one project. Start with a clay slab, trace a frame, sketch a landscape, and add texture. Glaze before adding elements like clouds, trees, and other small features. The glaze acts as the adhesive, eliminating the need for scoring and slipping. Glaze all the details and you’re done! Allow the tile to dry completely before firing for a vibrant, single-fired ceramic masterpiece.

    clay tile project in progress

    For a breakdown of this lesson, including a planning guide and process photos, check out the Ceramic Landscape Lesson in FLEX Curriculum

    2. Coil Pots

    glazed coil pots

    How many times have you pulled coil pots from the kiln only to find separated coils? Avoid this heartbreak by having students build their coil vessels and apply glaze immediately. Follow your basic coil lesson. Scoring and slipping between coils is optional but recommended for added security. Once students construct their pots, glaze immediately. The glaze acts as an adhesive, helping the coils stick together and stay intact through the firing process. No more half-ruined pots lingering in your kiln!

    coil pot in progress

    If you don’t have a go-to coil pot lesson, no problem! FLEX Curriulum’s Coil Pottery Lesson is jam-packed with student-facing resources to ensure coil success. 

    3. Trinket Dishes

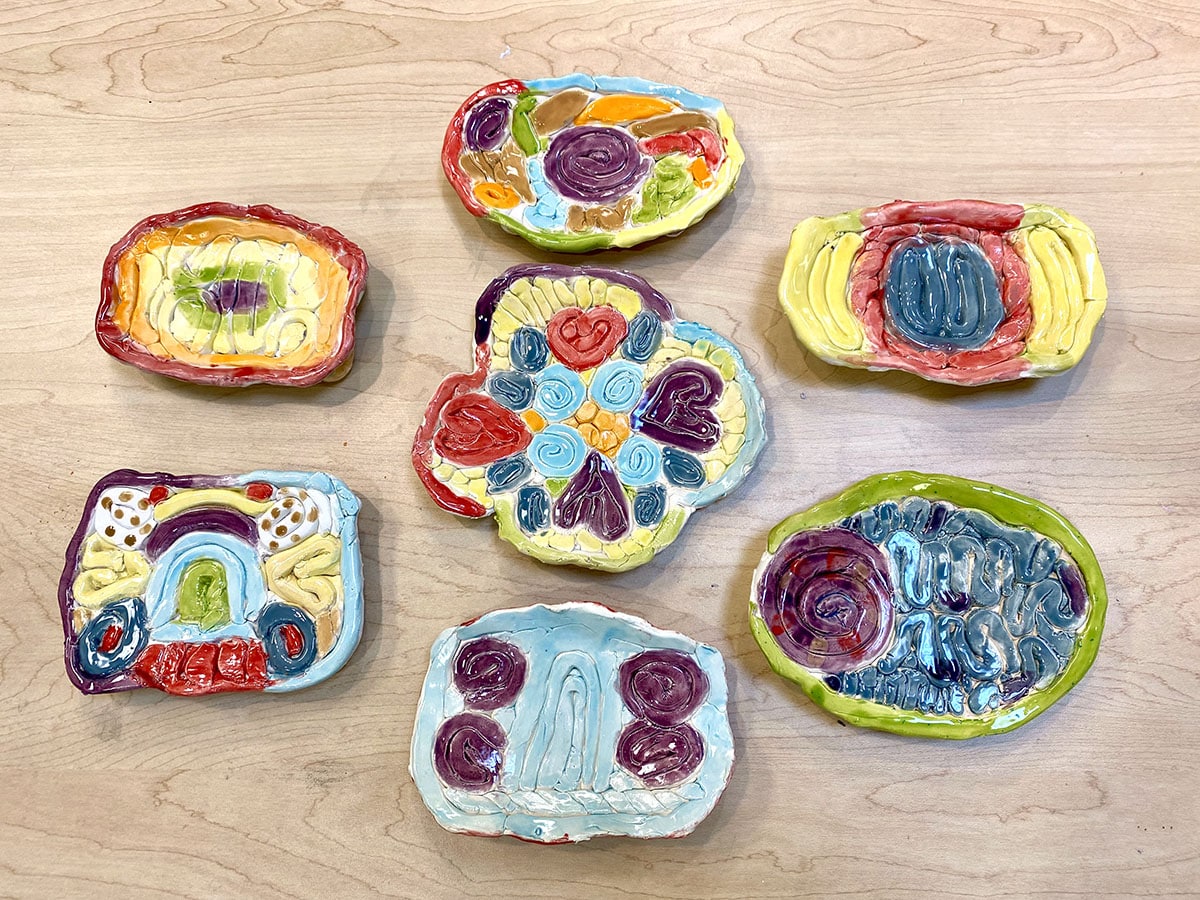
    coil trinket dishes

    Put a creative spin on your coil lesson by building out instead of up! Students start by outlining a dish shape on paper and then build outward from the center with coils, shaping and curling as they go. Roll one long coil and wrap it around the perimeter to keep everything contained. Smooth the bottom side of the dish, flip it over, and immediately apply glaze to the top. Glazing immediately prevents smaller coils from shifting during firing.

    Check out the Trinket Treasure Dish Lesson in FLEX Curriculum for step-by-step instructions and coil technique anchor charts! 

    4. Pet Pinch Pots

    pet pinch pot in progress

    Start with a basic pinch pot. Let students’ creativity transform it into a unique animal! Add features like legs, heads, tails, fins, or eyes to bring their animals to life. Glaze immediately. Scoring and slipping between pieces is optional since the glaze acts as the adhesive.

    how to make a pinch pot resource

    Head to FLEX Curriculum to explore student-facing resources, including a visual guide for how to create a pinch pot and assessments to help students reflect on their work and improve their techniques.

    Single-fire pottery is more than just a time-saver—it’s a creative shift that can redefine how you and your students experience clay. It simplifies the clay process, freeing up time, energy, supplies, and kiln usage. Single-fire pottery also creates stronger, more durable projects since the glaze acts as an additional adhesive. With fewer steps and more opportunities for innovation, take just one day to explore the magic of single-fire pottery.

    What are your student-favorite single-fire projects?

    To chat about ceramics with other art teachers, join us in The Art of Ed Community!

    Magazine articles and podcasts are opinions of professional education contributors and do not necessarily represent the position of the Art of Education University (AOEU) or its academic offerings. Contributors use terms in the way they are most often talked about in the scope of their educational experiences.

    Source link

  • Matching Mittens Art Project with Free Templates –

    Matching Mittens Art Project with Free Templates –


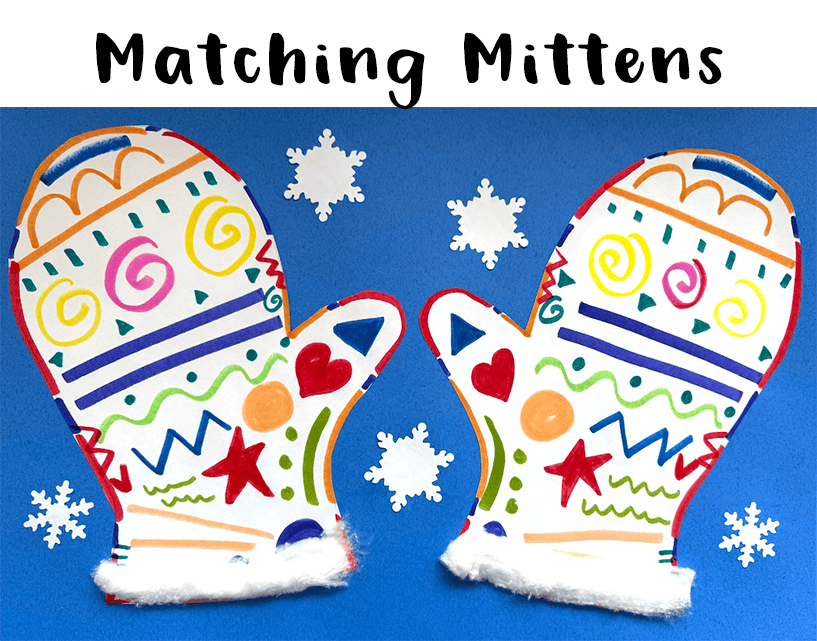
    Two colorful, decorated mittens featuring hearts, stars, and swirls rest against a blue background speckled with snowflakes. This matching mittens art project brings warmth and creativity to wintry days.

    This is a fun winter art project that allows students to use their creativity to make matching mittens, exploring symmetry and balance! I have been doing this art project for years and years and I keep returning to it every year because I think it’s great for fine motor skills and spatial awareness. It also strengthens their attention to detail as they work to make both mittens match perfectly.

    I’m not sure where I originally learned about this art project, but it had to have been about 15-20 years ago. So many of these ideas floating around social media and the internet have been around forever! This is a good one and maybe you haven’t seen it yet. I like to do this with Kindergarten, but I think Pre-K could do a simpler version and older kids could make more detailed mittens.

    Why do a Matching Mittens art project?

    Objectives:

    ● Students will develop observational skills by carefully replicating patterns and lines in reverse.

    ● Students will explore symmetry and balance in art by creating matching mittens.

    ● Students will practice fine motor skills through tracing, drawing, and pattern-making.

    ● Students will explore creativity by making unique patterns and designs.

    In this art project,  students will make a pair of mittens that match.  First, the students will design one mitten with patterns and lines. Then, they will copy that design onto the second mitten, but in reverse—like a mirror.

    “If you draw a heart on the left side of one mitten, you will need to draw the same heart on the opposite side of the other mitten.”

    “If you put a wavy line in the top of one mitten, the wavy line needs to go in the same spot on the other mitten.”

    Teacher Prep for the Matching Mittens Art Project

    ● Print the mitten template onto card stock (thicker paper).  (Amazon Affiliate links have been used for art supply links at no extra cost to you. The small commission earned goes towards maintaining this website.) You can use this as the drawing surface, or you can make them into reusable templates for your students to trace.  I have one set of templates and reuse them every year.  To do this, trace your mitten on to thicker poster board (I use “railroad board.”). Trace as many templates as you will need and cut them out.  Students will then use these to trace on to their larger paper.  They will trace it once, flip over the template and trace the other mitten.  I do this step, because it is a good skill for practicing fine motor skills.  But if you want to save time, you can just have the copies printed out.  

    Step One:

    ● Trace the mitten on to construction paper (I like Tru-Ray Construction Paper– 12” x18” paper). Flip the mitten over and trace the other mitten.

    Outlined shapes of two simplified, cartoon-style oven mitts facing each other, perfect for your next art project.

    Step Two:

    ● Draw designs on one mitten, using markers or crayons.  Emphasize coloring neatly and carefully.

    Step Three:

    ● Then, copy the designs and patterns on to the other mitten, but in reverse, like a mirror.  Some students may want to do one shape at a time, going back and forth between each mitten, which is totally fine!  Others might like to finish one whole mitten first.  

    ● Some kids might get stuck on the fact that it is very difficult to make an exact mirror image.  Explain that they should try the best they can, but it’s okay if it’s not perfect!   We are aiming for doing our best and it’s still going to look beautiful even if it’s not perfect.

    A vibrant art project featuring a colorful drawing of two mittens adorned with geometric and abstract patterns. Swirls, stars, hearts, and zigzags dance across each mitten in bright hues, set against a crisp white background that's perfect for creativity.

    Step Four:

    ● Cut out the mittens and glue to a piece of colored construction paper.

    (Optional) Steps:

    ● Unroll a cotton ball and spread out on the bottom of the mitten to look like fur.

    ● Add snowflake punch shapes (I like these and this one) to the background or draw on designs with construction paper crayons or metallic markers.

    A delightful matching mittens art project features two colorful, decorated paper mittens on a blue background, surrounded by delicate white snowflakes.

    To download the mitten templates, they are right here.

    Two mitten templates are beautifully showcased against a blue backdrop, with inviting text above: "Click here for the FREE Art Project Templates!.
    Explore our colorful mitten art project, featuring intricate decorative patterns on a soothing blue background. Dive into the "Matching Mittens Art Project" with our free templates for a creative adventure!.

    If you have any questions, feel free to leave a comment! Also, does anyone have any good book suggestions (besides the book The Mitten) that can go along with this project?


    Discover more from Art is Basic | Elementary Art Ideas

    Subscribe to get the latest posts sent to your email.


    Source link

  • Vinyl Sticker Art Project – Modern Abstract Art –

    Vinyl Sticker Art Project – Modern Abstract Art –


    Have you ever made vinyl sticker art? I saw an amazing idea to use vinyl sticker sheets (like the kind you use for a Cricut machine) on this post by Helloroscreates on Instagram. Cutting these into shapes is an easy, mess-free way to make modern abstract art! The kids had a fun time and we got LOTS of compliments on this project because they were all very successful and they were very eye-catching from a distance.

    This type of art is also called non-objective, if it doesn’t have any representational elements in it. I did have a student make a scene with a fish in it, so at that point it wouldn’t be considered non-objective. (I didn’t have that requirement for my students and his picture was awesome.)

    But these examples below are non-objective. When I explain what the word non-objective means, I say that it is art that uses shapes, lines and color to show a mood or idea and does not have real images in it (no people, animals or trees). Here is further explanation about non-objective and abstract art.

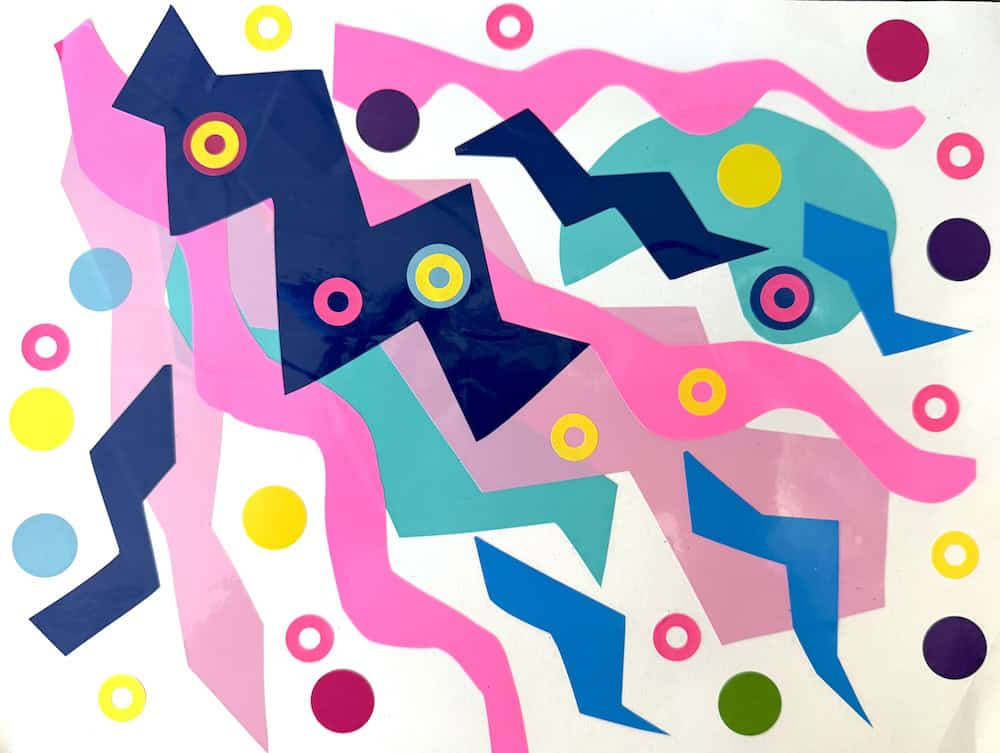
    Abstract artwork with overlapping geometric shapes in various colors—including pink, blue, green, and yellow—on a white background, reminiscent of vibrant vinyl sticker art.

    How to Make a Vinyl Sticker Art Project

    I created a short time-lapse video of the progression of this artwork so you can see how to make it! It’s easy- to make your vinyl sticker art all you need to do is cut out a variety of shapes and stick them down!

    Click here to see the tutorial video of how to make the vinyl sticker collage.

    Art concepts to discuss:

    ● Types of shapes such as organic and geometric

    ● Variety in types of shapes and sizes

    ● Balance and movement

    I would do this project with no younger than 3rd grade, as at that age they will have the dexterity to peel the stickers themselves.

    Abstract composition with colorful geometric shapes and curves on a white background, reminiscent of vinyl sticker art, featuring pink, purple, blue, green, gold, and red elements.

    Supplies for the Vinyl Sticker Art Project

    I bought several packs of vinyl sticker paper in order to get a nice variety of colors. The great thing about this project is there is no waste. Keep ALL of the scraps in a basket and the kids can make new shapes even from the smallest scraps.

    (Amazon affiliate links used at no extra cost to you. The small amount of commission earned goes towards maintaining this website, which is to help other art teachers with ideas and resources. Thanks for your support!)

    Holographic Sticker Paper

    A different set of designs of Holographic Sticker Paper

    74 Pack Vinyl Sticker Sheet Assortment

    55 Pack Vinyl Sticker Sheet Assortment

    What do you think? Have you tried this material before in your artwork?


    Discover more from Art is Basic | Elementary Art Ideas

    Subscribe to get the latest posts sent to your email.


    Source link

  • Washi Tape Art Project for Kids –

    Washi Tape Art Project for Kids –


    This is another project that is abstract and involves sticky materials! This washi tape art project is always a hit with kids! It uses two very fun art materials: patterned washi tape and Kwik Stix paint sticks.

    Many people are familiar with the technique where you lay down tape, paint over it and then peel the tape off to reveal the white sections. Here is an example of that project I did using hopes and goals with my Girl Scout troop years ago.

    This is a slightly different process because you leave the tape on and use Kwik Stix paint sticks instead!

    Three images depict a fun art project for kids: 1. Applying washi tape on paper. 2. Adding colored markers. 3. Completed colorful taped and colored paper sections. Confetti surrounds the images, adding to the vibrant creativity!.

    Note: these are all my teacher examples, but the kids are very successful with them starting in grades 3 and up.

    This vibrant abstract artwork, reminiscent of a joyful art project, showcases overlapping geometric shapes in pink, yellow, blue, and red. Patterns like stripes, polka dots, and hearts bring a playful touch akin to designs crafted with colorful washi tape.
    Abstract art with intersecting geometric shapes in pink and blue hues, accented by various patterned strips including polka dots, cherries, and zigzags.
    Abstract artwork with colorful zigzag and wavy patterns in pink, blue, yellow, and purple. Contains polka dot and striped borders on a textured background.
    Colorful abstract artwork with intersecting diagonal stripes and a vibrant mix of painted patterns, including zigzags, stars, and cartoon faces on tape accents.

    Click here for the link to the washi tape video tutorial– it’s under 2 minutes!

    https://www.youtube.com/watch?v=j_C6F3ioUEU

    If you like sculpture, you might be more interested in this other project that uses washi tape and wood scraps for a fun sculpture design!

    Washi Tape Art Project: Supplies Used

    Note: Amazon affiliate links have been used at no extra cost to you. The small amount of commission earned goes towards maintaining this blog.

    Kwik Stix paint sticks

    Washi Tape

    ● There are many different kinds of washi tapes that you might enjoy. I tested out several different sets to share with you and these vary in quality with some being completely useless, ripping as you try to unpeel them to others that unpeel and stick easily. The ones listed below I have tried out and like how they unpeel and stick. (The others I just returned!)

    Set of 30 Colorful Rolls

    Set of 40 Variety Pack

    Set of 50 Cute Characters Pack

    A collection of colorful washi tape rolls in a box, with various patterns including hearts, animals, and stars, next to cut strips arranged in rows on a white background.
    An array of decorative washi tapes with various patterns and colors, featuring cartoon animals, rainbows, and geometric designs, arranged vertically on a white background.

    Set of 27 Monet Inspired Washi Tape rolls (some with gold foil)- when I first opened the package it didn’t look as bright in person, but when I unrolled the tape onto white paper, the colors were very nice. I say these are inspired because I’m not sure all of these patterns are directly from his paintings.

    A box filled with rows of decorative washi tapes in various pastel colors and nature-themed patterns.
    Twelve strips of paper with various colorful patterns, including floral and abstract designs, arranged vertically against a white background.

    Black and Gold Foil Washi Tape set

    A box with multiple rolls of black tape with gold designs. Nine strips are lined up parallel, featuring various patterns like hearts, stars, and geometric shapes on a white surface.
    A box contains rolls of black tape with gold designs, featuring celestial and geometric patterns.

    Have you ever tried a technique like this? Do you have any other projects using washi tape? Share in the comments!


    Discover more from Art is Basic | Elementary Art Ideas

    Subscribe to get the latest posts sent to your email.


    Source link

  • Earth Day Art Project for Kids


    Are you looking for a fun Earth Day art project that would work for a variety of ages? This one was a hit with my students- with so many creative variations!

    Three colorful Earth-themed drawings by kids are displayed side by side, each depicting nature and celestial elements. The words "EARTH DAY Art Project" grace the top, celebrating young artists' creativity.

    Earth Day Art Project for Kids

    I wanted to quickly share with you this art lesson for Earth Day that was very successful with my students. I had to be out of school for a couple of days and the other art teacher at my school found this awesome art project to use while I was gone. This art lesson came from Seattle’s Child. Thanks so much for sharing! All of us art teachers are better together, when we share successful art projects.

    I loved the results so much, I decided to do it with another grade level. So these were created by 5th graders and 2nd graders. I love how thoughtful and creative each of the pictures turned out.

    Three colorful painted scenes pop with creativity: left shows a whimsical sun and tree, the center captures mountains in a dark circle, and the right depicts a vibrant landscape with trees and birds by a blue body of water. Perfect for an Earth Day kids' art project!.

    Materials Needed:

    ● A large circle to trace – we used coffee can lids

    ● Pencil

    ● Sharpies

    ● Watercolor Paints

    Three circular drawings for a kids' art project: 1. A person on a horse under a tree. 2. Red moon with craters resembling Earth's surface. 3. Colorful  landscape with stars and mountains, perfect for sparking creativity and environmental awareness on Earth Day.

    Steps to Make Your Earth Day Art Project

    1. First, trace the circle in the center of your page.
    2. Think about 3 or 4 things in nature that you love- animals, trees, plants, flowers, ocean, mountains, stars, moon, planets.. anything in nature!
    3. Include those 3 or more things in your drawing. Use pencil to start.
    4. Next, think about the background, and what you could do in the background to make your picture more interesting.
    5. Outline everything with a black Sharpie or fine tip permanent pen.
    6. Color everything using colored Sharpies, watercolor paints or BOTH!

    You could substitute any coloring materials of your choice.

    A vibrant "Earth Day Art Lesson" poster showcases three colorful Earth-themed drawings, encouraging kids through landscapes, animals, and the planet to inspire their next art project.
    Three circular drawings capture a kid-friendly charm: a rainbow arcs over grass, Earth with visible continents celebrates Earth Day, and animals lounges on a branch surrounded by stars. Each piece is vibrant and colorful, making it perfect for an engaging art project.
    Three colorful Earth Day-themed art pieces featuring nature landscapes and abstract designs. Text reads, "EARTH DAY Art Project - creative and fun for kids!.

    If you are interested in another idea for Earth Day, I have this oil pastel project we did with endangered birds and trees.

    If you liked this easy and fun Earth Day project for kids, comment below or PIN this post to save and share with others. Thanks for reading!

    The post Earth Day Art Project for Kids appeared first on Art is Basic | Elementary Art Ideas.


    Source link