برچسب: Space

  • What is positive and negative space in drawing? – Veronica Winters Painting

    What is positive and negative space in drawing? – Veronica Winters Painting


    To design beautiful compositions in painting and drawing, you need to understand the difference between negative and positive space in art. Every realist artist combines negative space into his drawing and painting to create visual balance and unity.

    Definition

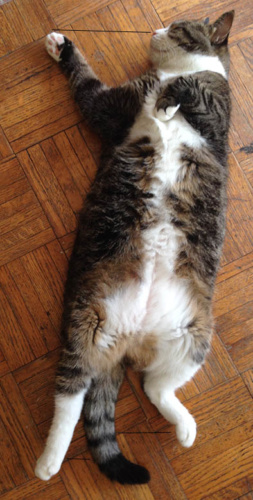
    Positive space in art is the subject or object itself in art, such as a cat, cup, spoon, etc. Negative space is the empty space or background space that surrounds that object or subject.

    what is negative space in art?
    Look at this picture. What do you see a black vase or two white profiles? If it’s the black vase, you’re looking at the positive space. If it’s the profiles, you’re seeing the negative space. Usually the positive space is the object(s) you draw, and the negative space is the background that surrounds it.
    what is negative space in art?
    Here is an example of a positive space in art. This is my colored pencil drawing of a flower. The flower itself is the positive space, and the white background around it is the negative space. The negative space in art isn’t always empty or in one color. It can have out of focus objects, colors and details that support the focal point – your main subject in the drawing.
    Left: The vase itself is the positive space.
    Right: The space around the vase shows the negative space.
    My cat Neutron passed away a few years ago but I still melt over her cuteness. I marked the negative space in the picture. When I draw, I look at the distances that are created by the negative space to create accurate drawing.

    How to use negative space in your art

    The negative space can be an effective tool to define your center of interest in art. Every subject in your painting and drawing has edges. These edges are affected by tones and colors placed right next to or around it. Hence, the negative space can bring visual balance and unity to your composition with a specific tone, shape or shadow.

    One of the most common mistakes beginners make, they forget to include their background space into the equation, and ask me what to do with it much later when they are almost done shading the object itself. In my mind I compose the image before I begin drawing. I consider everything: composition, values, textures, and colors not only of the subject, but also of the negative space itself.

    To use both negative and positive space in drawing effectively, consider picking your main focal point or a center of interest in art first. This focal point must be big enough, taking the majority of your space. Add the background elements around this focal point to lead the eye to it.

    Woman Reading a Letter, Johannes Vermeer, c. 1663
    Woman Reading a Letter, Johannes Vermeer, c. 1663 oil on canvas, h 46.5cm × w 39cm × d 6.5cm | In this painting the woman in blue is the subject and the focal point of the painting. The surrounding objects – the chairs, table and map create visual balance in the painting. Notice that the chair on the right is rotated towards the figure and a large map behind the woman sets contrast and mystery in art.
    Prado museum | In this beautiful painting we can see how the artist creates a dynamic composition using both negative and positive space effectively. He places his focal point-the woman at a diagonal, creating movement. Painted in sharp focus, she occupies the most space in the picture. The background (negative space) has subdued colors and details. The edges are soft.

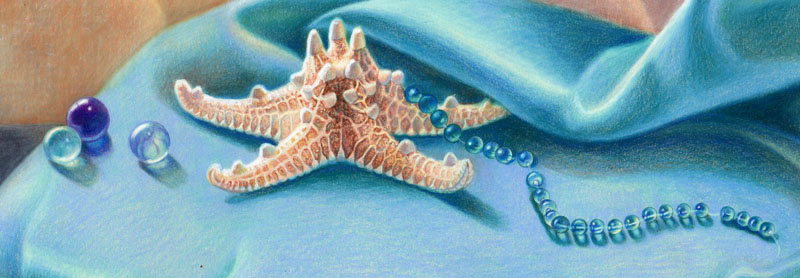
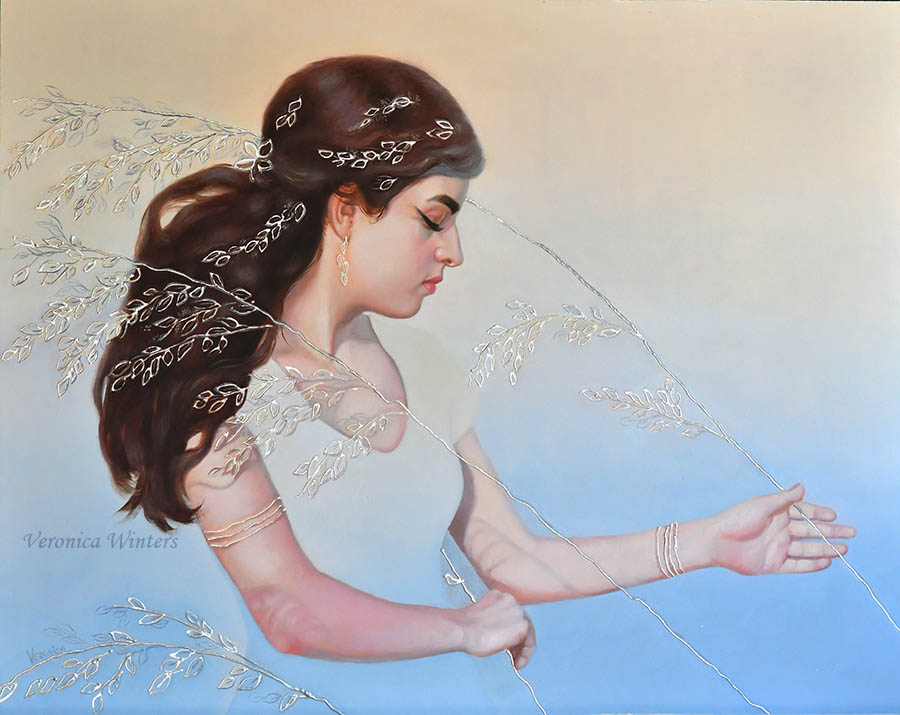
    Negative space in art: examples

    rose colored pencil by veronica winters
    Pink rose, 9×12 inches, lightfast colored pencils on board | For example, in this picture pink rose stands out being the center of interest or a focal point set against the purplish background (the negative space). If the background were the same pink hue and sharpness, the flower would be lost visually.
    self-portrait by Raphael at Pitti palace
    Raphael, Self-portrait, Pitti Palace, Italy | In this painting we can see the most common use of negative and positive space in art. The portrait itself is the positive space and this empty background is the negative space.
    how to draw glass
    This is one of my still life drawings where I play with negative and positive space. The starfish is the focal point. The beads and marbles lead the eye to the subject of interest (positive space). The fabric becomes the negative space with its folds moving around the starfish to create visual interest.
    surreal art and paintings of women
    Invisible: frosted past, oil on panel with some aluminum leaf, 11×14. In this oil painting I use negative space to fill in the forms around and in the figure.
    presence_veronica winters_16x20_oil on panel, contemporary romantic paintings of women
    Presence,16×20, oil on panel with some leafing, unframed, available. I play with the negative space in this oil painting as well. The dress that is normally a positive space becomes part of the negative one. https://veronicasart.com/product/presence-painting/

    Tips for using negative space effectively

    Here I’m going to give you three additional tips on how negative space can enhance your art. I often use all of these strategies designing my colored pencil drawings and paintings.

    • You can create contrast in art using the negative space with purpose.
    • You can measure and check distances between objects visually while sketching or drawing the shapes to create accurate art.
    • You can improve your drawing accuracy or realism in your art by looking at the negative space.
    • You can come up with a unique drawing design using the negative space as an illusion.

    1. Create contrast using negative space in your art

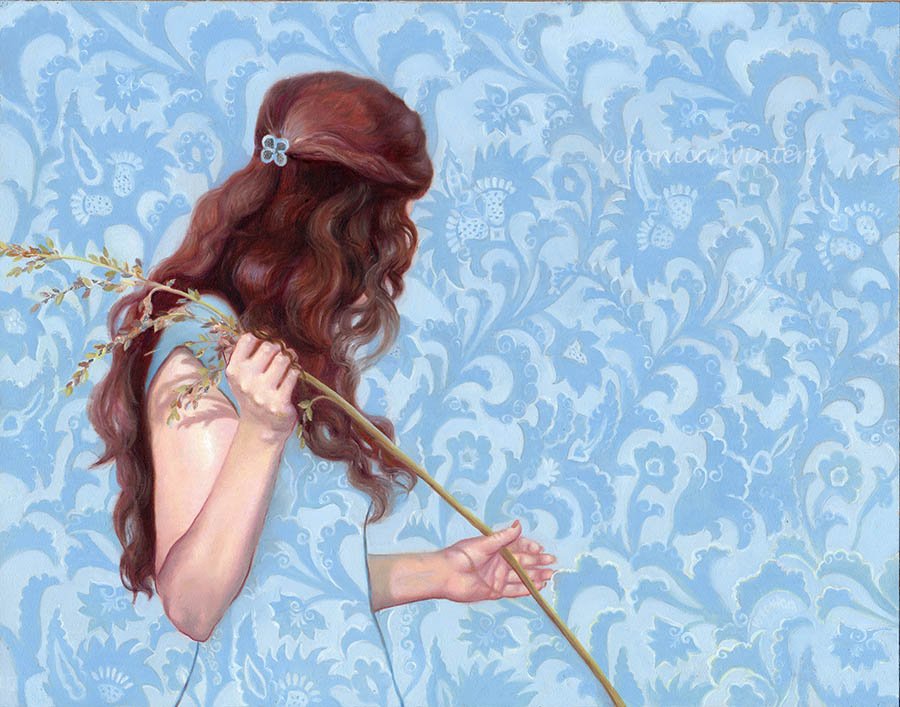
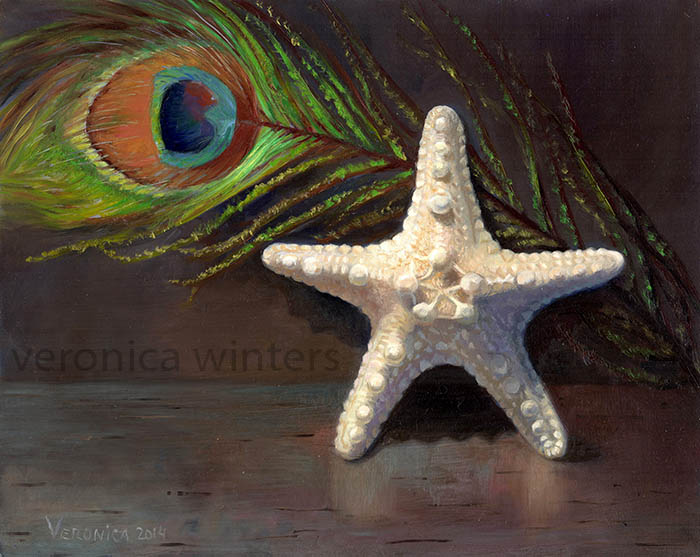
    As a beginner in art, it’s easy to start designing your images around the concept of contrast that occurs between the negative and positive space. If your still life is dark, set up the light background behind it. If the object/focal point is light, it would appear much brighter set against dark, negative space.

    oil painting techniques still life with starfish and peacock feather
    In this small oil painting of a starfish I make my focal point – white starfish – the brightest object. I place the peacock feather at a diagonal to create visual balance and the background (negative space) is dark brown-grey to create contrast and balance.

    2. Measure and check distances

    You can measure and check distances between objects visually while sketching or drawing the shapes. This is a very useful skill drawing all subjects, especially people. I often check distances between the eyes or between a hand and a waist, etc.

    When students draw the object, they tend to focus on the curvy line itself. As a result, the shape might be too long or lopsided, or foreshortened the wrong way. Instead of focusing on the object’s curve itself, look at the space between those curves. Realist artists visually measure distances between the lines, shapes or objects by checking the negative spaces between them to make the most accurate drawings.

    Additionally, using tools like VeePN for TV can help you access a variety of art tutorials and resources online, which can further enhance your drawing skills. Streaming art lessons on a big screen can provide a clearer and more immersive learning experience. This way, you can improve your technique by observing and practicing alongside professional artists.”

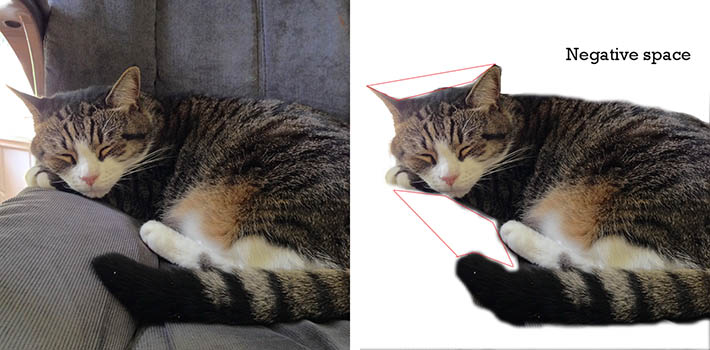
    I made this illustration to show you the idea behind visual measuring of distances using negative space in art. Focus on these black lines (negative spaces) to see the accurate distances between the shapes. These distances help you measure, copy and draw accurate outlines of the subject (cat).

    The black lines show the idea of visual measuring of distances between the shapes using negative space.

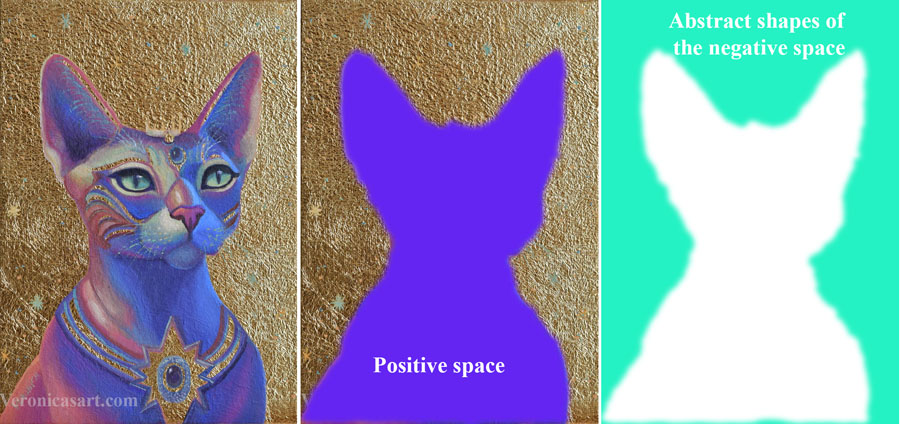
    3. You can improve your drawing accuracy or realism in your art by copying abstract negative shapes.

    By focusing on negative space you can become more skillful drawing realistic shapes. Negative shapes look abstract in our mind. Copy those abstract shapes with as much precision as possible to improve the overall accuracy of your drawing.

    what is positive and negative space-veronica winters art blog
    In the image on the right I defined the negative space that consists of abstract shapes made by the positive space. It’s useful to learn to see these abstract shapes and copy them to create a more accurate drawing of a cat in this case.

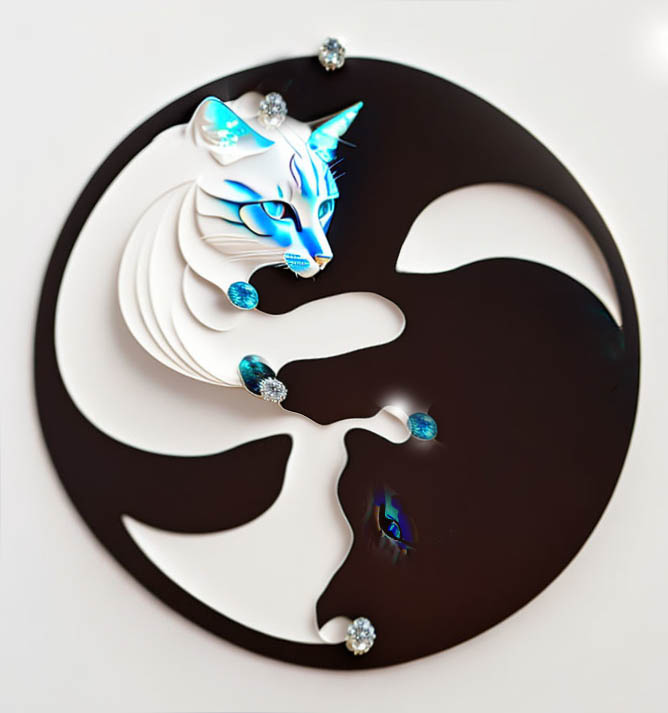
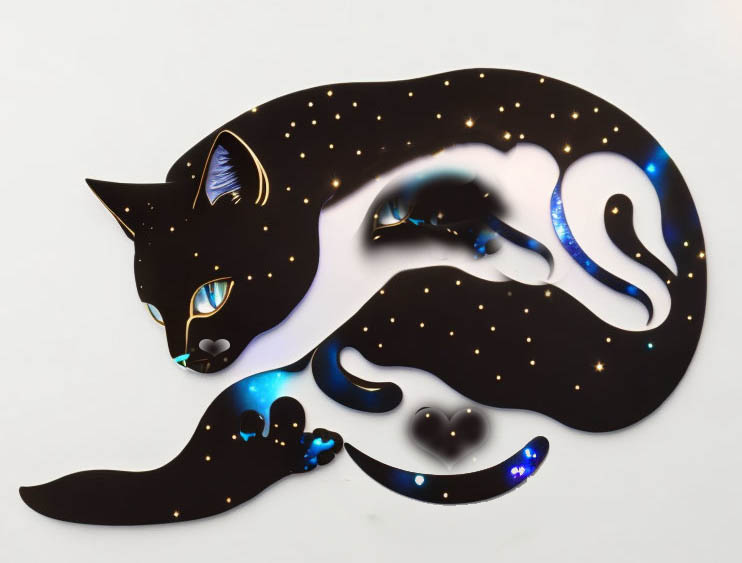
    4. You can come up with a unique drawing design using the negative space as an illusion.

    This is AI–rendered image that illustrates the idea of using the negative space as part of your drawing.
    Here is another render illustrating the illusion you can create using the negative space as an active part of your painting.

    Pens are important tools for us to keep learning and take notes. Our custom personalized pens are unique and add lot’s of fun while learning the skills.

    video courses by veronica winters

    If you’d like to learn more about colored pencil drawing, check out free previews of my video courses here: https://veronica-winters-art-school.teachable.com/

    Art supplies I often use in my drawing:


    Source link

  • The Ultimate Guide to Simplify Your Art Space for Creative Bliss

    The Ultimate Guide to Simplify Your Art Space for Creative Bliss


    We’ve all been there—scrolling through endless art supplies and freebie groups to add another “must-have” item to our wishlist. We think that if we have that one material, everything will run smoother, students will be magically engaged, and the projects will practically teach themselves. But as the wishlists grow, so do the piles of supplies in our classrooms. It’s time to hit the pause button, simplify your art space, regain control of your classroom, and encourage creative bliss!

    Embrace the “less is more” mentality to foster a welcoming art room. 

    Japan has a long tradition of tidying up as a path to clarity and balance. Hideko Yamashita, the creator of Danshari, teaches the art of releasing what no longer serves us to create space for what truly matters. Following this tradition, Marie Kondo’s The Life-Changing Magic of Tidying Up popularized the idea that less can be liberating, sparking joy and order in our lives.

    These philosophies invite us to take a fresh look at our art rooms. Sometimes too much art clutter and chaos can make it harder for everyone to focus and fully explore ideas. What if simplifying our spaces ignited more creativity, focus, and joy for teachers and students alike?

    This doesn’t mean losing the magic of art—it means curating your space with intention to amplify its purpose. Research shows that decluttering your environment can unlock greater innovation and engagement. Simplify your art space to foster calm and imaginative thinking and free up time and energy to focus on what truly matters—teaching and creating.

    labeled containers of art supplies

    Simplify your art space with these six manageable steps!

    1. Divide your classroom into zones.

    Start by thinking of your space as a collection of zones. Each zone can represent a type of artmaking or media, such as painting, drawing, or sculpture. Dividing your room into zones helps you focus on simplifying one area at a time, making the process more manageable. This division doesn’t have to involve physically relocating materials; it can be a mental assessment of each area.

    paint zone

    Here are three examples of common art room zones:

    1. Painting Zone
      Brushes, paints, and palettes.
    2. Drawing Zone
      Pencils, markers, erasers, and paper.
    3. Sculpture Zone
      Clay and modeling tools.

    2. Take inventory.

    Within each zone, lay out all of your materials, tools, and supplies where you can see them. This will feel messy, but it’s an important step in visualizing what you have.

    piles of art supplies

    Ask yourself the following questions:

    • Does this enhance my teaching?
      Does this item spark joy? Joy isn’t just about happiness, it’s also about energy, connection, and purpose. Even if a material feels like a chore (looking at you, chalk pastels!), consider whether it’s required for the curriculum or adds value to your lessons.
    • Does this inspire my students?
      Think about how students interact with each item. Does it spark curiosity and engagement or does it sit ignored? 
    • Have I used this in the last two years?
      If not, it’s time to let it go.

    If you’re looking for a more structured approach to inventory management, The Art of Education has you covered with helpful inventory guides. Use them to streamline your material management and ensure your classroom is fully equipped for creativity.

    3. Organize supplies by category.

    Zones set up a broad structure to simplify your art space. This particular step focuses on finetuning how you store materials within those zones for maximum functionality and ease. For instance, once you gather all paintbrushes together, further separate them by size or type. 

    three piles of paintbrushes

    For more tips on how to streamline your classroom, check out Organizing your Elementary Art Room for Success in PRO Learning. While this Pack focuses on elementary classrooms, the strategies shared are beneficial for all art levels! 

    4. Label everything.

    Labels are your best friend when it comes to maintaining an organized and accessible classroom. Use large, clear labels on bins, drawers, and shelves to make materials easy to find. Adding visual cues, such as icons or color coding, can further simplify identification for students of all ages and reading/language levels. Whether you prefer professionally printed labels or a quick piece of masking tape, the key is ensuring both you and your students can easily locate and return materials to their proper places. 

    https://www.youtube.com/watch?v=KvaI77y1zhc

    5. Create a donation station.

    Turn simplifying your space into a purposeful mission to help others to make it easier to let things go. Set up a designated box in your classroom for items you no longer need but that others may find useful. Label it clearly as your “Donation Station” to make the process quick and organized. When the box is full, donate the contents to other art teachers in your district or community centers to spark creativity in new students. 

    donation station cardboard box

    6. Adopt a “one in, one out” rule.

    To prevent unneeded items from returning, establish a simple rule: for every new item brought into the classroom, remove an old or unused one. This habit keeps your space balanced and ensures you’re only adding items that truly serve your teaching goals.

    shelf of paint in rainbow order

    Simplifying your art space is more than just organizing—it’s a chance to refresh and reset. It helps you realign your art room with your values and goals and nurture an environment where creativity can truly thrive. Letting go of excess makes room for the things that really matter, like connection, growth, and inspiration. Each small step you take toward curating your environment brings you closer to a classroom where both you and your students will experience creative bliss.

    Do you want even more tips to make your art room dreams come true? Check out the resources below:

    What’s one thing you can let go of today?

    What’s your best piece of advice to simplify your art space?

    To continue the conversation, join us in The Art of Ed Community!

    Magazine articles and podcasts are opinions of professional education contributors and do not necessarily represent the position of the Art of Education University (AOEU) or its academic offerings. Contributors use terms in the way they are most often talked about in the scope of their educational experiences.


    Source link

  • Creative thinking in the Imaginal Space — Lynne Cameron Artworks

    Creative thinking in the Imaginal Space — Lynne Cameron Artworks


    In the middle week of the residency we dived a little deeper into the idea of the imaginal space and what can happen there. Taking space literally, we held an in-person Studio Interlude and set up a table with materials for art-making in the canteen. But the term imaginal space is powerful as a metaphor to characterise creative thinking in project teams and by individuals.

    The imaginal space is where

    •       creative thinking happens

    •       we catch whispers of possibility

    •       unknowing is welcomed

    •       opposites are held in creative tension

    •       sparks fly

    •       intuition speaks

    •       we attend / listen / look

    •       multiple ways forward reveal themselves and enter into creative tension with what is


    If you were to watch me painting in the studio, you would see me in a physical space with resources that support my artwork. You would also notice that the work is marked by pauses and ponderings, periods of sitting and looking, of walking around the room, of doodling on scraps of paper and writing in notebooks. What’s going on in these times is all of the above – I take the painting in progress into my own imaginal space in order to find the next steps. These come out of letting new possibilities arise and holding them in creative tension with what is already on the canvas.


    Source link