برچسب: use

  • How to use color harmony in colored pencil drawing – Veronica Winters Painting

    How to use color harmony in colored pencil drawing – Veronica Winters Painting


    veronica winters colored pencil

    When you begin realistic drawing in colored pencil, the artistic aim is to copy what you see in front of you or your reference. Beginners in colored pencil drawing pay attention to small things like details and textures, and they’re important. However, they become truly important only when the basic drawing is in place. If you begin shading one spot and forget about the rest of your composition, you might end up having a colored pencil drawing that has no consistency or unity in color harmony and composition. In this article, I’d like to share a few strategies I often employ using color harmony to create mood and atmosphere in colored pencil drawing. Let me give you some ideas on how to use color harmony in colored pencil drawing so you can discover your unique approach to drawing.

    Another extensive article on colored pencil portrait drawing and the use of values and color: https://veronicasart.com/realistic-colored-pencil-portrait-drawing-guide/

    https://www.youtube.com/watch?v=kFdssDSWL3c

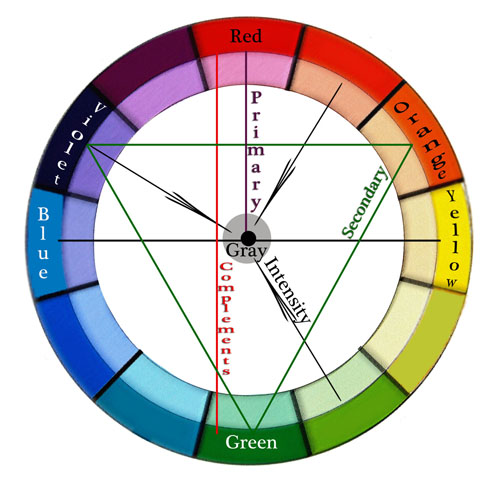
    Color wheel use in colored pencil drawing

    While the color wheel isn’t everything for colorful pencil drawing, you do need to know these basic definitions and color triads.

    Definitions:

    • Hue – means color. Red, green, yellow, etc.
    • Value – means how light or dark the shading is.
    • Chroma – is the color’s strength or color intensity. Colors can be super intense or muted.
    • Value – the lightness or darkness of a color.
    • Color Intensity – the saturation or purity of a color.
    • Neutralized color – the color with less intensity that’s either grayed down or mixed with its complement.
    • Local color – the natural color of an object as it appears in daylight (green of the cucumber or blue of the blueberries). Art students see only local colors in objects rather than the colors of light and reflections.
    This is a page from my coloring book titled “How to color like an artist“, in which I explain basic color theory as well. My art instruction book, titled “The Colored Pencil Manual” has the entire chapter devoted to color theory for advanced artists.

    I know it’s difficult to remember all the definitions, and I strongly recommend buying a color wheel because it’s visual. You can rotate the dial to see complementary colors, triads, etc. I still use it every time I design my colored pencil drawings. You can buy it at any art supply store or on Amazon.

    Color Wheel is available on Amazon.
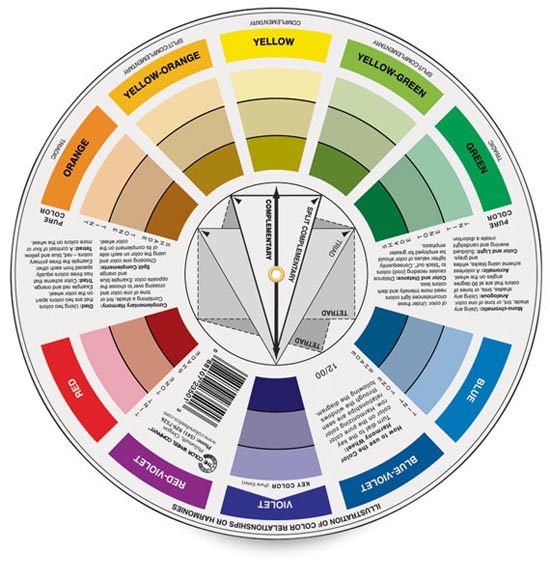
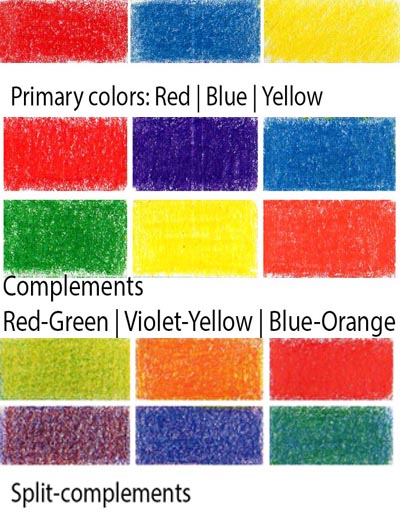
    • Primary colors are red, blue, and yellow. If you put all three primary colors (making them equal in intensity), your colored pencil drawing will be screaming with too much color.
    • Secondary colors are orange, violet, and green. They’re mixed with two primary hues.
    • Complementary colors in colored pencil drawing are opposite each other on the color wheel. Complements intensify each other. You don’t want to have all the complements in one drawing for that reason. Red-Green, Violet-Yellow, Blue-Orange.
    • Analogous colors in colored pencil drawing are hues adjacent to one another on the color wheel.
    Analogous colors: red-red-orange-orange
    Analogous colors: green-green-blue-blue
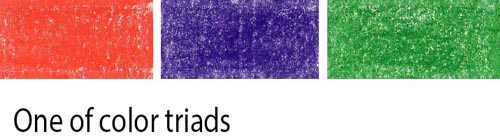
    • Triadic colors in colored pencil drawing –
    • Split complementary colors in colored pencil drawing – are the colors on either side of a color’s complement. For instance, if your primary color is blue, your split-complementary colors would be yellow-orange and red-orange. Violet’s complementary color is yellow, and its split-complementary colors are yellow-green and yellow-orange. Blue-purple and red-purple are split complementary colors. Red and green are opposite each other on the color wheel, so red-orange and blue-green are split complementary colors. Split-complementary colors seem to be less color-intense.
    • Tetradic colors in colored pencil drawing are a color scheme that uses four colors that are equally spaced around the color wheel. The four colors are made up of two sets of complementary colors, which are also known as double complementary colors. To be honest, I don’t think this color scheme is very useful, although you can try it, of course. I think it’s too many bright colors competing for attention unless you use a single dominant color in this color scheme.
    • monochromatic color harmonies- colors composed of variations of the same hue but different in color intensity and value. Red is a hue. Its monochromatic variant is pink and maroon.
    koh-i-noor colored pencils review
    color wheel_color intensity-color harmony blog
    Color wheel & Color intensity:
    Color Intensity – the saturation or purity of a color. Neutral colors are mostly browns, but
    Neutralized color is any color with less intensity that’s either grayed down or mixed with its complement.

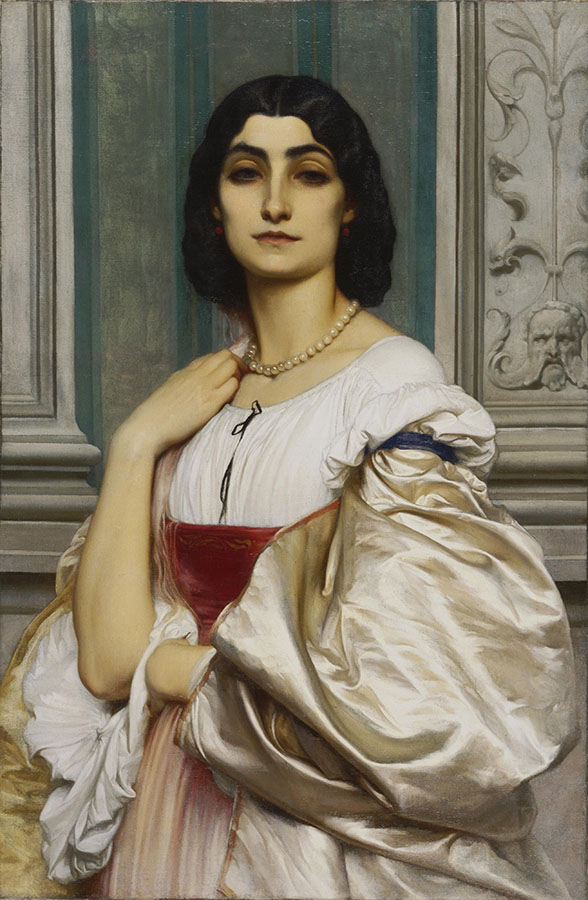
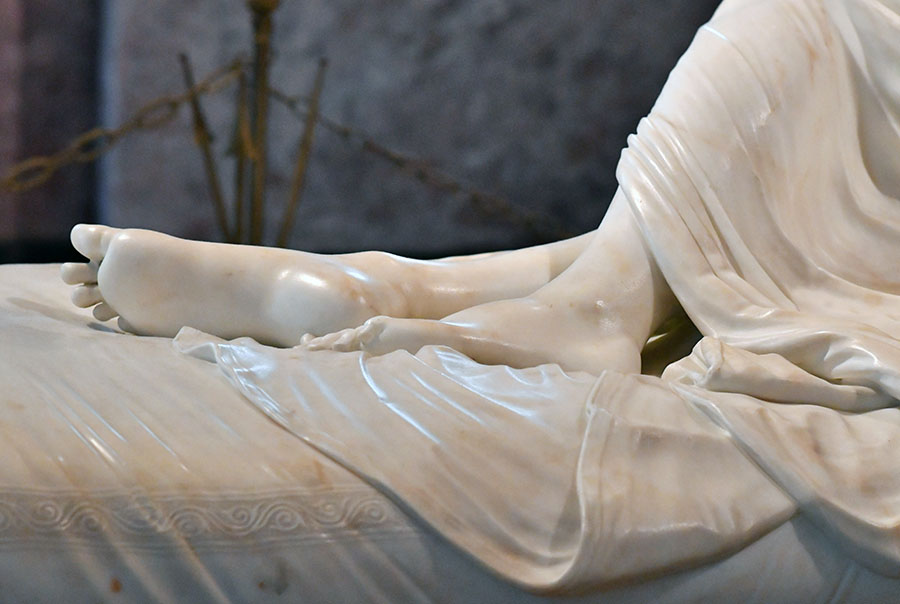
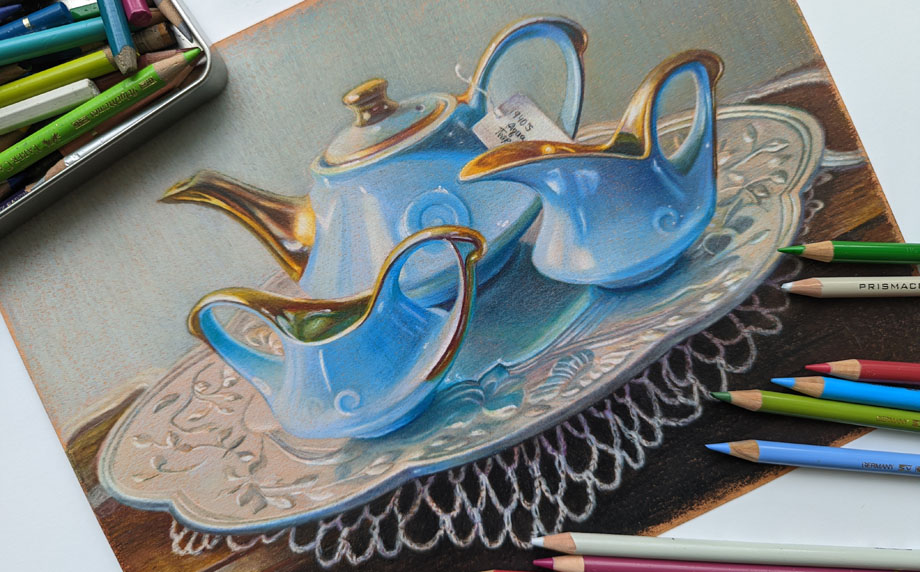
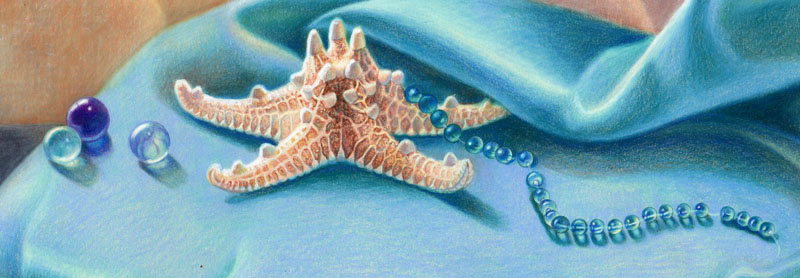
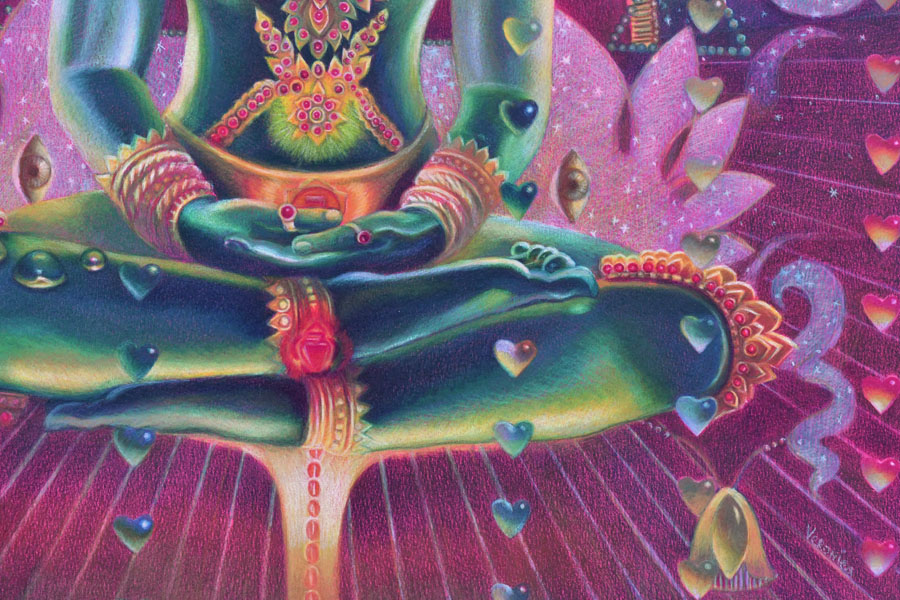
    Colored pencils don’t mix to grey unlike oil, acrylic and watercolor paint. Therefore you need to use grey colored pencils to neutralize the color so that there are 1-3 dominant colors in the picture, and the rest are neutralized. By using the grey colors you create selective focus as well as beautiful, subtle color variations and texture. In the closeup drawing below you can see grayed down fabric. I shaded with some bright hues first and then added light greys over them.

    Blue lily dream, 20x30 inches, colored pencil on art board by Veronica Winters
    Blue lily dream, 20×30 inches, colored pencil on art board by Veronica Winters

    https://www.youtube.com/watch?v=gZLdARPsFxI

    How to use color harmony to create mood and atmosphere in colored pencil drawing

    I’d like to share 5 drawing tips on using color harmony to make your colored pencil drawings more realistic.

    1. Consider overall color harmony design in your colored pencil drawing

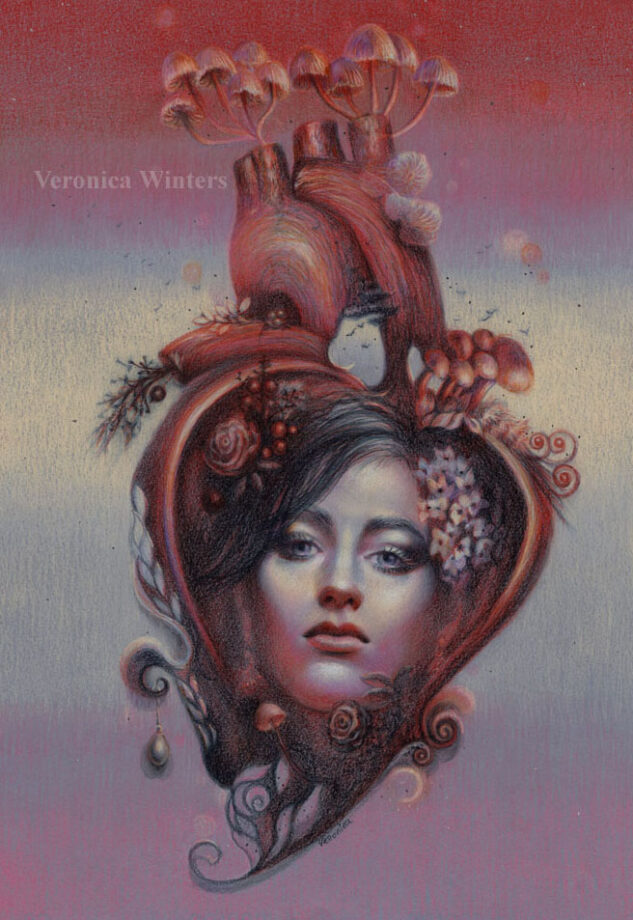
    Decide on the overall color theme of your colored pencil drawing. Is it light or dark? Is it monochromatic or in full color? How do you decide? Look at your main reference to see the dominant color. Make that particular color your main focus in colored pencil shading. Everything else should be less color intense to support the dominant color. The color harmony you decide on may not be unique to you, but you make it unique by choosing the unusual point of view, stroke, or subject. Your choice of a dominant color(s) and contrast determines the mood in the drawing. For example, light blues and pinks look serene, while deep reds and blacks make us feel very different.

    veronica winters colored pencil drawing-how to use colored pencil for beginners
    If you look carefully, the only dominant color here is light blue-turquoise. Everything else is grayed down using colored pencil shading in greys and less bright hues. The overall theme is light. The dominant color is present throughout the composition. It’s reflected in the silver plate. It’s noticeable in the background and crochet.

    2. Test your colors to decide on the best color harmony

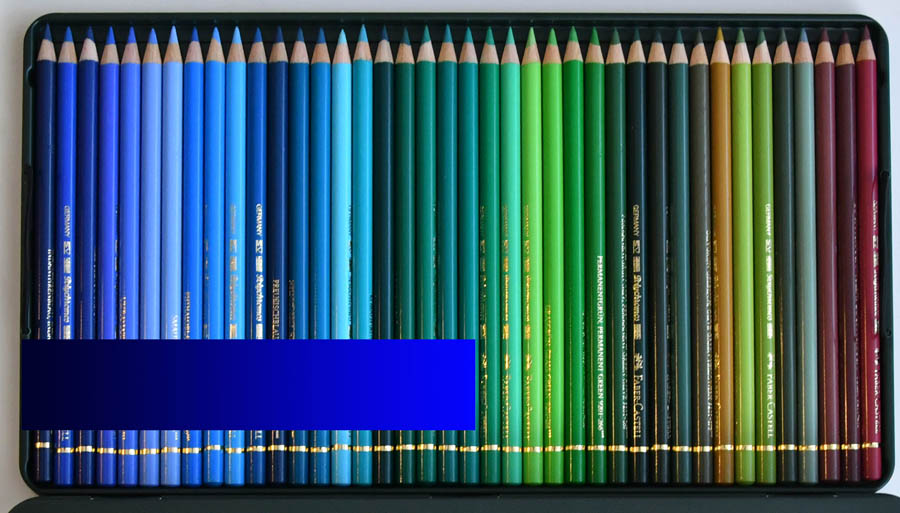
    Once you decide on your leading colors for your drawing, look at your colored pencils to pick the colors from that color family.

    Test your colored pencils on your drawing paper to have consistent color harmony and shading. If you see lots of blue in your reference, test all your blues to see which ones look similar to your picture. Start testing these colors right next to your reference, and you’ll notice that some colors are off and don’t look right as your main hue. If you have a big box of colored pencils, you have many similar colors. You don’t need to use them all in one drawing because you can adjust your pencil pressure drawing in one blue to get a range of blue tones that’s similar to several various colored pencils.

    colored pencil techniques
    If you’re testing dark blue colored pencils based on your reference, do you see that not all of them fit that particular color range? Many blue colored pencils are too light or too greenish to be considered for the dark blue range.

    3. Keep it simple to create consistent color harmony

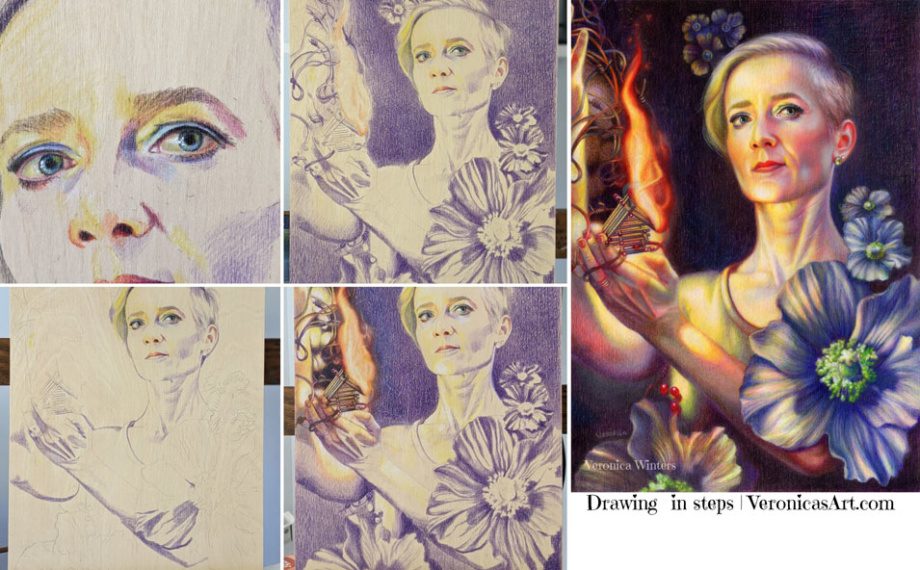
    Shade all shadows in one color first. Students love to jump around the picture, using all possible colored pencils to draw the portrait. Instead, pick one color to shade all your shadows first. Colored pencil shading in one color is key to creating volume in portrait drawing.

    veronica winters colored pencil
    In this example, you can see that I picked a single purple colored pencil to shade the deepest darks first. When I’m done with basic underpainting in one color, I shade with other colored pencils, layering them one by one.

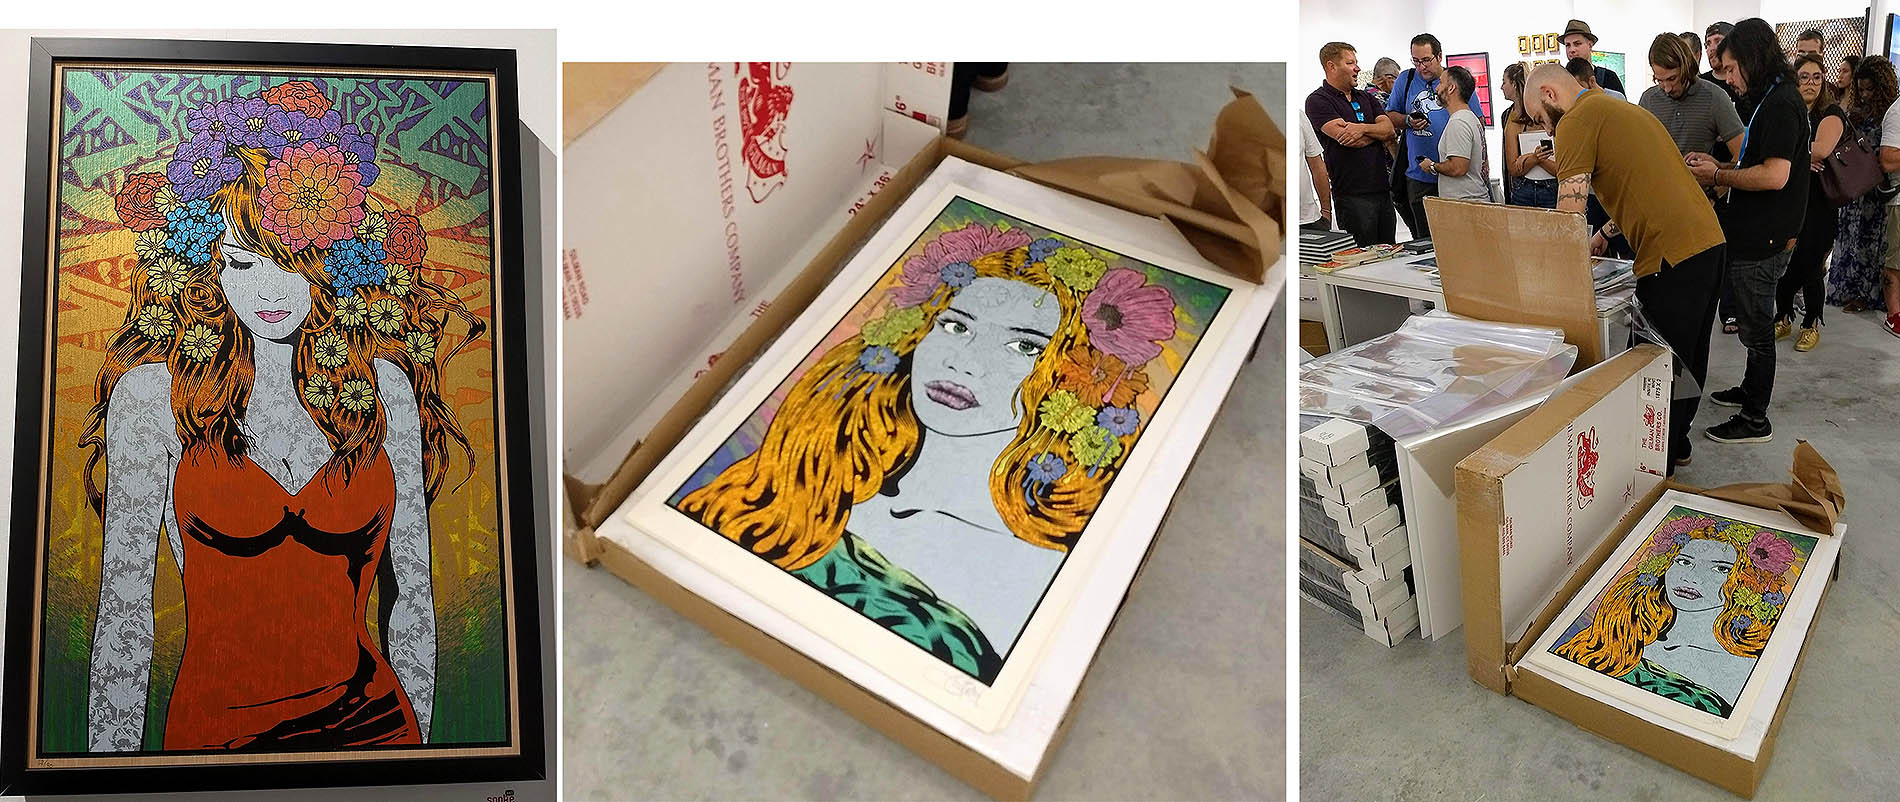
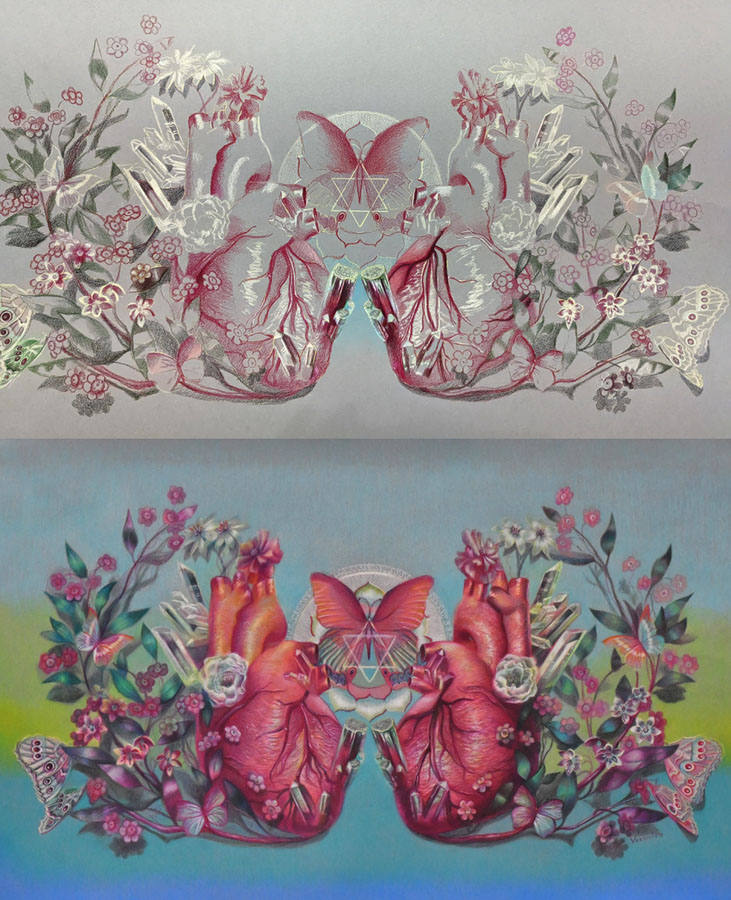
    You can make personal colored pencil drawings by focusing on a familiar subject that has unique story line or idea. For example, we all know how the human heart looks like but by designing my own composition and color scheme, I make my colored pencil drawing look different from everyone else’s.

    blooming heart in steps-veronica winters colored pencil drawing
    Here you can see that I used one dominant color – red for the shading of the heart and another one – dark green for the leaves. Because I created this colored pencil drawing on a light grey paper I also marked the highlights with white not to lose them by accident.

    https://www.youtube.com/watch?v=_WleeubdTbg

    4. Add more tested colors to develop contrast in your color harmony

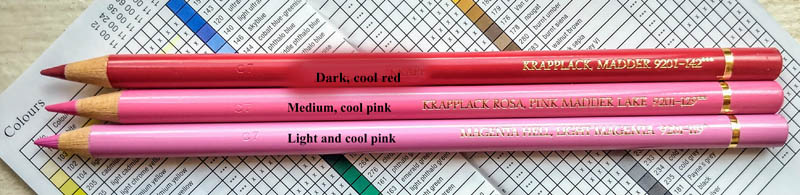
    Most colors are warm and cool. This includes reds, greens, blues, and even greys. Some are neutral, like browns. You must consider how light or dark they are. You can’t create a very dark shadow using light pink. You can’t shade around the highlight with a dark blue ( because dark blue is too dark for shading in the light).

    Build contrast by having a range of tones in your colored pencil drawing going from very light colors to very dark ones. Of course, not all references call for it but keep it as a guideline for your art and colored pencil shading.

    Most colors are warm and cool. This includes reds, greens and blues. Some are neutral like browns. You also must consider how light or dark they’re to build contrast in shading.

    5. Look at your colored pencil drawing from a distance!

    You lose all the details by looking at your art from a distance. You do see the inconsistencies in color, awkward shapes, weak shadows and highlights, or undefined edges.

    If you consider all 5 rules, you will be able to draw a photorealistic colored pencil drawing that has unity in color.

    how to draw glass

    On using color harmony to create unique and personal colored pencil drawings

    veronica winters colored pencil art, mushroom heart
    mushroom heart, 10×16, veronica winters colored pencil drawing

    I’d like to share my approach to using color harmony to create unique and personal colored pencil drawings. I think it may be useful for advanced artists interested in colored pencil art.

    veronica winters colored pencil

    #1 Start with a good idea

    Have a good idea in mind of what colored pencil drawing you want to create. The idea is a visual story in color, subject, or light. It doesn’t have to be the figure. It could be one object displayed in a unique light, rotation, or point of view in the artist’s drawing. This is the artistic vision and interpretation of a “boring” object that becomes fun to look at because of your unique interpretation of it. You can train yourself to see the world more creatively by improving your photography, reading, looking at art masterpieces, and contemporary art.

    I have a folder where I save art to learn from done by other artists. I study unique color choices, composition and subject. Sometimes, the subject isn’t new but the approach to drawing it is totally unique.

    veronica winters colored pencil
    Lambent space, Veronica Winters colored pencil drawing, 19x25in

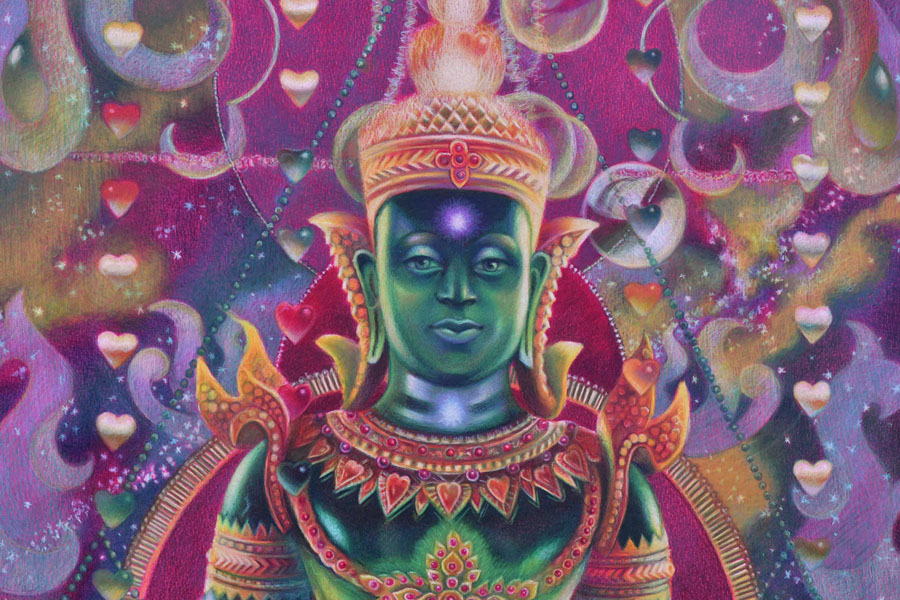
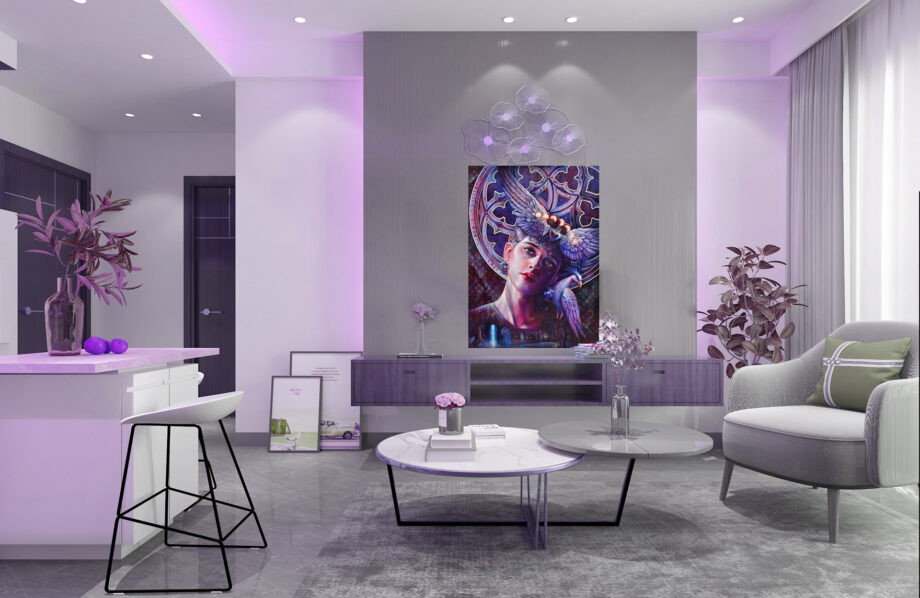
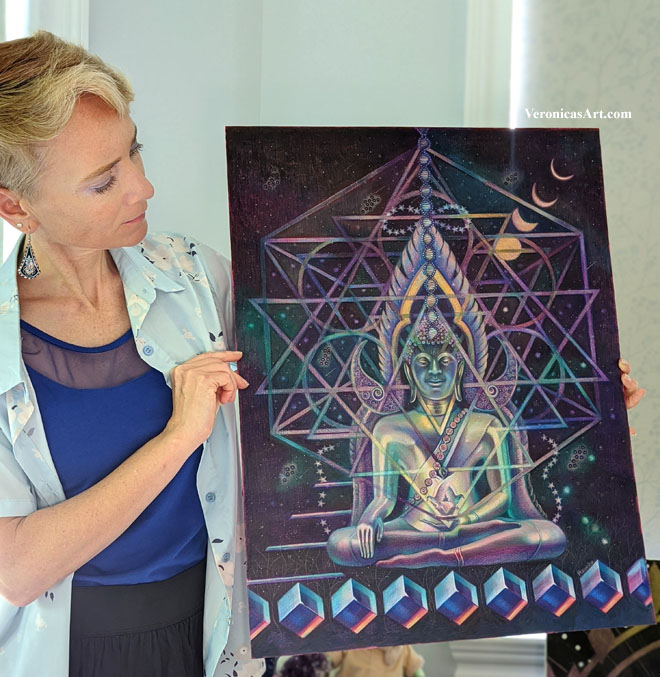
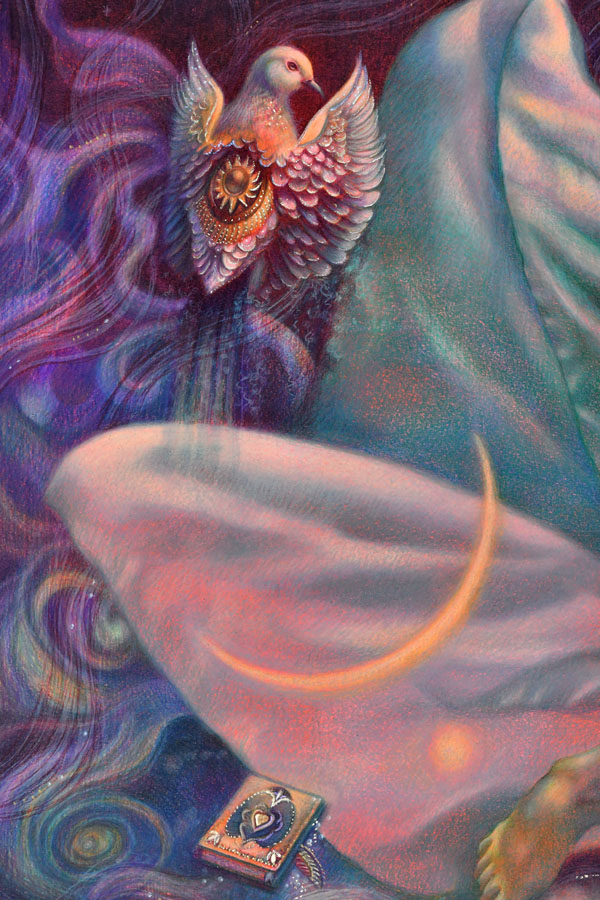
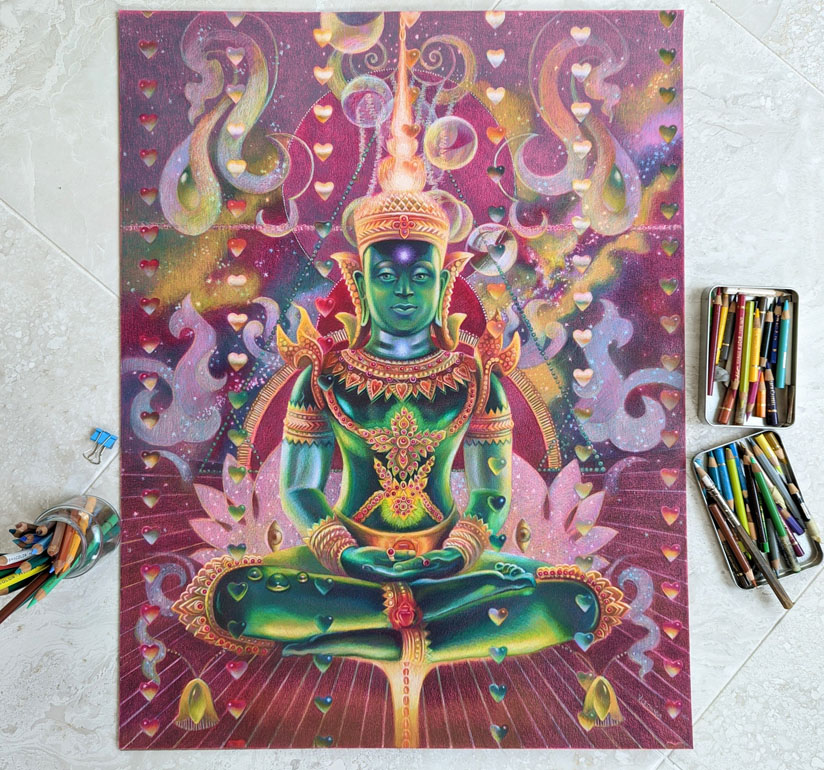
    My idea starts from my imagination, reading, travel, emotions and thoughts. One day I imagined a seated figure with light passing through his body. I also imagined a rain of hearts above the figure. I made notes of this idea on my phone…I wanted to depict energy, chakras and the colors of the Universe in this colored pencil drawing of Buddha. I came home and started thinking of my references to illustrate this concept.

    #2 Pick high-quality references for realistic colored pencil drawing

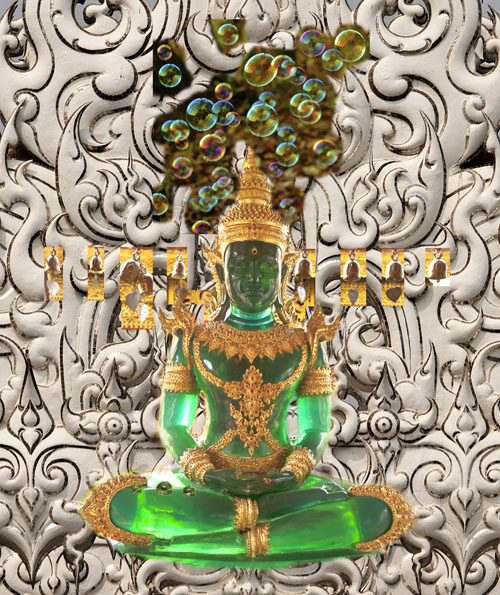
    At first I wanted to paint a real person but I had no references of the pose. So I browsed pictures from my Thailand trip folder. I saw so many beautiful Buddhas and palaces there…And this green Buddha was made of semitransparent stone that looked like glass.

    You need to pay attention where your references come from. Sometimes you can’t enter competitions drawing from someone else’s photo. Other times, you don’t have an emotional connection to the picture which is not yours. Or you need to get a photo release that takes time and effort. Personally I try to use my references but when it’s impossible to do, I go to Pixabay to find inspiration and you can too! Pictures are of high-quality and free for commercial use. The only problem with them is that they’re Photoshoped heavily. You must see if you have enough information to draw from as most filters remove warm/cool contrast from pictures.
    
    
    This is my original idea, designed in Photoshop. I used a combination of my pictures to illustrate the visual reference to draw from. As you can see, I made considerable changes to the final drawing.

    Picking the right references is not enough. They need to “connect” with each other in light and color temperature.

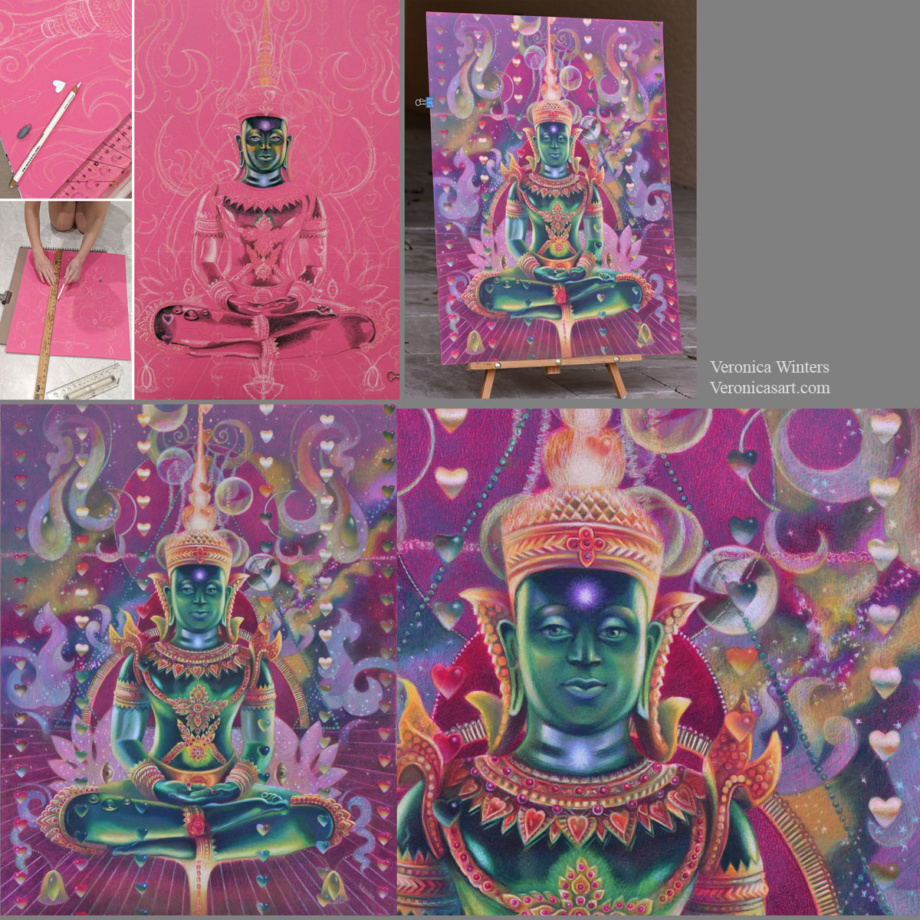
    I always design my images around the main subject. I place it first and put smaller shapes around it. In this example, the largest shape is Buddha’s image, and my design revolves around the figure. I used the ruler to make straight lines and place the hearts. I cut a heart-shaped template to have a consistent shape in my colored pencil drawing. I use Photoshop to plan the design as much as possible by layering and moving elements around the main figure to arrive at a perfect composition.

    step-by-step drawing on Canson Colorline paper

    #3 Decide on your color harmony in colored pencil drawing

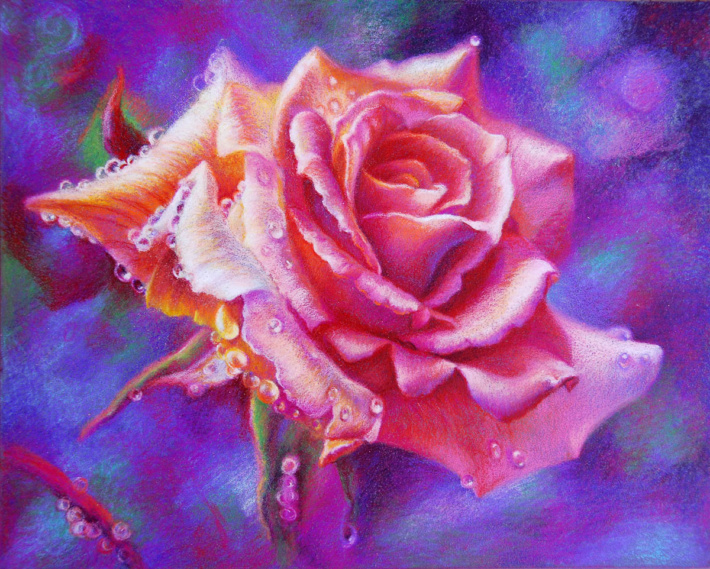
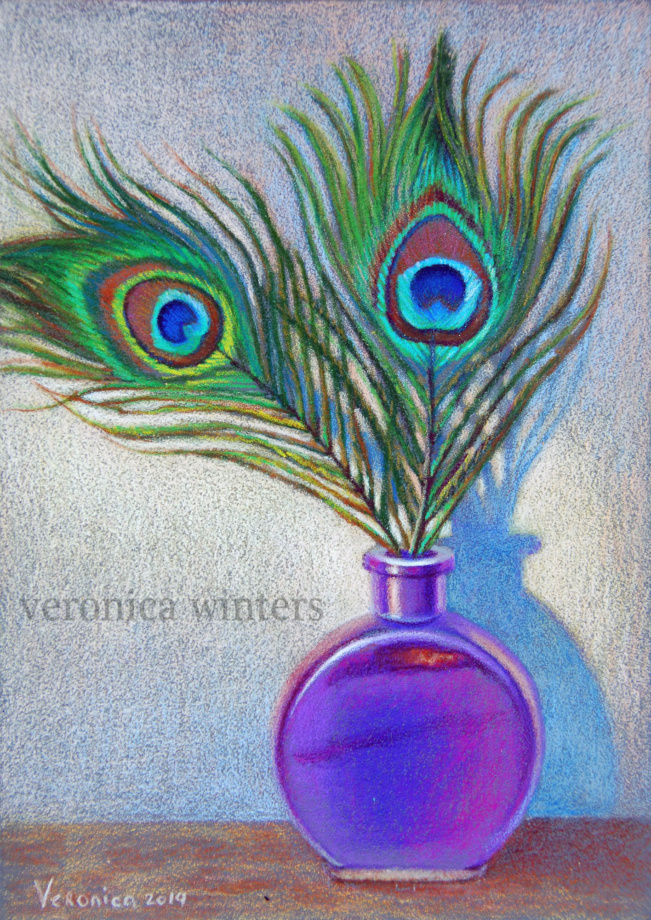
    This drawing has quite a sophisticated color scheme. My color harmony is a combination of cool red, green, and cool, bluish white.

    My tip is to focus on picking 1-2 main colors in your color harmony. It doesn’t mean that you use just two colored pencils for that. It means that you pick the basic scheme, say, ‘yellow-purple’ and design your colored pencil drawing in these colors. The rest of them should be grayed down or become less prominent to support the main hues.
    

    #4 Pick the right toned paper for your specific color harmony

    veronica winters colored pencil
    Lambent space, closeup, Veronica Winters colored pencil drawing, 19x25in
    I love drawing on Canson Colorline paper because it comes in a variety of bright colors. The texture is not overwhelming, and colored pencils become very vibrant when drawing on this paper. (I’m linking to this paper on Amazon, but I find that DickBlick Art Materials online store has much better choices. Amazon sells a lot of fake products positioned as real ones. Be careful. Buy your art supplies from established shops. Read one-star reviews to understand if the products are fake or not. I bought several art supplies that were listed with professional images, yet the received supplies were knockoffs from China.

    Once you have picked your main color scheme, say ‘yellow-purple’, look at the color of your drawing paper. In general, don’t draw on yellow paper if your main color is ‘yellow’. Don’t draw on a purple drawing paper if your main color is ‘purple’. Pick the opposite color of paper (like green or orange) and test the colored pencils on it. Test a few colored pencils on it to see how vibrant or dull they are. Some colors may disappear on colored paper, and others would be super bright.

    #5 Have consistent shading in your colored pencil drawing

    Begin shading the shadows first using one color. Don’t jump around the picture with many colors. Pick one color and shade all the darks with it. Mark the highlights with white colored pencil (or reserve the space for your highlights if you draw on white paper). Lastly, shade the middle tones connecting the darks with the lights.

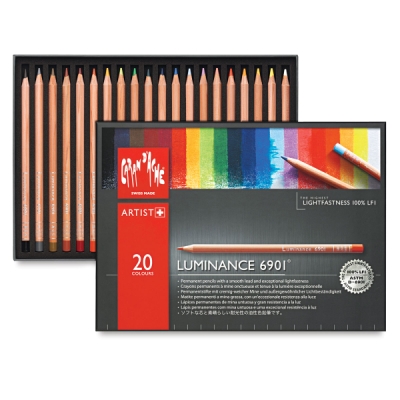
    Shade with the softest colored pencils, filling in large areas. If you start working with harder colored pencils like Polychromos, it might be frustrating to fill in a large space. I save a lot of time and hustle for myself by drawing with the softest pencils like Prismacolor Premier and Luminance or Pablos, and then switching to harder pencils like Polychromos to work on the details in my colored pencil drawing.

    Have fun creating your super vibrant colored pencil drawings with beautiful and unique color harmonies!

    buddha art-veronica winters colored pencil
    Lambent space, Veronica Winters colored pencil drawing, 19x25in, Canson Colorline drawing paper, lightfast colored pencils ( Faber-Castell Polychromos, Luminance and Prismacolor Premier colored pencils)

    You can learn a lot more about color and color harmonies by taking my video course, where I explain the properties of color and how you can design your images around color. I share my secretfor picking a perfect color scheme for my colored pencil drawings every time.

    Design your perfect color harmony by taking this course:
    https://veronica-winters-art-school.teachable.com/p/color-crush-course-for-colored-pencil-artist-by-veronica-winters

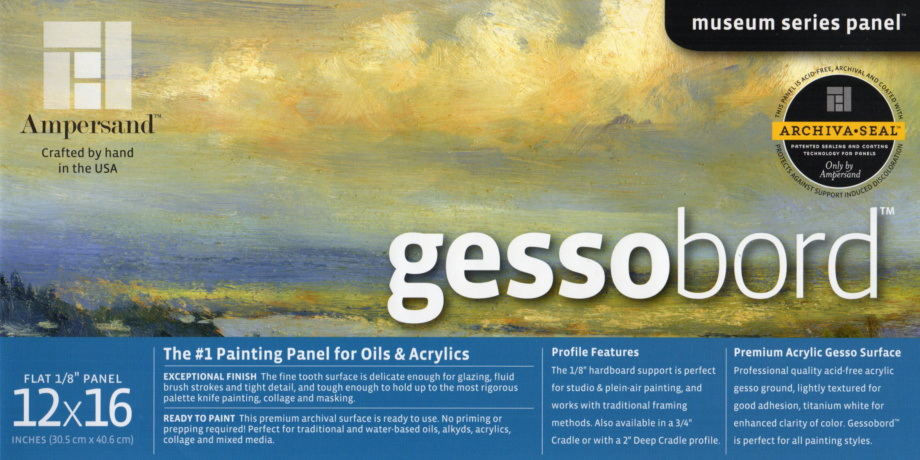
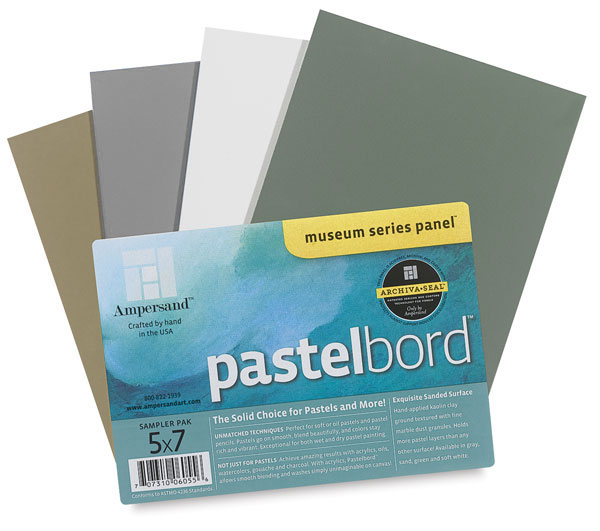
    Colored pencil drawing on Ampersand pastelbord

    This board could be an alternative to drawing on colored paper, but you must consider the disadvantages of working on it with a colored pencil.

    I like to experiment with different surfaces drawing in colored pencil, searching for the most archival support for my art. Since most people find the colored pencil work inferior to oil painting and even pastel painting, finding the right, archival surface takes the fear away from your clients who wish to buy your artwork otherwise.

    This slightly sanded, colored pastelbord by Amersand is similar to the 800 grit Uart paper, which is great for soft pastel painting. Just like the Uart paper, the pastelbord has similar advantages and disadvantages to using it in colored pencil drawing.

    Advantages:

    • Ampersand offers a nice variety of colors: sand, dark green, white, gray, and other neutral colors. It takes much less time to shade on a colored surface rather than on white.
    • Artworks look vividly drawn on this board.
    •  This archival surface is durable. It doesn’t bend or crumble, stays flat at all times.
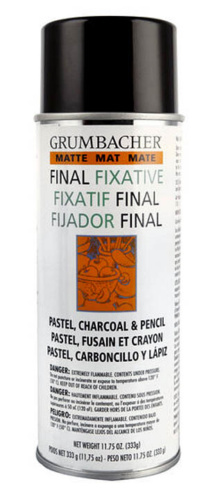
    • It offers easy display without a glass. Just make sure you fix your art beforehand with 3 layers of final fixative. Now you have neither glass reflections nor fear of transporting the art!
    • The Ampersand pastelbords come in standard sizes that make it super easy to frame them!

    Disadvantages:

    • Colored pencil shading on pastelbord is limited. It accepts a few layers of pigment.
    • It “eats” my colored pencils. If you buy expensive, lightfast pencils, they don’t last long drawing on this surface, and you’d have to replenish them quite often.
    • It’s best to use harder pencils on these boards. I use Pablo’s to fill in all the details.
    • The boards cost more than the average drawing paper, of course.
    rose colored pencil by veronica winters
    Pink rose, 9×12 inches, lightfast colored pencils on pastelbord, in private collection
    peacock feathers
    Peacock feathers, 5×7 inches, lightfast colored pencils on pastelbord, in private collection

    colored pencil manual veronica winters how to color like an artist_coloring book_veronica winters
    These art instruction books are on sale on Amazon!

    https://www.youtube.com/watch?v=moe99sjFvd0

    https://www.youtube.com/watch?v=GaDyhypmWwY

    One mistake every beginner makes!

    Art Supplies:

    Colored Pencils:

    Drawing paper:

    Spray fixative for drawings:

    Other art supplies:

    Tombow mono eraser: https://amzn.to/3yOVmMT

    I’m an Amazon affiliate. You can find these brands at other art supply sites as well.


    Source link

  • 5 great art supplies to use in your art studio – Veronica Winters Painting

    5 great art supplies to use in your art studio – Veronica Winters Painting


    5 great art supplies to use in your art studio


    In this article you’ll find reviews of art materials I use a lot in my painting and drawing practice. These art supplies make a big difference in the final result of my art presentation.

    5 art tools for oil painting & drawing to keep in your studio:

    #1 The color shaper set

    5 art tools for your studio
    These are great tools for oil painting, pastel painting, and even colored pencil work (if you work on the Icarus board to blend the wax-based pencils).

    1. When I paint, they help me clean a sloppy edge. And that’s how I use them for the most part.
    2. It’s easy to take the extra paint off the area I put in by accident.
    3. I can “carve into” the freshly applied paint to make a specific pattern or texture. 
    4. I can create an entire underpainting by applying the brown paint first and then lifting out some of the paint with the color shaper creating a drawing!

    Made of silicone, the shapers have the unique property of not absorbing the paint. Rather the paint comes off their tips easily and doesn’t need washing. Just wipe the color shaper off with a paper towel. Besides moving the paint around, removing or carving into it, the color shapers are great for blending the oil pastels or wax-based colored pencils (Prismacolor Premier) when heated, using the Icarus Art board. The color shaper set has several tips that you can buy separately or as a complete set. I find that I mainly use the taper point (round tip) size #2 in my art.

    You can buy the color shapers at any art supply store online like Jerrysartarama or use this link to buy it on Amazon.

    #2 Gloves in a bottle

    gloves in a bottle review
    This is a truly unique product that I love! I especially use it when I paint since the lotion provides relief from a very dry skin, making a protective layer between the skin and the chemicals. A modest amount of lotion works like gloves I use while painting. Its unique formula bonds with the upper layer of my skin and creates the invisible protection from harmful chemicals. It’s waterproof and doesn’t wash off, rather it comes off naturally shredding the dead skin cells. The bottle comes in two sizes. Give it a try!

    Gloves in a bottle is a lotion https://amzn.to/3SxSE93

    #3 Luminance, professional colored pencils

    luminance review
    Swiss-made, Luminance colored pencils is the Cadillac of professional colored pencils. All colors have supreme lightfastness rating. They’re very durable, highly pigmented and have the softness I love. The price tag is very high. Please don’t be tempted to buy them in strange places because they could be the fakes. Buy these from the established art supply companies only like the jerrysartarama. You can buy them in sets or as open stock.

    https://www.youtube.com/watch?v=vu0kycGEWzc

    #4 Professional panels for oil and acrylic painting

    gessobord review
    These are durable, archival, and acid-free surfaces that are great for oil painting. Remember, paintings of the old masters have survived through the centuries because they were painted on panels, not canvases. If you paint professionally and want your art to last, paint on panels.

    The cradled gessobords provide much greater support against humidity as the panels resist warping.  Gessobords have a very slightly textured surface making them perfect for oil painting because the oil paint needs some tooth to adhere to to create a permanent bond with the surface. Avoid using panels that are too smooth or cheap canvases because the paint doesn’t adhere to the surface properly.
    I also use gessobords for my silver gilding. I do sand the surface some with a 800 grit sandpaper but the silver leaf goes over the panel perfectly.
    The toned, neutral gray surface of Richeson panels is great for beginning painting without any additional preliminary work, but I find their surfaces too smooth and thus questionable if the paint makes a bond with its surface.
    One disadvantage of painting on these panels (gessobords) is the damaged corners. They often arrive chipped in shipping and although art supply companies do replace the damaged stuff, it’s still a big inconvenience, in my opinion.

    https://www.youtube.com/watch?v=oxygIkpOwLA

    #5 Grumbacher final fixative for drawings and scratchboard art

    This is a really great product that’s different from cheaper brands. It makes a very nice, even sheen, eliminating the surface’s unevenness, fingerprints, and other imperfections in scratchboard. The colors look nice and bright. It works great on paper, too. I use 2-3 coats on my colored pencil drawings.
    Like other sprays, the final fixative protects your artwork from the UV-rays, moisture, smudges, and humidity.
    The only downside is its smell. It’s not a product to inhale. So spray it in a well-ventilated area or outside in low humidity environment.

    https://www.youtube.com/watch?v=o9UOM97rVUU

    Don’ confuse the fixatives with the varnishes as the varnishes are used in oil and acrylic painting.

    educational books, drawing instruction books, travel books
    Art Lessons in Drawing, Painting & Beyond, 2014 | This is an art inspiration book filled with creative and technical advice coming from contemporary realist artists. Realist artists share their painting and drawing inspiration in the Art Lessons book available in print, on Kindle and as a digital download (pdf file) from: https://veronicasart.com/product-category/art-instruction-books/
    colored pencil manual veronica winters how to color like an artist_coloring book_veronica winters
    These art instruction books are on sale on Amazon!

    https://www.youtube.com/watch?v=BWyIfBFuoBw

    Art supplies:


    Source link

  • How to use Instagram for artists & creatives – Veronica Winters Painting

    How to use Instagram for artists & creatives – Veronica Winters Painting


    I’ve been using Instagram for several years to see it change and evolve. I spent hundreds of dollars on Instagram courses claiming to help me build the audience. While I don’t have a crazy following like so many artists out there, I did learn a thing or two about it with lots of sweat and tears. In 2022, I decided to share some simple truths about the social platform that you can apply to your account today to see some growth and hopefully cut on the frustration Instagram can give us. I updated it in 2024.

    https://www.youtube.com/watch?v=p_ZxkNDo5s4

    Overall, I like Instagram for art. It’s my favorite social network mainly because it’s so visual and easy to present art and connect with others in the art community and beyond. Perfect for us – artists because it’s still free! I must say that there are plenty of couches who claim to grow your account if you “follow their steps and strategies”. While it could work for them, it doesn’t mean it will work for you because you’re a different person with different art, ideas, and presentation. I saw couches that simply lied promising growth, and selling their silly programs. This is not me being negative about others, rather be mindful of all of this as you work on your account’s growth. Observe, what other top art accounts are doing now to incorporate their strategies into yours. Also, the reach has declined on Instagram tremendously (remember, the Facebook pages? Same idea) so please don’t think that it’s just you doing something wrong.

    https://www.youtube.com/watch?v=69fwfG3tnAc

    This video became viral on YouTube, but I didn’t do anything special or different from my other reels on YouTube. I think sometimes it’s really just luck.

    All artists need strong art, presentation, and following. Social media is yet another place to network with people. Artists need to be seen both online and off-line. So artists must have a business card in different formats to reach various groups of collectors, professionals, and alike.

    How to fix Instagram’s storage space

    This is one of the major problems I often have with Instagram and other apps like Spotify. At some point, my Instagram takes up all the space on my half-empty Android phone! The size of the app gets bigger and bigger despite my limited use of the app. So, I tried different things to share what works for me.

    1. You must remember your account name and password before you do the reset! After that,
    2. Open the Settings tab on your phone. Click on Apps —All Apps—and you’ll see a list of all your installed apps. Pick Instagram (or Spotify or any other app you want to downsize).
    3. Click on Instagram app—Storage & Cache–‘Clear cache’ first & click on ‘Clear Storage’. It will ask you ‘Delete app data?’ Click ‘Delete’.
    4. This action will reset the app and recover the storage space on your phone. You must open the Instagram app to enter your login information again to use it.

    Why you need to be on Instagram

    1. Every art professional, gallery owner, curator, artist, and art writer is on Instagram. You can connect to or reach out to people in a very informal way. Something that was totally impossible to accomplish a few years ago!
    2. If you have no website, no worries! Art professionals check your Instagram account first, and your website second!! You can host your art portfolio on Instagram for free.
    3. You expose your art to new audiences every day, showing your inspiration and behind-the-scenes footage. In other words, you find your audience, opportunities, and art collectors on Instagram.

    How to use Instagram effectively

    • The name of your account must include your artist’s name. If it’s taken, expand on it some more by adding art/painting/sculpture, etc. The word that describes your expertise the best.
    • Treat your Instagram account like your portfolio. This means deleting photos showing what you ate or where you bathed. Think of it as your professional portfolio with the best images of your artwork available to sample. People are very quick to judge. So when they get to your account, they must see the consistency in style and theme.
    • Include yourself in some of the shots. My photos perform a lot better when I’m standing next to my painting or I’m painting… This is important and makes IG different from regular, clean product photography. People want to connect to real artists, not just our artwork. Let them see your art, studio, and the creative process! We’re always very interested in the process of making something (hint: make short videos and reels. More on that later).
    • Show your WIP shots in a carousel, placing your finished piece first. Shots of art with supplies in them work well. I think that you can experiment with wip shots in a video format since the reach is declining quickly, posting photos only.
    • Use description space to write a story about your process and art. How did it come together? What challenges did you have? Focus on inspiration, rather than art supplies. Although sometimes it can work as well.
    • Follow your favorite artists, curators, and art brands on IG. Leave meaningful comments to engage and befriend them like you befriend people in real life… This is a long-term strategy. You can’t expect to see them liking or engaging with you, but there is a chance that you can develop a meaningful connection this way. Don’t pressure people to like you. It’s annoying. Rather try to connect to someone you admire or like… I recommend doing this with people whom you love as a fan.
    • Use dm’s to connect with people as well. There are no rules here. Don’t be obnoxious but think how you can be helpful or inspiring to others.
    • Beware of spam! Don’t respond to messages stating they can help you grow your account for a certain amount of $$ you spend with them. Also, there are big art accounts out there as well that promote you for $25-100 per post. Most of these accounts are scams. Don’t waste your hard-earned money on these strategies. Some take the money and give you a following that disappears in a couple of days or a couple of months. If you see that the engagement is low on big art accounts (500k- million), it means these are not real. Some large, legit aggregate accounts post the best artists on their feeds. Most of the time, posting on their feed is not free, while the best artists can get a free post, which translates to considerable following to the artist’s account. I think the best strategy with big accounts is to use their branded hashtag, so when they look for art, they can spot your video or image. I think that this strategy is about to die off completely… You can read about a whole list of scams I’ve received, here: https://veronicasart.com/top-scams-to-avoid-on-instagram-other-social-platforms/
    • Your Instagram account will grow not only because of your daily engagement with other users but also because of what you do outside of Instagram. This is important. You have to be social and proactive showing your art and personality elsewhere and the Instagram following becomes a byproduct of your main publicity efforts that include art shows, publications, guest posting on big sites, and podcasts…
    • Getting shares with reels is the most important factor right now. It’s not likes, it’s shares.

    Reels

    Your Instagram account won’t grow by posting pictures only these days. So posting reels is a must! Look at suggested art reels to understand what becomes viral. Oftentimes, it’s not the beauty of a painting, rather it’s about tape peeling or varnishing videos… Most videos are entertaining, not educational these days…

    This is the only viral reel I had on Instagram, although there were a few others that were high in views as well.

    View this post on Instagram

    A post shared by 💫Veronica Winters, M.F.A. (@veronicawintersart)

    • Reels. Yes, you have to deal with them. All my courses went out of the window because Instagram is having a new tantrum (strategy) in place. Have you noticed a decline in reach when you just post a photo? Instagram wants to become a video app to compete with TikTok. (I’m rolling my eyes here:))
    • My top tip on reels is to treat it as a very short demo of your drawing/painting process that’s super entertaining. The first 3 seconds of your vertical video are very important. I’ve experimented with reels quite a lot to understand what does and doesn’t work. My actual painting/drawing reels used to do well and now they don’t.
    • Posting time matters but not to the extent as the quality of your reel. Show mini-tutorials and behind-the-scenes that are snappy and unusual. As Instagram often shows you top reels in your feed, study them for inspiration and ideas. There must be a reason why it’s performing so well.
    • Frequency. In my experience, posting reels every day doesn’t do much for my account growth. I did test this for many months. It seems that the second reel would get less reach and interaction and sometimes it performs just as badly as a regular photo post. Play with your reels and timing to see if it’s the same for you or different. Let me know how it goes! https://www.instagram.com/veronicawintersart/
    • The immediate post engagement is very important for your reel to rank well. So reply to your comments instantly. Don’t delay.
    • keep reels under 30 sec.
    • Post the BEST content.
    Tip: Click on three stripes button located at the top right corner and go to your settings and then click on' upload at the highest quality' to upload your reels with max quality. If you have the creator account, you can also see Insights to understand how your videos perform.

    View this post on Instagram

    A post shared by 💫Veronica Winters, M.F.A. (@veronicawintersart)

    Hashtags

    Hashtags are still important. However, not all hashtags are good for your business. Pick the relevant ones to your artistic practice. Avoid using large hashtags that have over 500k posts with them. The reason is that if your account is small, your chance of being seen with a big hashtag is a fraction of a second. If you do your research and pick medium-size hashtags in your niche, you increase your chances to be noticed.

    Facebook

    What about Facebook, you may ask? I think it can be a powerful platform that has a different, much older demographic. Due to some privacy changes, a lot of targeting is gone. Many people have Facebook accounts they haven’t used for months, if not years. There seems to be no algorithm showing your stuff.. However, you’ve got to understand where your customers are, and what platform they prefer to engage on, so you spend more time there. I think Facebook groups can be useful to build friendships, which is not possible on IG. I hope it’s helpful.

    In conclusion:

    To wrap up, pick one platform to be active on, almost every day. Be professional by posting your art, inspiration, and story. Don’t obsess with the numbers, rather build real relationships with people who follow you and find inspiration and opportunities by being present and social there. Respond to your fans. Add location to posts and reels. Tag yourself in reels. If you make your audio, name it. I don’t do it because I don’t do well speaking, but it might work for you. Enable ‘Upload at highest quality.’ Enable close captions. Enable “recommend on Facebook.” Post the BEST video and post a call to action in every post!

    As I’m honest, I think that competition is increasing tenfold in terms of content production. Ads take up most of the space, and if it’s going to continue like that, we will eventually get another Facebook called Instagram with lots of empty accounts… Ads will be more expensive and will take even more space, but all we can do is stay positive, mindful, and helpful. We can work on trying to make a viral reel or connecting to an art collector who loves our work despite all these factors. I know, it can be hard at times, but I think people go on Instagram and some other social platforms for inspiration and entertainment as a way to relax from daily stress and work. Therefore, try to post positive and fun content to stay afloat in this busy world of social media!

    Connect with me here:


    Check out visionary art for sale

    Amazon links to art supplies I use the most often:


    Source link

  • 6 Reasons to use high-quality art printing services for your art collection – Veronica Winters Painting

    6 Reasons to use high-quality art printing services for your art collection – Veronica Winters Painting


    art miami 2018, spoke art
    Spoke Art gallery, the art fair in Miami.

    Sometimes it’s unclear what the difference is between art print companies, especially if you compare them online. However, all of us can agree that high-quality printing can make or break the display of a piece. High-resolution, well-crafted prints bring art to life, capturing the vibrancy, details, and textures that a lower-quality print might miss. With advancements in printing technology, fine art printing has evolved into a specialized service. In this guide, we’ll explore the benefits of using high-quality art printing services and why it’s worth the investment for collectors and creators.

    #1 Maintaining Originality and Detail

    A major benefit of high-quality art printing services is the ability to reproduce broad and accurate color spectrum, contrast and details of the original, fine art. Standard printing processes may fail to capture super fine brushstrokes, texture, and shifts in tone that create a special feeling when we look at art. So art printing companies that use high-resolution giclée or specialized pigment-based inks can offer reasonable fidelity.

    If you plan on using the art printing service yourself, you must have a high-resolution, digital file to print from that’s at least 300 dpi and saved as a png or raw file. jpegs are compressed images and the file compression may show up printing large posters.

    Sir Frederic Leighton, La Nanna

    #2 Using Archival-Grade Materials

    Archival-grade materials are designed to last decades without fading, yellowing, or warping. This level of durability is essential for anyone looking to keep their art prints in pristine condition over the long term, especially when they are limited-edition or rare art prints. Companies like the Stackhouse printing use the highest-quality materials for colorful art reproductions that can last over 100 years without fading under museum conditions.

    Always keep your art and prints away from a direct sunlight, artificial light, high humidity and changing room temperature conditions. Art and prints fade, crack and warp if they're not custom-framed with archival, non-glare plexiglass and backing.

    Archival materials used for printing add an extra layer of protection, helping fine prints resist the effects of light and moisture, thereby preserving their beauty and market value. When you shop for a printer, ask what supplies they use because paper must be pH-neutral not to yellow over time.

    Moonlight, 22x30in, closeup, colored pencil on art board, Veronica Winters

    #3 Using Advanced Printing Techniques

    Companies that create high-quality art prints use advanced printing techniques. Some of these methods include:

    Giclée Printing: A technique known for its exceptional quality, giclée printing uses pigment-based inks and high-resolution printers. This method is popular among artists and art collectors due to its ability to render incredibly detailed reproductions that mimic the look and feel of the original piece.
    UV-Protective Coatings: UV coatings shield prints from sunlight, which can fade colors over time. This added layer of protection is necessary for prints displayed in well-lit spaces or under direct lighting. Printing companies like the Stackhouse use these advanced methods for high-end art reproductions.

    #4 Having Customization

    Customization is a big advantage of working with a high-quality art printing service. Standard printing services often have limited choices in sizes, framing, and finish. A specialized art print shop can print pictures in a requested size. It’s invaluable for art collectors aiming to match a print to their collection’s theme or display needs, as well as for artists wanting to maintain complete control over the presentation of their work for a show.

    If you plan to make a large order, ask for a test run of your pictures. I'm sure the shop could print a sample for you to appreciate their quality.

    #5 Enhancing the Viewer’s Experience

    Usually, we can distinguish between the art print and the original when we look at art in person. The emotional impact is lost in art reproductions. However, today advanced printing techniques are so good that high-quality prints can evoke similar emotions as the original piece. If you go to the Miami Art Context you can look at gigantic photographs that have beautiful detail, color, contrast, and sharpness. Sometimes art galleries display printed digital art that looks impressive because of high-definition in prints. The quality is so perfect that it looks like art, not a print.

    javier bellomo coria_face_art miami 2017
    Javier Bellomo Coria, Face, Miami Art Fait, 2017

    #6 Offering Long-Term Value and Investment Protection

    Both limited-edition prints and rare art prints could become a valuable investment when these art prints are signed by a famous artist. Such prints may appreciate in value over time because the artist gains recognition. Therefore, it’s important to know if they were printed with high-quality inks, paper, and UV coating to ensure longevity and peace of mind, knowing that art prints will continue to hold their value and appeal.

    Andy Warhol’s silkscreen print seen at the auction in Naples, FL
    You must understand the difference between a giclee print and a hand-pulled lithograph or silkscreen. Both types of prints can be signed by a famous artist, but the first one is a computer-generated print, while lithographs, silkscreens and intaglios are hand-made prints pulled through the press. Done in multiples, these prints should have a much higher price point as opposed to a giclee print.

    Next time you see a beautiful art print, ask its owner where it got printed. I keep a short list of businesses that offer different art services. For anyone serious about their collection or artistic portfolio, investing in a professional art printing service is a decision that pays off in the quality and satisfaction of each piece produced.

    Check out open-edition prints in my shop.

    To read more:


    Source link