Hello! It’s been a while. I have been working so much on The Creativity Project that it’s been hard to find the time to write over here on Art Bar. But I have things to share! As you know, I have been facilitating open-studio classes at our local library over the past year (I’ve written about them and you can scroll to the bottom for links), and I have grown and learned so much from those experiences. I really want to write a book (not really but sort of) about setting up open-ended community art events that appeal to multi-ages and cultivate a new mindset around what childhood art experiences can (and should) look like. Including parents in these library events has been such an important part of the process because that’s really where the work needs to be done. Changing grownup mindsets to giving children the freedom to make their own choices, and seeing them as artists who are capable of having good ideas and playing with materials on their own — even if they end up abandoning what they start or simply participate by observing. Just giving children room to be who they are and develop confidence knowing that grownups trust their choices (easier said than done because grownups are used to making choices for their children). This is actually a lot of the same work that Shannon and I do at TCP — mindset shifts for teachers in prioritizing creativity and giving children opportunities for authentic choice-making.

In September I brought this approach to a local early childhood program to work with 5-7yr olds in their beautiful art barn. Today I’m sharing about the day I brought wood scraps, magazine clippings, and a collection of other materials that children could use along with the wood (all inspired by my brilliant friend Samara at Purple Twig from this post and this event). I offered this experience twice — once at the library, too — and each time was a little different. I’ll tell you about the school experience first, then the library. But first, the materials.
[ I am a participant in affiliate programs designed to provide a means for bloggers to earn small fees at no cost to you by linking to Amazon.com and affiliated sites. ]
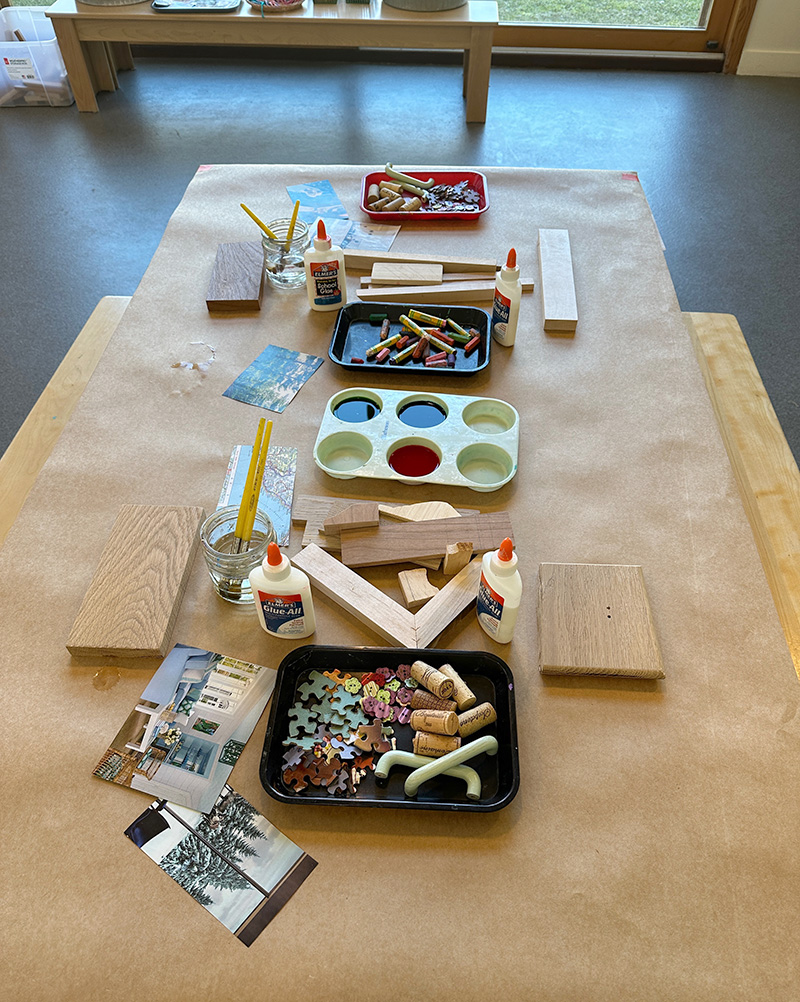
Materials for mixed-media exploration with wood:
~ Wood scraps (collected from local high school wood shop)
~ Elmer’s glue (next time I will use wood glue)
~ Liquid watercolor
~ Jars and brushes
~ Oil pastels
~ Scissors
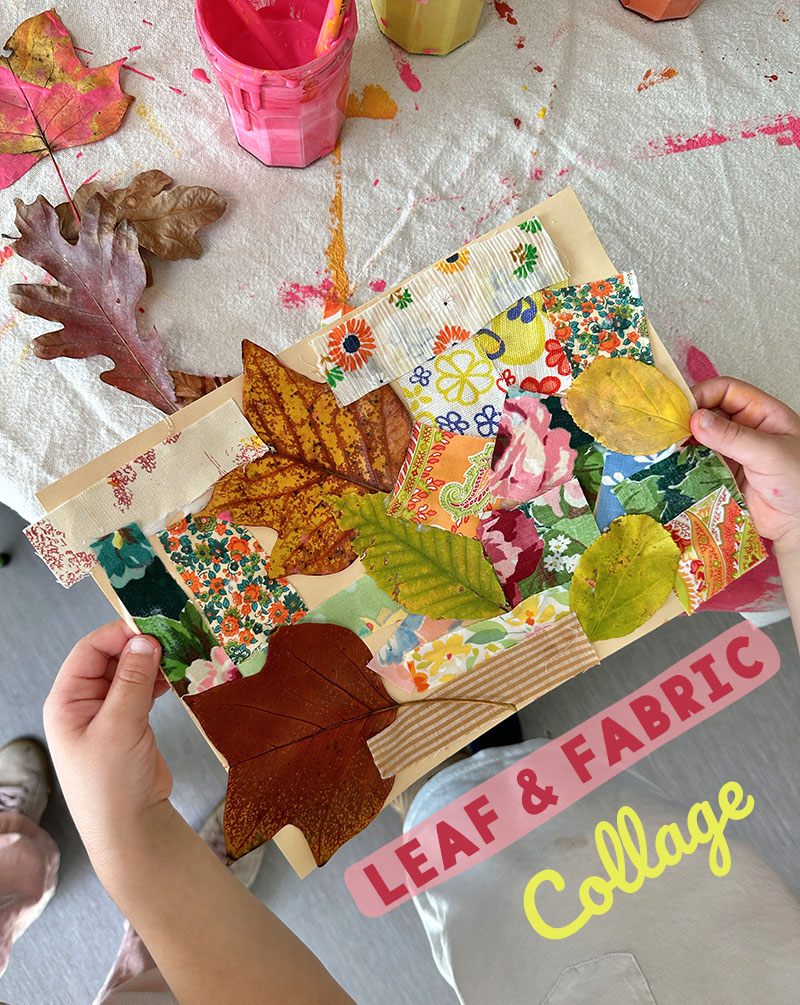
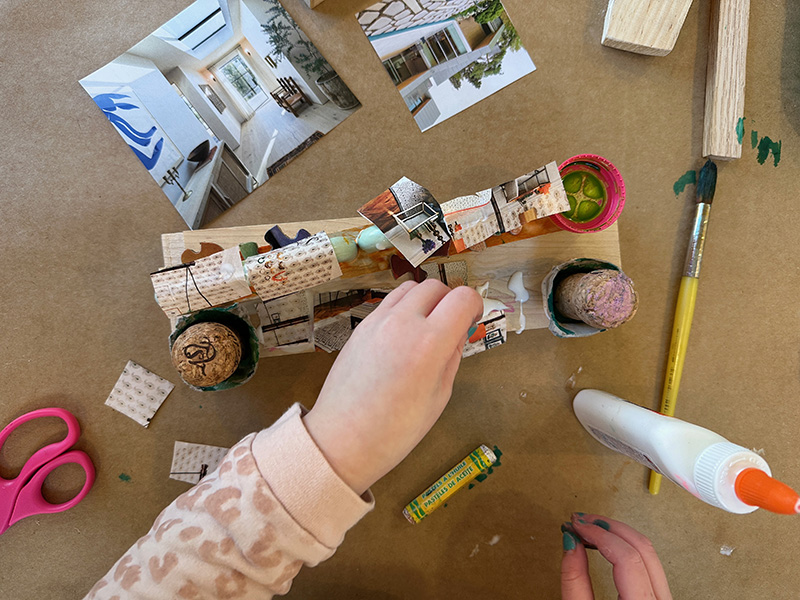
~ Magazine clippings (I used mostly home and garden magazines to spark architecture, design, and landscape ideas)
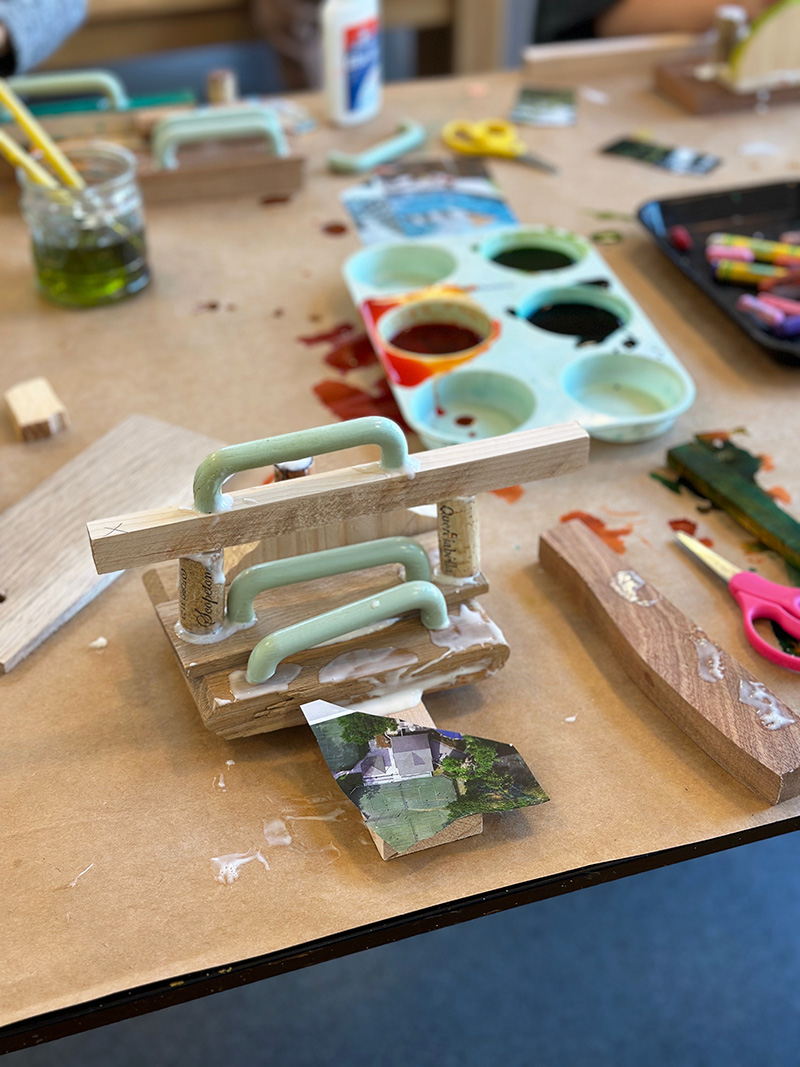
~ A collection of wooden cabinet handles (I had about 40 from my old cabinets, they were used up pretty quickly)
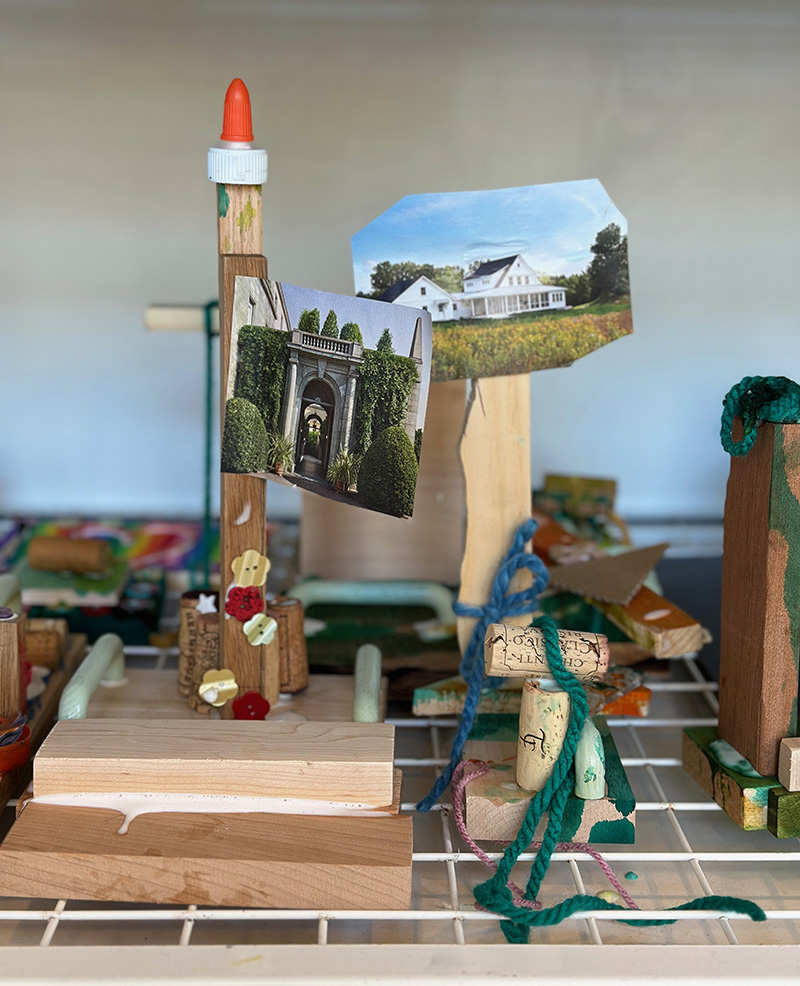
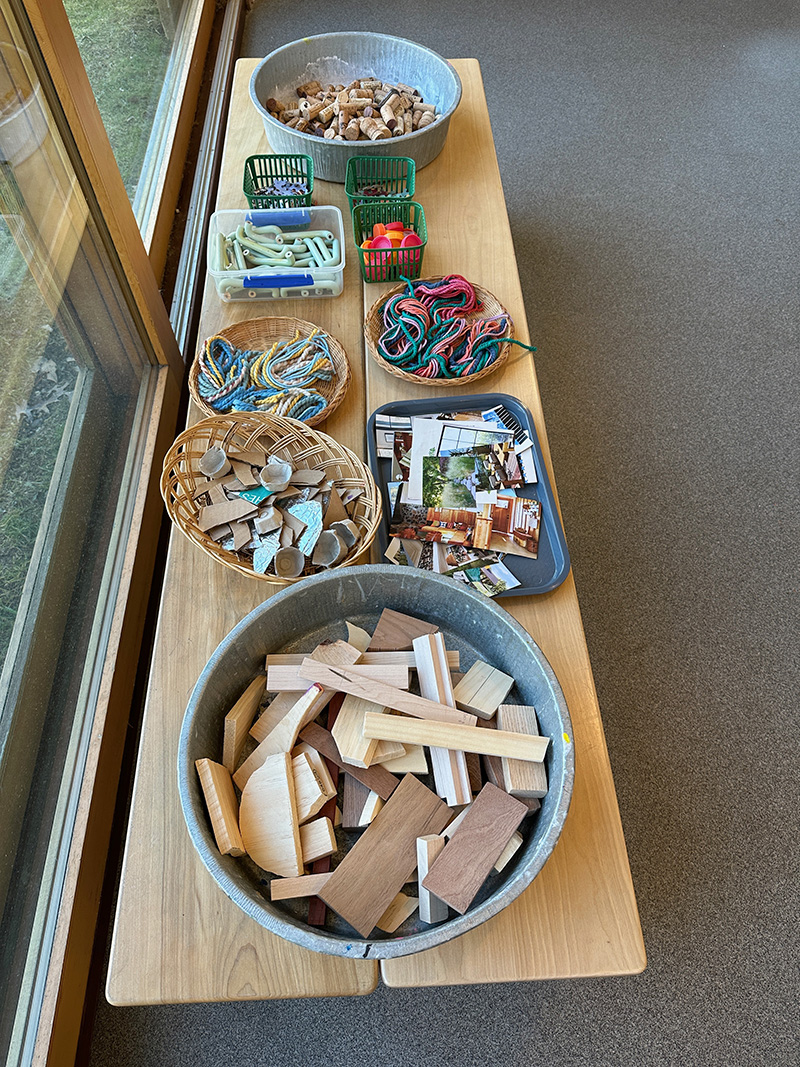
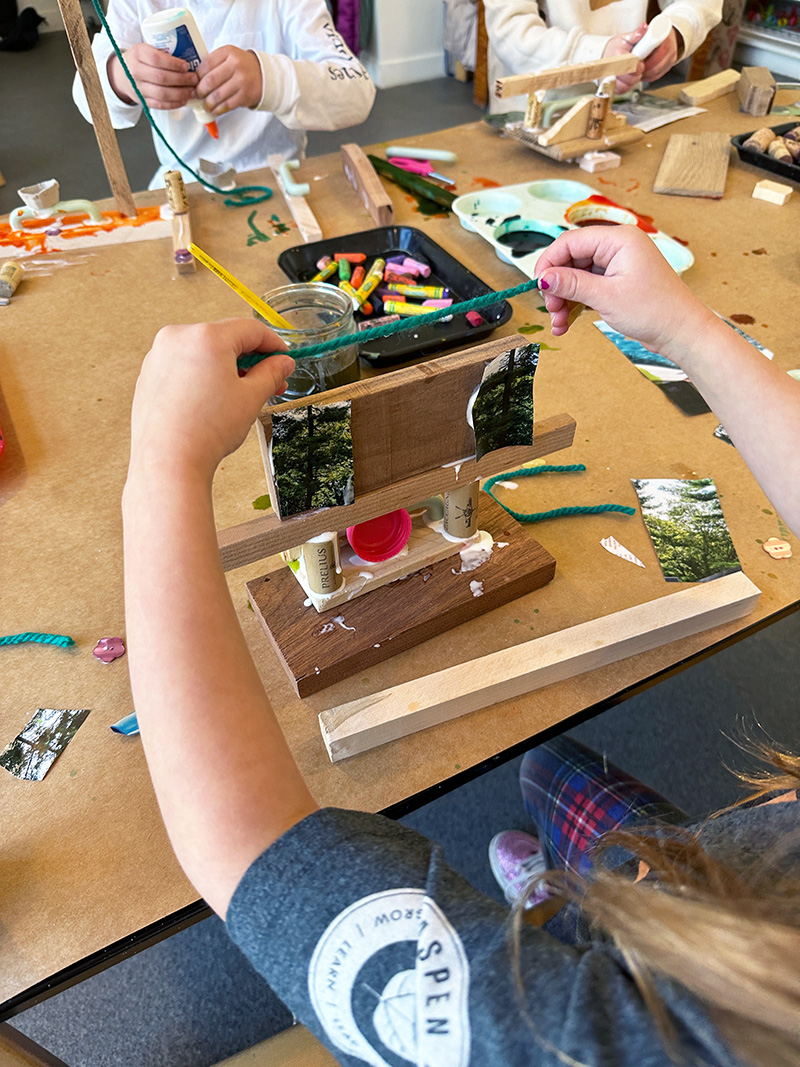
~ Smaller collage materials to build with like: bottle tops, corks, cardboard pieces, egg carton pieces
~ Other collage material: buttons, puzzle pieces
~ Yarn pieces cut into about 18-inch lengths (I love to add a soft element when working with lots of hard materials so children can get a variety of textures)
Setting out materials for mixed-media exploration with wood:
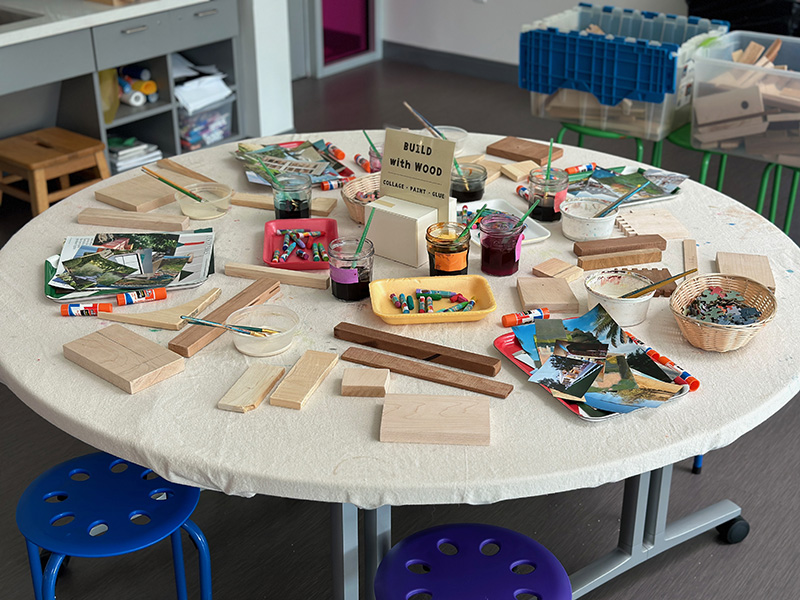
I put a lot of thought into which materials will work best together and spark enough interest without feeling overwhelming. There was only so much I could fit on these small tables because four children had to also sit there and have enough space to work. This school has a wonderful art teacher who suggested on this day that we create a buffet for all of the materials so children could “shop” for what they want. I loved this idea, and the children did too! I put a small selection of things on the table to start, but most of the materials were set out on the buffet and replenished. You can see the buffet on the far end of the space by the window in the 2nd picture down from the top (two above here), and you can also see the plastic box on the floor which was full of wood pieces to choose from. I had another box of wood pieces that I used to refill as the children worked.

Preparing for a mixed-media wood exploration
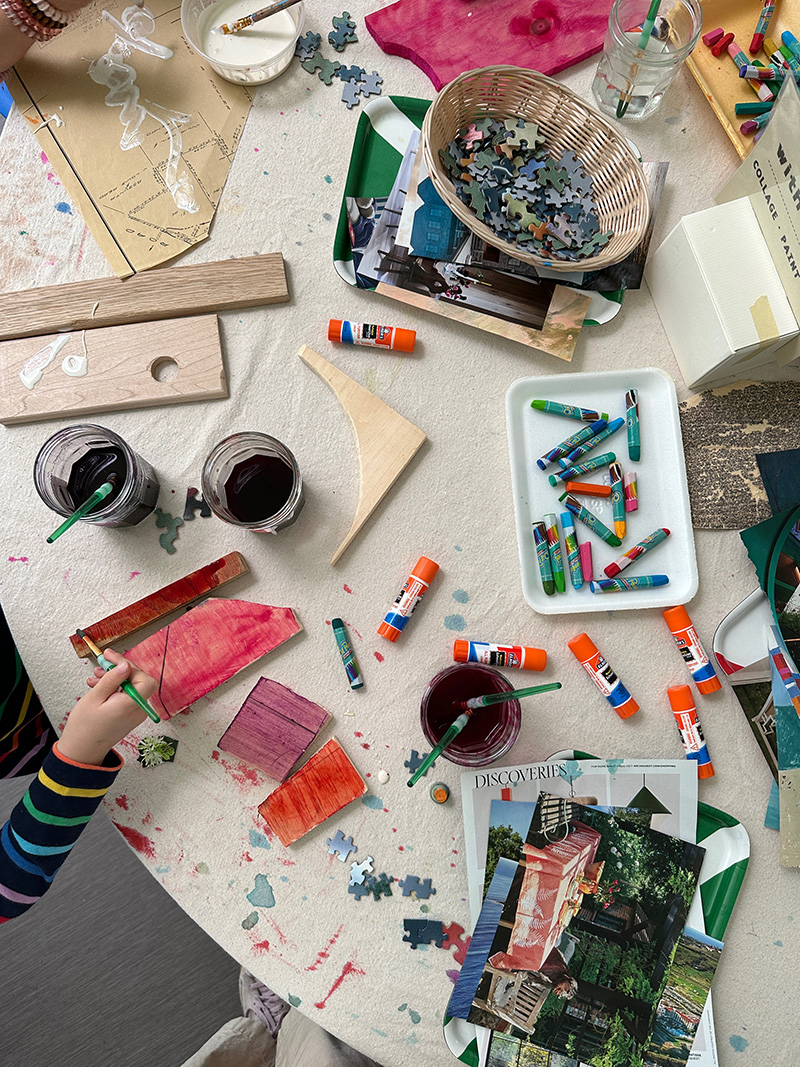
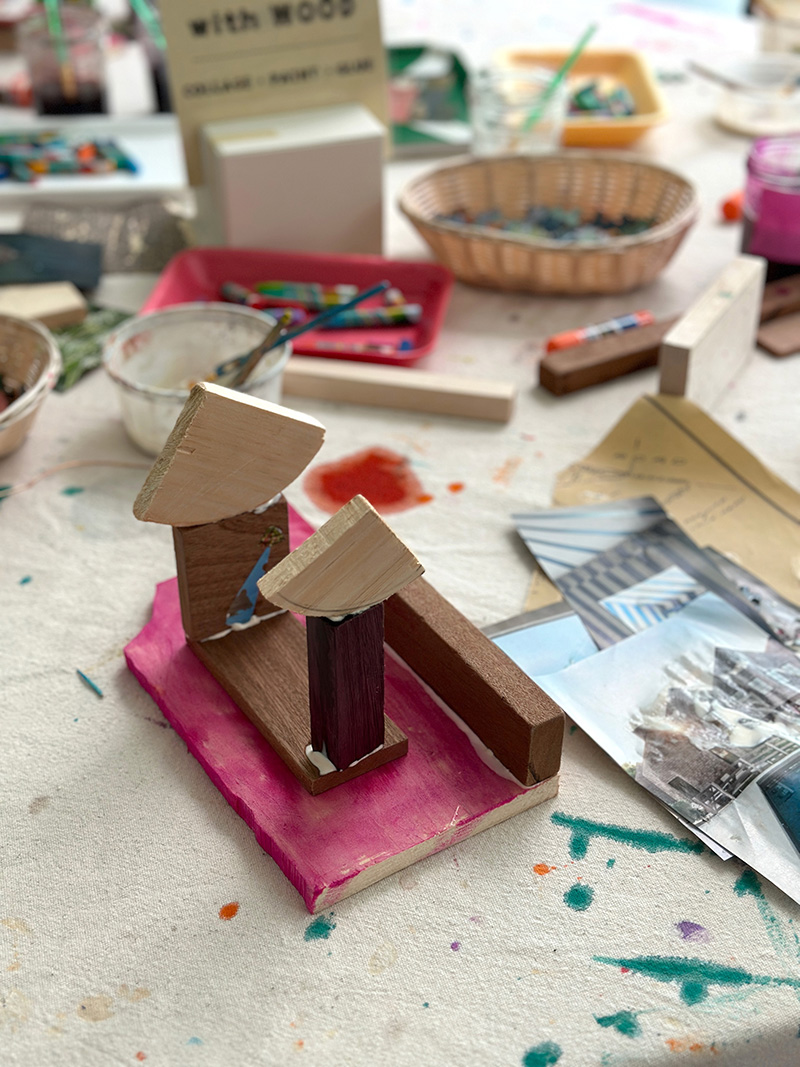
Wood: At this school I see 60 children in 4 groups and they each have half an hour, so I need a lot of materials plus extras just in case a child has a very big idea they want to execute. I don’t want to limit anyone’s ideas. I prepared one big wood base for each child. Some of the “big” bases were just a long strip and if I did this again I would make sure I had a bigger rectangle for everyone. Some children really wanted to build their structure up and the small bases made their structures unstable which was a little frustrating. I think if we had used wood glue it would have helped. I then prepped another 300 pieces (sanded them) about 5 per child. I wagered that some children would use many and some would use one or two since I was also offering so many other materials to play around with. As it turned out, I had only about 20 small pieces left so I was relieved my bet paid off.
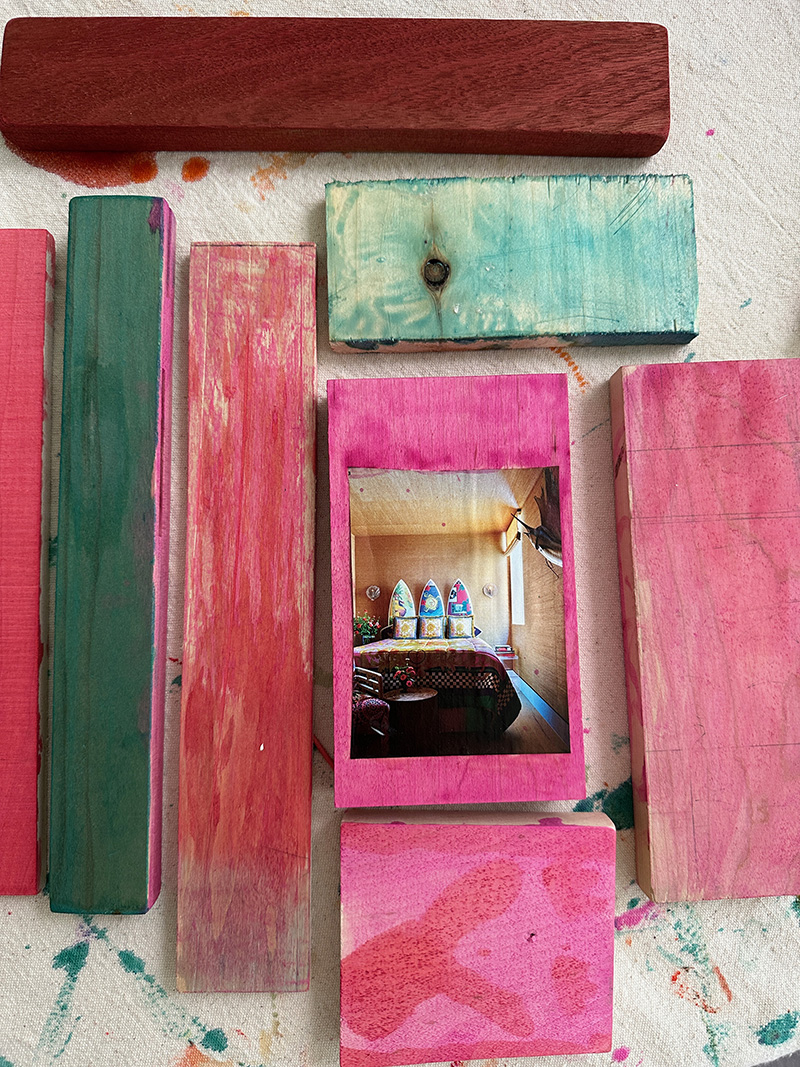
Paint: Liquid watercolor is the best to use with wood. I usually limit the palette to warms or cools so that they can be layered on top of each other and not get mucky, but on this day we ran out of time so we just poured a few colors into palettes and set out a jar of water. If I did this again I would have prepped some jars beforehand and put brushes in the jars. It would have saved some space and a little of the mess.
Compatible materials: I have a pretty extensive collection of recycled and collected materials. I ask my community on our local Facebook page all the time if I’m looking for something specific and they always come through. I actually asked for home and architecture magazines and now I have an entire milk crate worth to choose from. The magazine where I found all the best images for this project is Dwell. I also cut up some maps which I collect whenever I can find them. Recently my son and I visited UVM when looking at colleges and they had a whole map display in their student center with maps of Vermont and all of the ski mountains. So just keep your eyes open when you are traveling.

Observations: While I did spend one minute before each group telling them about the materials that I brought in and all of the possible ways in which they could be used (wood can be painted, glued, collaged; make sure to use a sturdy base when building up; there is no wrong way to use the materials it’s really up to you and your ideas) I don’t normally spend time introducing materials in this way. When I am just there once a month, and for only 25 minutes for each group, I don’t want to waste any time and I trust that the children (ages 5-7) will all have their own unique ideas about how to use the materials. But the art teacher does it this way, and asked me to please spend a minute on the rug introducing everything. There is nothing wrong with this and in fact, if I had a class that I saw every day, I might occasionally spend some time talking about materials in this way. But in my practice, I see myself as more of a facilitator, not a teacher. Not only do I want to be careful about influencing them, I am also just curious and excited to see the children’s ideas because without a doubt their ideas are always better than my own. These experiences are as much a learning time for me as they are for them. And I find that the best way to get to know children and their interests and to foster a safe space that reflects each child and their lived experience is by simply letting them play and getting down on their level to listen to their stories and ideas. If they need help I am there to lend a hand. But they are the artists and I really don’t want to limit them in any way.
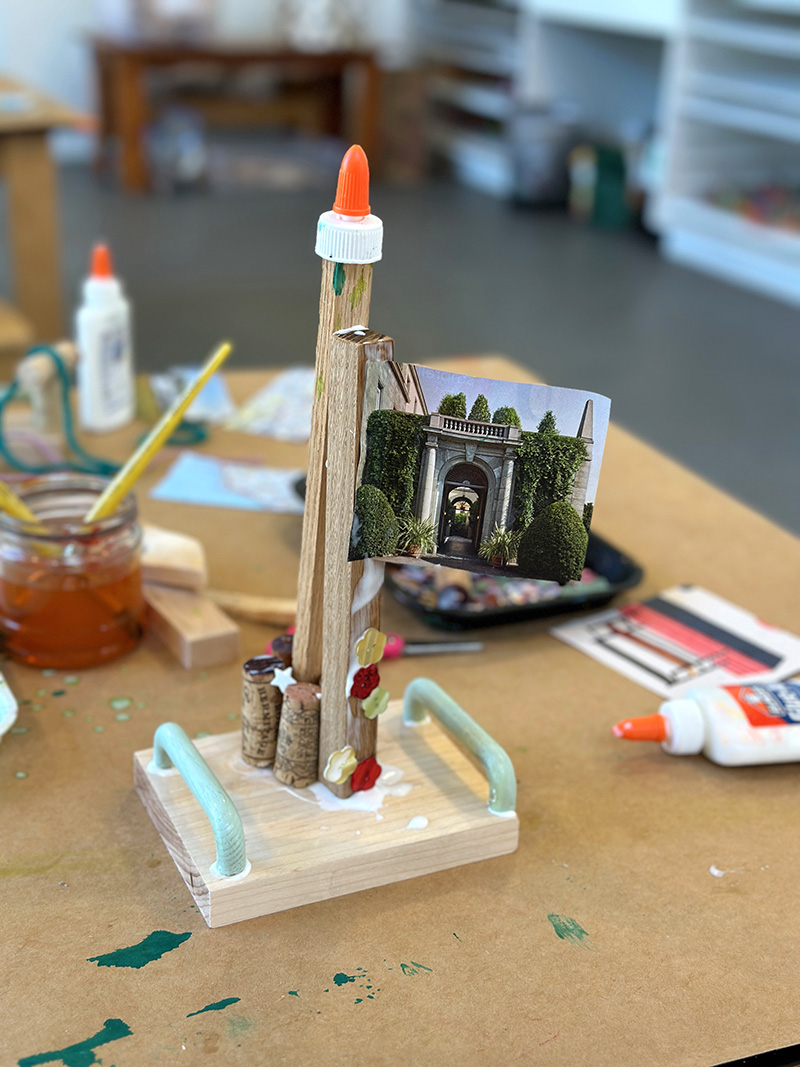
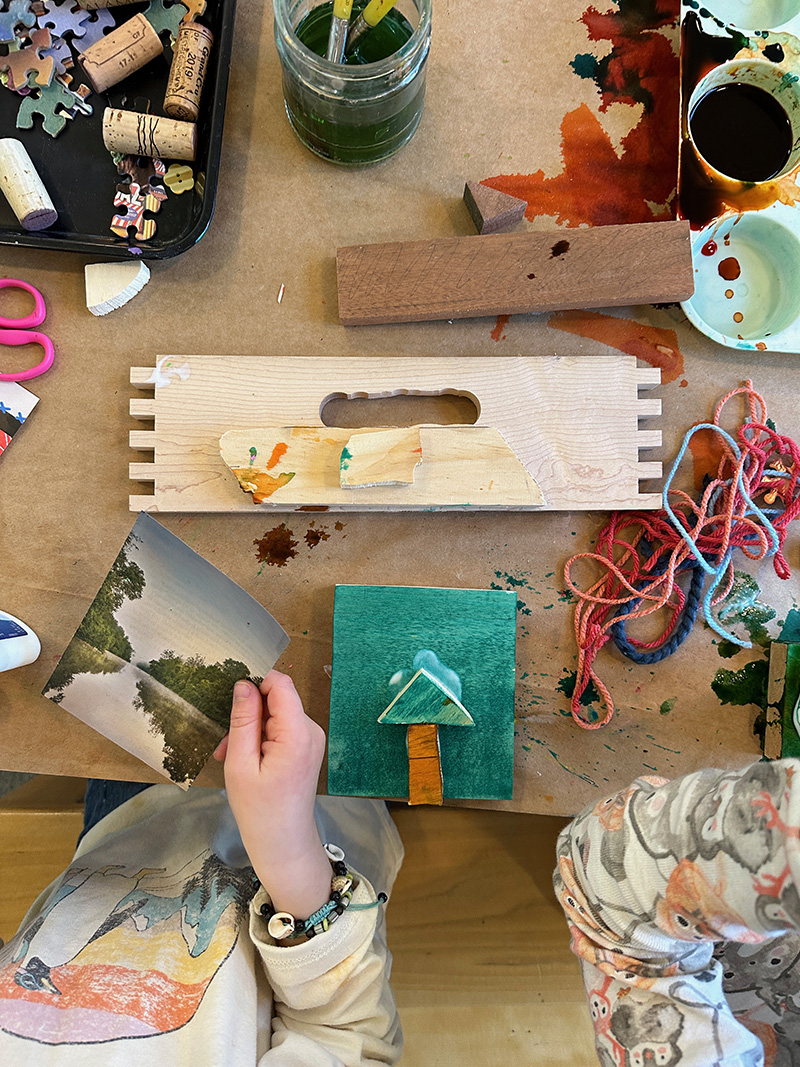
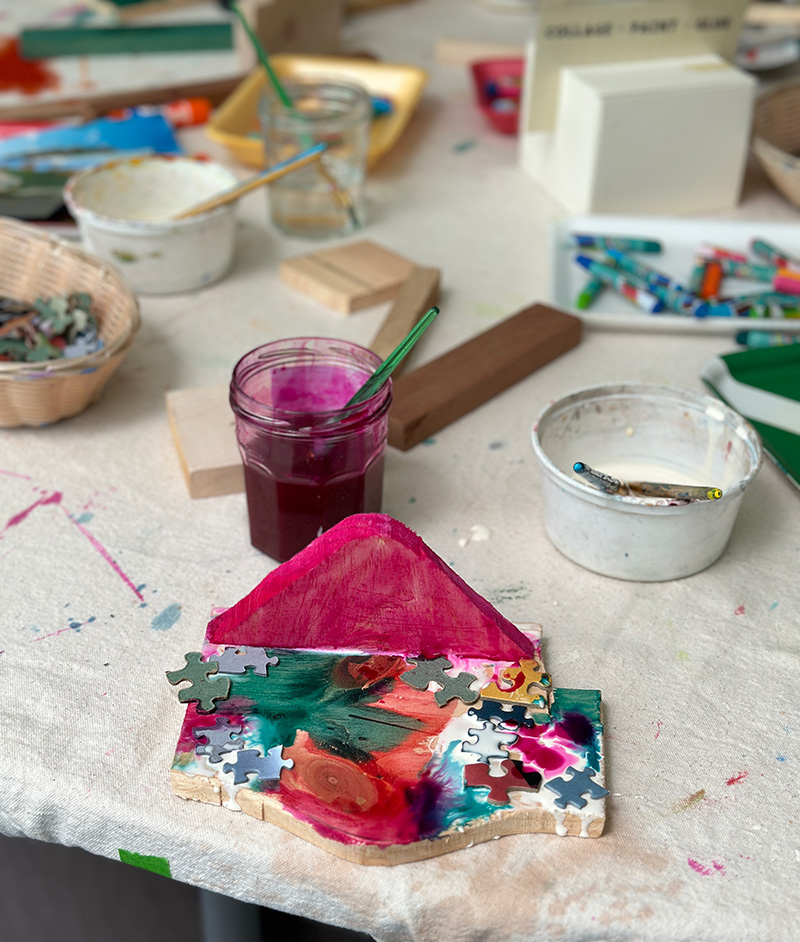
Looking at these photos, you can see the wide variations of ideas and execution. Every one of those 60 children was experiencing flow. The time went by in a heartbeat — they could have all worked for an hour — and they felt very proud and excited about their pieces. And I felt so inspired, too! These children were very capable and many of them built quite elaborate structures with many pieces (you will see this contrast with the day I offered these same materials at the library). They often walked around and looked at each other’s creations and became inspired to add more to theirs. They loved shopping at the buffet which also was a place where children talked about materials and how they were going to use them. I overheard children say they were building a stage for the Rockettes, a pirate ship, a motion sensor, a video game, a vacuum, and an obstacle course. Many of them were making something for their mom. One child who spent his time covering single wood pieces with magazine images so that he had about 6 or 7 separate pieces said that they were for his mom because she loves beautiful things. It’s hard to imagine these stories, innovations, and iterations happening if the children had been guided through a project.
Mixed-media exploration with wood at the library:
Bringing these materials and setting them up for my community library event went a little bit differently. First of all, it’s a two-hour timeframe and I usually have about 20-30 children coming through, so a lot less materials and a much slower pace. Children can range from age 2 to teen, but usually they are between 3-10. I make a very basic sign because children are with their parents and parents usually want to know what they are supposed to do. I keep it very open-ended and I hope that the parents are going to let their children take the lead. What I do love though is when parents are also making their own art beside their child.
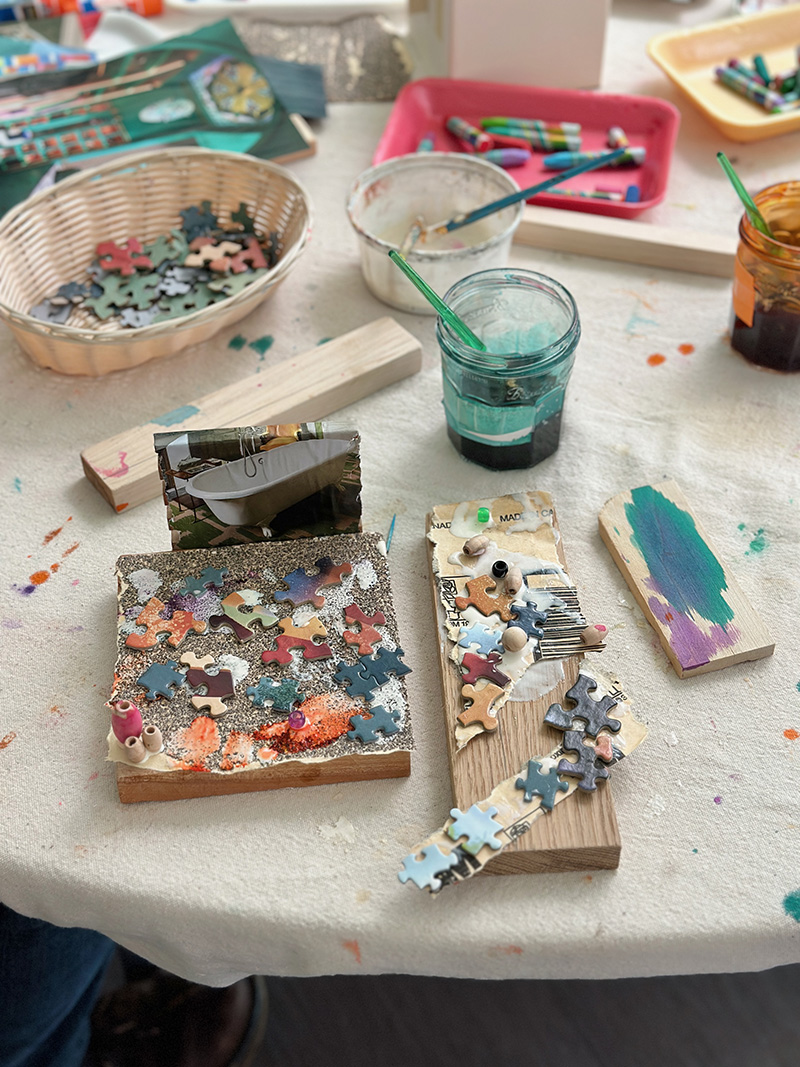
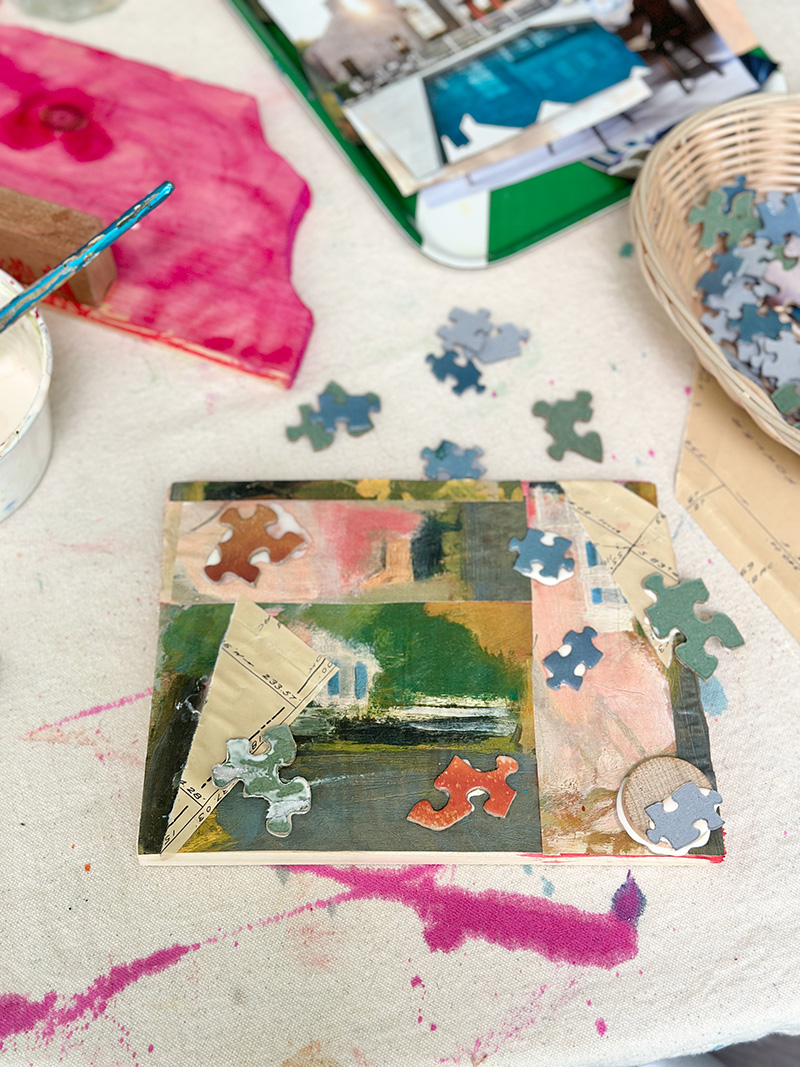
Children did a lot less building and more painting and collating. They also left their work to wander to other tables and then came back to add more when they saw a new material on the table. I love the child who found the sandpaper in the bin of wood pieces and used that in her bathroom collage. The painted wooden pieces below were all left behind, and I have the surfboard headboard pieces propped up on my bookshelf.
I believe that anyone can gather materials and set them out for children in an open-ended way. You don’t have to feel like you need to be “creative” or “artsy” to do this, you just need to believe that this time for creative exploration and discovery is vital in childhood. My wish is that all art in early childhood, from preschool through early elementary, only offer open-ended, process art experiences. They develop so much confidence, and it’s so exciting to see what children can imagine and build, how they share their ideas with others and collaborate, build empathy, find their voice, and grow into future innovators who think about how they can make the world a better place.
xx, Bar
– – – – – – – – – – – – – – – – – – – –
Did you like this post? Here are 3 more open-ended exploration ideas: