
Editor’s note: In our new Mind Upon Mind series, we ask readers of our books, blog and Substacks what else they’ve thought of, tried out and improved on? You can read more about the series here.
Today we’re featuring an idea from Sam Robinson. In our books and blog posts, we don’t have the time or space to share every technique out there. Instead, we highlight what works well for us. Here’s a time-honored approach for reaming and drilling leg mortises, explained by Sam. Thanks, Sam!
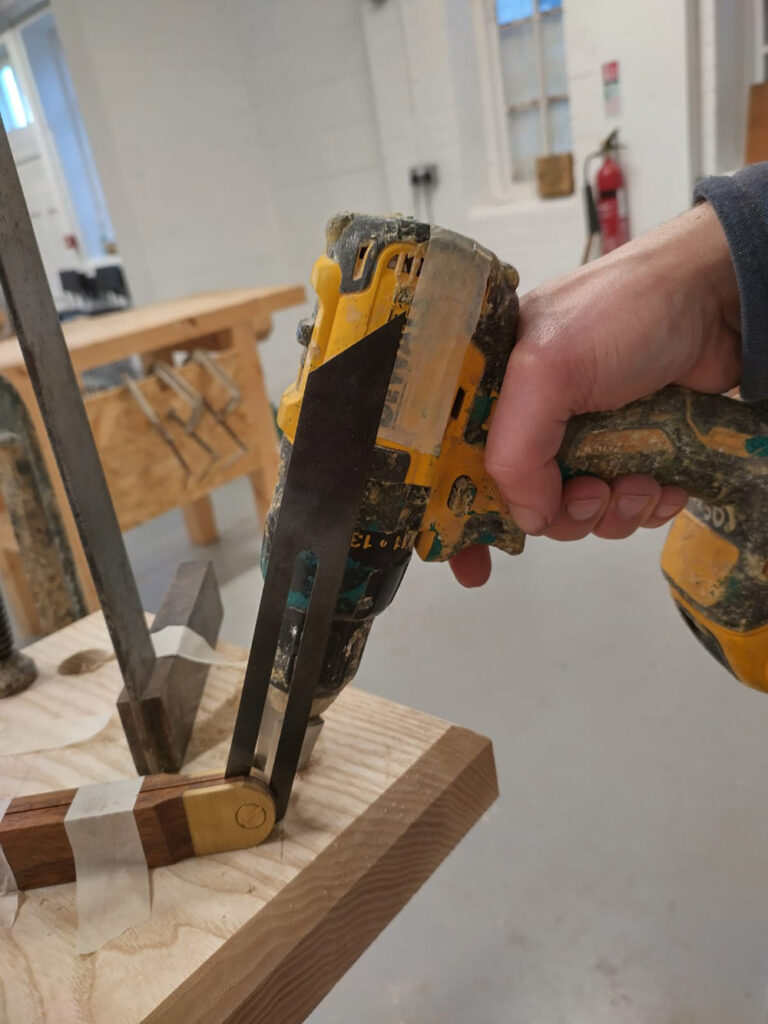
This technique requires carefully positioning the sliding bevel gauge and engineer’s square.
The bevel gauge is positioned on a line drawn at 90° to the sightline from the center of the mortise to be drilled. You have to sight down the edge of the bevel gauge to check it’s bang on the line, as the curve at the end of the tool means you can’t just set it on the line. The bevel gauge is taped in position only 2″-3″ away from the mortise so that it’s very close to the drill when you are drilling.
The engineer’s square (the bigger the better) is likewise set exactly on the sightline.
Next, use tape to create a centerline on the back/side of the drill (such that the top of the tape aligns with the center of the drill bit/reamer). Do the same for the top of the drill if it doesn’t have a centerline on it already.
The trick is to align your eye with the engineer’s square/sightline/top centerline on the drill and keep them in alignment while you are drilling (I hold the drill against my body to resist the torque). At the same time, keep the pointed tip of the bevel gauge in line with the top of the tape on the side/back of the drill.
This means you can see everything you need to see from above.

Do you have a clever idea for an improvement? Email kara@lostartpress.com. You can read more about the submission process here.
— Kara Gebhart Uhl
دیدگاهتان را بنویسید