بلاگ

  • Printmaking Hacks to Transform Cleanup Into Part of the Creative Process

    Printmaking Hacks to Transform Cleanup Into Part of the Creative Process


    Printmaking is one of the most engaging art processes for students, but it can quickly turn your classroom into a disaster zone. Inky rollers, murky water, and sticky plates can make cleanup overwhelming. Plus, it can require alternative materials that may be new to your classroom. With smart and efficient strategies, you can keep your printmaking tools in top shape while teaching students responsibility.

    Gain time-saving hacks, space-saving solutions, and teacher-tested tricks to make printmaking in the classroom easier than ever!

    students printmaking

    Smart Flow Stations

    Instead of having materials scattered across the room, try stations. This helps students move through the printmaking process with more independence. Give a clearly defined purpose and provide anchor charts to remind students about the purpose, steps, and materials for each station. Try breaking your stations down into the following: Inking, Printing, Drying, and Cleaning.

    Here are common materials to include at each station:

    • Inking: Inks, brayers, palettes, wipes, and paper towels.
    • Printing: Printing press, barens, or large spoons, newsprint, printing paper, and scrap paper.
    • Drying: Tables, drying racks, or clothesline and pins.
    • Cleaning: Sponges, buckets, soap, wipes, paper towels, and drying cloths.

    Space-Saving Storage Hacks

    No matter how large or small your teaching space is, printmaking storage requires extra care. Supplies like brayers, printing plates, and rags can pile up fast. To avoid clutter, think in terms of visibility, accessibility, and vertical space.

    Explore these three creative storage ideas:

    1. Brayers
      Brayers are often bulky to store in containers. Glue magnets to the handle and attach them to magnetic strips, or if there are holes in the handle, use small nails or adhesive hooks to utilize wall space.
    2. Printing Plates
      Store a class’s printing plates in a large accordion folder or collect each table’s printing plates in labeled pizza boxes. Ask your local pizzeria for box donations! Plus, they are easy to stack and will keep the plates clean and organized.
    3. Rags
      Dry wet rags and cloths on a retractable clothesline. Once dry, store in an over-the-door shoe or pocket organizer.

    Budget Drying Racks

    Drying prints is one of the biggest space challenges in a classroom because students are often rapidly printing multiples. If you don’t have access to a traditional drying rack, you’ll need to get creative. Immediately hang wet prints up using a clothesline and clothespins. Ask local grocery stores or bakeries for donations of rolling baking racks to store prints on. Tape newspapers under tables or desks and gently place prints under the table. If you have absolutely no space, send prints home the same day. Protect damp ink with “print sandwiches” using newspaper and cardboard.

    drying rack with art

    Team Effort Cleanup

    Are you the last one in the room scrubbing brayers and wiping tables? Cleaning up after a printmaking lesson takes time, but it doesn’t have to all fall on you. Creating a job system gives students ownership and accountability over materials and teaches them to respect the tools they use. Make students feel “official” with fun laminated name tags that have their cleanup role on them!

    Try these fun cleanup roles:

    • Brayer Boss: Cleans and returns brayers.
    • Plate Patrol: Wipes down and stacks plates, palettes, and trays.
    • Ink Inspector: Checks for inky fingers before anyone leaves and distributes wipes accordingly.
    • Table Technician: Ensures all tables are clean and dry.
    • Paper Picker: Picks up and recycles all paper scraps.
    • Print Pro: Organizes drying racks or hanging prints.

    No Sink Printmaking

    It’s easy to stick with drawing if you don’t have sink access. However, with some water-saving tricks and a bit of planning, you can still bring the magic of printmaking to your students! The goal is to remove most of the ink before rinsing and to conserve water. Grab a bunch of cheap spray bottles and pre-fill them with clean and soapy water, and you’re ready to go!

    mini spray bottle

    Follow these easy steps to make cleanup without a sink a breeze:

    1. Cover tables with newsprint or disposable tablecloths and toss them at the end of the period.
    2. Roll off excess ink from the brayers onto scrap paper.
    3. Spray soapy water on the brayers and roll onto a damp sponge or rag.
    4. Wipe the brayers down with a dry cloth and store.
    5. Use paper plates for palettes and throw them away at the end of the period.
    6. Provide wet wipes or DIY ones to clean hands.
    7. Keep shop towels on hand for emergency cleanup!

    Leftover Ink Ideas

    Leftover ink doesn’t have to go straight into the trash. In fact, it can lead to some of the most creative moments in your printmaking unit. About 5-10 minutes before it’s time to clean up, walk around and see if you notice leftover ink. Turn this opportunity into a mini challenge to foster sustainability! Prompt students to create a print using only what’s left on the brayer and plate.

    Here are four ways to use leftover ink:

    1. Pull ghost prints from the same plate.
    2. Save roll-off sheets for future collage or layering.
    3. Play with color mixing and gradations.
    4. Experiment with textured scraps of paper.

    printing plate, ink jar, and brayer

    Printmaking is truly all about the creative process, so why not invite students to extend the experience into cleanup? When you provide students with structure and empower them with responsibility, cleanup will transform from a chore into part of the learning. The key to success is preparing your hacks ahead of time and ensuring all systems are in place with clear expectations before students crack the printing ink open. These small routines build lasting habits and teach students that caring for their creative space is just as important as creating within it.

    What printmaking hack would you add to the list above?

    How do you incorporate cleaning into part of your students’ artistic process?

    To chat about printmaking with other art teachers, join us in The Art of Ed Community!

    Magazine articles and podcasts are opinions of professional education contributors and do not necessarily represent the position of the Art of Education University (AOEU) or its academic offerings. Contributors use terms in the way they are most often talked about in the scope of their educational experiences.


    Source link

  • LearnFromMasters YouTube channel – Lines and Colors

    LearnFromMasters YouTube channel – Lines and Colors


    LearnFromMasters YourTube channel review
    LearnFromMasters YourTube channel review

    If, like me, you enjoy YouTube videos about art and artists, you may have come across a number of slideshow style videos showcasing the art of historic painters.

    In many of these, if not the majority, the creator of the videos seems compelled to add motion — panning, zooming and using transitions that flip, swipe, rotate, dissolve into blocks and otherwise try to be “entertaining”. It’s a video, so things have to move, right?

    While I appreciate the effort invested in gathering and presenting the images in these presentations, as soon as I realize it’s one of those, I click away in search of another. I like viewing art images whole, or with simple close crops, without them squirming around on my screen! (Sigh.)

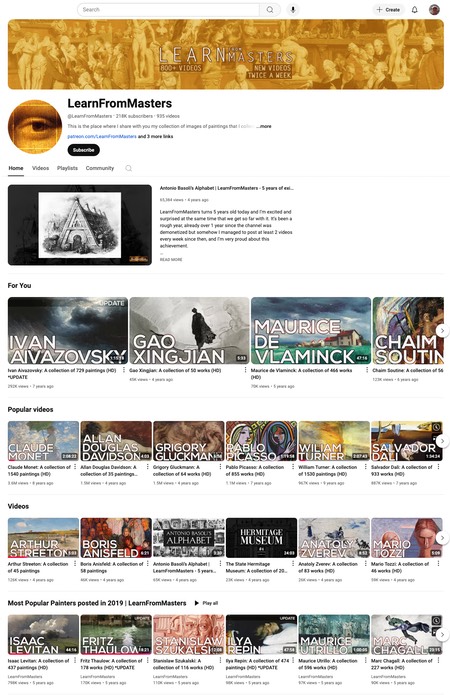
    Fortunately, there are other options. One of them I enjoy is a YouTube series under the name of LearnFromMasters.

    The channel offers an extensive selection slideshows of varied and interesting artists that are mercifully free of unnecessary motion. They are arranged as simple straightforward slides of the full image separated by basic jump cuts. (What a concept!)

    In addition to the regular YouTube listing of the videos, there is a text list here of all of the videos posted to date. The channel has a Patreon account for those who wish to support the effort.

    The LearnFromMasters videos are engaging and plentiful enough that I will issue a Timesink Warning.


    Source link

  • “A Poor Sort of Memory” by Photographer Tracy L Chandler

    “A Poor Sort of Memory” by Photographer Tracy L Chandler


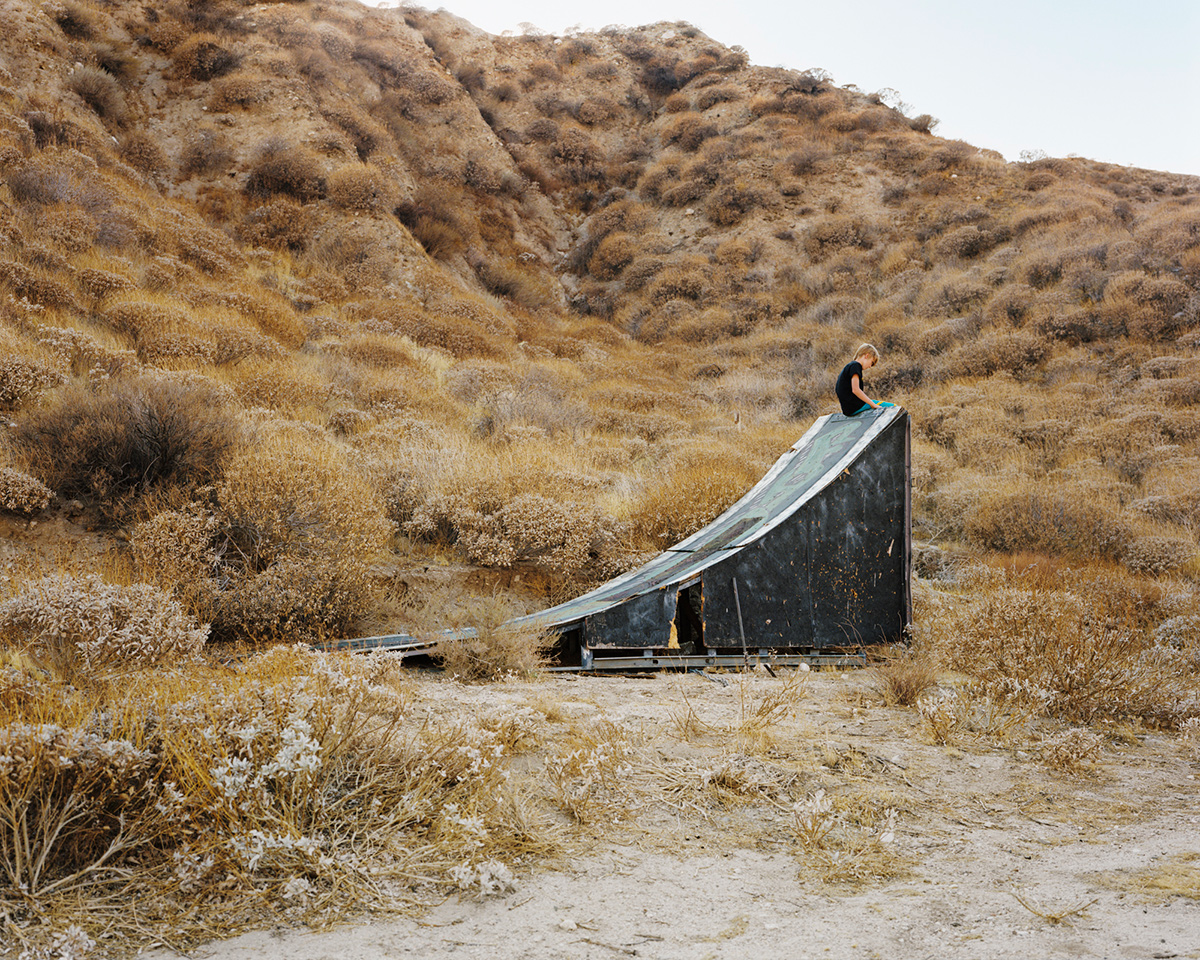
    Los Angeles-based photographer Tracy L Chandler documents her hometown in “A Poor Sort of Memory.” Set against the Californian desert and with reference to the words of the White Queen from Alice’s Adventures in Wonderland–“It’s a poor sort of memory that only works backwards”–Chandler revisits her past, not with the expectation that she will arrive at some sort of conclusive truth but, rather, with the understanding that she is venturing further down the rabbit hole:

    “As I revisit old hideouts in concrete washes and private bunks in rock formations, I am reminded of a past laden with trauma and my youthful desperation to find both a sense of belonging and independence. I would escape the morbid chaos of my family home and take refuge in the periphery. Now I return to these spaces to photograph. This land is strikingly beautiful but also feels both claustrophobically familiar and alien with dis-belonging. There is ambivalence as I explore this landscape. I contend with the conflict of the seemingly objective reality before me versus the subjective truth of my memories. I find myself chasing ghosts and evading monsters. I struggle to parse memory from fantasy and reflection from projection. As I work, I embrace this unreliable narrator and use the tracings of my history to craft a new loose photographic fiction.”

    Tracy L Chandler shared “A Poor Sort of Memory” with us via the Submissions section of our site. The project is currently available as a photo book published by Deadbeat Club.


    Source link

  • Island Life Potters | Britt Whitaker & Craig Britton

    Island Life Potters | Britt Whitaker & Craig Britton


    Britt Whitaker & Craig Britton | Episode 1082

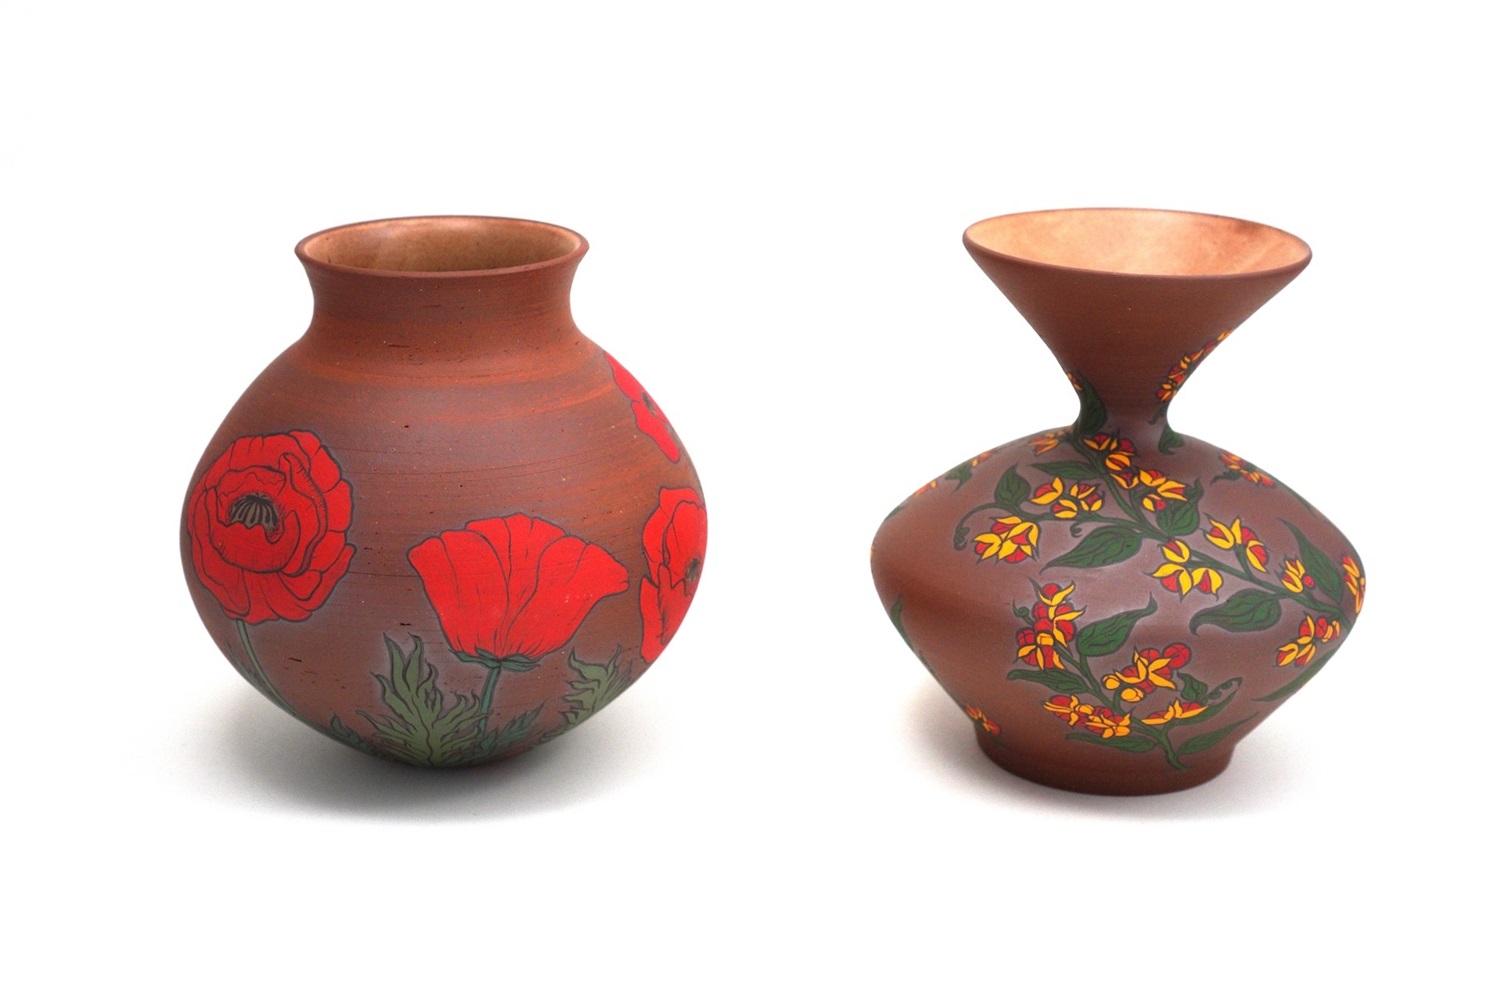
    Craig Britton & Brittany Whitaker are ceramic artists currently residing on San Juan Island, WA. Craig and Britt’s collaborative work is inspired by nature and often includes hand-painted flora & fauna motifs. However, Craig’s current body of work explores texture, materiality, and the creation process.

    SPONSORS

    Image result for Patreon logo  You can help support the show!

    Skutt Logo


    Number 1 brand in America for a reason. Skutt.com


    Georgies Logo


    For all your ceramic needs go to Georgies.com


    Mudtools Products - Stone Leaf Pottery Tools you find indispensable. Mudtools.com

    What is the process of getting supplies out to you? There is no Georgie’s there so what’s it like?

     Britt: You know, anytime we do a show in Seattle after we set up the booth one of us will make a run to a pottery supply store to kind of make up for the fact that shipping can be pretty expensive to get things sent here.

    Does the tourist season make the rest of the year possible?  Those short months in the summer?

     Craig: Not usually. We tend to do shows in Seattle and surrounding cities in the wintertime. And do more things on our website and online to make up for those times.

    What is something Britt, for you, that you can only get on the island and what is something that you cannot get on the island?

    Britt: I guess for me one of the things that I love about living here is just although it is a small island there’s so many different trails that I can take the dog for a walk on year-round. It might be rainy in the winter, but I love that I can drive ten minutes in any direction and have a pretty beautiful trail to take the dog on.

    How about something you can’t get on the island?

    Britt: Let’s see, I guess food can be limited, although there are a lot of great local farms here and in the summer there’s so much fresh produce, it’s great. We are also spoiled having spent time in California where there is fresh produce year-round. Sometimes I notice the produce in the winter can be hard.

    Craig what kind of packing is required to go to show from where you are to a Tacoma show? What is that like?

    Craig: It’s usually about a week out we are getting ready for a show like that. We are getting all of our bins ready to hold all of the wares we are going to take because if you forgot something on the island, there’s no coming back. You can’t just pop back to the house to get something. So it’s a lot of preparation and just making sure we have everything we need before we leave the island.

    Last question. Do you ever get Island fever?

    Craig: No.

    Britt: No, I guess the only thing that comes to mind is just missing the sunshine in the winter. That is the only time I feel like I want to get off the island, maybe mid-January and you haven’t seen the sun in what feels like a year. Other than that it is pretty manageable to be here.

    Book

    Demon Copperhead by Barbara Kingsolver 

    Contact

    livinglargesmall.com

    Instagram: @livinglargesmall


    Source link

  • Best Practices for Growing Your Fandom – Veronica Winters Painting

    Best Practices for Growing Your Fandom – Veronica Winters Painting


    Professionals in the creative sector must adjust to the changing dynamics and prospects of the digital marketplace, where skill in online marketing and sales is becoming crucial. The global online art market was valued at $9.18 billion in 2022, highlighting the significant audience and market potential for digital offerings. If your approach has mainly focused on traditional methods up to this point, like ad placement in art magazines or art contests’ participation, it would be beneficial to delve into the digital domain to greatly increase your exposure and connect with a much wider, varied audience. This transition builds stronger brand, authority, and creates new opportunities for income and creative output.

    Utilizing Social Media to Expand Your Audience

    Social media platforms, like Instagram and TikTok, have revolutionized how artists connect with potential fans. These platforms not only allow artists to showcase their creativity but also to engage with a broader audience through dynamic and interactive video content. However, the immense volume of content uploaded every minute makes standing out a real challenge, especially with constant algorithmic changes. This is where organic growth strategies become invaluable. 

    By focusing on authentic engagement—responding to comments, participating in trends, messaging and thanking people, and creating original content—you can build a loyal following. To further enhance your visibility, it’s important to grow your audience with organic TikTok growth tactics by using targeted hashtags and joining platform-specific challenges to capture the attention of those art fans who are most likely to appreciate your work. Some artists choose to accelerate this process by employing professional services that specialize in organic growth, ensuring that their interactions remain genuine and impactful. Spend some time researching such companies, looking into other creatives who used their services to make your judgment about possible collaboration.

    Establishing a Professional Online Platform

    Building your own website for showcasing your art projects creates a strong, refined presence and establishes a central location for your portfolio. It’s paramount that your website strikes a balance between visual appeal and functional simplicity, enabling visitors to effortlessly browse and complete purchases. 

    You must adapt your site for easy browsing on mobile devices. For example, if you use WordPress, pick a theme that makes automatic adaptation/ resizing of your website on different screens. Look at websites of your favorite artists to see what’s done well and can be borrowed for your site.

    To build authority, use clear, high-quality images, art in interior space, art with collectors and in collections, exhibition reviews, detailed ‘about’ page with highlights of your shows and magazine features, and contact information, like the email you check regularly.

    Fostering Community Interaction With Engaging Content

    Sustained engagement goes beyond routine art posts. Incorporating interactive features like live broadcasts, question-and-answer sessions, and cooperative projects with other creatives can greatly enhance your connection with your community. 

    Such activities show your audience that they are appreciated and give them insight into your creative process, which personalizes their experience and helps build a supportive community around your projects. Update your followers, fans and community about your new creative projects, art, upcoming shows to build the brand and create anticipation about your future initiatives.

    Harnessing Email Marketing to Maintain Audience Connection

    Email marketing remains a vital strategy for keeping in touch with your followers directly. Gathering email addresses through your website, social media or at live events enables you to build a mailing list. This list serves as a channel to distribute news about upcoming releases and special promotions. 

    Sending out regular newsletters helps keep your followers interested and engaged, ensuring they stay updated even if they do not frequent your social media or main site. Tailoring emails to address each recipient by name and writing interesting headlines and newsletters can significantly enhance open rates and strengthen the relationship with your audience. You want to write an email that you wish to read yourself without being spammy. By writing your emails, look for a genuine connection with your audience.

    Applying Analytics to Sharpen Your Audience Engagement Strategies

    Gaining insights into your audience’s preferences and behaviors through analytics is essential for refining your promotional tactics and crafting content. Social media platforms typically offer foundational analytics that reveal high-performing posts, the composition of your audience, and peak activity times. 

    By analyzing these patterns, you can segment your audience and design content that appeals to specific groups, enhancing relevance and engagement. For instance, segment artists who are interested in your teaching skills. Have a different segment for art collectors. This strategic use of data helps in customizing your communications to boost interaction and engagement rates.

    Collaborating with Other Artists and Influencers

    Collaborating with fellow creators and influencers can introduce your projects to a much wider range of audiences and bring new perspectives to your work. Forming alliances with creators who share a portion of your audience yet also reach different groups is beneficial; it presents your projects to individuals who are likely intrigued by your unique style. It should be interesting and relevant to both parties. Establish collaborations with like-minded people where you both can benefit from. Engaging in joint promotional efforts, like combined giveaways or shared events, can extend your influence and attract an even wider array of followers.

    filippo tincolini-spacesman seat-marble, art contexxt miami
    Filippo Tincolini, Spaceman seat, Marble sculpture, photo: V. Winters

    Conclusion

    The digital environment presents unmatched opportunities for those who are prepared to innovate and adopt new methods for displaying their projects. Direct interactions with followers on social media, enhancing your website’s effectiveness, or leveraging data analytics to guide your strategic choices—all these actions open doors to immense potential for those willing to leverage them. As you delve deeper into these digital channels, maintaining consistency and genuine engagement are crucial strategies for success in the constantly changing online world.


    Source link

  • How to Transform Your Art Room with Zones to Simplify Your Life

    How to Transform Your Art Room with Zones to Simplify Your Life


    Managing a busy art room can be overwhelming, especially when juggling multiple student needs, materials, and projects at the same time. One of the most effective ways to bring order to the creative chaos is to set up art zones. Whether you’re working with elementary students or high school artists, designing clear, purposeful zones in your art room will help with classroom management, student independence, and workflow efficiency.

    Let’s explore how art zones in the art room can revolutionize your teaching and create a more organized, engaging space for students to explore their creativity.

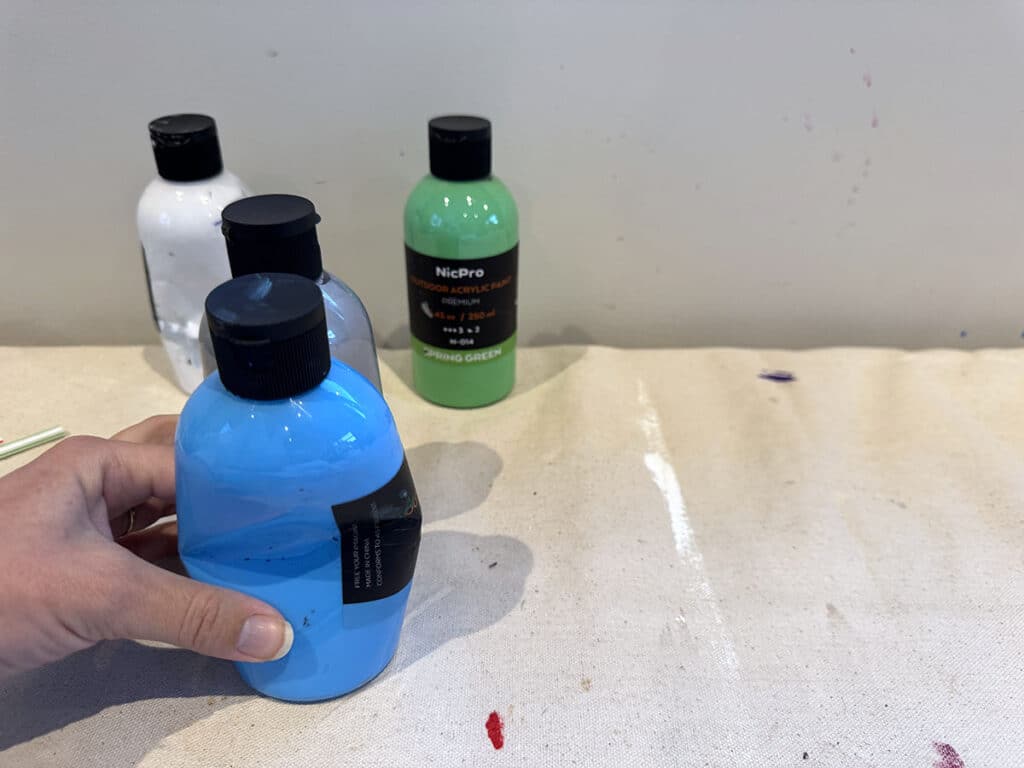
    paint bottles

    What are art zones?

    Art zones are specific areas within your art room that serve a dedicated purpose. Instead of a one-size-fits-all setup, divide your classroom into areas to guide students through different aspects of the creative process. Students will be able to navigate the studio more independently as artists. Plus, it will free you up to provide meaningful instruction instead of constantly directing traffic. 

    Let’s take a look at six art room zones:

    1. Material Zone
      Keep supplies accessible with a Supply Shack, open shelving with labeled bins, “grab and go” caddies for daily essentials, or a checkout system for specialty items.
    2. Creation Zone
      This is your students’ space for making art and is the heart of the art room! Consider flexible seating options, further zones by media, and easy access to reference materials and resources.
    3. Cleanup Zone
      Transform cleanup into the smoothest part of your class routine and boost student ownership. Maintain order with a sink or handwashing area and clearly marked bins for trash, recycling, and reusable scraps. Make tossing trash fun with a basketball hoop!
    4. Artwork Zone
      Have clear systems and locations to store completed and in-progress works. Not only does this keep tracking student work more efficient and organized, but it protects work from getting damaged or lost.
    5. Reflection Zone
      Encourage thoughtful artmaking with a spot to slow down. Include sketchbooks and artist statement prompts. For a twist on the “reflection” theme, include mirrors for self-portrait studies!
    6. Early Finishers Zone
      Include extension activities for both elementary and secondary, like drawing prompts or a rotating collection of art books and magazines.

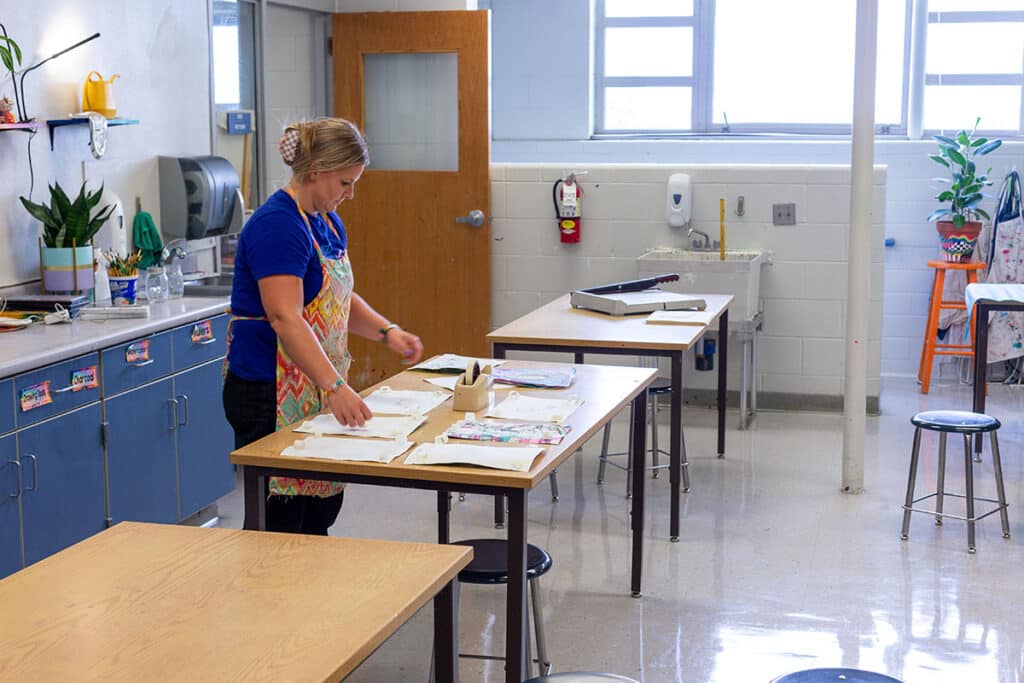
    art teacher in classroom

    How do I set up effective art zones?

    Creating art zones doesn’t have to be a complete classroom overhaul. Start small and redesign one key area that needs improvement. As you start implementing your zone, adjust based on student needs. You can always add a new zone each year!

    Ask yourself these questions to determine what zone you should focus on first:

    • What questions do students ask me the most?
    • What routine is consistently not hitting home for most students?
    • Where and when in my classroom is there a bottleneck of traffic?

    Then, consider these questions to navigate design and setup:

    • What big furniture items can I move/swap and which do I need to work with?
    • How can I ensure each component is easy to identify and clearly labeled?
    • What is the best way to visually separate this zone from others?

    Use these questions to guide how you teach and reinforce zone expectations:

    • What’s the most engaging way to tour the zone with students?
    • How can I model how to move through and use the zone as I teach?
    • What is specific encouragement I can give to reinforce correct zone usage?
    • What signage or anchor charts can I add for helpful reminders?
    • What are classroom jobs I can assign to maintain the zone?

    paintbrushes and cups in the sink

    What are some common challenges I may face setting up and implementing art zones?

    Even the best systems take time to perfect! That said, there are a few tips to avoid common art zone pitfalls. For example, you’ll have students that ignore the zones and ask for help anyway. If this is a widespread class issue, pause and regroup. Reteach the zone’s purpose and how to use it with the entire class. Model it and have students practice it together, much like a fire drill! If this is specific to one student, have a brief discussion to determine where the disconnect may be. 

    Another potential struggle may be that your zone gets messy—particularly the Cleanup Zone. Get ahead of the clutter and delegate cleanup jobs to foster leadership. Leave enough time at the end of class to clean and double-check before the bell rings. Use a fun animated timer or cleanup song to keep the energy up!

    Lastly, you may notice that your Early Finishers Zone is a distraction. Students may rush through their work to go play or they’re not engaged with the options. Ensure you keep artwork expectations high with clear rubrics. Provide structured choices and rotate the activities so there’s always a fresh selection.

    Discover more ways to make the most of your classroom space with the Rethinking Art Room Space Pack in PRO Learning. Watch these quick videos to find out why classroom space is so important and how to create and alter your existing space on a budget.

    You probably already have designated areas in your art room. Level up your classroom management with intentional zones to increase engagement and efficiency. When you spend less time on cleanup, missing artwork, or locating supplies, students will have more energy to focus on creating, communicating, and camaraderie! With clear zones, they’ll also gain confidence, independence, and a greater sense of responsibility.

    What art zone will you implement in your studio first?

    To chat about art room zones with other art teachers, join us in The Art of Ed Community!

    Magazine articles and podcasts are opinions of professional education contributors and do not necessarily represent the position of the Art of Education University (AOEU) or its academic offerings. Contributors use terms in the way they are most often talked about in the scope of their educational experiences.


    Source link

  • Happy Leyendecker Baby New Year 2025! – Lines and Colors

    Happy Leyendecker Baby New Year 2025! – Lines and Colors


    Happy Leyendecker Baby New Year 2025!
    Happy Leyendecker Baby New Year 2025!

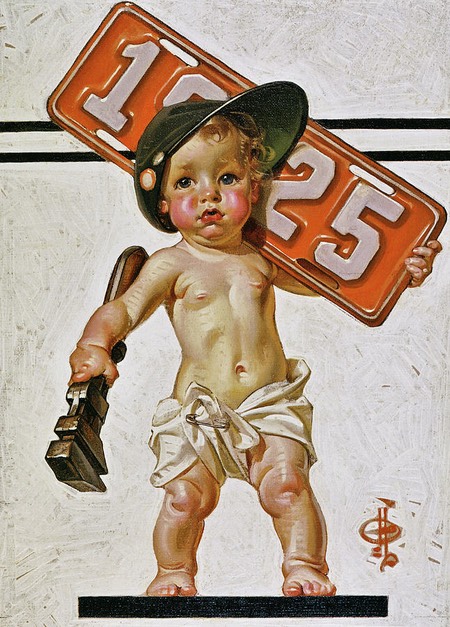
    As I’ve done every New Year’s Eve since 2005, I’ll wish Lines and Colors readers a Happy New Year with one of J. C. Leyendecer’s New Year’s covers for the Saturday Evening Post, in this case marking the arrival of 1925.
    For more Leyendecker to while away your New Year’s day, check the list of Lines and Colors J C. Leyendecker posts at the end of this article.
    I wish you all a new year rich with artistic exploration and inspiration!


    Source link

  • Toss or Keep? 8 Simple Guiding Questions to Declutter Art Supplies

    Toss or Keep? 8 Simple Guiding Questions to Declutter Art Supplies


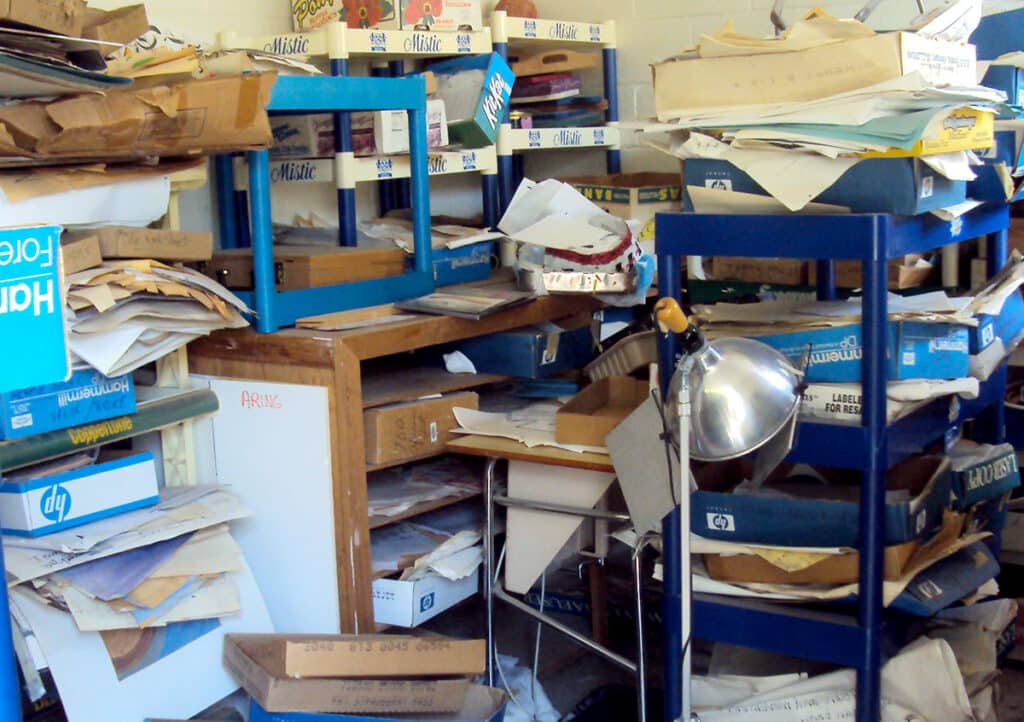
    Many of us inherited someone else’s art room… and someone else’s treasures. Piles of old artworks, interesting collections of still life objects, and boxes of archaic slides fill the shelves. You could definitely use the extra space but are you allowed to toss these items? Perhaps you’re the one who carefully curated the piles of art supplies in your art room. You blinked and now your space is overflowing. You need to reprioritize but would like an extra voice giving you permission to undo all of your efforts.

    Let’s walk through eight simple guiding questions to determine what art supplies you can toss and what you should keep in your art closet.

    Are you having trouble finding the motivation to tackle your messy art room? If you’re not sure how you’re going to make it to the end of these eight questions, pause and go binge-watch Art Room Makeover on YouTube. This short series will inspire you to channel your inner declutterer with a super satisfying and relatable art room cleanout and makeover.

    https://www.youtube.com/watch?v=YgjyHYeVioE

    Isn’t tossing wasteful?

    Art teacher budgets are often very tight. The idea of throwing something away that you can use to make great art and stretch your budget may make you cringe! Don’t worry—there are several other ways to pass on art supplies without throwing them in the dumpster.

    Here are five ways to be generous with your surplus:

    1. Donate to another art teacher in your building or district.
    2. Create a bin of “free” art supplies for students to take home.
    3. Gift to another colleague in your building.
    4. Drop off at your local arts council or community studio space.
    5. Post in your local buy-nothing group.

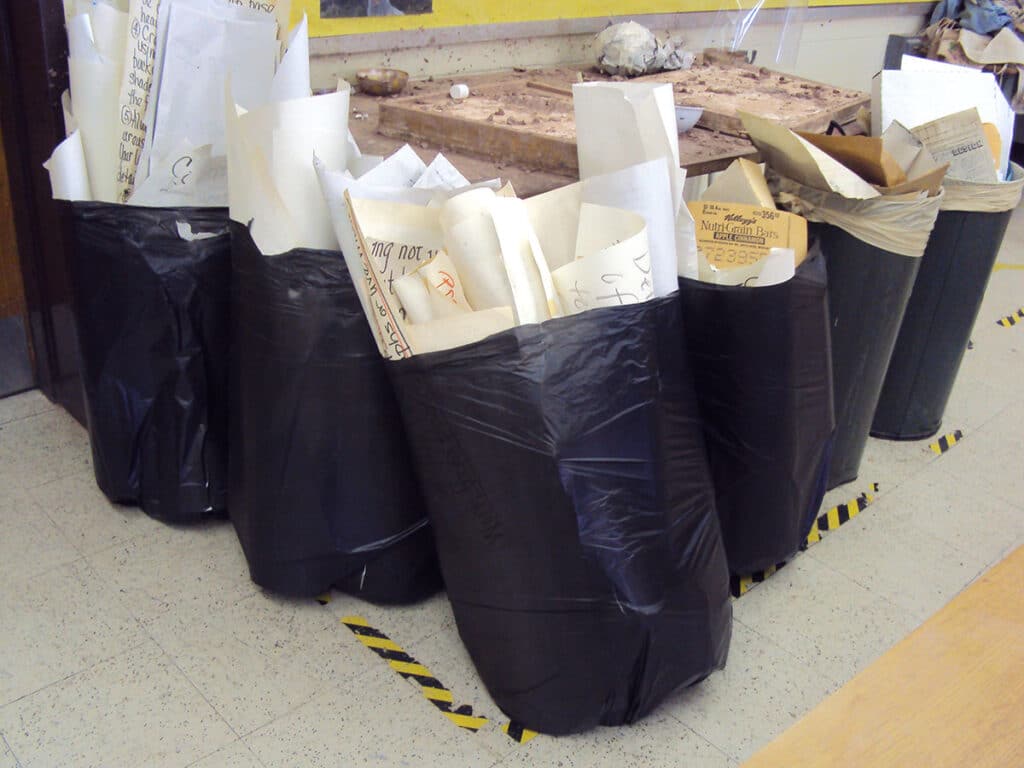
    trash bags of artwork and paper

    1. Will you use it this school year?

    We often collect items because “one day we’ll use them.” Before you know it, you have an art closet of curiosities overflowing with weird things. Will you use the item this school year and does it fit in with the media, techniques, and concepts in your curriculum and scope and sequence? If not, it’s time to toss it or rehome it.

    For example, you have a pile of large butcher paper that students painted on. You don’t want to toss it because it’s a lot of paper. If you know you have a paper mache unit next quarter, keep it to recover the tables. If you need a few extra messy mats, cut them up into individual sizes and laminate them.

    On the other hand, if you find garbage bags of plastic drink bottles, and you know you won’t have time to clean them and do an upcycled sculpture project with them anytime soon, drop them in the recycle bin! If, one day, you decide to do an upcycled sculpture project, do another schoolwide collection and you’ll have a fresh stash of bottles in no time.

    https://www.youtube.com/watch?v=7M70J1ae2Nk

    2. Is it dirty?

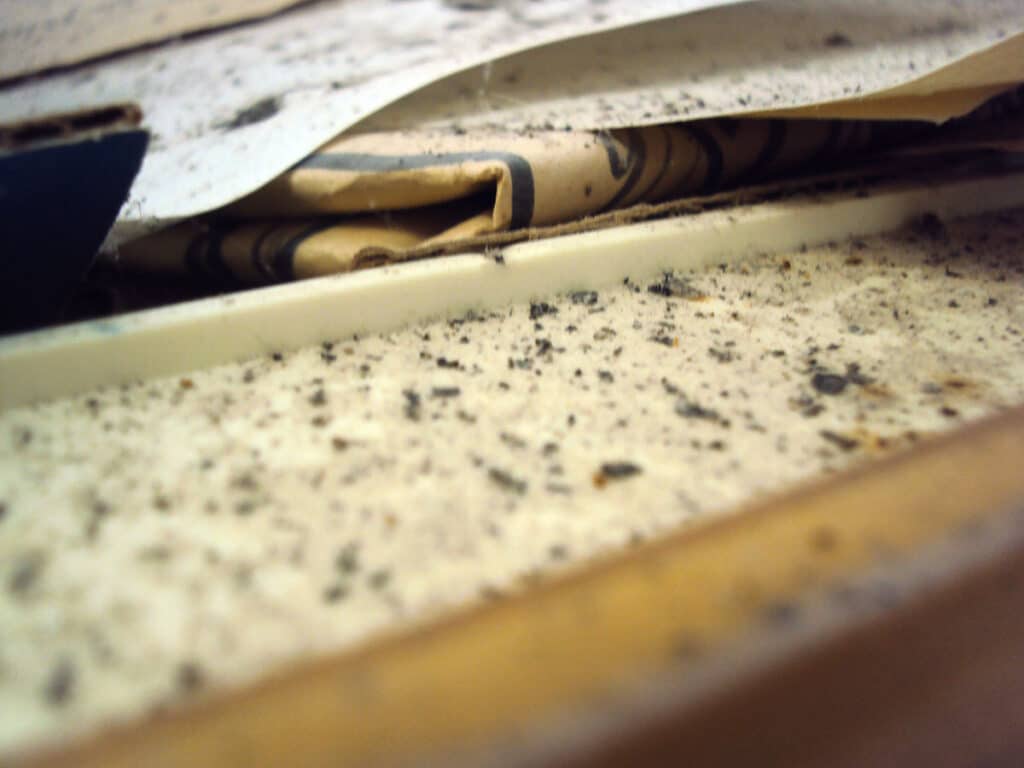
    If you can clean the item fairly quickly and easily, go for it! Say you found a bin of watercolor palettes where each cake is smeared with black paint. Grab a sponge and wipe them off; in a few minutes, they’ll look brand new! If the item has dirt, mold, bugs, or mouse feces—throw it away. The item is no longer sanitary and safe and is not worth salvaging.

    piles of paper with dirt

    3. Is it district or school property?

    Maybe you uncovered some archaic equipment in your closet, like an overhead projector or slide carousel. You have a stack of broken stools or textbooks from the 1970s. These may be district or school property. Check with your department chair, art supervisor, or school administrator to discover the proper channels and procedures for removal.

    4. Is it hazardous?

    Some art supplies or tools are no longer safe or recommended in schools. For example, you may unearth a set of oil paints and linseed oil or you may dig out a box of old-school super sharp metal compasses. Talk to your maintenance staff to dispose of these items properly or donate them to your local arts council for professional artists to use.

    5. Can you digitize it?

    Do you have drawers of hand-drawn anchor charts, old student artworks, or art history reproduction posters? What about filing cabinets chock-full of handwritten “dittos” or lesson plans generated on a typewriter? Determine if the content is still relevant. If you can use the artworks as exemplars for your projects, photograph them, and organize them digitally. Share those folders with fellow art teachers for them to use too! Sometimes, you find activity handouts that are gold—they just need to be digitally updated as well.

    piles of artwork and plastic shelves

    6. When was the last time you used it?

    Maybe, the items you’re uncovering are things you’ve collected. Think back to the last time you touched it and used it. Was it recently? How often do you use it? Let’s say you have a giant box of pinecones for students to draw each fall. Instead, take your students outside for 10 minutes to collect their own still life items from nature. When you’re done with the unit, toss the items back out into the woods. Reuse your valuable closet space to store completed relief sculptures for your end-of-year art show.

    7. Is it still functional?

    Broken items tend to creep their way back into our storage spaces because “one day we’ll fix them.” Let’s be real—if you were going to fix them, you would have fixed them! Does the item still serve its intended purpose? Does the tablet turn on? Do you still have the power plug to the printer? Do you have all of the pieces for the loom? If you don’t have the time or funds to fix the item before the end of the quarter, give yourself permission to move on.

    However, you can save some items with minimal effort and money! Clay is expensive and it’s usually worth it to rehydrate a block of dried clay. You can also save really nice paintbrushes by soaking them in a solution to remove dried acrylic paint.

    https://www.youtube.com/watch?v=bCZdZ0simOs

    8. Do you have duplicates?

    Sometimes we get it into our minds that we need to have a whole class set of each item or supply. You can end up with a huge hoard of tools that you don’t regularly use! For instance, you may have 30-40 brayers taking up two bins in your closet. However, you may only use 10 because you usually do printmaking in small groups or stations. Think about how you teach and the flow of your studio and consider gifting spares to another art teacher. You can always borrow them back if needed!

    Decluttering your art room isn’t just about tossing old art supplies—it’s about making an inspiring space that fuels creativity and efficiency. By applying these eight guiding questions, you’re reclaiming control over your classroom. Every decision, from determining whether an item fits into your current curriculum, to deciding if it’s worth repurposing or donating, brings you one step closer to a space that truly works for you and brings you freedom.

    What guiding questions would you add to this list?

    Are you an art teacher who tosses or keeps?

    To chat about decluttering with other art teachers, join us in The Art of Ed Community!

    Magazine articles and podcasts are opinions of professional education contributors and do not necessarily represent the position of the Art of Education University (AOEU) or its academic offerings. Contributors use terms in the way they are most often talked about in the scope of their educational experiences.


    Source link

  • 7 strange myths of Mycenae that changed ancient Greece – Veronica Winters Painting


    From Perseus to Trojan War: 7 strange myths of Mycenae that changed ancient Greece


    Mycenae is the ancient archeological site near Mykines in Argolis, Greece. It’s a fascinating place to visit when you learn about its connection to the ancient Greek history. 16th century BC to be exact. It’s a place of one of the oldest known cultures in the world- the Mycenaeans. They wrote in Linear B text, the cyclopes built walls and people worshiped the Earth goddess. Perseus founded Mycenae and Agamemnon, king of Mycenae, set out against Troy in the Trojan War. Go on a journey to discover myths and art of ancient Greece.

    Video on YouTube: https://youtu.be/V1iCUh91qD0

    To read and see pictures about Mycenae, Greece: https://veronicasart.com/from-perseus-to-trojan-war-7-mind-blowing-myths-about-mycenae-that-changed-ancient-greece/

    Subscribe & rate this podcast on Spotify and Apple | Show your support for the podcast: here | Host: Veronica Winters, MFA | veronicasart.com


    Source link

  • Philip de Laszlo – Lines and Colors

    Philip de Laszlo – Lines and Colors


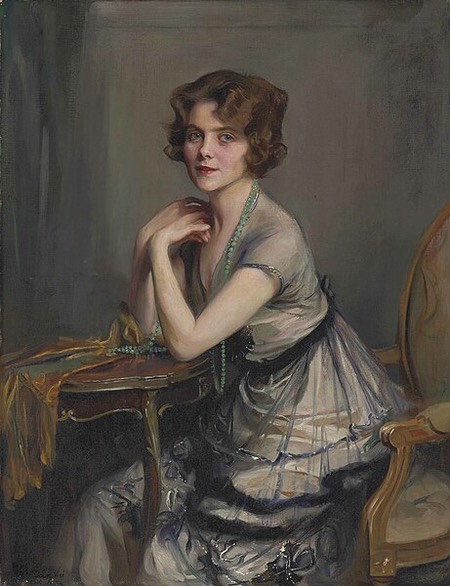
    Portrait paintings by Philip de Laszlo
    Portrait paintings by Philip de Laszlo

    Hungarian born painter Philip de László, who was active in the late 19th and early 20th centuries, spent much of his life and career in the UK, where he was noted for his portraits of royalty and the wealthy.

    The de Lazlo Archive Trust website features information about the artist, as well as a catalogue raisonné of his work.


    Source link