*Written in 2018, Updated
How to frame art on paper & canvas on a budget
In this article I’d like to share the basics of framing art on paper and how you can do it yourself inexpensively. Professional framing is your best option because it takes quite a skill to frame art on paper well. It also involves some understanding of color and color temperature to pick the right frame and mat that add beauty to the artwork and not subtract from it. Professional framing is expensive, and if you have to mount an entire solo show you know how draining that is financially, especially if you just begin showing your drawings in a non-commercial space. If you are not an artist, but you have just purchased an original drawing and want to frame it yourself, you’ll find your answers in this article below.
When I began drawing, I knew nothing about framing and I found it frustrating to frame a lot of art for a show. Even framing one piece seemed too difficult because I didn’t know what to look for in frames, why they differed in pricing, and what was best for my budget. And while I learned the ropes that I’m sharing in the article below, I find that every art collector has his/her taste and unique style, and while the frame must match the art, not the house, the interior design still plays a role in the collector’s mind. That’s the reason why I prefer selling art without the frame. However, a good frame dresses up a painting big time. It gives the art a finished appearance, enriching the artwork visually. So the ideal situation is to frame the art with a beautiful wood frame that complements the original painting in style and color.

Watch on YouTube:
How to frame art on paper
There are two types of framing choices you have to frame art on paper or canvas.
Art on paper must have a mat, plexiglass, backing and frame. Art on canvas/ panel/ wood needs a frame only.
Framing supplies
Every drawing/print/photo should have:
- Acid-free mat
- Acid-free white backing (mounting board)
- Non-glare glass or acrylic plexi-glass (plexi-glass comes in different formats)
- Wood or metal frame
- acid-free tape to attach the drawing to the backing (in the corners) + tape the mat and backing together
Mats: white vs. color
The majority of framed work on paper that includes photography has a white mat and a simple frame around it. If you go to a museum, you’ll see plenty of examples there. While you can pick a frame to your taste, playing with the styles and colors, the color of the mat should be reserved. And if you are not sure about the color, stick to a white or off-white mat.
A common mistake is to frame drawings with a black mat. While it may work for a specific, very dark artwork, most of the time it doesn't. When I'm not sure about the mat's color, I take my drawing to Michael's and start placing various, pre-cut mats over the drawing to see what color works best for my artwork.
If you are not sure about color and it’s your first time framing art, always pick an off-white mat as opposed to a color one because it won’t overpower your drawing or print. If you still want to play with color, consider framing art with a double mat. White or off-white never subtracts from your drawing, while color mats may overpower your artwork visually. I often see drawings framed with black mats, and most of them kill art. You end up looking at the mat, not the artwork. White mats come in different shades of white, and you need to pay attention to their color temperature.
Either warm white or cool white is fine as long as you match this color temperature with the color temperature of white in your drawing.

A Single or a double mat?

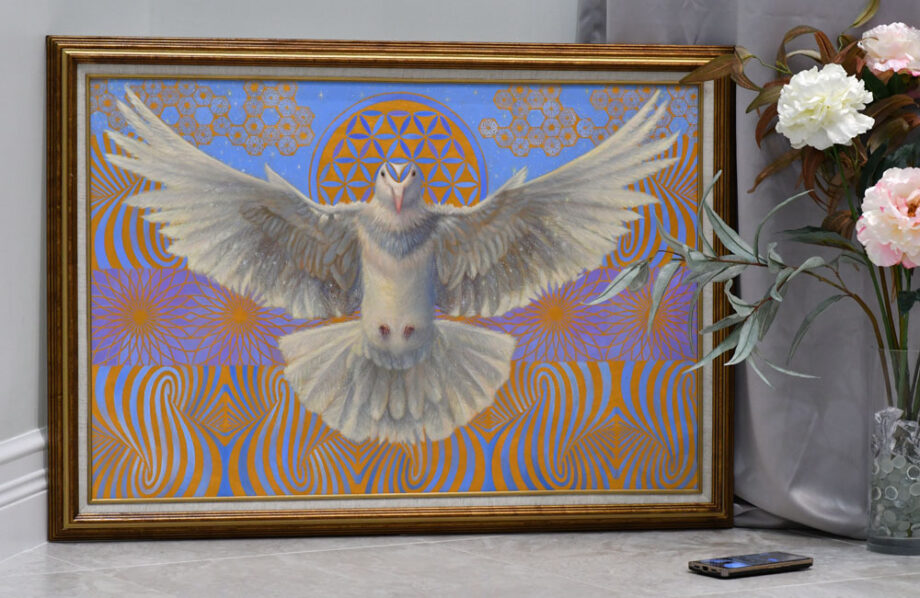
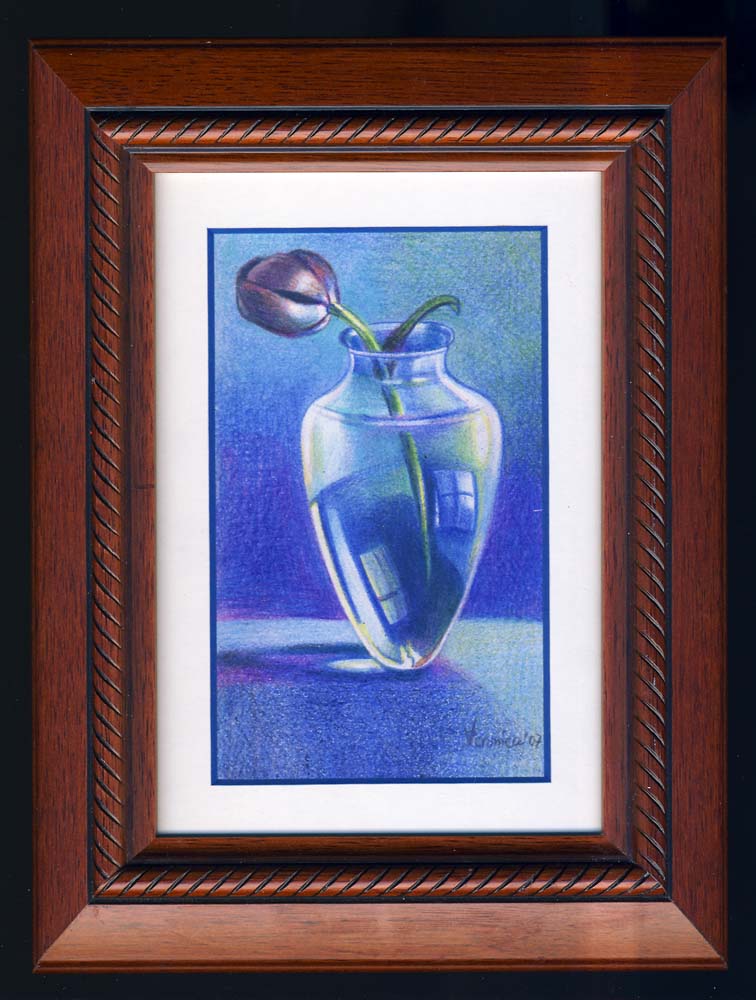
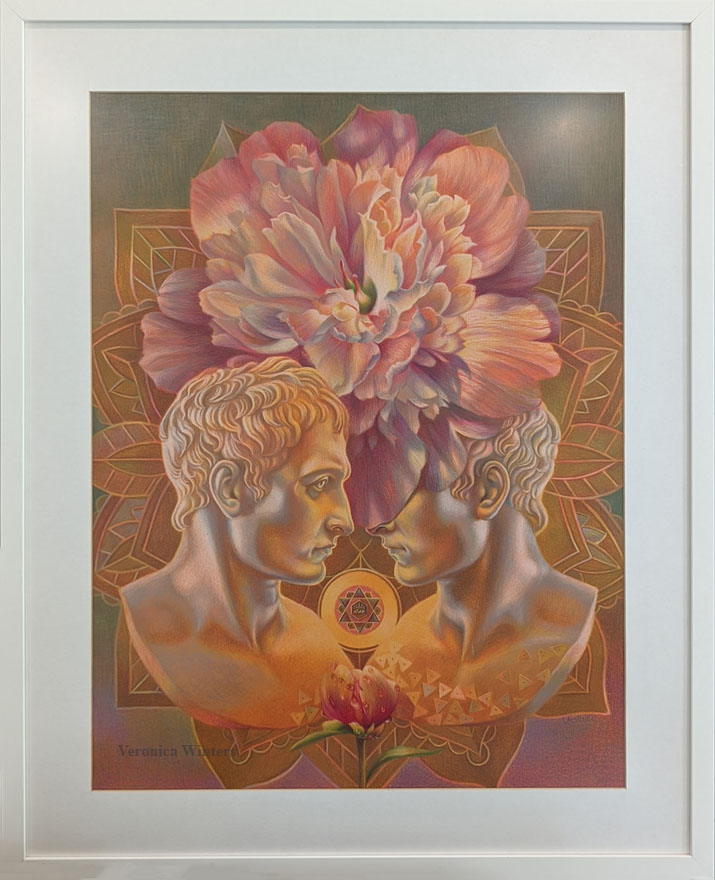
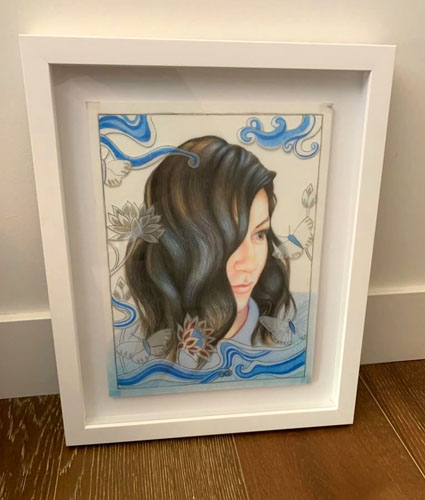
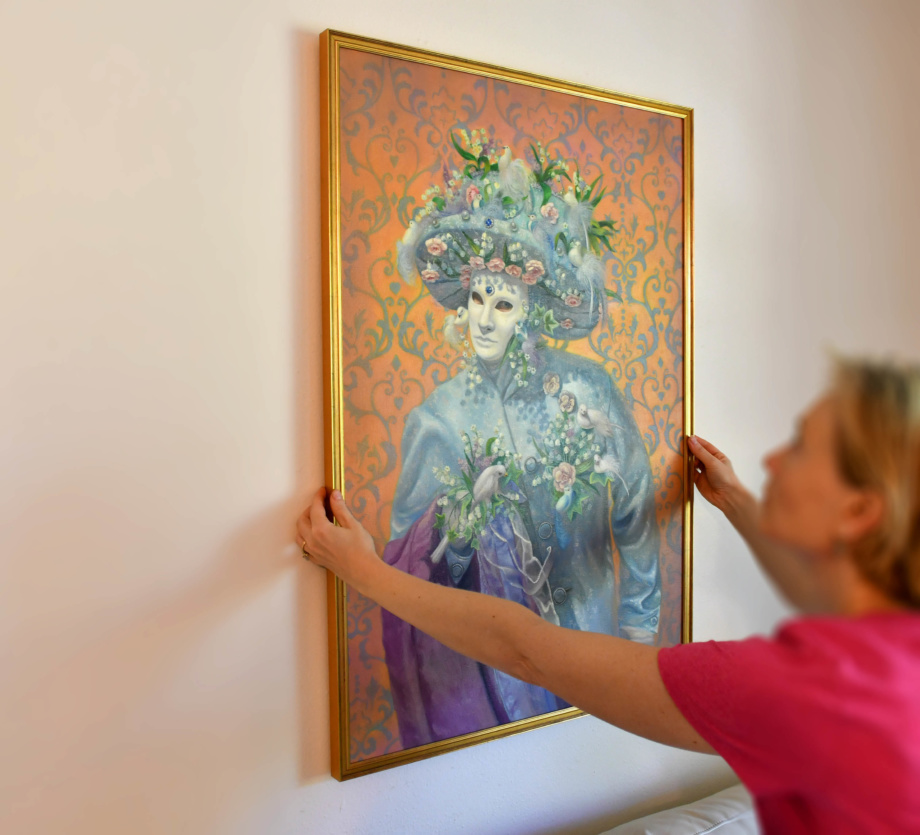
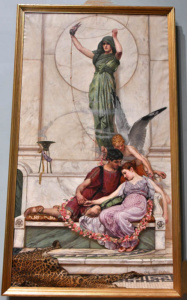
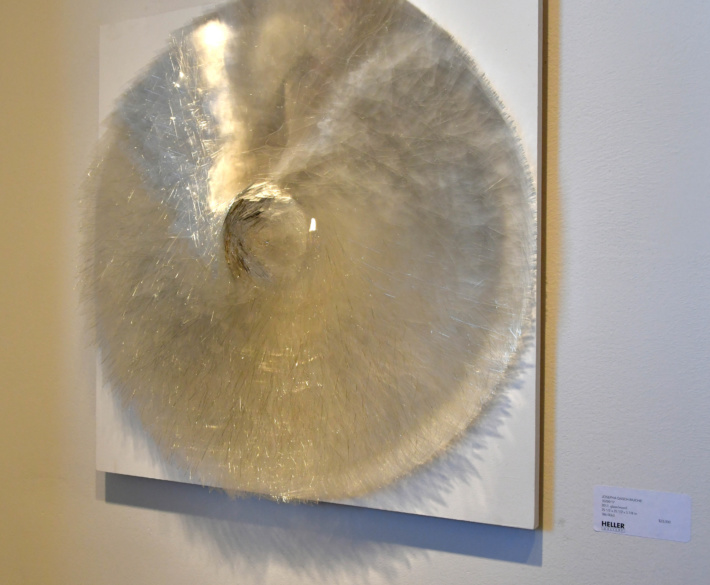
This colored pencil drawing has a double mat. Gold is the inner color and light grey is the outer color. This light grey mat mimics the colors seen in the glass. Gold metal frame and regular plexiglass complete budget framing. This drawing would look much better if it’s framed with a wide, real wood golden frame having the same mat.
If you want to do a double mat, have a color mat as your inner layer and the off-white mat as the outer layer. So you have a quarter inch color stripe around the artwork but the overall color remains neutral or off-white. The hue of your color mat should pick up on one of the colors present in the drawing. This is where professional framers are good at. They have the talent to pick the right colors for your inner and outer mats and match that with a beautiful frame of the right hue and style.
Prints can be framed with frames without a mat to have a contemporary feel.
Tip:
Technically, any mat creates a barrier between your art and glass. Beware that photographs stick to glass eventually if they don't have that space between the glass and the photograph. If you decide to stick a picture into a ready-made frame without the mat, add corners that would maintain necessary space between the photo and glass.
Standard vs. custom cut mat

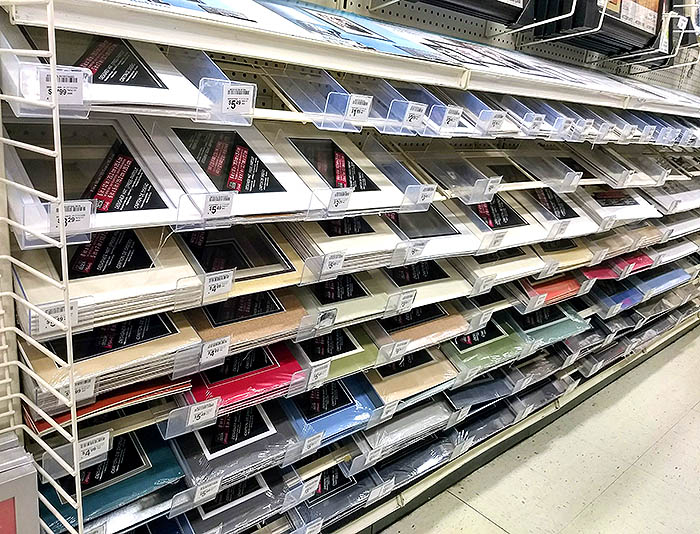
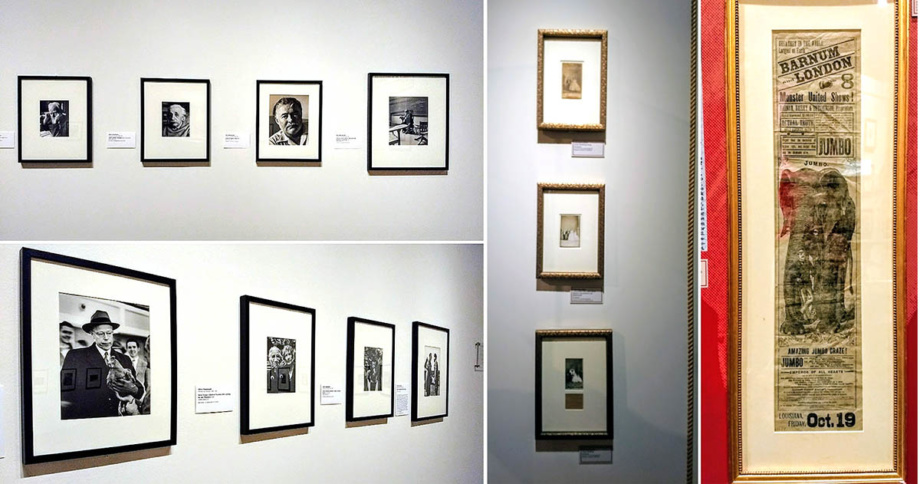
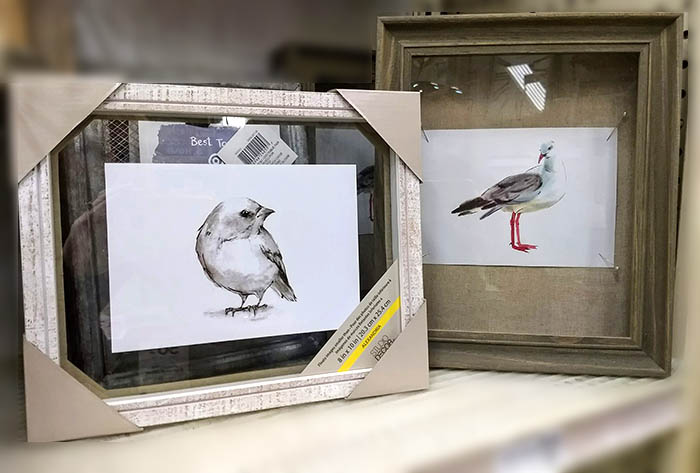
Standard mat has a 3-inch width on all sides of the drawing. It gives your drawing necessary space between the mat and the frame. This 3″ distance can be altered, however. A lot of times expensive artworks have mats with a much wider width that add richness to the art. Sometimes you see framed photographs that have mats with varied widths (right image) that allow for placing prints and photography into standard frames (minimizing costs of custom framing).
Backing & Tape
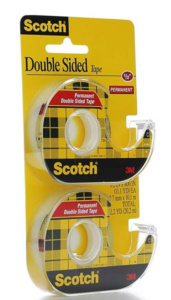
All materials must be acid-free, which include backing (mounting board/foam board/foam backing) and a double-sided tape. If it’s not the case, your drawing will yellow over time. The tape holds it all together but it also yellows the surfaces if it’s not acid-free.
Beware that the ready-made frames you find in craft stores and Walmart don’t sell frames with necessary acid-free backings. Therefore, they are not suitable for professional framing and your original art or print will yellow over time. It yellows a lot faster than you think!!
Mat Cutters

You are lucky if your drawing is completed on standard-size paper and you can buy all the supplies at any craft store to do the assembly. But what if your drawing has different proportions and is far from standard mat openings? Most of the time you have no choice but to go to a framer, so he can cut the right mat for you. However, if you do a lot of drawing and plan on selling your work, it’s a good investment to buy a professional mat cutter and learn how to cut mats yourself.
Mat cutters give the greatest flexibility possible in mat cutting. You can cut mats to any size. You can also cut it to fit the overall dimensions to a standard frame, making a nonstandard opening. Logan mat cutters are not cheap, but they save you lots of money in the long run. You can buy large sheets of museum board in any color and cut them to size. It takes practice to learn how to measure and to cut mats, especially the mat openings, which have a beveled edge as opposed to a regular cut. Correct measuring and cutting of mat boards is a skill that demands practice and patience.
The quality of a mat is determined not only by its thickness, but also by the cleanness of the beveled corners. If a blade is not new or cutting is sloppy, the inner corner edges look uneven. I think it’s best to learn the basics of mat cutting at a framer’s shop, or perhaps to find a detailed video of the process shown online. I used to cut mats myself using the Logan mat cutter, and I found this process quite frustrating at times because you’ve got to be perfect every time doing it. After doing it myself for several years, I prefer going to a framer or buying pre-cut mats online.
Glass or acrylic plexi-glass?
You can frame drawings with regular glass but consider the overall size of your piece. Glass is very heavy. It can shatter cutting into art. It’s also very reflective! So it depends where you are going to hang your artwork to minimize the reflections.
Plexiglass is light and durable. Many galleries require framing with plexiglass as opposed to glass to minimize possible damage during the transportation to a show. However, regular plexiglass scratches and becomes useless once even a tiny scratch is there. The cost of plexi often exceeds the price tag of glass. Another thing to consider is reflections.
Pick a non-glare glass vs. regular glass. So you can enjoy looking at art from any corner of the room. Or consider framing art with a non-glare UV-protective plexiglass. Tru Vue Optium Plexiglass is the best museum-quality conservation plexiglass available today at almost any framing store online, but beware that it's really expensive and can easily cost you more than the frame itself.


Metal or wood frames? Consider the lifespan of your display
There are three types of frames. Plastic, metal and wood. The choice is largely determined by your budget, but I strongly suggest not to give in to buying plastic frames or some craft-store frames that may look decent at first glance. Such frames don’t hold up well: they scratch, break and fall apart too quickly. They also don’t provide adequate support for big art in a hot and humid climate, bending and losing its original shape quickly. The frame’s surface may look like wood but it’s paper wrapped around the plywood. It comes off and scratches easily. The hanging wire and hardware are not there to support artwork larger than 11×14″. I always regret buying plastic frames because one scratch prompts eventual replacement.

Metal Sectional Frames
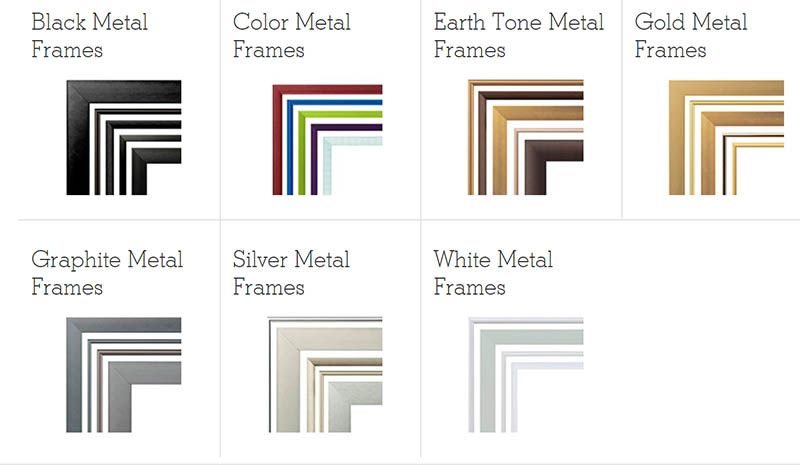
Metal sectional frames are a great alternative to plastic frames if you work on a budget. They last for years and don’t scratch that easily and don’t fall apart. Sectional frames come in a variety of colors and styles, assemble easily and hold up their shape for a very long time. The only drawback is that most frames have a small width and therefore provide economy framing, unlike the real wood frames. At the same time, metal sectional frames can be great for some contemporary art and photography. Many have canvas depth to frame canvas art as well.
In my experience, if the artwork is larger than 16x20" acrylic plexi-glass or glass may not hold up well within the metal sectional frame if the backing is not thick enough. Plexiglass tends to pop out of the frame in large drawings and large glass sheets are also too heavy for these frames.
Wood frames
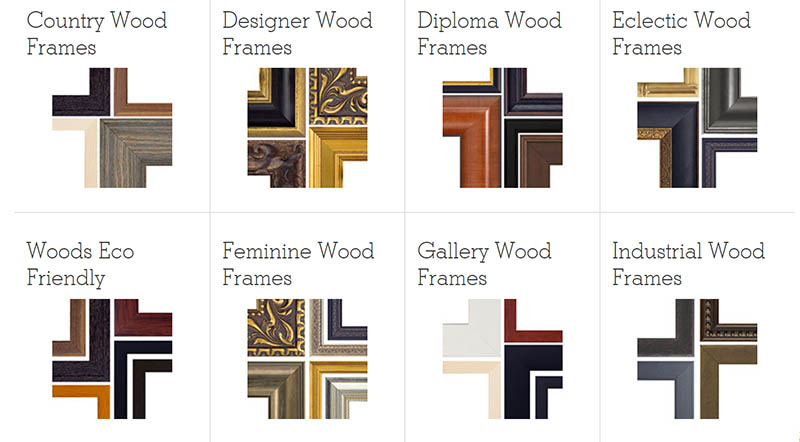
Real wood frames come in a variety of styles. They are the most beautiful, durable and stylish. Wood frames have varied width and finish and the professional framer can really make it or break it picking the right frame for your piece. Usually the wider the frame, the richer your artwork would look in it. However, the style of the frame is more important than its width because it needs to complement your drawing. Well framed art always looks amazingly beautiful.
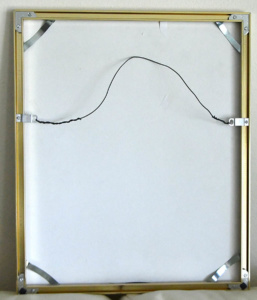
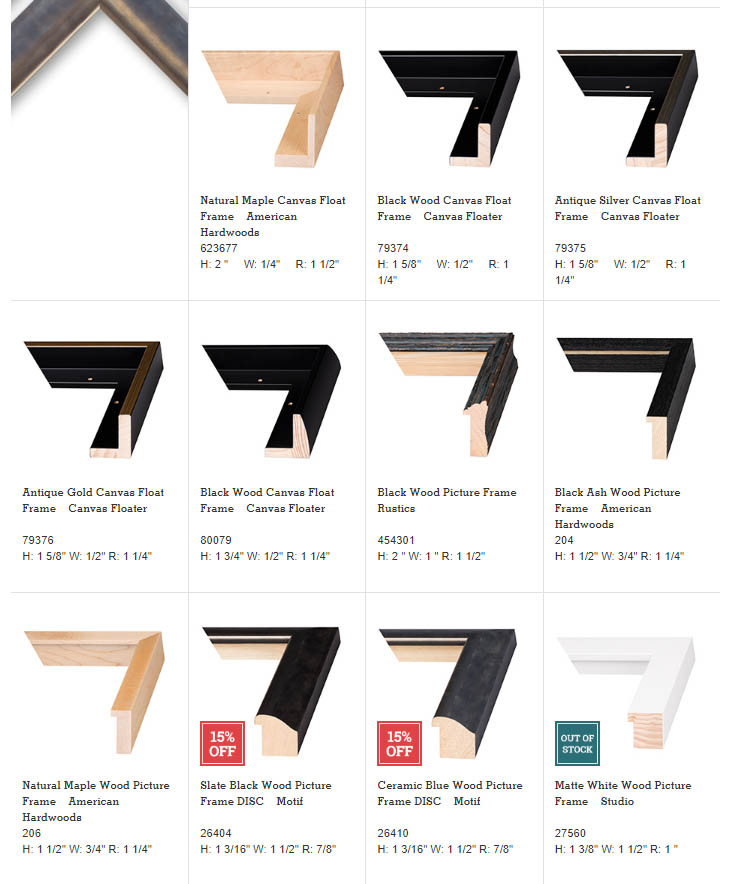
I buy real wood sectional frames that are cut to my dimensions and then assemble them into finished frames. It’s not difficult, but requires some patience and care to do it right. I buy all the supplies in varied sizes at American Frame (frame samples of which you see in the images above). Frame destination is another company located in Texas that cuts custom frames.
If the frame is standard size (8×10″, 16×20″, 18×24″ etc), you can buy these frames at any craft store. However, the variety and quality of ready-made frames is not great in comparison to those found online.
Shadow boxes and canvas floater frames
Sometimes canvas floater frames or shadow boxes may work better than traditional framing. Glass suspends the artwork in the middle and creates open space between the art and the frame.
Framing companies where you can customize any frame, mat, online:
American frame: https://www.americanframe.com/
Top quality, great customer service, limited free samples of plexi and frames.
Custom picture frames: https://www.custompictureframes.com/
Very good quality, great customer service
Frame destination: https://www.framedestination.com/
Sell acid-free backing and other framing supplies both in bulk and in custom order.
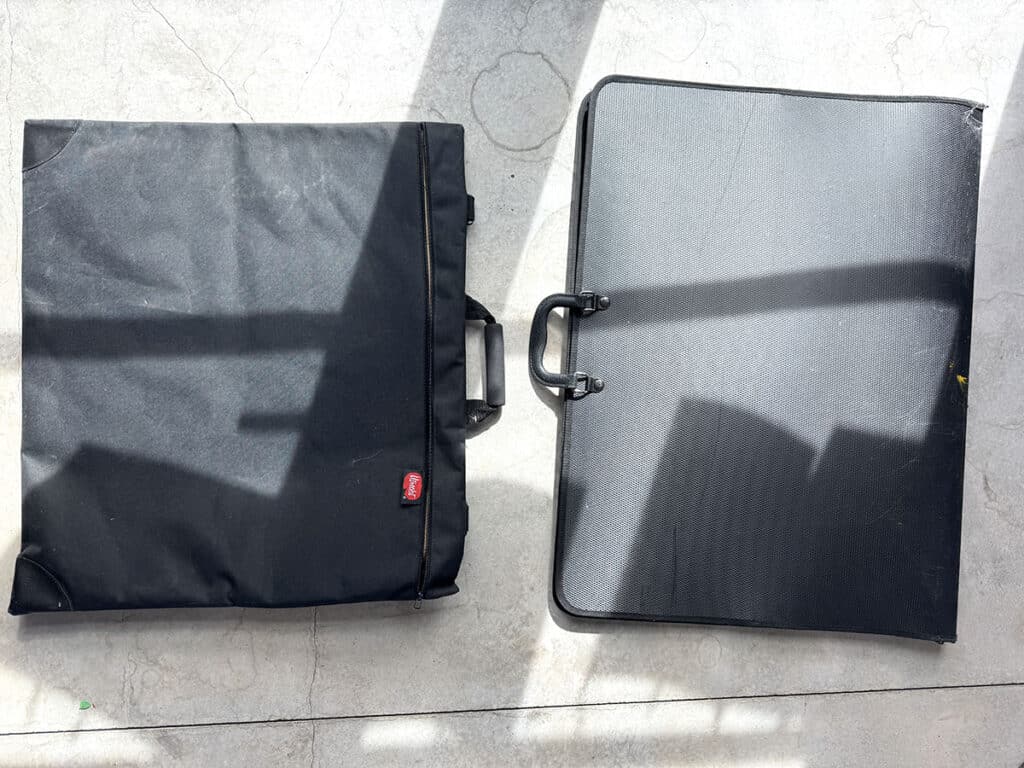
Reusable art bags for shipping art: https://artcadis.com/
Reusable art bags for shipping art: https://www.framedestination.com/photo-storage/gallery-pouch.html
Other packaging supplies in great variety and low price: https://www.uline.com/
The best museum-quality plexiglass: https://tru-vue.com/solution/optium-museum-acrylic/
Everything framing: https://www.clearbags.com/
Check out visionary art for sale
Here is a basic guide on how to frame art on canvas. Framing of oil/acrylic paintings is much easier because there are fewer moving parts involved. You’ve got to pick the right frame and assemble it, if it’s not a ready-made frame. Art on canvas, panel or wood doesn’t need glass for display. Oil and acrylic paintings look best without it. Also, remember that these paintings would need canvas-depth frames unless it’s a panel. Usually panels are thin, unless they are cradled.
Types of frames for paintings
Once again you have three choices: plastic, metal, and real wood frames. Go for the solid wood picture frames because they last the longest, look beautiful, and you frame it once. Metal sectional frames are a good choice for beginner artists, some contemporary paintings, especially abstract art.
The style of the frame should add to your painting. Some paintings look beautiful in golden baroque frames, others in minimalist black frames. Canvas float frames give an interesting effect to some contemporary pieces (see below).
I find a very big difference in quality of wood sold at different framing stores online. If you see rather a cheap wood frames it means that they use soft, cheap wood that scratches and bumps corners very easily! I ended up re-framing such wood frames. It's better to frame art with metal sectional frames in such a case. Poplar wood and pine wood are very soft. Oak is very heavy and solid wood. Always ask a customer service rep what wood they use for framing!
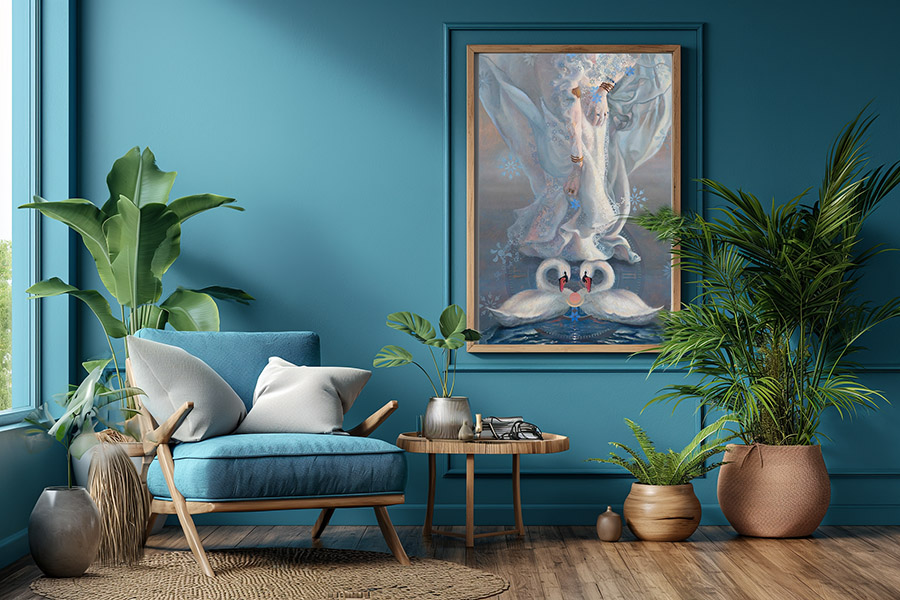
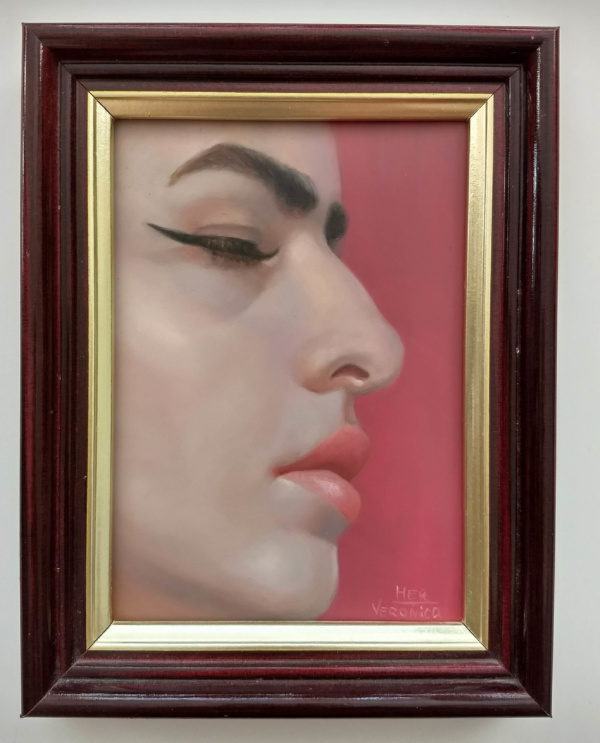
Most people consider their interior space and style, picking frames. While it should harmonize with the rest of the space, always consider how a framed piece looks on its own. Pick the frame for the painting, not your sofa. If the artwork has some warm, golden tones, pick a golden frame. If the piece has silvery, blue-grey tones, a silver frame would be good.

If the painting is standard size, you can find a ready-made frame in a craft store or online, but remember that canvases are between 3/4 and 1″ deep, and not every generic frame would work for framing of stretched canvas.
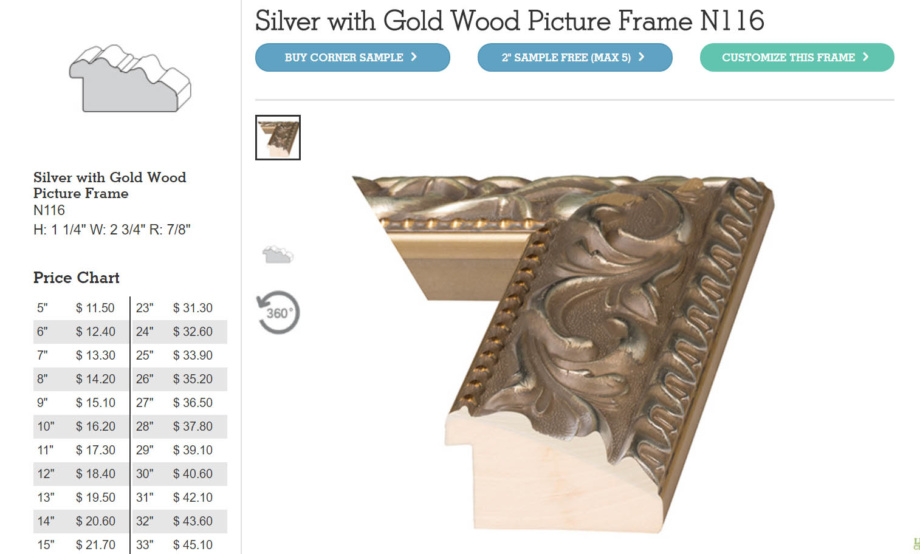
Canvas-depth frame
Image: American Frame
In this image taken from the AmericanFrame, you can see that the frames have three dimensions: H, height, W, width, and R, rabbet. Rabbet should be at least 1″ if you have a painting on canvas. Some canvases require even wider rabbet height.
Canvas floater frames
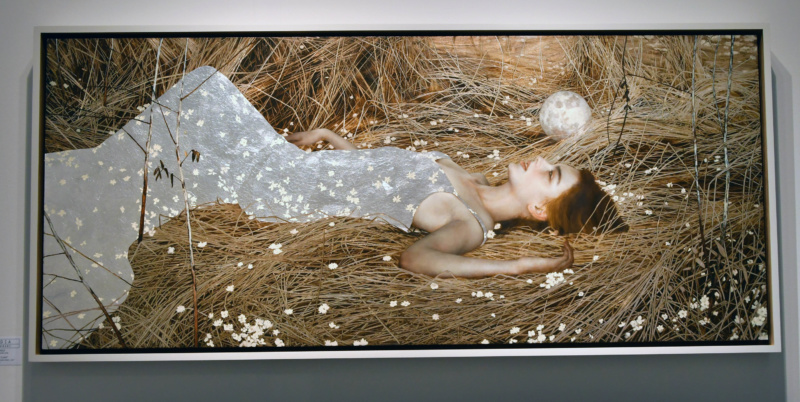
Canvas floater frames “suspend” your painting inside the frame without the edge touching it. Most picture frames cover the edge of the artwork. Personal aesthetic plays a big part in picking the frame. In this image, you see a white floater frame that extends the whiteness of the canvas. The entire canvas floats within the frame.

White floater frame gives minimal appearance to the art that allows for a complete focus on the painting, not the frame. | Art by van Roos at King Woman art show in New York, 2017

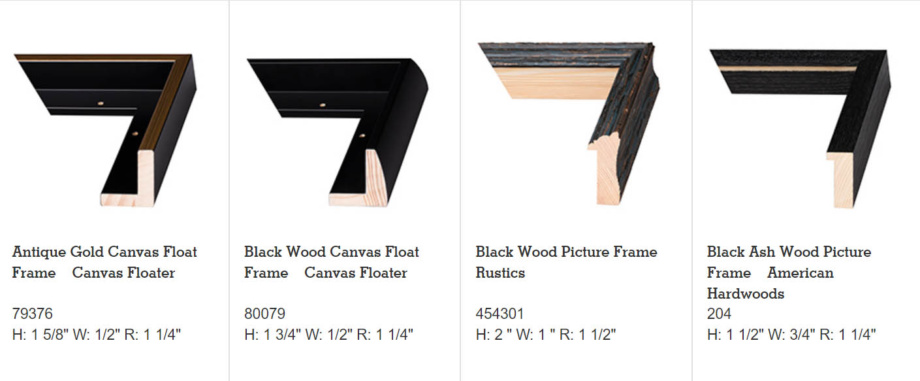
In this screenshot taken from AmericanFrame you can see the difference in frame styles. Canvas floater frame has a deep opening to nest the canvas painting inside. These are the bars in the back to which the painting attaches. The frames to the right cover the edge of the painting where canvas slides into a channel. Most wood, plastic, and metal frames cover the painting’s edge by 1/4″ or less.

Standard vs. non-standard frames
Standard frames are 8×10, 9×12, 11×14, 16×20, 18×24, 24×36 and so on. If your painting is done on non-standard stretcher bars that don’t correspond to standard sizes, you have to order wood frames online to be cut to your specifications, and then assemble them at home if these are very large frames. If artwork is not very large, the shop does it. An electric screwdriver comes in handy, and you also need some hanging wire and hardware, which you can buy in a kit online or even at Walmart. AmericanFrame includes the kit with the purchase of custom-cut frames.
In this screenshot from the American Frame website, you can see how much the frame costs depending on its length. The great thing about this service is that you can order any frame cut to your specifications. You can also order samples and corner samples.

Tip
Sometimes you can order samples of available frames and put them next to your artwork to see if the style of the frame works well with the painting. A lot of times it's difficult to say how a specific frame would look like unless you have a sample in your hands. Usually the wider the frame, the richer it looks. Although some abstract paintings would look the best framed with thin frames.
You can also buy standard frames at any craft or art supplies store.
This is a standard 5×7″ frame.
Framed oil paintings at art museums

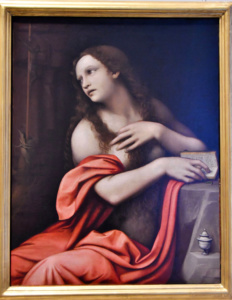
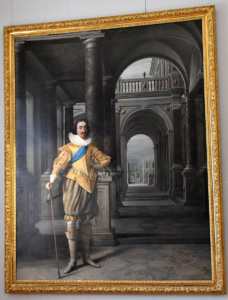
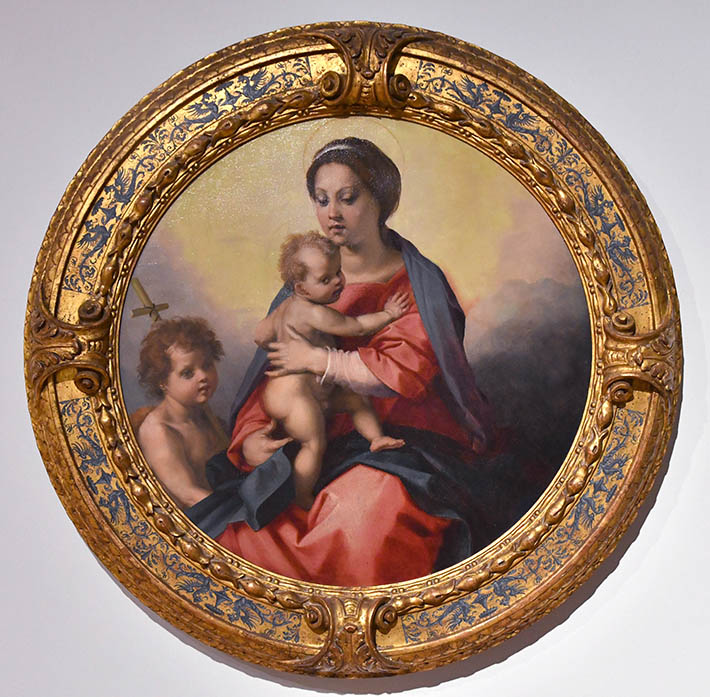
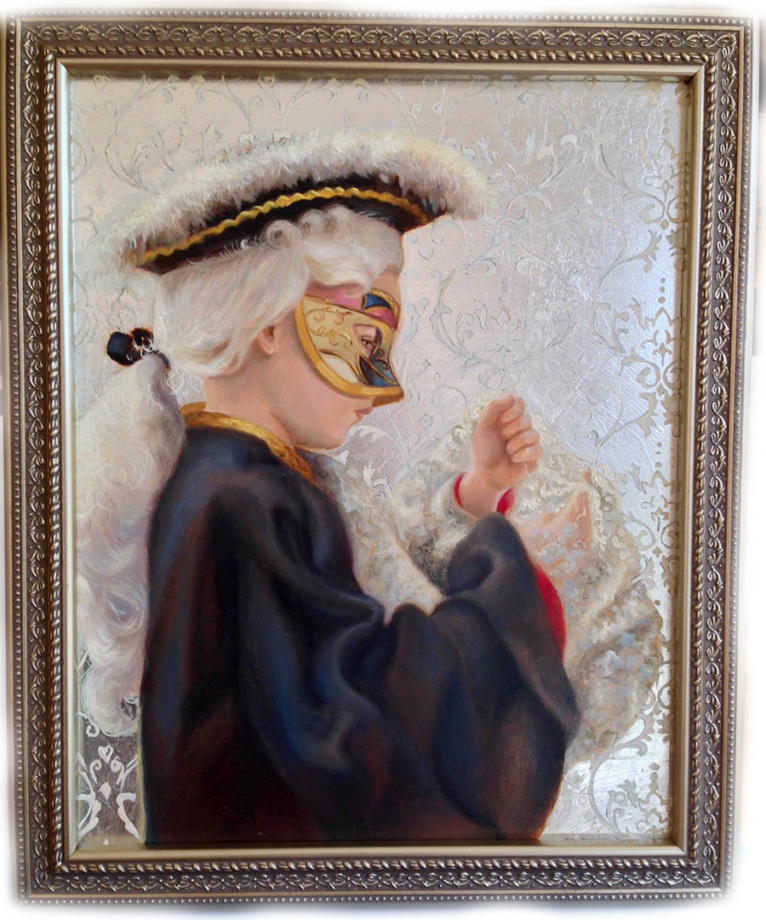
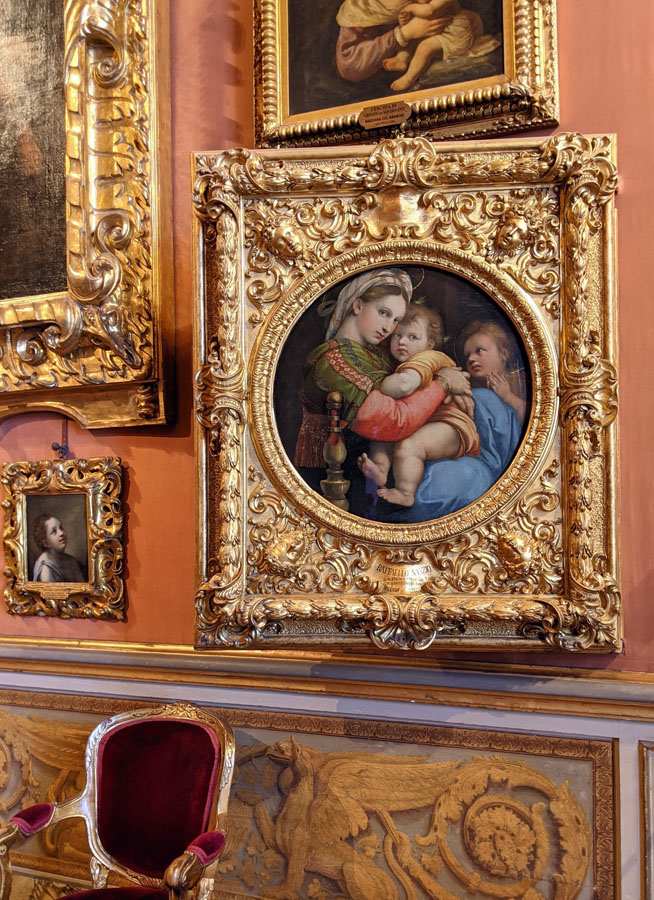
These are examples of framed masterpieces I took pictures of. All of them have gold frames but the style of each frame varies. The color of the frame picks up on prominent hues seen within each painting. If these paintings had silver/grey elements, they would benefit from a silver frame. Also, the complexity of the frame matches the exuberant details seen in the painting. For example, the second image of Magdalene has simplified shapes and color that’s supported by a plain gold frame. The exuberant golden jacket of the king seen in the last image matches the more elaborate frame.
In this short video you can see how I assemble a custom-cut real wood frame using the provided hardware.
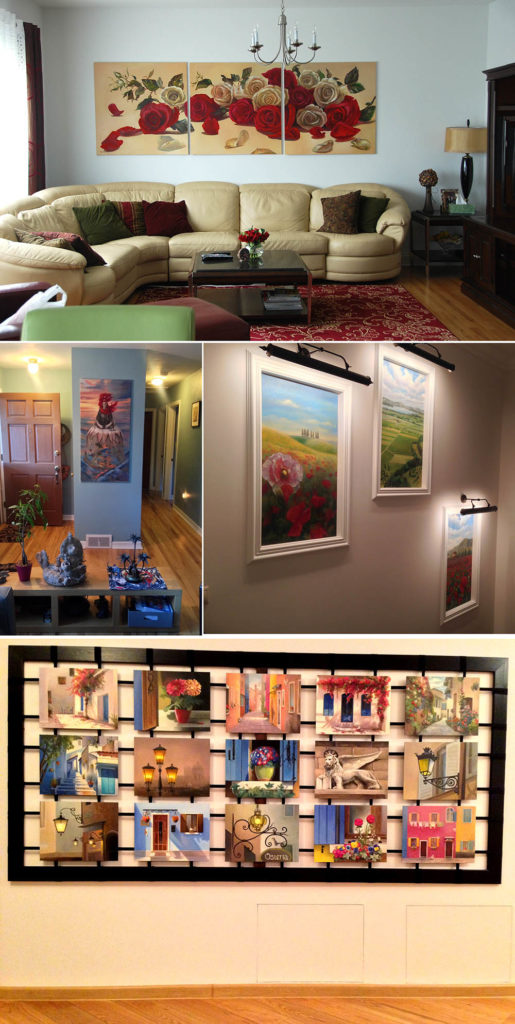
Consider wall space & art display unity
If you plan on having a show, exhibiting a large number of works, consider framing art with similar frames to have display unity. In my experience, I framed art at different times with varied frames and my paintings don’t always look consistent as a group. It makes it harder to present as a coherent body of work in a solo show. I have to get creative arranging art pieces to have a sense of unity.
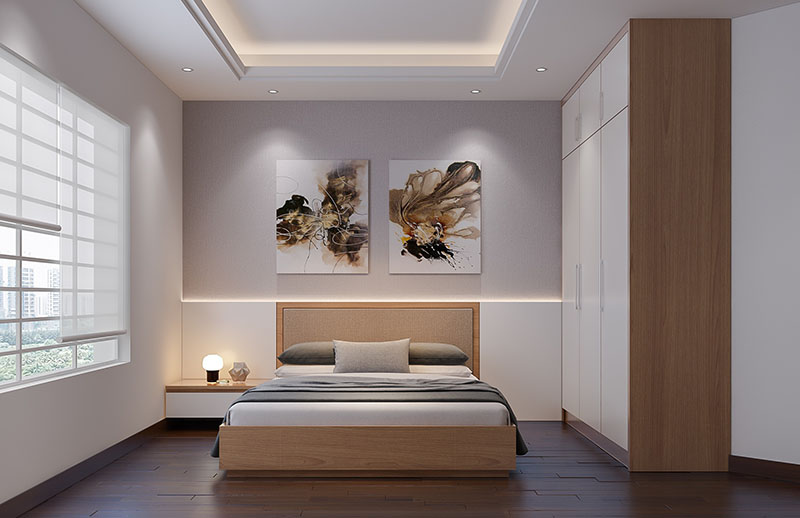
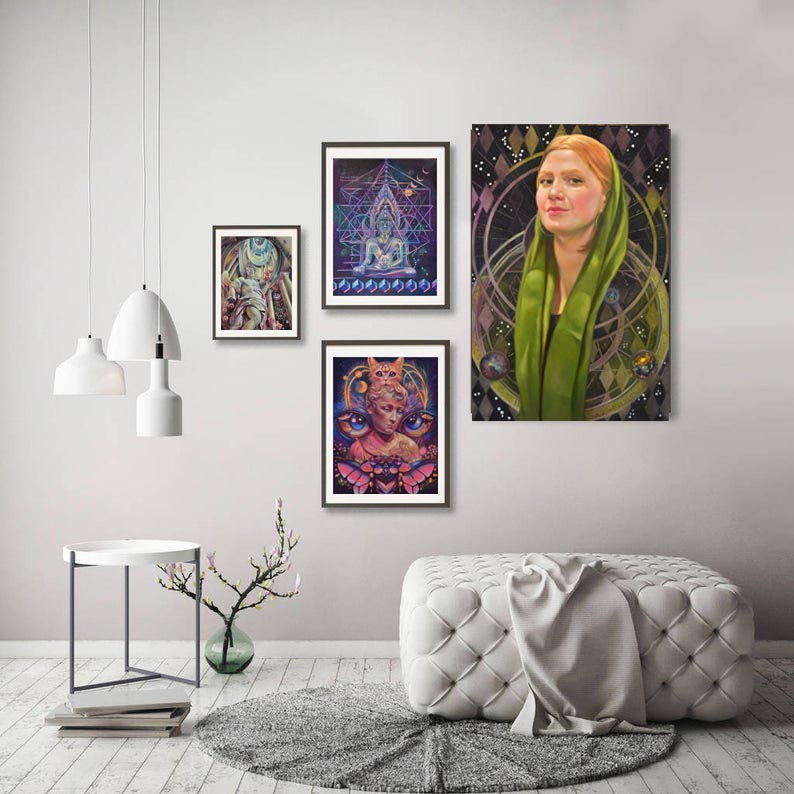
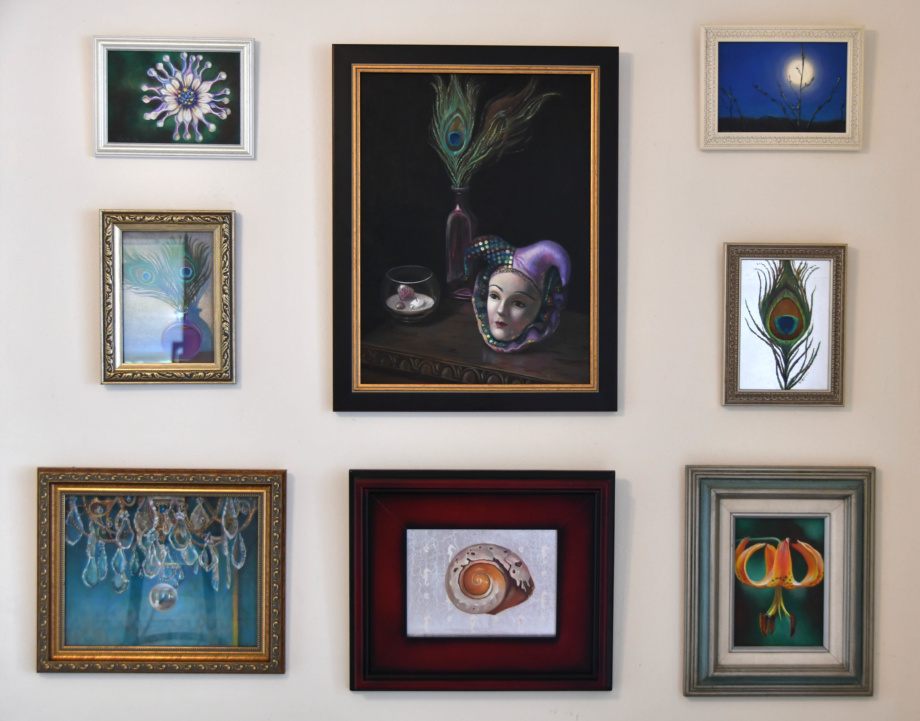
If you have a single piece of art, consider the size of your wall space and the artwork’s size. I often see small art displayed on a large wall where one picture gets lost and just looks too timid or “eaten” by a large wall space. If you have a large wall and small art, consider grouping small pieces on a wall to create a gallery. Below you’ll find several examples of art displays.
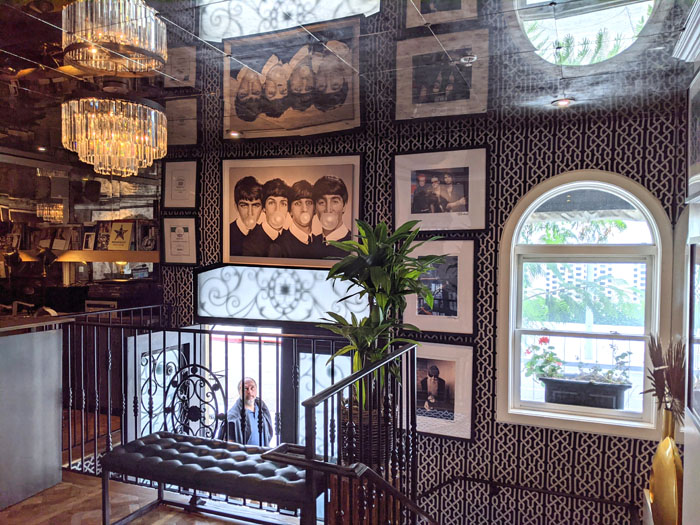
Framed pictures display @ Beverly hills hotel, Los Angeles
To Frame or not to frame?
Some art doesn’t require framing. When canvas’s edge is wide and clean, it might not need a frame, especially if it’s a sculptural piece. It gives a contemporary, minimalistic appearance you might like more.

As you can see framing can be fun but takes time to figure out. Next time you are at an art show or a museum, pay attention to framing, take notes, and frame your pieces in accordance with your knowledge and taste. Good luck!
If you’d like to get more inspiration how to organize and display wall art at home, here is a great article “How to design the best gallery at home”.

Complete video series:
Video #1 Part 1 – Learn what makes a painting great
Video #1 Part 2 – Learn what makes a painting great 2: composition, color, emotion
Video #2 Contemporary Art History
Video #3 How to take care of your art collection – coming soon!
Video #4 How to frame art – you are here!
Video # 5 Why you don’t need an interior designer to buy and display art in your home – coming soon!
Shop contemporary art here: