دسته: طراحی داخلی

  • Meaningful One-Day Lesson Ideas for when Time and Art Supplies Are Scarce

    Meaningful One-Day Lesson Ideas for when Time and Art Supplies Are Scarce


    The end of the school year is in sight, and the struggle is real. You’re exhausted, supplies are dwindling, and your students’ attention spans are shorter than ever. Sometimes you just need a meaningful one-day lesson to fill those final days. Try some of these low-prep, high-engagement lesson ideas that will keep your students focused on learning while making the most of those last precious moments in your art room.

    Keep reading for engaging one-day lesson ideas for when you are low on time and art supplies.
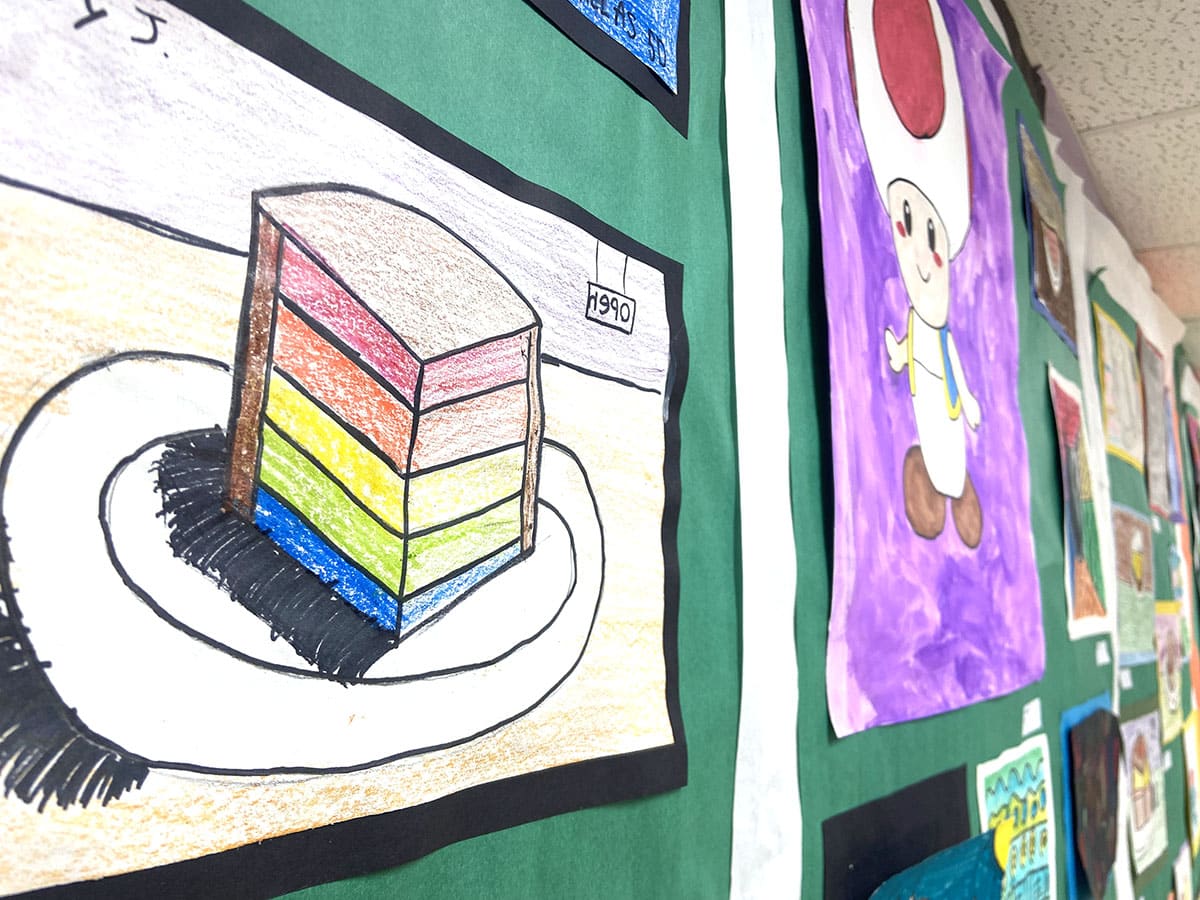
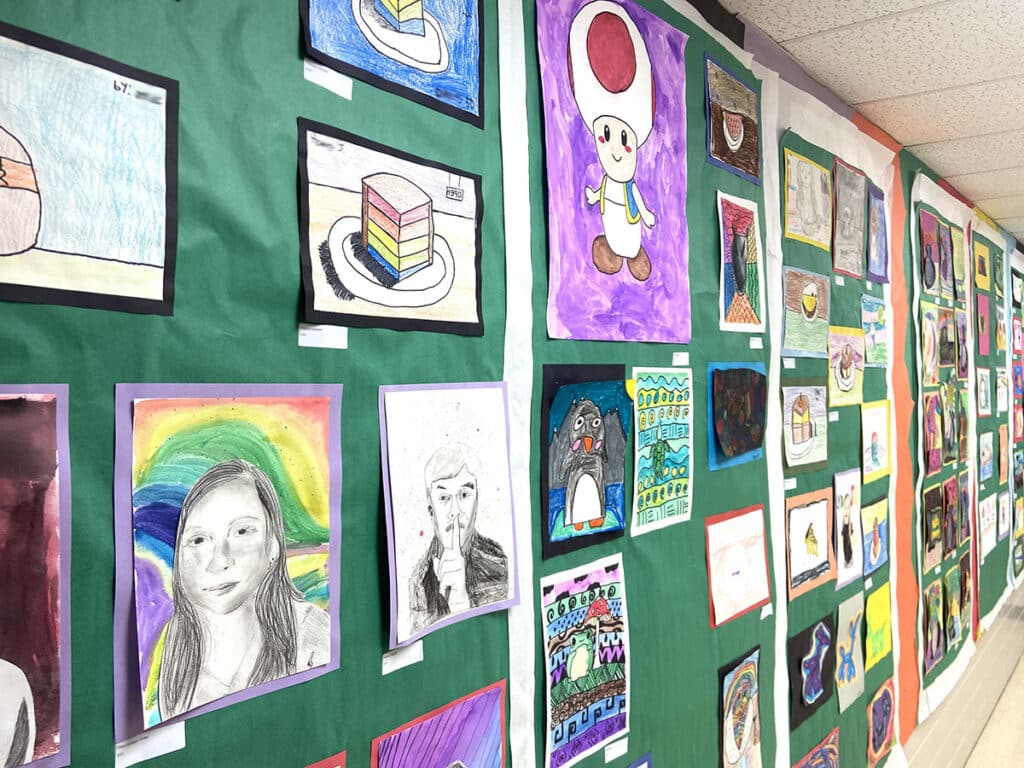
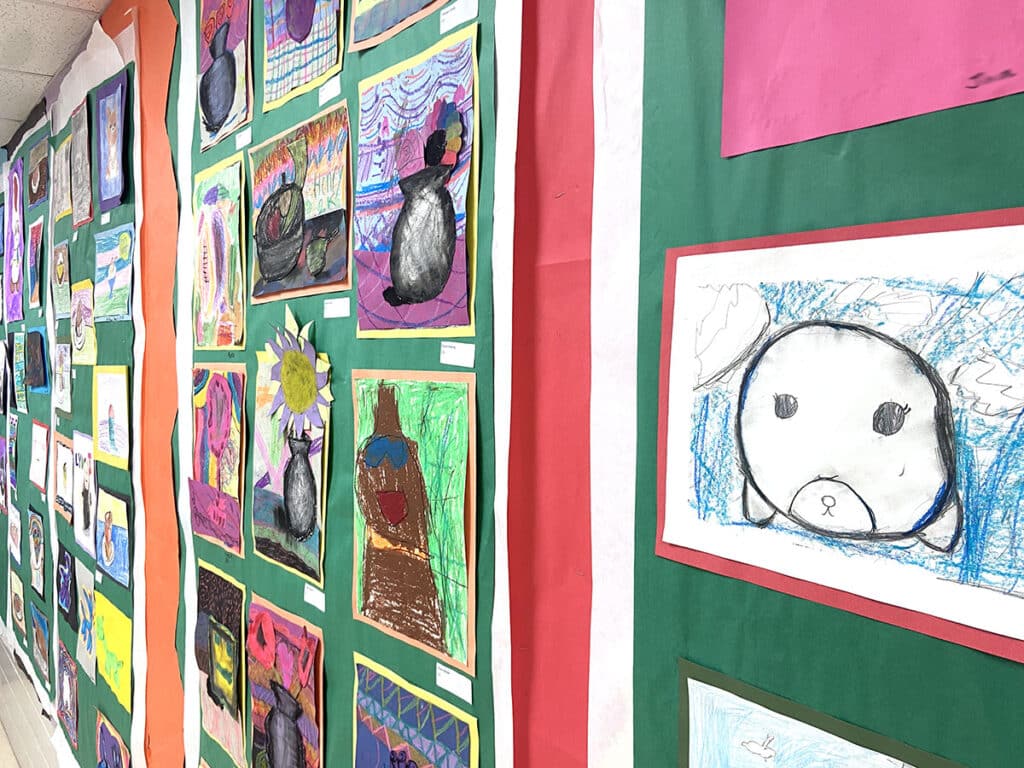
    hand holding broken pencils

    Portfolio Day 

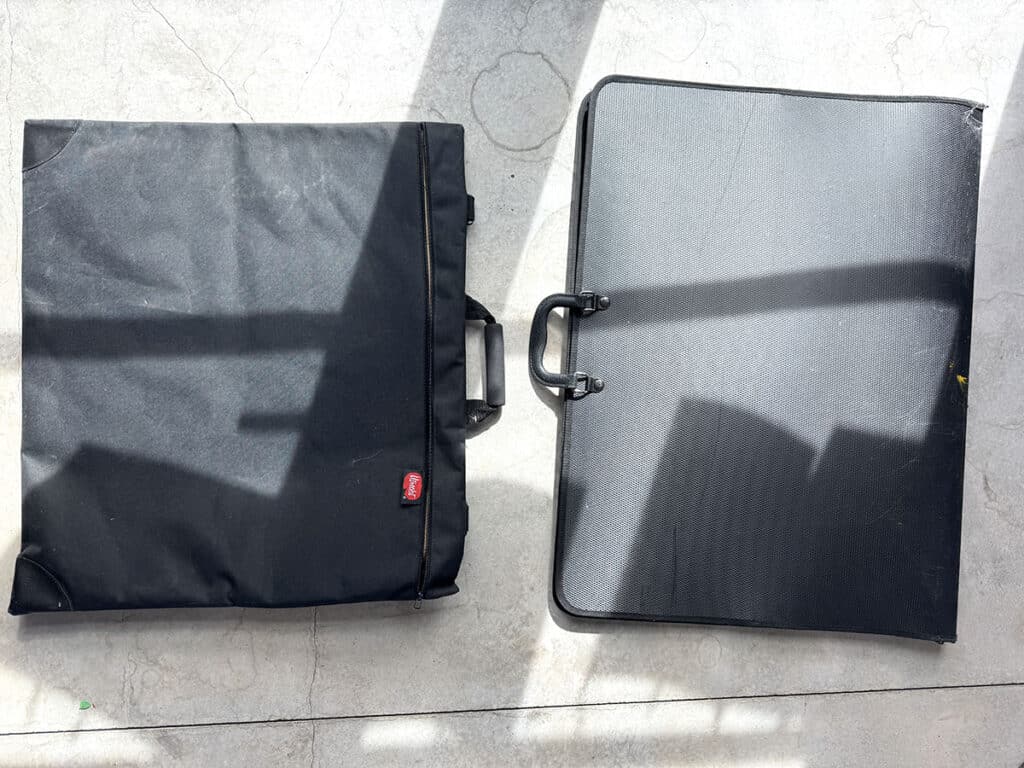
    The end of the year is the perfect time to review the portfolios that students worked so hard on all year long. Students will select a few pieces that demonstrate the most growth. Then, students will write a brief artist statement describing their artistic progress and the choices that fueled that progress. Next, create a class gallery with one artwork per student. Arrange the selected works around the room or digitally in a slide deck. Finally, share the class’s work through a gallery walk or slideshow. Encourage students to drive the narrative with peer compliments and discussion prompts about key concepts.

    student taking a photo of their artwork

    Creativity Challenges

    Keep students creating and making right up to the last day with Creativity Challenge lesson ideas. Foster friendly collaboration and competition with minimal consumables. Continue the fun and stack your challenges for a full Creativity Challenge Week.

    student example with recycled materials

    Here are five exciting Creativity Challenges to add to your curriculum:

    1. Exquisite Corpse Drawing
      This classic Surrealist game sparks creativity and collaboration—and a lot of laughs! Students will complete each other’s drawings to reveal a wonderfully bizarre creature.
    2. Found Object Coloring Sheets
      Transform famous artworks or simple emojis into giant, collaborative coloring pages. Students then race to “color” the image using found objects from around the classroom, arranged within the lines. This activity promotes teamwork and observation skills.
    3. Upcycled Old Papers
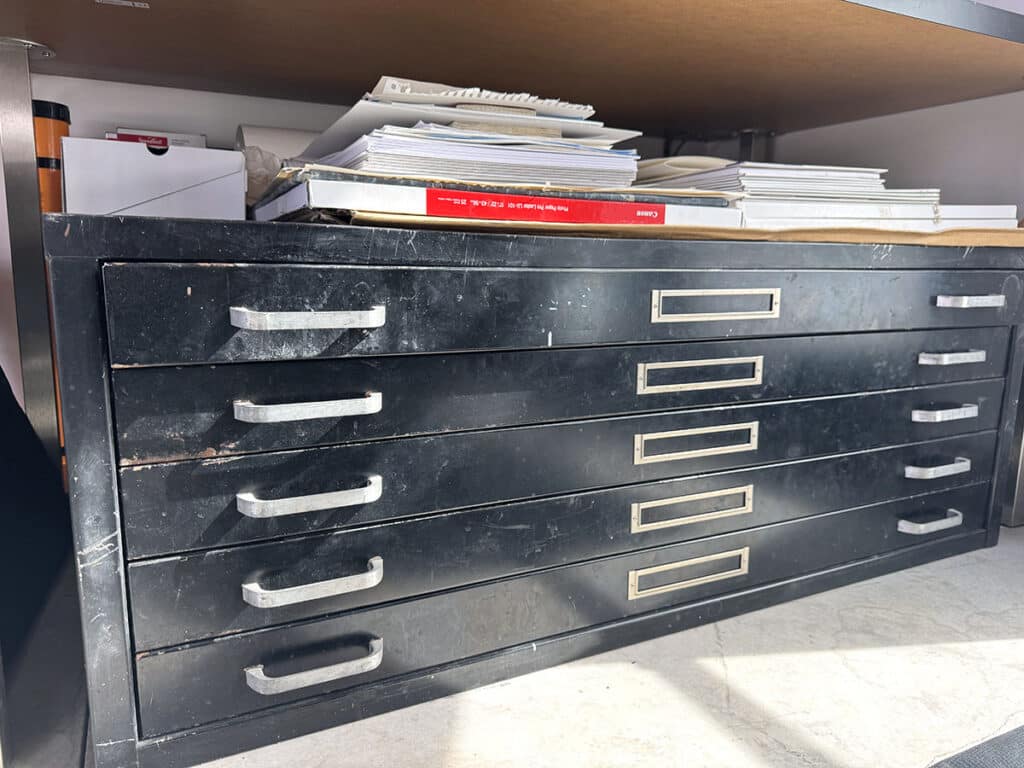
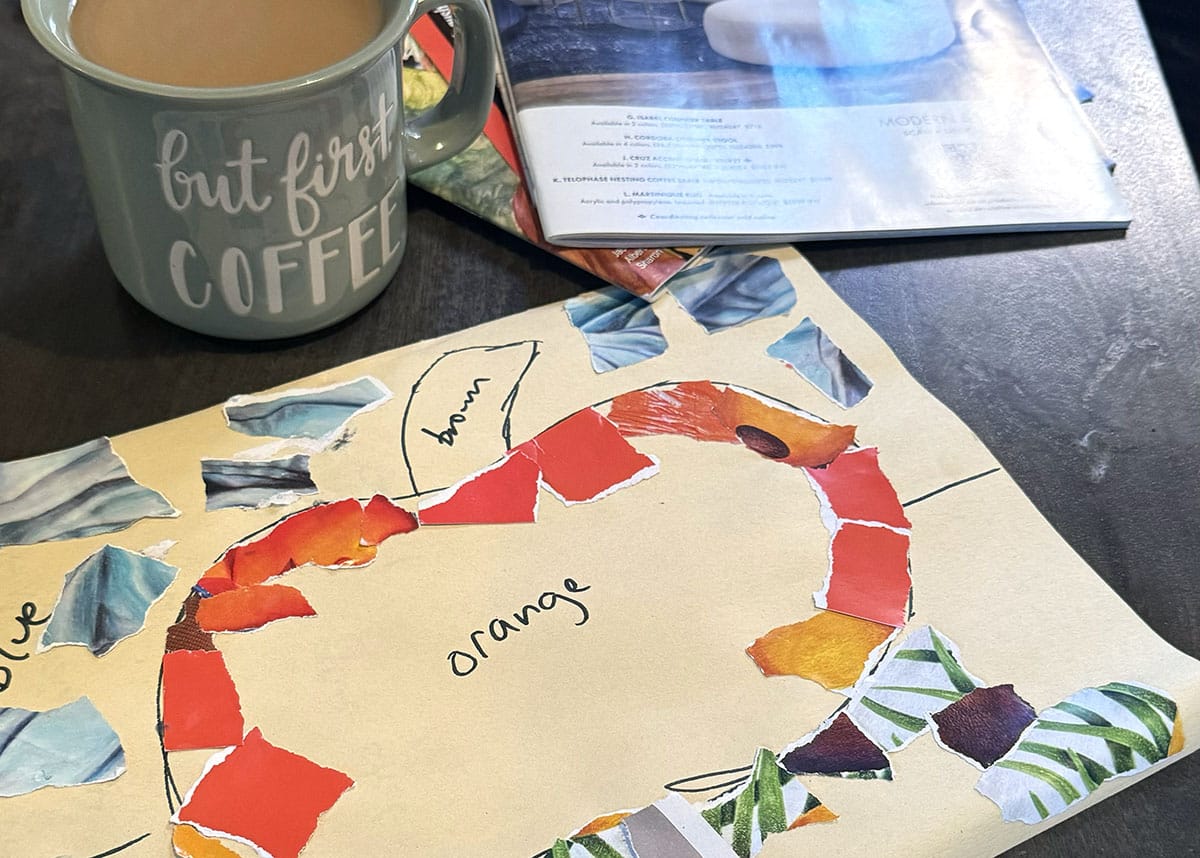
      Give abandoned artworks a second life. Students empty their drawers and folders, ripping up old work and sorting the pieces by color. Use the scraps for papermaking, individual collages, or a large, shared piece. This activity encourages resourcefulness and is perfect for low-energy days.
    4. Photography Scavenger Hunt
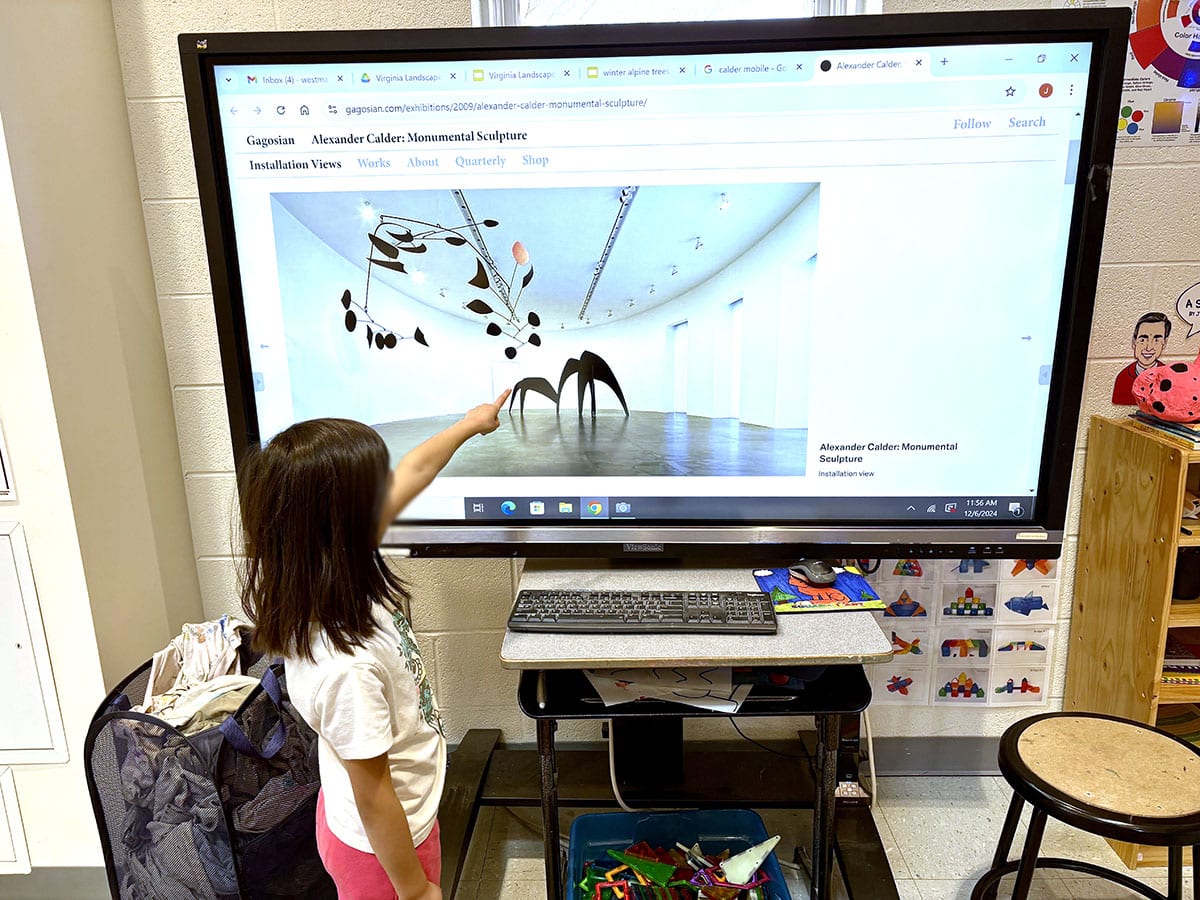
      If you have access to electronic devices, explore photography to get students thinking about composition. Show examples of different photographic techniques and perspectives. Then, provide a list of prompts like bird’s-eye view, worm’s-eye view, forced perspective, action shot, macro shot, leading lines, rule of thirds, and symmetrical balance for students to capture. 
    5. One-Line Drawing
      This continuous line drawing game tests focus and control. Students draw a subject or scene without lifting their pencil from the paper. Encourage them to fill the page with a single, flowing line, capturing the essence of their subject in a unique and minimalist way.
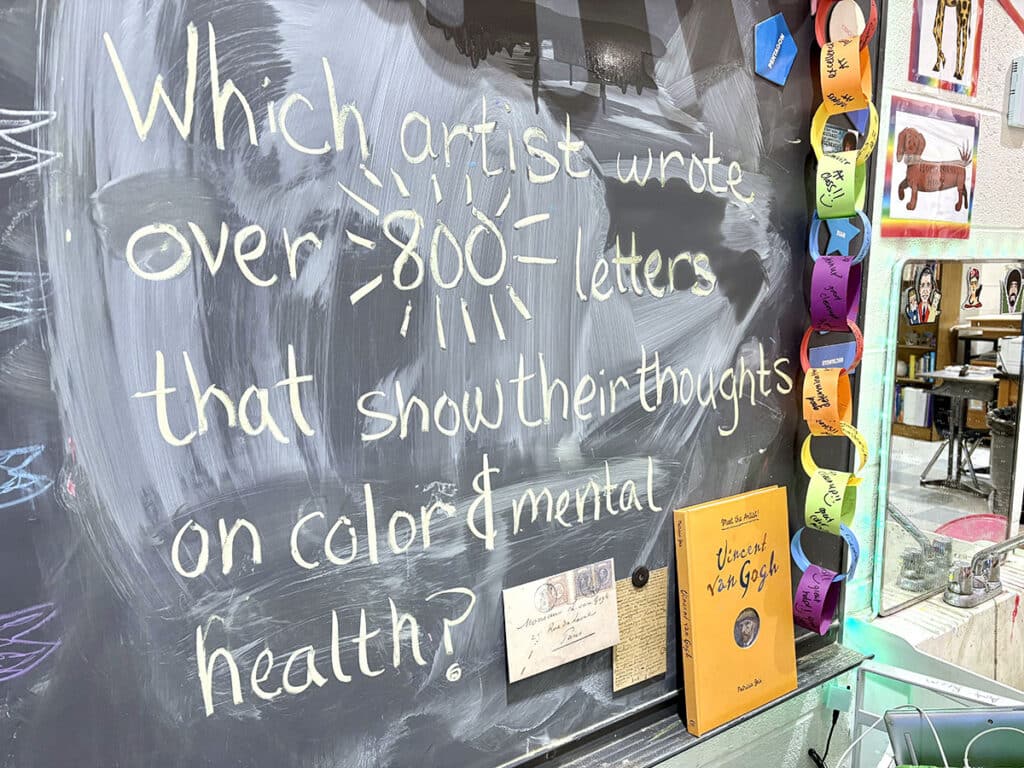
    Art-iculate Game

    Try a fun, fast-paced art history review game. Reinforce art recognition and key concepts, all while encouraging teamwork. You’ll need a deck of at least 20 “artwork cards.” Print images of famous artworks onto index cards. Use the artist bios from FLEX Curriculum to build a deck of diverse artists like Frida Kahlo, Piet Mondrian, Yayoi Kusama, and many others.

    Divide the class into teams. Set a timer for one minute and have the first team select an “Artist Interpreter.” This student draws a card from the top of the face-down deck. Their mission is to describe the artwork for their teammates to guess without using the artist’s name and artwork title. For example, if the card shows Vincent Van Gogh’s The Starry Night, the student may say, “It’s an evening landscape with a big, swirling sky and a small village below. It has a blue color scheme, and the sky looks hopeful.” Each artwork that the team correctly guesses within the one-minute time period is worth one point. 

    Once the minute ends, add a trivia twist for bonus points. For each identified artwork, ask a trivia question. For The Starry Night, ask, “What art movement did Van Gogh belong to?” Each correct answer earns an extra point. Be sure to base your trivia questions on key concepts from the curriculum.

    stack of art history cards

    Don’t miss these other game ideas to sneak in learning up to the last day:

    As the final bell of the school year approaches, remember that you can still deliver engaging and worthwhile art experiences even when time and supplies are scarce. These one-day lessons provide opportunities for creativity, collaboration, and reflection. Finish the year strong and remind your students of all the ways they have grown as learners and creators. End the year on a high note and send them off with a sense of accomplishment and a lasting love for art!

    How do you make the most of the last few days in the art room?

    What are your go-to one-day activities for when supplies are running low?

    To chat about one-day lesson ideas with other art teachers, join us in The Art of Ed Community!

    Magazine articles and podcasts are opinions of professional education contributors and do not necessarily represent the position of the Art of Education University (AOEU) or its academic offerings. Contributors use terms in the way they are most often talked about in the scope of their educational experiences.


    Source link

  • Skip the Bisque: 4 Creative Project Ideas for Single-Fire Pottery Success!

    Skip the Bisque: 4 Creative Project Ideas for Single-Fire Pottery Success!


    Clay projects are magical! However, managing clay is one of the more labor-intensive tasks in the art room. You have to prepare the clay and slip, shift projects around as they dry, load the kiln, bump the temperature, cool it down, unload the kiln—and repeat. The process is beautiful but it demands time and effort. If you only have one day and a classroom full of energetic students, try single-fire pottery! This time-saving technique skips the bisque stage and lets you build and glaze in one class period. Bring the joy of clay to your students without sacrificing creativity or quality.

    Let’s explore how single-fire pottery can turn your art room into a hub of stress-free creativity!

    student building a coil pot

    What is single-fire pottery and how does it work?

    Single-fire pottery lets students build and glaze clay pieces on the same day. This saves time and uses the glaze’s adhesive properties to your advantage. Normally, you probably warn students not to glaze the bottoms of their pieces to prevent sticking to the kiln. While you still want to do this, with single-fire pottery, use that stickiness to your strategic advantage and streamline the process! Glazing wet clay ensures pieces stay securely attached during firing.

    Important Tip:

    It’s crucial to match the cone of the clay with the cone of the glaze to ensure a successful single-fire process. If you’re using a low-fire (05) clay, pair it with a low-fire (05) glaze. Mismatched clay and glaze cones can lead to underfiring, glaze defects, or incomplete bonding. Always double-check your clay and glaze compatibility to prevent issues and achieve optimal results!

    Why try single-fire pottery?

    Single-fire pottery isn’t just about saving time. It can transform how you and your students experience clay and how you steward your budget and resources.

    Here are four reasons to embrace this innovative approach:

    1. Conserve Energy
      Firing once per project uses less energy, making this method more sustainable and environmentally friendly.
    2. Reduce Material Loss
      Because you handle pieces less often, single-firing minimizes the risk of breakage.
    3. Encourage Experimentation
      The wet glazing process introduces students to new techniques they can’t achieve with bisque-fired pieces.
    4. Simplify Planning
      With fewer steps, you can focus more on the creative process and less on logistics.

    How do I tell when it’s ready to fire?

    Drying single-fire pottery can be tricky without the color changes in the clay to guide you. For a reliable method, try the temperature test. Simply feel the clay with the back of your hand. If it feels cooler than your skin, it still contains moisture and isn’t ready for the kiln. When the clay matches your skin temperature, it’s ready to fire! When in doubt, it’s always better to give it more time. Waiting four weeks, even in humid conditions, is usually enough to ensure your clay is thoroughly dry and ready for the kiln!

    Are you ready to jump on the bandwagon?  Here are four one-day projects to get you started!

    1. Textured Landscape Tiles 

    clay landscape tiles

    Create clay landscape tiles that combine texture, layering, and glaze in one project. Start with a clay slab, trace a frame, sketch a landscape, and add texture. Glaze before adding elements like clouds, trees, and other small features. The glaze acts as the adhesive, eliminating the need for scoring and slipping. Glaze all the details and you’re done! Allow the tile to dry completely before firing for a vibrant, single-fired ceramic masterpiece.

    clay tile project in progress

    For a breakdown of this lesson, including a planning guide and process photos, check out the Ceramic Landscape Lesson in FLEX Curriculum

    2. Coil Pots

    glazed coil pots

    How many times have you pulled coil pots from the kiln only to find separated coils? Avoid this heartbreak by having students build their coil vessels and apply glaze immediately. Follow your basic coil lesson. Scoring and slipping between coils is optional but recommended for added security. Once students construct their pots, glaze immediately. The glaze acts as an adhesive, helping the coils stick together and stay intact through the firing process. No more half-ruined pots lingering in your kiln!

    coil pot in progress

    If you don’t have a go-to coil pot lesson, no problem! FLEX Curriulum’s Coil Pottery Lesson is jam-packed with student-facing resources to ensure coil success. 

    3. Trinket Dishes

    coil trinket dishes

    Put a creative spin on your coil lesson by building out instead of up! Students start by outlining a dish shape on paper and then build outward from the center with coils, shaping and curling as they go. Roll one long coil and wrap it around the perimeter to keep everything contained. Smooth the bottom side of the dish, flip it over, and immediately apply glaze to the top. Glazing immediately prevents smaller coils from shifting during firing.

    Check out the Trinket Treasure Dish Lesson in FLEX Curriculum for step-by-step instructions and coil technique anchor charts! 

    4. Pet Pinch Pots

    pet pinch pot in progress

    Start with a basic pinch pot. Let students’ creativity transform it into a unique animal! Add features like legs, heads, tails, fins, or eyes to bring their animals to life. Glaze immediately. Scoring and slipping between pieces is optional since the glaze acts as the adhesive.

    how to make a pinch pot resource

    Head to FLEX Curriculum to explore student-facing resources, including a visual guide for how to create a pinch pot and assessments to help students reflect on their work and improve their techniques.

    Single-fire pottery is more than just a time-saver—it’s a creative shift that can redefine how you and your students experience clay. It simplifies the clay process, freeing up time, energy, supplies, and kiln usage. Single-fire pottery also creates stronger, more durable projects since the glaze acts as an additional adhesive. With fewer steps and more opportunities for innovation, take just one day to explore the magic of single-fire pottery.

    What are your student-favorite single-fire projects?

    To chat about ceramics with other art teachers, join us in The Art of Ed Community!

    Magazine articles and podcasts are opinions of professional education contributors and do not necessarily represent the position of the Art of Education University (AOEU) or its academic offerings. Contributors use terms in the way they are most often talked about in the scope of their educational experiences.


    Source link

  • Jasmine Mansbridge: Postcards from Another Realm

    Jasmine Mansbridge: Postcards from Another Realm


    Within the intricate geometry of Jasmine Mansbridge’s paintings, there is a whisper of something ancient, something celestial—and something deeply, achingly human.

    By Sophie Heatley | 29 Apr 2025

    Her works do not clamour for attention through spectacle or volume; instead, they beckon with a quiet magnetism, inviting the viewer into contemplative spaces where form and feeling coalesce. They are portals into “imagined worlds” and “inner landscapes”.

    Jasmine
    Jasmine Mansbrige in her studio | ©Armelle Habib

    Painting from her Hamilton studio in Australia, Mansbridge’s process is both rigorous and reverent. She begins with delicate pencil lines drawn directly onto linen—an intentional nod to the material traditions of Indigenous artists among whom she was raised. These faint marks remain visible beneath layers of white gesso and paint, preserving the fragile essence of the human hand. Mansbridge speaks to the almost mythic tension between artist and artwork—what is gained and what is sacrificed when the tool meets the surface, when creation begins to separate from its creator. “There is something actually quite painful about covering up these marks,” she reflects. “So I wanted to preserve the line; I wanted to preserve the human mark.”

    Jasmine
    Jasmine Mansbridge, STATE OF THE WISE (2024, Acrylic painting, 160 x 160 x 4 cm)

    This fidelity to origin infuses her architectural geometries with an unexpected tenderness. Her works, though meticulously constructed, never lose the pulse of the human spirit. Though her visual language is rooted in sacred design, mathematical principles, and the desire to carefully birth order from chaos, her paintings are far from austere. They are meditative, organic, and quietly radiant. In Mansbridge’s hands, geometry becomes redemptive rather than rigid. “Humans are soft structures,” she explains, “but everything around us is underpinned by mathematical, geometric systems. For instance, even the energy field around us is structured and gridded.” Painting, for Mansbridge, is a method of harmonising these dualities: the organic and the constructed, the visible and the unseen, the rational and the intuitive.

    Jasmine
    Jasmine Mansbridge, HERE BETWEEN POINT A AND B (2025, Acrylic painting, 70 x 53 x 4 cm)

    A profoundly personal and spiritual artist, her practice is anchored in ritual, mindfulness, and a deep curiosity for the unseen. Her works emerge not solely from imagination but from dreams—transmissions from some “inner cosmos” made visible through hours of deliberate labour and a Surrealist desire to explore the unconscious. Time, for Mansbridge, is both a medium and a material. Her compositions evolve gradually, often over many weeks, and once begun, cannot be reworked. “The design is one go,” she says. “There’s not much room for a mistake.” This high-stakes precision is tempered by a philosophy of presence: to show up, to allow what needs to emerge, and to release attachment. “This work supports my life, and my life supports my work. If I look after the work, the work will take care of me.”

    Jasmine
    Jasmine Mansbridge, PATH TO THE HEART PORTAL (2025, Acrylic painting, 70 x 53 x 4 cm)

    Her latest series for Rise Art, shaped by a recent journey to India, emerges as “a constellation of contemplative spaces”. “Postcards came from India. This country is just so dense and colourful and impactful,” she recalls. “Everything is always organically unfolding.” These works evoke the echo of ancient observatories or sacred architecture, structures designed not only to house the human body, but to gesture skywards, towards the infinite.

    Jasmine
    Jasmine Mansbrige in her studio | ©Armelle Habib

    It is perhaps significant that Mansbridge’s father was a minister. In an age where the term “spiritual” is frequently diluted or commodified, Mansbridge offers something more rooted, more embodied. Influenced by her father’s belief that “all we cannot see is equal in value to all we can,” she approaches her practice with reverence—for mystery, for process, and for the unseen dimensions of life. Even the rise of artificial intelligence does not escape her curiosity. “My work is a question rather than an answer,” she says. It invites stillness, introspection, and a re-centring of the self. “To think more presently about their movements in life… I want people to ask: Who are you? And where are you going?”

    Jasmine
    Jasmine Mansbridge, HELD BY THE EVERLASTING EYE (2024, Acrylic painting, 180 x 220 x 4 cm)

    Also interesting to note is Mansbridge’s nomadic upbringing; as a child, she moved around a lot and often stayed in households with minimal possessions. She specifically recalls not having access to a television, and having to seek other forms of stimulation to spark her imagination. Some of her most vivid memories are of lying on a couch, gazing into paintings by her grandmother. “My grandmother was a talented painter,” she tells me. “It was her works that survived our frequent moves and are deeply etched in my memory to this day.” These artworks, scenes from distant places like Hong Kong, were like postcards from other worlds. The works themselves and the act of quiet observation played a formative role in her imagination, serving as a visual dialogue and a catalyst to her ability to pull entirely new realms from the recesses of her mind. 

    Jasmine
    Jasmine Mansbridge, STATE OF THE WISE (2024, Acrylic painting, 160 x 160 cm)

    The idea of remaining open to new paths and discoveries is not merely a theme in Mansbridge’s work, but a way of being. She describes herself as a “vessel”: open, porous, and devoted to the act of making. “I’m just a conduit,” she says, “for people to connect with their own stories and their own presence.” Her art becomes an offering—a quiet gesture of presence, care, and communion. It is shaped by a longing to create emotional refuge, rooted in her own experiences of grief and loss, yet always outward-reaching. “My ultimate intention is to make work that is soothing and speaks to the shared, often unspoken, emotional currents that bind us.”

    Rather than seeking resolution, her work invites viewers to embrace the mystery and the process itself—a rare and powerful stance in a world increasingly fixated on immediate answers and gratification. And, perhaps this is her most profound gift: to gently remind us that there is always something beyond what we can see: within the chaos of all things, there is still space for wonder. 


    Source link

  • Organize It! Easy Paper Systems for Any Art Room

    Organize It! Easy Paper Systems for Any Art Room


    Paper overflows in every art room—giant sheets, colorful scraps, old artwork, specialty textures, drawing paper, and more. It multiplies overnight where it doesn’t belong and vanishes when you need it for a lesson. Organize paper and get ahead of the clutter with simple systems that empower students, run themselves, and reduce waste.

    Let’s take a peek at easy systems to organize paper in your art room!

    flat files to organize paper

    Add specific and detailed labels.

    Paper storage doesn’t need to be elaborate or expensive—it just needs to be clear. The most effective systems are so intuitive that students don’t have to ask what goes where. This starts with bold, direct labeling. Instead of writing “Drawing Paper,” try specific labels like “Scraps: Use Me First!” or “9×12 Black Construction Paper.”

    Here are three small shifts that make a big difference:

    1. Keep common paper accessible with open shelving and open bins.
    2. Pair scrap bins with fresh paper to encourage reuse.
    3. Add images to your labels to assist younger artists and multilingual learners.

    Create an intentional scrap bin.

    Scrap paper is both a blessing and a burden. When left unmanaged, it turns into a mess of torn bits, weird sizes, and frustration. But with the right setup, scraps can become creative gold.

    Make a “Use Me First!” scrap bin right next to the fresh paper station. This subtle placement reminds students to check it out before grabbing new materials. If you have space, sort scraps by color scheme or material type using clear plastic drawers, a spread of baskets, or a hanging over-the-door pocket organizer.

    https://www.youtube.com/watch?v=g28uc4LJsF8

    Here’s how to encourage your students to use the scrap bin:

    • Reward creativity that comes from reuse.
    • Challenge students to use a certain number of scraps in an artwork.
    • Create a “Scrap Challenge Day” where everyone transforms scraps into masterpieces.
    • Introduce a collage unit.

    Try envelopes for small “next time” scraps.

    Speaking of scraps, what about those scraps students claimed for their art project but didn’t have a chance to use yet? At the beginning of the year, give students an envelope with a metal clasp to glue into the inside cover of their sketchbooks. This is the perfect spot to store paper scraps like small collage pieces they want to save for next time! Plus, the clasp allows students to close it securely so items don’t fall out.

    Use vertical space for large paper.

    Large paper is especially tricky if you don’t have flat files. It’s often too floppy to stack, too wide to fit in regular drawers, and too precious to crumple. If you’re comfortable rolling paper, store rolls in tall laundry hampers or gift wrap bins. Many of these items also have wheels, which is handy because paper can get quite heavy!

    For specialty paper you don’t use often, keep it in the cardboard packaging it came in. Label the edge of the box and slide it into a vertical space, such as between cabinets. If you have a variety of specialty papers, keep them neatly stacked with binder clips or paper clips on each side. Put them into a large portfolio, label the portfolio, and slide it into a vertical space.

    portfolios

    Sort flat files with trays and bright labels.

    Flat files are a dream if you have one, and a black hole when they get clogged. Assign a weekly “Paper Captain” to organize the papers. Giving students this responsibility encourages studio ownership and waste reduction.

    If you are storing smaller papers in a large flat file, use drawer organizers such as expandable dividers or paper trays to keep everything sorted and contained. If you’re storing larger papers, use binder clips or paper clips on multiple edges with large, bright labels. The labels can be as simple as a piece of fluorescent construction paper folded in half around a stack of watercolor paper that says in marker, “9×12 120 lb Watercolor Paper.” This way, when large stacks slide around, you can easily find the label and what you need!

    open flat files

    Repurpose kitchen items for your art on a cart.

    If you’re teaching in multiple rooms or need flexibility, rolling carts can be a lifesaver—but only if they’re well-organized. Try expandable racks to keep wet papers separated and baking trays for pre-cut papers, just like in the video below!

    https://www.youtube.com/watch?v=Va6hOytGhoI

    Here are some other kitchen hacks to organize paper:

    • Use a metal bakeware organizer to stack fresh paper or completed projects.
    • Organize papers in hanging file folders in a plastic file box.
    • Keep small papers in accordion folders.
    • Grab cardboard or plastic magazine file holders to contain paper.
    • Glue labeled samples of each kind of paper to a clipboard for students to reference, so they don’t dig through your cart.
    • Throw small scraps in clear gallon storage bags and clip or hook them onto your cart.

    Implement the “One Sheet Rule.”

    One of the fastest ways to run out of paper is letting students take as much as they want and start over as many times as they want. Give each student one sheet of paper and put away the rest. If they “mess up,” encourage them to embrace imperfection and figure out a way to incorporate the “mistake” into the final art. Introduce this policy at the beginning of the year to build a culture of creative problem solving!

    To support sustainability and creative thinking, keep an “Oops Box” nearby. This is where slightly damaged paper can live another life as collage material, texture sheets, or sketchbook covers.

    piles of paper

    When your paper system works, you feel it. The art room flows better, students know where things go, and everyone respects paper instead of wasting or forgetting it. Best of all, you’re no longer spending precious prep time digging and sorting through paper instead of planning the next exciting project. Let’s spend more time making with paper and less time managing it!

    What’s the best paper organization system you use in your art room?

    Share a hack for keeping paper scraps tidy!

    To chat about how to organize paper with other art teachers, join us in The Art of Ed Community!

    Magazine articles and podcasts are opinions of professional education contributors and do not necessarily represent the position of the Art of Education University (AOEU) or its academic offerings. Contributors use terms in the way they are most often talked about in the scope of their educational experiences.


    Source link

  • Curator at Large: Spring 2025

    Curator at Large: Spring 2025


    Spring has arrived, and with it comes a fresh wave of exhibitions sweeping through London’s galleries. This season, shows delve into everything from nature’s hidden structures to the dynamic tension between opposing ideas that shape how we live, think, and feel. Whether you’re craving quiet reflection or bold confrontation, we’ve selected these exhibits for their promise to spark curiosity and conversation.

    By Sophie Heatley | 24 Apr 2025

    Jure Kastelic: Cathedral and Bazaar

    Curator At Large: Spring 2025
    © Jure Kastelic | Courtesy of Carl Kostyál, London | Stockholm | Hong Kong

    In October 2024 Jure Kastelic had his debut solo exhibition ‘Musical Chairs’ with Carl Kostyál in Milan. Now, back for his second instalment in London, Kastelic continues to explore the push and pull of opposing forces—ideas that shape how we live, what we desire, and how we assign value to things. At its core, his practice asks: what holds value in a world where everything feels increasingly diluted? Drawing from both analogue and digital influences—including online forums, classical painting, and economic theory—Kastelic crafts surreal, dreamlike scenes that reflect the tensions of life in late capitalist society.

    Carl Kostyál, London | 1 May – 8 Jun 2025 


    Giuseppe Penone: Thoughts in the Roots

    Curator At Large: Spring 2025
    Giuseppe Penone, Alberi libro (Book Trees), 2017 and Respirare l’ombra (To Breathe the Shadow), 2000 | Installation View, Serpentine South. © George Darrell. Courtesy of Giuseppe Penone and Serpentine.

    A key figure in the Arte Povera movement, Giuseppe Penone has spent over five decades exploring the profound connection between humans and nature. Thoughts in the Roots brings together works from 1969 to the present, highlighting his poetic use of natural materials such as wood, bronze and marble. Set both within the gallery and in the surrounding park, the exhibition reveals the hidden structures and rhythms of the natural world through Penone’s quietly powerful sculptures and installations.

    Serpentine South Gallery, London | 3 Apr – 7 Sep 2025


    Eileen Perrier: A Thousand Small Stories

    Curator At Large: Spring 2025
    From the series Afro Hair and Beauty Show, 1998-2003 | Courtesy of Eileen Perrier and Autograph 

    For over 30 years, Eileen Perrier has used portrait photography to connect people and celebrate the power of being seen. Drawing on her dual Ghanaian and Dominican heritage, she blends 19th-century European and contemporary African studio styles to explore identity, belonging and representation. Often working in makeshift studios and community spaces, Perrier’s portraits centre shared experiences—from family ties to beauty salons—highlighting individuality while bridging cultural and social divides. This first retrospective brings together key series from her career, featuring three generations of her own British Ghanaian family, and her recent work on the pressures faced by teenage girls.

    Autograph, London | 17 Apr – 13 Sep 2025


    Exhibitions Closing Soon

    Rose Wylie: When Found becomes Given

    Curator At Large: Spring 2025
    Installation View, Rose Wylie: When Found becomes Given, David Zwirner, London, 2025

    Featuring recent single- and multipanel works from Rose Wylie, When Found becomes Given, the show blends personal, historical and imagined narratives across time and space. Wylie’s bold, seemingly playful style belies a deep and witty exploration of how images are composed and perceived. Her layered approach often involves reworking motifs and mixing unexpected elements to create visual echoes that challenge traditional perspective and storytelling. 

    David Zwirmer: London | April 3 – 23 May 2025


    Amoako Boafo: I Do Not Come to You by Chance

    Curator At Large: Spring 2025
    Installation View | Courtesy of Amoako Boafo. © Prudence Cumings Associates Ltd. 

    Ghanaian artist Amoako Boafo’s first UK solo exhibition features new, finger-painted portraits that celebrate Black identity with authenticity and joy, while challenging stereotypes through powerful, intimate works. The exhibition also includes an immersive recreation of Boafo’s childhood courtyard in Ghana, designed with architect Glenn DeRoche, reflecting themes of community and memory. Key works like Self-Portrait with Cacti (2024) invite reflection on space, identity, and shared creativity.

    Gagosian Grosvenor Hill, London | 10 Apr – 24 May 2025


    The Shape of Colour

    Curator At Large: Spring 2025
    Paul Feeley, Untitled, 1962 | Courtesy of The Artist and Waddington Custot

    Building on Waddington Custot’s 2019 exhibition Colour Is, The Shape of Colour continues to explore the transformative power of colour in shaping how we perceive art and space. Spanning works from the 1950s to today, the exhibition examines how artists use colour and form to blur the lines between painting and sculpture. Featuring pieces by Josef Albers, Vanessa Jackson, David Annesley, Sheila Hicks, and others, the show reveals how colour can create spatial illusions, challenge perception, and turn flat surfaces into vibrant, multidimensional experiences.

    Waddington Custot, London | 22 April – 29 May 2025


    Source link

  • Youth Art Month (YAM) Trivia: Ignite Curiosity and Celebrate Creativity!

    Youth Art Month (YAM) Trivia: Ignite Curiosity and Celebrate Creativity!


    When you encounter an intriguing trivia question, you may notice you sit up taller and tenser, lean in closer to the screen, or even raise your eyebrows. That’s the power of trivia! A good fun fact is gripping and sparks a curiosity that makes us want to learn more. Trivia activates our sense of wonder and invites us to explore the world in new ways, which is exactly what art education and Youth Art Month are all about. 

    Turn Youth Art Month into a schoolwide celebration with a trivia competition to get everyone buzzing about the arts!

    holding the golden paintbrush in an art room

    Work with your administration to set the stage for success.

    The first step to launching a schoolwide trivia game is to engage your administrators. Share how trivia can foster teamwork and critical thinking while energizing the school community. Connect the benefits for the school to the mission behind Youth Art Month (YAM) to make your case. YAM shines a spotlight on the importance of art in schools. Its mission is to promote observation, problem-solving, creativity, and communication—all of which art trivia supports as well!

    Introduce trivia to teachers early to get them involved.

    Once your administration is on board, share the idea with your colleagues. Present Youth Art Month Trivia at a staff meeting through a sample game to garner excitement! Explain the format and don’t forget to mention any agreed-upon incentives!

    Select a week or month for the school to participate. If you’re doing one week, students will begin each day or first-period class with a trivia question. If you’re doing a month, spread it out to one day each week. Provide pre-populated slides to all staff members with the question of the day. Allow students to discuss and decide on an answer together as a class before the teacher submits the class’s final answer. This setup keeps the activity quick and organized!

    vincent van gogh trivia on the board

    No buy-in? No problem!

    If getting full-school participation in Youth Art Month Trivia feels like a challenge, don’t worry! You can still make art trivia a success. Run the trivia game in your art room with your students. Start class with a quick trivia question and let your students work together to find the answer. This approach keeps the activity contained while still building excitement.

    You can also take the game online to involve families and the wider community. Post weekly trivia questions on your school’s or art program’s social media pages. Encourage students and parents to work together to answer the questions and leave their responses in the comments.

    Make schoolwide implementation simple with a link.

    Teachers are busy, so simplify the trivia process for all. Create a link to a slideshow with art trivia questions. Participating teachers can copy and paste the questions into their weekly slides or use yours, eliminating extra prep work. Include a link to an online form for teachers to submit their class’ responses. This keeps everything in one place and ensures answers stay organized for you!

    girl pointing at trivia on a smartboard

    Keep trivia fresh and exciting with a variety of question types.

    Offer different kinds of questions to ignite interest in new ways. From visual challenges to inquiry-based prompts, a mix of questions will ensure trivia feels fun and dynamic every time.

    Get inspired with these three creative approaches to trivia:

    1. Reveal a Painting
      Build close observation skills and encourage students to think critically about how small details fit into a bigger picture. Choose a famous artwork and cover it with several squares or rectangles to mask the painting. Each minute, reveal a new section of the painting by deleting a square. As you reveal the painting, students will guess what it is.
    2. Standards-Based Questions
      Reinforce learning by reviewing key concepts from your curriculum. Ask questions about color theory, perspective drawing terminology, or printmaking tools.
    3. Inquiry-Based Questions
      Encourage research and critical thinking with questions that prompt students to explore art history. For example, Which Mexican artist turned a traumatic bus accident into inspiration for vivid, emotional self-portraits that explored her pain and identity? (Answer: Frida Kahlo.)

    reveal a painting

    Expand your trivia repertoire with these additional resources:

    Build excitement with rewards and a final celebration.

    Celebrate the winning class each week with an administration-approved award! Include the participating teacher in the award or give them a small gift to show your appreciation for their support of Youth Art Month and the arts. 

    Here are some fun award ideas:

    • Present a “Golden Paintbrush” award. Display it prominently to encourage friendly competition.
    • Host an Art pARTy with an open studio for students to explore special materials.
    • Allow students to have a “Dress Down Day.” This is particularly incentivizing if you are at a school that requires uniforms.
    • Distribute school-appropriate art-themed vinyl stickers.
    • Invite students to eat lunch in your art room and share a few art-themed treats.

    golden paintbrush and paint supplies

    Trivia is much more than entertainment! It can spark curiosity, build teamwork, and bring energy to learning about the arts. This Youth Art Month, make trivia the centerpiece of your celebration and art the talk of your school. Get administrator support, make it easy for all teachers to participate, and provide incentives for colleagues and students to set your initiative up for ultimate success. If you want to elevate your art program in just a few minutes each day, grab your golden paintbrush and let the games begin!

    What words of wisdom can you share about hosting a schoolwide initiative? 

    Tell us your favorite types of art trivia questions!

    To chat about Youth Art Month with other art teachers, join us in The Art of Ed Community!

    Magazine articles and podcasts are opinions of professional education contributors and do not necessarily represent the position of the Art of Education University (AOEU) or its academic offerings. Contributors use terms in the way they are most often talked about in the scope of their educational experiences.


    Source link

  • 3 Ways to Cultivate Successful Relationships with Paraprofessionals in the Art Room

    3 Ways to Cultivate Successful Relationships with Paraprofessionals in the Art Room


    If you have students with special needs in your art room, they may come to class with a paraprofessional, teacher assistant, or a “one-on-one.” Sometimes, it can be a little vague on what their role is and how to work together. However, when you welcome instructional assistants into your art room and cultivate a great working relationship with them, there are many benefits. Students with special needs will blossom, you’ll spark a love for art in the paraprofessional, and you will be more efficient at your job.

    Foster positive relationships with paraprofessionals in the art room with these three ideas and then, dive into some frequently asked questions.

    1. Make paraprofessionals feel important—because they are important!

    Paraprofessionals are often the experts on our students in special education. They are with these students for most of the day and can answer questions about their skill level, interests, or even behavioral triggers. Ask for input for both the “in the moment” problem solving and the long-term “getting to know” the student. They can have the missing puzzle piece if you’ve tried everything and nothing’s working… or, you want to take a shortcut and go straight to what’s worked before!

    Another way to make them feel valued and respected is to collaborate on the “fun art stuff” too. Talk to them about the neat things they or their student are doing. Be cognizant that you balance bringing up problems and commands with positivity and encouragement. One way to do this is a simple “thank you” at the end of each period. Acknowledge their effort with specific tasks (no matter how small!) to let them know you appreciate them showing up and being an active participant. Another way to show you are grateful is to provide coffee, water, or treats.

    coffee cup

    2. Help yourself by helping them.

    A lot of people are uncomfortable with art because they feel like they’re “bad at art.” This is evident in the familiar response, “I can’t even draw a stick figure!” Also, many paraprofessionals don’t want to “mess up” a student’s project. Remember these sentiments when building relationships with your paraprofessionals. Although they are adults there to provide support to students, they can also be an extra art student. When you equip them to be more comfortable in the art room, they will be a positive catalyst for your students.

    One simple way to mitigate anxiety is to communicate clear expectations for the whole year and for each class period. Tell them what the students will be doing for the day and what the paraprofessional’s expectations are during this time. Just as you would for a student, provide specific instructions in more than one format, and don’t assume they already know what to do.

    A quick way to provide expectations is to print out a simplified, bulleted, step-by-step list of each action item for the lesson. You can also print the whole lesson and highlight what the students need to accomplish on that particular day. It’s very helpful to have photos showing each step because sometimes a finished art project can be visually overwhelming. If you don’t have the time to compile step-by-step instructions with photos, check out FLEX Curriculum. FLEX is a standards-aligned curriculum that includes detailed step-by-step project instructions with photos and student-facing videos and resources.

    step-by-step photos

    3. Give paraprofessionals their own art project.

    It can be wonderful when you have an eager and artistically-minded paraprofessional working with your students in the art room. However, sometimes they can be too eager to make art for the student. They are focused on having the project look “perfect” instead of indicative of the student’s true performance.

    One way to mitigate this is to preemptively leave out extra supplies and give the paraprofessionals permission to create their own piece of art next to their students. As long as the students are getting the attention and assistance they need, many paraprofessionals will appreciate the thought. They usually enjoy the opportunity to sneak in a little creative outlet during their day!

    If you’re short on supplies and worried about not having enough, many paraprofessionals can be invaluable support in helping you garner donations and recycled materials. Give them a list of what you’re looking for and chances are, they’ll work hard to collect boxes and bottles from other classrooms throughout the day. This creates many opportunities for them to feel like a contributing member of your classroom community!

    art supplies

    Let’s answer your most frequently asked questions about paraprofessionals!

    What if a paraprofessional doesn’t show up?

    It can be frustrating when a designated instructional aid doesn’t show up for your art class with their students. If you have a good relationship with them, ask them about it the next time you see them. They may have had an emergency or didn’t think it was a big deal. It’s a great time to remind them of their importance in the art room and how vital they are to maintaining a smoothly run classroom.

    However, what if this happened multiple times already? Email the lead special education teacher to gather thoughts and ask for guidance. The lead teacher often has a solid relationship with them since they work closely all day. The email will also create a paper trail documenting their absences.

    What if the paraprofessional does too much or too little of their student’s art project?

    If the paraprofessional is doing too much of a student’s project, provide enough supplies so they can make their own. If they’re not helping enough, pull them aside before class to reset expectations. Show them examples of what you need them to do and give them a quick list of written instructions. An example of a reminder expectation can sound like, “I really value your extra set of hands and eyes. Please sit at the same table with students, phone-free so you can be readily available to assist.

    What if the paraprofessional frequently leaves or disappears?

    As aforementioned, pull the paraprofessional aside to reset expectations. Remind them that they are an integral and important member of your class and it can be disruptive for students if they don’t have a steady source of support. Your chat can sound like, “I noticed you stepped out the other day. I’d really appreciate it if you remained here during class. I really rely on the support you bring because you know [insert student’s name] the best.” If the behavior persists, email the lead special education teacher for advice and follow their guidance.

    Bonus Tip

    If you’ve already had a friendly chat to reset expectations and tried emailing the lead special education teacher, you can also seek out the guidelines used in the paraprofessional’s training. This can reiterate that you, the art teacher, aren’t the one “coming up with” the rules and that they are a part of the job requirements.

    Building positive relationships with paraprofessionals in the art room is essential for fostering a collaborative and supportive learning environment. Not only does it model these skills for your students but it streamlines instructional tasks, strengthens classroom management, and bolsters individualized student support. Plus, when teachers and assistants work harmoniously together, they boost each other’s morale. Make your art room a welcoming and appreciative spot for paraprofessionals with the tips above so they’ll look forward to your class and spread a vigor for art to your students!

    What’s one thing you do to make paraprofessionals feel welcome and included in your classroom?

    How do you navigate challenging situations with paraprofessionals in the art room?

    To continue the conversation, join us in The Art of Ed Community!

    Magazine articles and podcasts are opinions of professional education contributors and do not necessarily represent the position of the Art of Education University (AOEU) or its academic offerings. Contributors use terms in the way they are most often talked about in the scope of their educational experiences.


    Source link

  • The Top 5 FAQs About Printmaking in the Art Room

    The Top 5 FAQs About Printmaking in the Art Room


    Printmaking is a powerful process in the art room. It offers students hands-on, engaging artmaking experiences and teaches creative problem-solving and experimentation. The many methods of printmaking make it accessible for all students, classrooms, and budgets. However, this is also what can make printmaking so intimidating! Art teachers just like you in The Art of Ed Community asked their burning printmaking questions and we’re here to deliver practical solutions.

    Let’s answer your top five most frequently asked questions about printmaking in the K-12 art room!

    spread of prints

    1. “I’m not comfortable teaching printmaking. Where do I start?”

    Printmaking can be an overwhelming medium—there are so many forms, lots of tools and equipment, and several stages in the printmaking process. It can feel like a lot to teach on top of classroom management, ideation, assessment, and more. The great news about printmaking is that there is a process for everyone at every comfort and skill level!

    Start with simple techniques and processes like foam tray printing or stamping. These two methods are great entry points and are a good segue into block printing. They do not require any fancy printmaking tools and you probably already have the supplies you need in your closet. Boost your confidence by incorporating mediums you love! For example, if you love drawing, painting, or mixed media, try monoprinting or collagraphy.

    Another tip is to experiment first. Try exploring foam tray printing or stamping on your own for fun. Then, host a laidback Art Night event at your home with friends or at school with colleagues to practice teaching a mini-lesson. This can help you troubleshoot any considerations before you bring it to your students.

    Embrace imperfection! Printmaking is all about trial and error and the process. Don’t think you need to know everything about printmaking before diving in! Invite students into the creative process and show them how to learn from mistakes and discoveries.

    linocut plate and carving tool

    2. “I studied printmaking, but I still avoid teaching it. Why?”

    Even if you are comfortable with printmaking in your own artmaking, bringing it to students can be a whole different ball game. Printmaking can seem messy and intimidating if you have large classes and limited studio space. With a little intentional planning, printmaking can be a smooth process that is engaging for all of your students.

    Just like you’d scaffold a difficult skill with your students, scaffold the lesson and process for your instruction. Break down the printmaking process into small steps. Teach each step as an individual lesson and move on when the class as a whole is ready. For example, spend one class sketching ideas and then the next carving. When you get to “Printing Day,” set up student-led stations with clear roles to reduce chaos. Let the first round of printmaking be an experiment to see how everything works before diving in again to make more fully realized and final prints.

    Perhaps you love printmaking so much that you don’t know where to start because you want to bring every form to your students! This is a wonderful “problem” to have. Instead of overloading your students with every possibility, pick one very simple process and let your passion trickle down to your students. Once they’re hooked, you will be unstoppable together!

    pink ink on paper and brayer

    3. “How do I teach printmaking on a tight (or nonexistent) budget?”

    Certain types of printmaking can be on the pricier side and take up the bulk of your valuable art budget. For instance, lithography traditionally uses heavy blocks of limestone and requires a heavy-duty printing press with lots of studio space. Etching can also use expensive and toxic chemicals that aren’t school-friendly. However, there are many hacks and alternatives to make printmaking accessible to your students!

    Here are some budget-friendly printmaking ideas perfect for the K-12 art room:

    carved plate with black ink

    4. “I want to try block printing, but I’m worried about students cutting themselves!”

    Prioritizing student safety is a part of having excellent classroom management in the art room. Many items used for carving or incising designs, like linoleum cutters or etching tools, are very sharp. Paired with the force and pressure required for carving and many students’ poor hand strength and coordination, you may have cause for concern. With proper instruction, supervision, and limits, you can execute a printmaking lesson with zero injuries!

    Start by teaching students about the tools and equipment they will be using. Assume nothing and explain and show everything to ensure everyone is on the same page. Explain what each item is for and how to properly use it. Verbalize and demonstrate safe-cutting techniques, such as carrying sharps pointed toward the ground, cutting away from the body and helper hand, and using a bench hook or scrap board to stabilize the block. Do several exercise drills to get students in the habit of how to behave with, hold, and use these exciting tools!

    Another tip is to start with soft-cut materials, such as rubber blocks or foam, instead of traditional linoleum. These require less pressure to carve and often, duller tools. You can also practice the motions of carving with plastic tools and clay slabs before graduating to printmaking materials. These are all great alternatives for younger printmakers.

    two types of printing plates

    5. “How do I keep printmaking from becoming a total mess in my art room?”

    Art teachers spend hours and hours maintaining the art room. There are tons of materials, tools, and projects before adding printmaking to the mix. Plus, printing ink seems to multiply on hands, tables, clothes, and sometimes even the floor! In the chaos of a “Printing Day,” students may not follow cleanup instructions and leave the sink full of inky brayers. Avoid the mess and take a few simple steps to prepare for cleanup before class even starts.

    Take a look at these quick steps to avoid the mess:

    • Set up printmaking zones.
      Designate separate areas for drawing, carving, inking and printing, and drying to keep messes contained.
    • Use minimal ink.
      Show students how much they need and how to roll it out into a thin, even layer. You can even pre-portion ink into small cups so they don’t overuse and waste it.
    • Assign cleanup roles.
      Build ownership in the studio by putting students in charge of wiping tables, cleaning brayers, and organizing prints. This will free you up to supervise the class and the classroom as a whole.
    • Provide wipes and scrap paper.
      Baby wipes—store-bought or DIY—will be your best friend during printing to minimize the spread of ink! Use large scrap paper as “trays” or small scraps as “tweezers” to transport paper and prints without tiny fingerprints.
    • Grab a lot of newsprint.
      Order a bulk pack of newsprint or ask your local newspaper for scrap newsprint. Use this to blot prints to absorb excess ink. This reduces smudging and dry time.

    pink ink on paper and brayer

    Whether you’re new to printmaking or a seasoned expert, you can absolutely teach printmaking to your students! Printmaking may feel overwhelming, but it’s one of the most rewarding processes to teach. The key is to start simple so you will gain confidence and hook your students! From there, try some of the hacks and tips above to keep it budget-friendly and mess-free. Turn your most frequently asked questions about printmaking into your most frequently asked for art lesson!

    What’s your biggest classroom printmaking challenge that we can help with? 

    To chat about printmaking with other art teachers, join us in The Art of Ed Community!

    Magazine articles and podcasts are opinions of professional education contributors and do not necessarily represent the position of the Art of Education University (AOEU) or its academic offerings. Contributors use terms in the way they are most often talked about in the scope of their educational experiences.


    Source link

  • Think Outside of the School: 9 Unique Art Show Locations

    Think Outside of the School: 9 Unique Art Show Locations


    Choosing a unique art show venue outside of your school creates a novel and exciting experience for your young artists. It also expands the audience for your students’ work and exposes your program to a wider segment of the community, including potential supporters and stakeholders. Partnering with community organizations and having your art show outside of your school makes the culmination of all of their hard work special and makes your students feel like professional artists. 

    art show display

    Reap the benefits of hosting your art show at a fresh location in the community!

    Hosting your art show in the halls of your school is usually the easier option. However, stepping outside of your school campus bubble can truly benefit your students and your art program. Aside from the positives listed above, hosting your art show at a community venue brings other people to help hang and take down your show. The business or organization will likely also promote your show. For families and students, it connects the visual arts with tangible careers in the community. Let’s take a look at nine unique locations to consider for your next art show!

    1. District Administration Building

    Place student artwork directly in the path of district decision-makers. Those with the power to influence budgets and approve new courses will experience the impact of your art program firsthand. This daily exposure to the creativity and skills fostered in your classroom can powerfully advocate for the value of art education.

    2. City Hall

    Showcase your students’ artwork in your local government building so the broader community will see the importance of your art program. Students will take pride in having their work displayed in a prestigious location. A gallery night will allow families and students to personally meet their city’s officials.

    3. Local Park

    Hold your art show amidst nature’s beauty in a local park. The Impressionists loved creating en plein air but outdoor spaces can be wonderful for viewing art as well. Take advantage of natural light to enhance the artwork. Families will enjoy the relaxed, outdoor setting, and the open space allows for larger crowds.

    conservatory

    4. Community Art League

    Many art leagues have a dedicated gallery space. Your students will benefit from professional hanging systems and lighting. This collaboration connects your school and students with experienced artists. Nothing motivates students to up their game like telling them accomplished artists will be examining their work!

    5. Community College

    Hosting your art show at the community college exposes them to a post-secondary environment. Many community college art departments have a small gallery space but there are usually plenty of other larger lobby spaces available too. Nearby classrooms or studio spaces work perfectly for workshops, demonstrations, or blacklight galleriesAs students see their best work hanging prominently in an institution of higher learning, they will naturally envision themselves continuing their education and thriving in college.

    6. Library

    Literacy isn’t just for Language Arts! Visual arts is all about visual literacy and a partnership with your local library is a natural connection. After all, every great art room has a library, and your local library should have a space for student art. The library offers a quiet, studious environment that encourages close examination of artwork. This public space attracts a diverse crowd with lots of community events, ensuring a steady flow of visitors. Libraries also do a really good job of advertising their events, guaranteeing built-in publicity for your students.

    7. Historic Buildings

    Choose a historic building or site for a truly unique backdrop. This adds a sense of grandeur and importance to the student artwork. Many buildings rent out their space and property on weekends for events such as weddings. However, they are often available during the week. 

    8. Local Museum

    Partnering with a local museum elevates your art show to a professional level. This venue provides top-notch display facilities and climate control to protect the artwork. This location lends credibility and prestige to your students’ work. Think outside of the box and reach out to any type of museum—not just an art museum! The type of museum you partner with can also dictate your art show theme.

    9. Feeder Schools

    Vertical alignment and partnerships across grade levels can be tremendously beneficial for everyone. When older students show their work in an elementary or middle school, the younger students see quality work that they will want to make one day. The older students will feel a surge of pride as they showcase their work in their old stomping grounds. When you display elementary artwork at the high school, it lightens the mood and can help older students remember the earnest joy of creating. This builds a stronger art program across the district and shows students that art is a lifelong journey. 

    art show display

    Stay focused on practical art show considerations.

    Choosing an unconventional venue for your art show is exciting, but demands careful planning. Fortunately, there are many people, often who work at the location you are partnering with, who are more than willing to help you plan and execute!

    Here are some things to consider as you choose and plan your venue:

    • Is the location accessible to all of your guests?
    • For outdoor locations, do you have an inclement weather plan?
    • Do you have access to restrooms and ample parking?
    • Do you have clear signage to find the event?
    • Are you allowed to offer refreshments in the space?
    • What are the associated costs, including furniture rentals, refreshments, prizes, and transportation?
    • How far in advance can you set up, and how much time do you have for takedown?
    • How will you safely transport, display, and light the artwork?

    art show brainstorming

    Let your community help you with your art show.

    Putting together an epic art show seems overwhelming. It is okay to ask for help and advice from colleagues. The Art of Ed Community is a tremendous resource with immeasurable collective wisdom. Delegate as many tasks as possible to your Art Club, students, colleagues, and friends. Get a peek behind the scenes of how Sarah Krajewski and Jenn Russell put on their art shows. Gain their best Art Show Secrets to help you put on your best art show yet! 

    https://www.youtube.com/watch?v=NPHW2zteeSQ

    Turning your unconventional art show vision into reality requires a bit more consideration and planning. However, the benefits are always worth it! Hosting your art show off-campus increases the visibility of your students’ artwork, your art program, and the value of art education as a whole. Look into partnering with a historic site, your city hall, the local library, or a feeder school to curate a truly memorable and impactful art show experience for families, students, administrators, and other community members.

    Tell us! Have you ever hosted an art show outside of your school?

    What is your dream location for your art show?

    To chat about art shows with other art teachers, join us in The Art of Ed Community!

    Magazine articles and podcasts are opinions of professional education contributors and do not necessarily represent the position of the Art of Education University (AOEU) or its academic offerings. Contributors use terms in the way they are most often talked about in the scope of their educational experiences.


    Source link

  • 5 Ways Art Teachers Can Afford a Master’s Degree to Continue Learning and Growing

    5 Ways Art Teachers Can Afford a Master’s Degree to Continue Learning and Growing


    One thing that makes art teachers so amazing is that we are self-proclaimed forever students who embrace learning. Continuing your education is appealing! It’s a chance to feed your brain, interact with others on the same wavelength, revitalize your teaching strategies, and grow as a researcher. It gives you a chance to challenge yourself to go further than you ever thought you could. On the other hand, it can be costly to continue learning; it can seem unattainable on a teacher’s budget. It may leave you wondering, “How can I afford a master’s degree?”

    Explore five ways you can afford to pay for a master’s degree!

    Let’s take a look at five practical ways you can afford to continue learning. And don’t worry—it won’t be to stop buying a cup of coffee or adding guacamole to your burrito bowl. As you read, remember that none of these suggestions live in isolation. You may be able to pair tuition reimbursement or scholarships with paying as you go to lower the cost of your degree.

    laptop with aoeu's master's degree landing page

    1. Use district professional development funds.

    Many K-12 schools have tuition reimbursement programs, so they may already cover part of your continuing education. These programs are often not widely advertised, so you’ll have to seek them out. Research your district contract, talk to your union representative, and source information from fellow colleagues. Take the time to understand exactly how the funding works in your district and what limits apply. A few key things to note are deadlines, reimbursement, and payment policies with purchase orders.

    Insider Tip:

    District funds go quickly! Have your paperwork polished and ready to submit before the application window opens. 

    Learn More!

    2. Apply for grants and scholarships.

    Money is available through school scholarships, state education programs, cultural associations, and grants. Sometimes, you can find money available through your district’s parent-teacher association or other local community organizations. No matter what options you discover, take the time to apply! Any opportunity that offsets part of your tuition is worth your energy. 

    Insider Tip:

    Scholarship and grant applications can take time, but a tuition break is worth the extra effort to get and stay organized! Prepare your resume/CV, letters of recommendation, and references so they’re ready to go when an opportunity becomes available.

    art teacher on a laptop with the aoeu website

    3. Leverage salary lane changes.

    Research your district’s salary schedule to clearly understand how earning your master’s degree will affect your net salary over time. Some districts offer smaller pay increases for incremental steps between degrees, such as a BA +12 and BA +30 credit hours. If you time it right, you can use this increased salary to fund your degree—you won’t feel a thing because this salary increase is not part of your existing budget yet.

    Insider Tip:

    Pay attention to deadlines and work backward. You don’t want to miss a salary increase for an entire year by a few days. Ensure you have the credits you need beforehand from the issuing institution. Allot at least one month between the course end date and the day you need to submit official transcripts. 

    4. Pay out-of-pocket in small increments.

    Let’s talk budgeting! Consider items you can cut out or cut back on to help you hit your monthly tuition target. Taking a detailed look at your spending will identify where every dollar goes. Then, create a process to reallocate certain buckets of money toward your tuition. At The Art of Education University, you can make small payments toward your coursework so you’ll have tuition paid in full by the start date. Remember that this is a short-term adjustment. The goal is a completed degree, a potential raise, and more financial freedom!

    Insider Tip:

    Cut out the extra cost of guac on your burrito bowl—just kidding! Look for windfalls, like tax refunds or a month when you get an extra paycheck. Set that money aside specifically for your degree. 

    5. Determine the right pace.

    Pacing your coursework is one way to spread out your degree’s monthly or annual cost. Look for a program that you can tailor to meet your specific needs, compared to a strict, regimented course of learning. At The Art of Education University, take classes when it is convenient for you, your schedule, and your finances. Some students prioritize a faster pace to reach their end goal, while others spread their degree over four or five years to pay out-of-pocket as they go.

    Insider Tip:

    As you look at schools, ask specific questions about course pacing, course availability, and any requirements around staying on a particular timeline. Some programs require you to take courses continuously or progress with a cohort of classmates. 

    aoeu master's student with diploma and cap

    No matter where you are in your teaching career, the best time to invest in yourself is now. 

    Determining when to pursue and earn your master’s degree is personal. So many factors can determine what the “best” time is. Look at your season of life, how much time you have to dedicate, how much time you want to dedicate, and what your ultimate goal is. However, if we are talking strictly about earning potential and the return on your investment, there’s one clear answer—and I’m betting it won’t surprise you. The sooner you navigate the logistics of a master’s degree, the sooner you can increase your earning and learning potential!

    Share a professional goal you have as an art teacher.

    What’s holding you back from pursuing a master’s degree?

    To chat about how to afford a master’s degree with other art teachers, join us in The Art of Ed Community!

    Magazine articles and podcasts are opinions of professional education contributors and do not necessarily represent the position of the Art of Education University (AOEU) or its academic offerings. Contributors use terms in the way they are most often talked about in the scope of their educational experiences.


    Source link