دسته: معماری مدرن

  • Jazz at LACMA: Nicole McCabe Quartet


    Chris Burden’s Metropolis II is an intense kinetic sculpture, modeled…

    Perhaps the most dominant art form of the last 100 years, film has an important…

    Tuesday Matinees

    Enjoy concerts featuring leading international and local ensembles in programs o…

    Art & Music,Jazz at LACMA,Latin Sounds

    LACMA offers in-person art classes for kids, teens, and adults, offering the cha…

    Random International’s Rain Room (2012) is an immersive environment of…

    Rain Room

    Artist Robert Irwin’s work in the last five decades has investigated perception…

    Barbara Kruger’s Untitled (Shafted) features her distinctive use of advertising…

    Band (2006) may qualify as Richard Serra’s magnum opus, representing the fullest…

    LACMA’s Modern Art collection features primarily European and American art from…

    LACMA’s Acquisitions Group and Art Council members share a deep affinity for the…

    Art Councils,Acquisition Groups,Art of the Middle East: CONTEMPORARY,Asian Art Council,Costume Council,Decorative Arts and Design Council,LENS: Photography Council,Modern and Contemporary Art Council,Prints and Drawings Council

    Welcome to the employment page of the Los Angeles County Museum of Art. To see a…

    Jobs,Careers,Internships,Volunteer

    Join museum educators, artists, curators, and experts for artist talks, virtual…

    Create+Collaborate

    In Golden Hour, over 70 artists and three photography collectives offer an aesth…

    Established in 1967, the Conservation Center at LACMA supports the museum’s comm…

    painting conservation,paper conservation,object conservation,textile conservation,conservation science,conservation imaging

    Barbara Kruger: Thinking of You. I Mean Me. I Mean You. is a major exhibition de…

    Featuring Ai Weiwei, Huang Yong Ping, Wang Guangyi, Xu Bing, Yue Minjun and more…

    Beyond the concrete materials of ink and paper, there is an intangible spirit un…

    To complement the presentation of The Obama Portraits by Kehinde Wiley and Amy S…

    From the moment of their unveiling at the Smithsonian’s National Portrait Galler…

    (Los Angeles, CA—January 13, 2022) – The Los Angeles County Museum of Art (LACMA…

    (Los Angeles, CA—December 14, 2021) The Los Angeles County Museum of Art (LACMA)…

    Mixpantli: Contemporary Echoes showcases the lasting impact of Indigenous creati…

    LACMA marks the 500th anniversary of the fall of the Aztec capital Tenochtitlan…

    Since the mid-20th century, California has been a beacon of both inventive desig…

    Revealing insights about family life and the quotidian in the 21st century, Fami…

    One of the most significant contributors to fashion between 1990 and 2010, Lee A…

    Comprising approximately 400 works, including an unprecedented number of loans f…

    Archive of the World: Art and Imagination in Spanish America, 1500–1800 is the f…

    Scandinavian Design and the United States, 1890–1980 is the first exhibition to…

    In the work of American artist Sam Francis (1923–1994), Western and Eastern aest…


    Source link

  • Mind Upon Mind: Improve Us

    Mind Upon Mind: Improve Us


    Le menuisier (colour litho) by Fraipont, Gustave (1849-1923); Private Collection; (add.info.: Le menuisier. Illustration for Le Vocabulaire des Petits by M Fournier with designs by G[ustave] Fraipont (Librairie Gedalge, c 1895).); © Look and Learn.

    In a 1937 Chips from the Chisel column, which is also featured in “Honest Labour: The Charles H. Hayward Years,” Hayward wrote, “The influence of mind upon mind is extraordinary.” The idea being there’s often room for improvement. (You can read the entire column here.)

    Recently, one of Chris’s chairmaking students, Lo blue, sent us another way to drill sticks for chairs.

    So now we want to know: What else have you thought of, tried out and improved upon?

    To that end, we’re asking any LAP readers who have built projects from our books to share your ideas for improving the design, construction or finishing of a project. We will feature some of our favorite submissions in our new series, Mind Upon Mind. Those featured will receive a $50 Lost Art Press gift card from us.

    To submit:

    • Include written steps or a summary of your improvement. Write it in a style you, as a reader, would find helpful and easy to understand. But don’t fret too much. We’ll edit it to make you look good, promise.
    • Include photos to help illustrate your improvement. You don’t need special equipment to do this. Just good lighting and your phone should be OK.
    • Include your name as you’d like it to appear in print and any links you’d like to share with readers, such as your personal website or Instagram account.
    • Email your submissions to kara@lostartpress.com.

    As a great example of the above, here’s Lo’s recent submission, showing a different way to drill sticks for a chair, as detailed in “The Stick Chair Book: Revised Edition.”

    — Kara Gebhart Uhl

    Drilling Short and Long Sticks Lo Style

    Well, after drilling the sticks for my armchair at the Lost Art Press workshop with a laser, I wondered – do I really need one? What I didn’t like about using it was how long it seemed to set up the whole ordeal. For each stick you have to move the tripod and laser, line it up, then go back to the chair, line it up and drill on. Also I just don’t want to buy more “things” (I don’t have much storage space in my shared shop). So I set out to come up with another method that so far has worked without fail on two chairs. I’ve never explained a process before but I’ll give it my best shot and hopefully it makes sense.

    Things You Need

    • BBQ skewer or small dowel
    • Different colored pens
    • That sticky poster-hanging stuff that’s in the random items section in the grocery store

    Marking Your Skewer

    The spindle decks of my chairs so far have been 2” wide, so I mark a centerline and go over an inch on both sides. The different colors really do help here. That way, when you’re aiming down, you can match up your measurements. I spaced them 1/8” apart.

    Set Up Your Axis

    (Maybe that’s what it’s called? I’m not really sure, but hopefully you get what I mean with the photo …)

    Snap some lines so you set up your skewer just right, lining up the driver’s side stick with the passenger side stick.

    Yep, just like that.

    For the back sticks, you can just line up the skewer by eye so it sits right on the 2” marking.

    For this one, that meant it had to be angled.

    Now, put that sticky stuff on the middle of your skewer jig and get ready to drill.

    It was a bit of a challenge to photograph the fine lines of the skewer, but you can just barely see two dashes on the left here. Now, line up your drill very cleanly between the two matching dashes.

    Here, for instance, you can see I’m angled a wee bit too far back.

    Here, I’m almost a quarter of an inch too far to the right.

    Once you line up the dashes between your armbow, drill your top hole and move your skewer to the next stick position. Drill your spindle deck hole. If you’re kinda nervous (like me) you can check with an undersized dowel to see if yah buggered up your drilling …

    Well, I didn’t screw it up, great, move on to the next.

    And well, that’s it. Personally, moving a skewer from one hole to the next is a lot faster and less stressful than setting up a laser.

    Here are all my sticks lined up, pretty darn straight …

    Maybe you’re wondering … “But did it work when you put the armbow on?” Yes, I had zero resistance while gluing up, significantly less than when I used the laser.

    But … as per usual, I was sure to f%$# something up in this process.

    Idiot …

    Oooopsy … I drilled into the leg. 🙁

    I didn’t get too worked up about it. It’s wood, it can be repaired. When I was at school for luthiery, there was a repair guy who did a lecture and I’ll never forget something he said. Something like, “I don’t repair something to make it look like it never happened, when I’m done, they’ll know it was repaired but repaired well and with care.”

    I just plugged a piece of cherry in my little accident.

    Here is the final chair.

    About the damn ugliest thing I’ve ever made. Good god, I hope to never make anything again that inspires words like “Regal!, Master, I’ve done well in the stock market now I just like to smoke cigars! Conquer!”

    I hate it.


    Source link

  • Eco-Expressions: Drop-In Letters and Art-Making Workshops with Michele Lorusso

    Eco-Expressions: Drop-In Letters and Art-Making Workshops with Michele Lorusso


    Eco-Expressions: Drop-In Letters and Art-Making Workshops with Michele Lorusso

    jascencio

    Wed, 04/09/2025 – 11:15

    Join artist-in-residence Michele Lorusso for drop-in activities including letters to the world in the future, environmental chats, and hands-on art-making workshops inspired by the exhibition Nature on Notice: Contemporary Art and Ecology.

    All ages are welcome to participate. All programs provided with bilingual translation in Spanish.

    Short Title
    Eco-Expressions Apr 26

    Event type

    Policies/Notes

    Charles White Elementary School

    2401 Wilshire Blvd., Los Angeles, CA 90057

    Location (Building)
    Charles White Elementary School

    Primary image
    Photo courtesy of Michele Lorusso

    Date
    Sat, 04/26/2025 – 13:30
    -Sat, 04/26/2025 – 16:00
    Mobile tile settings
    Image tile format
    Exhibition Format

    Tile type
    Image Tile

    Hide on mobile
    Off

    On-sale time
    Mon, 11/25/2024 – 15:21

    Event audience

    Ticketing button label
    Free

    Credit line – Left column

    All education and outreach programs at LACMA are underwritten by the LACMA Education Fund and are supported in part by the Judy and Bernard Briskin Family Foundation, The Rosalinde and Arthur Gilbert Foundation, the William Randolph Hearst Endowment Fund for Arts Education, Alfred E. Mann Charities, The Ralph M. Parsons Foundation, Gloria Ricci Lothrop, the Flora L. Thornton Foundation, U.S. Bank, and The Yabuki Family Foundation.

    Credit line – Right column

    Photo courtesy of Michele Lorusso

    Ticket price

    Free

    Event Tier
    Tier 3

    Module
    Enable “Add to Calendar” button
    On


    Source link

  • Leaf & Fabric Collage – ARTBAR

    Leaf & Fabric Collage – ARTBAR


    We experienced another successful community art table! This time, I set out leaves with fabric scraps, tempera paint, glue, and colored construction paper. I had a prompt at the table, but children could use the materials however they chose. The results were pure magic. I love every single piece!

    Children make mixed media collage with leaves, fabric scraps, and paint.

    [ I am a participant in the Amazon Services LLC Associates Program, an affiliate advertising program designed to provide a means for us to earn small fees at no cost to you by linking to Amazon.com and affiliated sites. ]

    Here’s what you’ll need for Leaf & Fabric Collages:

    ~ Drop cloth or butcher paper to cover your table

    ~ Colored construction paper (I used sulphite paper in almond, pink, and gold)
    ~ Tempera paint (I mixed a muted yellow, deep orange, and bright pink)

    ~ Brushes

    ~ Fabric scraps (cut up from donated fabric and old clothing)

    ~ Leaves (collected the morning of so they were fresh)

    ~ Glue

    Table set up and ready for mixed-media collage with leaves, fabric scraps, tempera paint, and colored construction paper.

    Table set up and ready for mixed-media collage with leaves, fabric scraps, tempera paint, and colored construction paper.

    Setting up the table:

    I used a round table and made sure there were about 3 separate stations so children didn’t have to reach too far to get what they needed.

    1. Start by covering your table. I like using a dropcloth, it can absorb the paint a little if there are spills, and it can be washed and reused, so it saves on paper.

    2. Mix some warm colors. I added white and a dash of purple to the yellow to make it a little more muted and opaque. I mixed the orange with a dash of blue and a little white so make it more of a burnt orange. You can add a little red, too. And I added white to the neon pink. Add a brush or two to each jar.

    3. Set out a box of leaves and some trays of fabric scraps. And add some glue bottles, making sure that they all work. I used light, warm-colored construction paper instead of white so that even the most minimalist explorations would feel complete.

    A young child is painting with temperas and collage with leaves and fabric on colored construction paper.

    A young child is creating a collage with leaves and fabric on colored construction paper.

    Managing the process:

    1. The thing I love most about setting up an essentially self-serve art experience is watching how children will use the materials and in what sequence. When I used to have art classes in my house, I would have staggered this type of project. Meaning, I would have started with collage and then brought out the paint, or maybe vice-versa. This is because art class was an hour and I wanted to extend the experience for as long as possible. But I can admit that spacing the use of materials controls the experience to a certain degree, since children don’t have full autonomy over when to use the materials. With a community table where children and families come and go, I can’t space out the usage of the materials even if I wanted to, it would be too clumsy and take up so much of my time. I have up to 75 people in the room at one time with three different tables, so I need to set up a painting experience with the understanding that all the materials are out at once and children will have autonomy over their entire experience (that is, if a parent doesn’t control it). This first used to make me anxious, but now I love and embrace the outcomes and I don’t think I’ll ever go back!

    A young child is glueing leaves and fabric strips to her painted collage.

    2. The only thing I have to manage is making sure to restock the fabric scraps, add more paint (but I didn’t actually have to do that because even after 2 hours, the paint never ran out), and clean up the space quickly to add some fresh paper. The rest is just left to fate!

    Child painting with tempera paints on top of construction paper and leaves.

    3. I absolutely LOVE watching different styles emerge. This child had a very minimalist aesthetic. She started with this simple yet dazzling layout, adding yellow all the way around her painted leaf.

    The transformation of a child's mixed-media artwork using tempera paints, leaves, and fabric.

    Once all the yellow was added, she painted back over her leaf so it was just a monochromatic piece. Next time I cam pack she had added another color at the top, and made hair and a border from the fabric. It was fascinating to watch her iterate.

    Child adding fabric scraps to her painting, with leaves and glue on the table.

    We had other minimalists as well. This one really caught my eye.

    Child using glue to attach fabric scraps to her mixed-media collage.

    Mixed-media collage with tempera paint, finished on a table.

    And these were two of my very favorite pieces of the whole day. The control and purpose behind these mixed-media paintings are unreal! Frame worthy.

    Child paints with tempera paints on top of her leaf and fabric collage.

    This child was very young, maybe between 2 and 3 years old. Her parents were nearby but let her work mostly by herself, adding layers and layers of color and collage. I love it so much.

    Finished mixed-media collage using leaves and fabric on a table next to a tray of fabric scraps.

    This artist seemed to have a particular affinity for the textural collage pieces and didn’t want to add any paint. The colors and composition are so on point.

    Finished mixed-media artwork using tempera paints, leaves, and fabric scraps.

    4. Make sure you have a drying area nearby. We just used the floor. I would also suggest having a few pieces of flat, scrap cardboard available for the very wet paintings that needed to get home without too much mess.

    Finished mixed-media artwork created by young children using tempera paints, leaves, and fabric scraps.

    Finished mixed-media artwork created by young children using tempera paints, leaves, and fabric scraps.

    5. What I learned from watching the children hard at work at this painting table was that they use core design elements so effortlessly and instinctively, such as color, texture, space, form, mark-making, and composition. It’s actually so inspiring!

    Let me know if you try this one, and tag me on Instagram @artbarblog if you do!

    xo Bar

    – – – – – – – – – – – – – – – – – – – –

    Did you like this post? Here are other collage and leaf ideas:


    Source link

  • Tuscany Travel & Inspiration – ARTBAR

    Tuscany Travel & Inspiration – ARTBAR


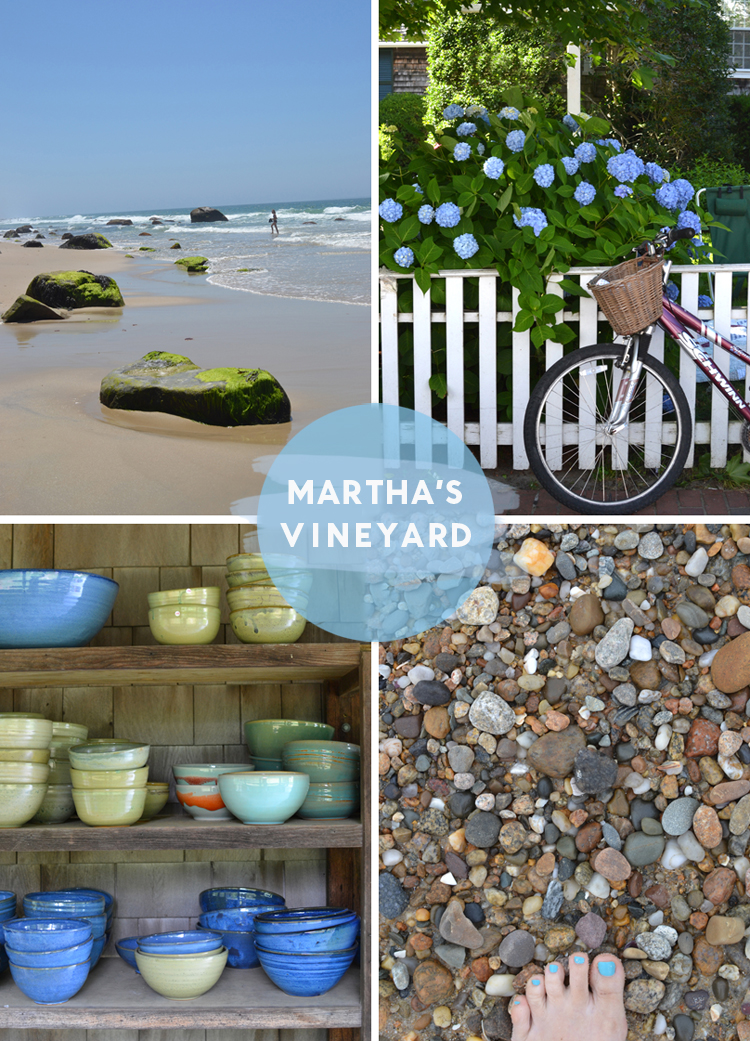
    Our family went on a trip of a lifetime to Tuscany, Italy last summer and finally, I am sitting down to write and share all about it. We had been planning this trip for what feels like a decade. Every year we would do all the work creating the itinerary, but then be too overwhelmed with the details, cost, logistics, dogs, work, summer camps. We had spreadsheets and links and secret Pinterest boards, but would instead become paralyzed and just end up driving to Maine or Martha’s Vineyard or Rhode Island (all amazing places) or up to Montreal in search of a little slice of Europe without the air travel. (If you follow me on Instagram, I have lots of story highlights with our family travels along the East Coast — there are some really beautiful spots.) We had everything planned for summer 2020, but then the world stopped (we did perfect the staycation during those pandemic summers). Somehow, some way, with help from friends who cheered and counseled and convinced, we finally hit “buy tickets” with an emotional wave of excitement and panic. We’re going to Italy!!

    Villa Barbazzano in Tucscany, Italy

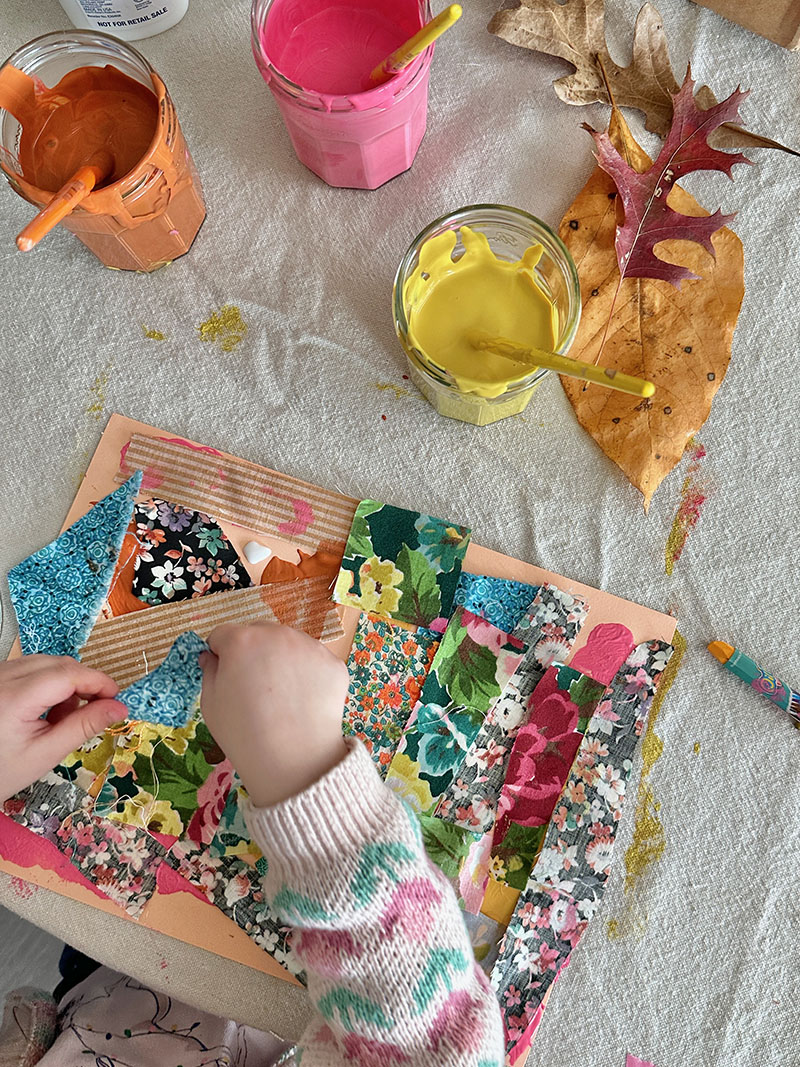
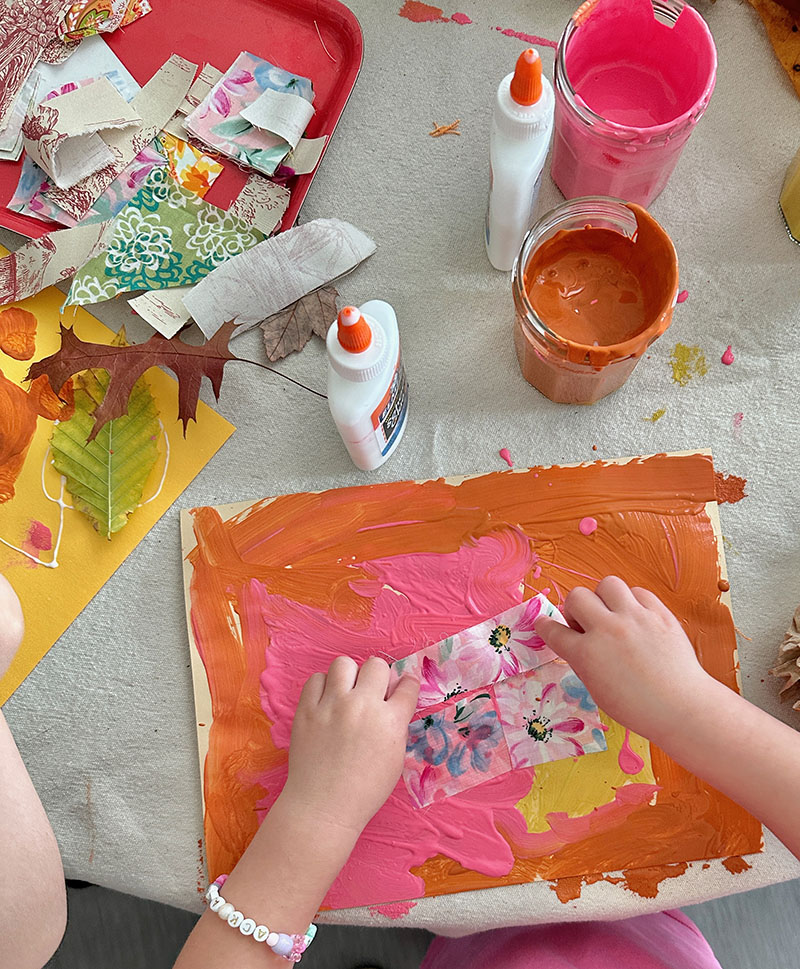
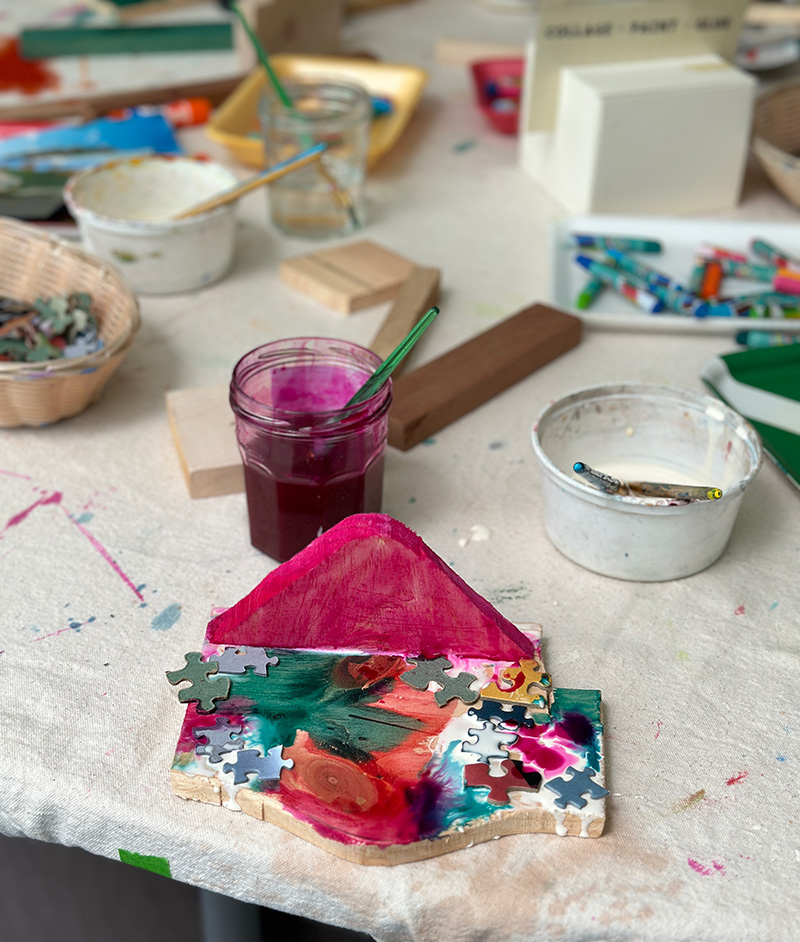
    Here’s what STEP 1 of our Italy planning entailed: Watch all of Stanley Tucci’s Searching for Italy; watch White Lotus (season 2). STEP 2: Wardrobe and art supplies. Then alas, STEP 3 (the hard part): Itinerary. I say the hard part because, on the one hand, it’s fun to do the research (especially following all the Tuscany IG accounts), but on the other hand, planning and logistics are not something I’m naturally good at or like very much. I prefer being a follower on vacations; just tell me what’s happening and where to go, and I’m there. But this trip forced me to be a travel leader, which is way out of my comfort zone. I’m really a homebody at heart. I want to see and experience new places, but I want to teleport there. I hate flying, and I get motion sickness in any moving vehicle.

    Villa Barbazzano in Tucscany, Italy

    But now that this whole trip is done, I can say that I did all the hard things, and it went really well. And even though I still would prefer to be a follower on trips, I was actually okay at being a leader. Not perfect (like the first-day excursion to Arezzo during the 3 hours everything is closed), but pretty okay!

    So, without further ado, I am sharing my favorite photos and inspiring spots, the t-shirts I made, my Tuscany color palettes (still to come and the reason this post has taken 6 months), and some links to the places and things we loved most.
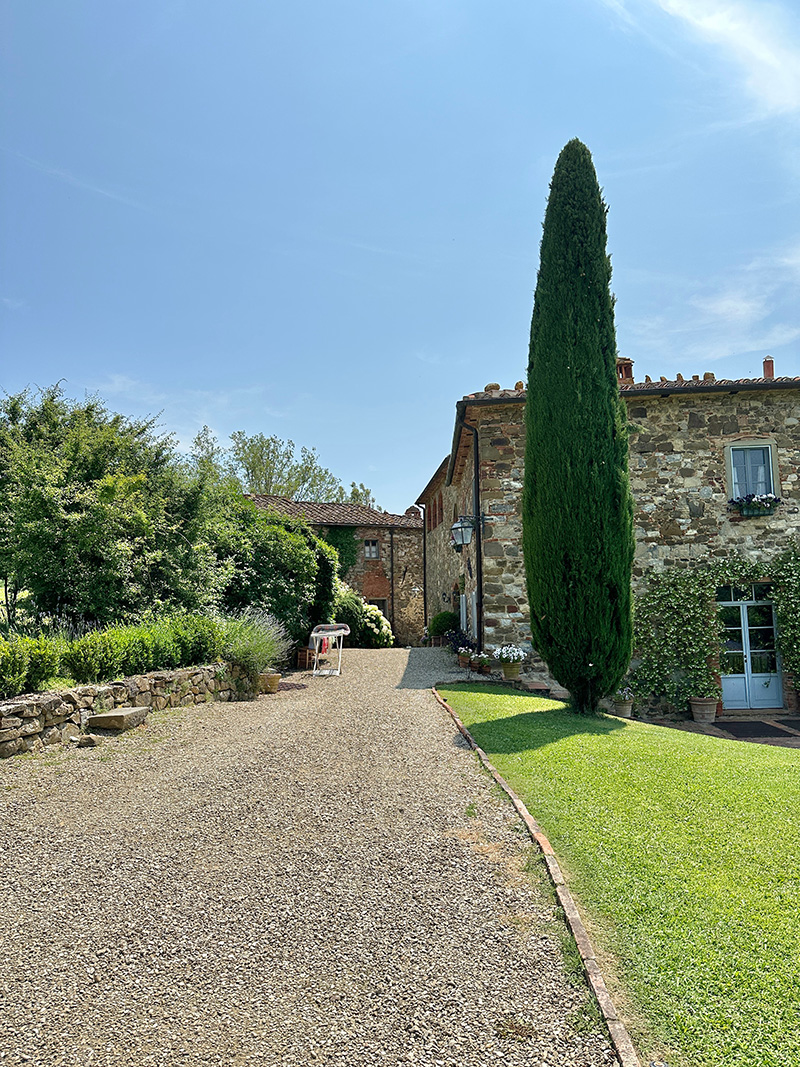
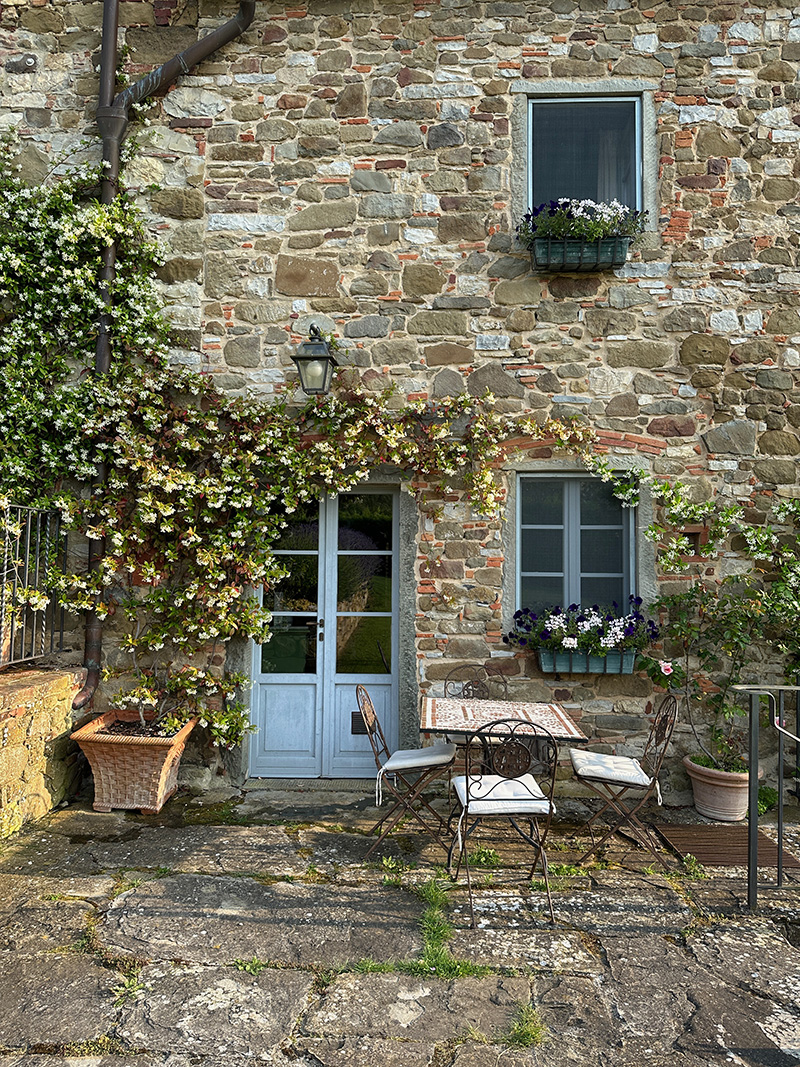
    Villa Barbazzano

    The first 9 days of our trip were spent at this gorgeous villa (which is available to rent!). It’s located about 45 minutes south of Florence in a small town called Val di Chiani. It was the five of us, plus each of my kids brought a friend, for a total of eight people. The villa has nine bedrooms and sleeps 20 (perfect for family reunions)! If you click on the link, you can see how beautiful the villa is from all of the photos. But it so far exceeded even our wildest dreams. It is heaven on earth. The grounds are absolutely stunning, kept so beautiful by one man, Corrado, and his dog Terri; the pool and pool house are gorgeous and in perfect shape, plus so comfortable and tasteful; the bedrooms are cozy and comfortable and feel a bit like being in a castle with delightful tile and incredible architecture; and the sunsets are magnificent. We would go back in a heartbeat.

    Villa Barbazzano in Tucscany, Italy

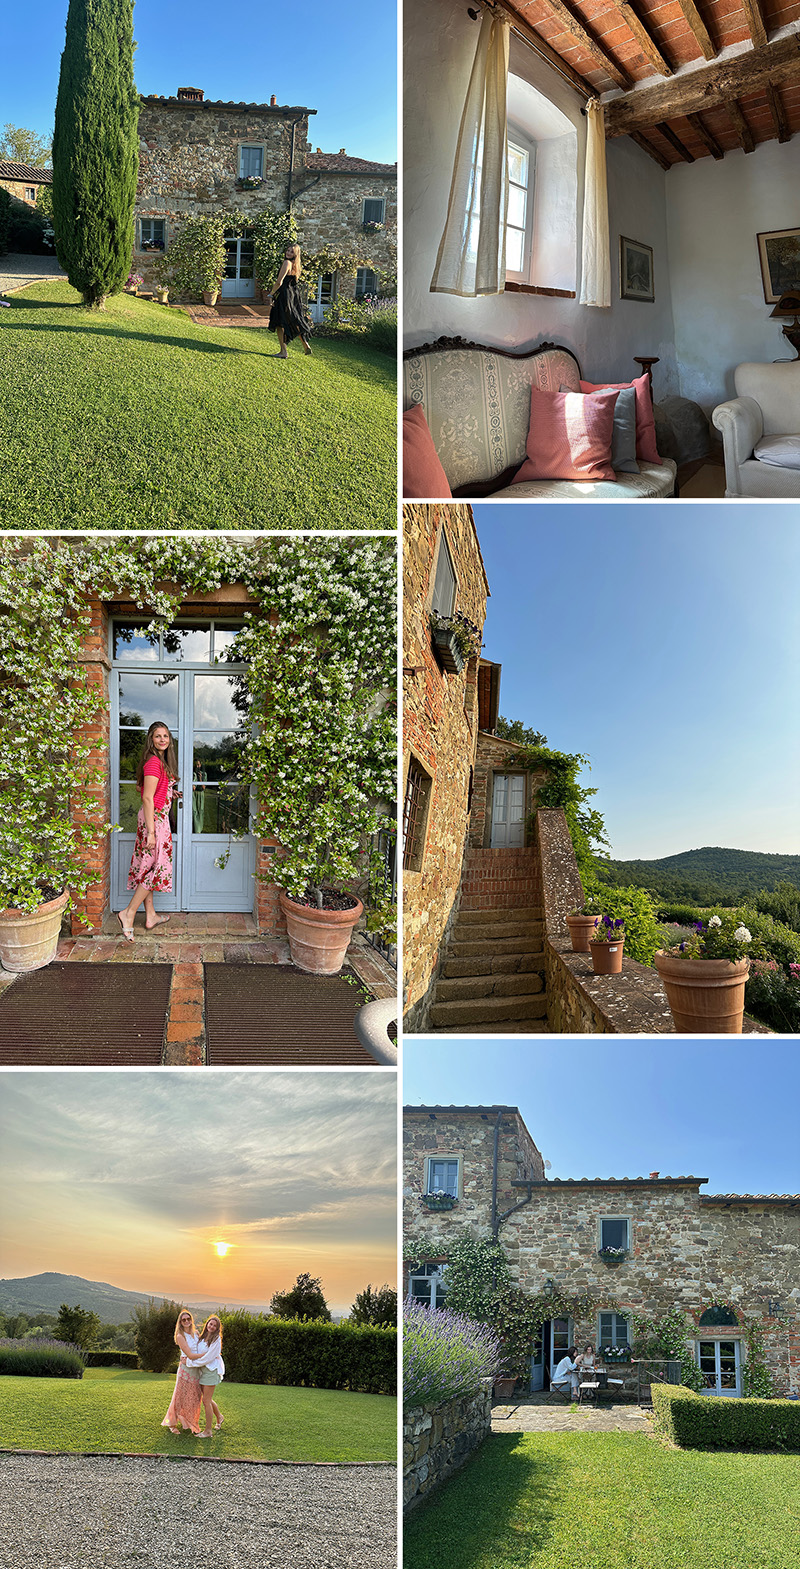
    In fact, the villa is so beautiful and comfortable that we decided to have more rest days at home than originally planned. We had rented two cars to fit everyone, and it did get to be a bit much to do so much driving every day, so we were happy to just plan a day off. The closest big town is Arezzo, about 20 minutes away, and we went there three times for short excursions and meals. We actually loved Arezzo so much, scroll down for more on that.

    Florence

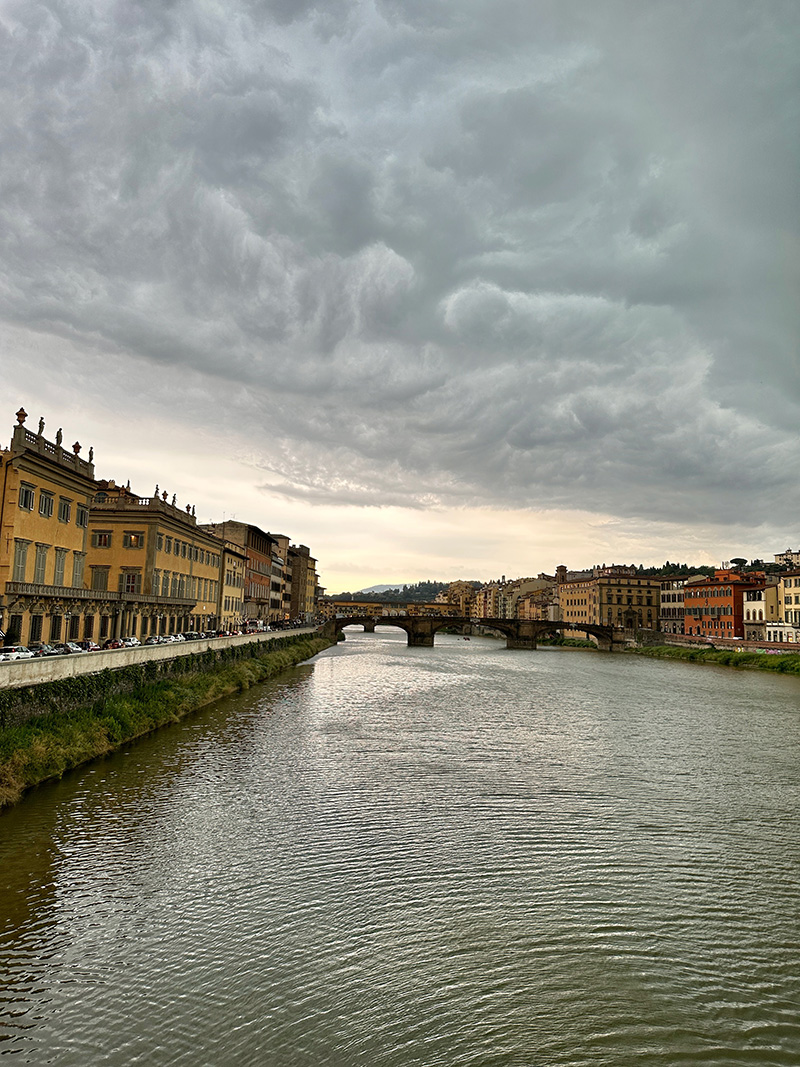
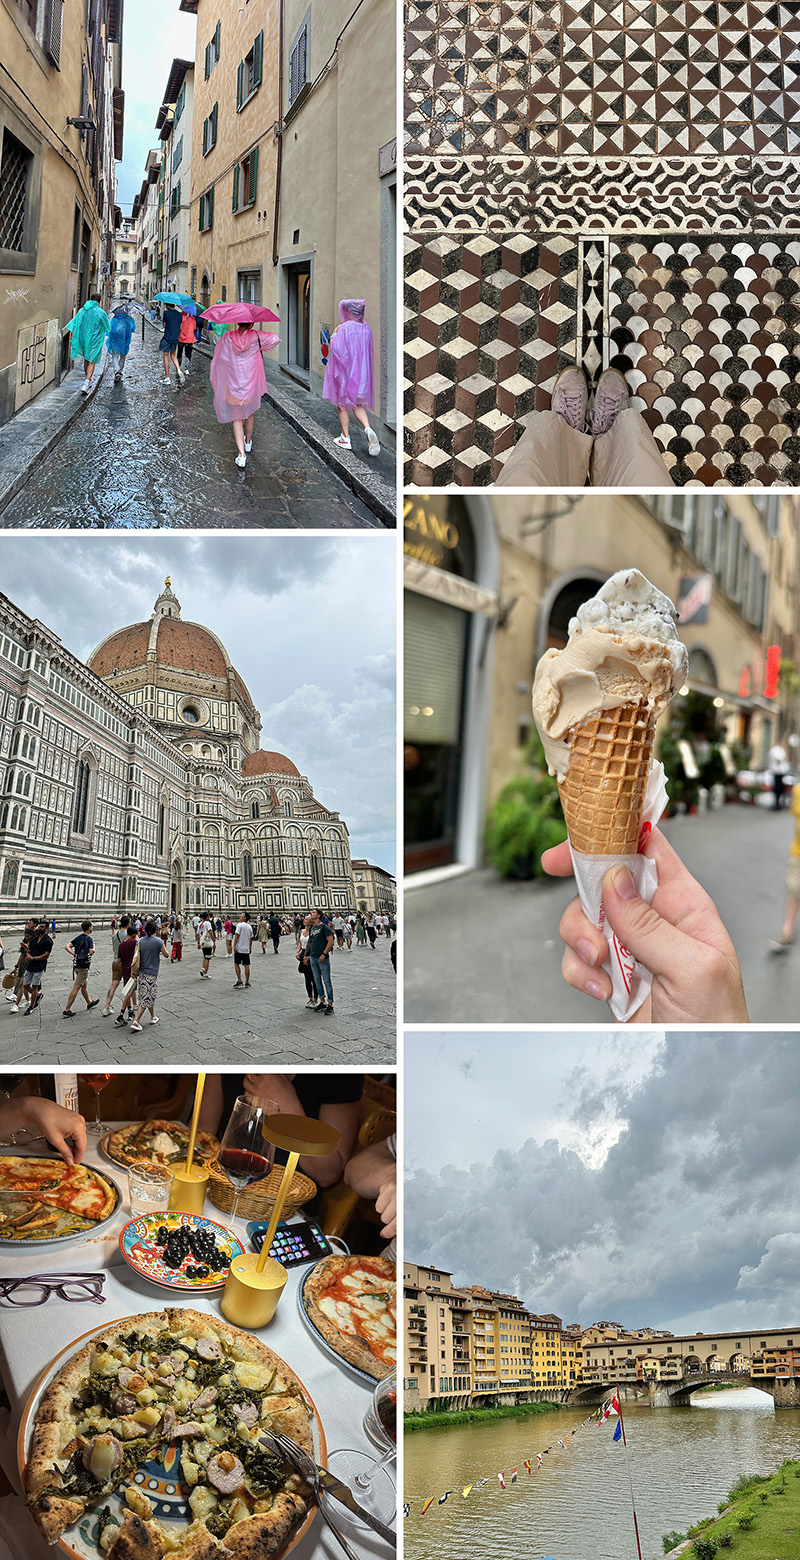
    On the day we planned our Florence tour, there were intermittent thunderstorms. I took the photo above right before the skies opened up. I love the moody sky and the Ponte di Vecchio in the distance. We bought ponchos and umbrellas on the fly, which gave me an opportunity to quickly snap photos of the contrast between the gray, neutral environment and the rainbow gear.

    Florence on a rainy day, view to Ponte di Vecchio

    We hired a tour guide which I messed up by going to the wrong location. It was supposed to be a 4-hour tour but ended up being 3 hours which was honestly plenty, and maybe even a tad long, for teenagers. I loved it, but I think in the future, I would have booked a shorter tour, like 2 hours tops. However, Chiara from Florence Custom Tours was phenomenal! She was so friendly, patient, charismatic, warm, and knowledgable, and found us the most delicious pizza restaurant, Ciro & Sons, right near the train station so we could easily catch the train back home. We unfortunately missed getting inside the Duomo by minutes, which was a bummer. But coming upon that giant structure in the middle of the city is quite magical. We also saw the Statue of David by Michaelangelo, which was breathtaking. All in all, a good and exhausting day. We definitely needed a rest day after that!

    Florence, Italy with Art Bar

    Montepulciano

    This was one of my favorite little towns to visit. It was such a beautiful day, and the drive was not too long (less than an hour) and also gorgeous with so many perfect Tuscany landscape moments. From the lush, windy hills to the expansive vineyards, there was beauty at every turn. The village is very hilly, as all villages in Tuscany are, with skinny, winding roads and paths that were just so beautiful with the weathered stone and pops of colored shutters and doors.

    View from the tower in Montepulciano, Italy

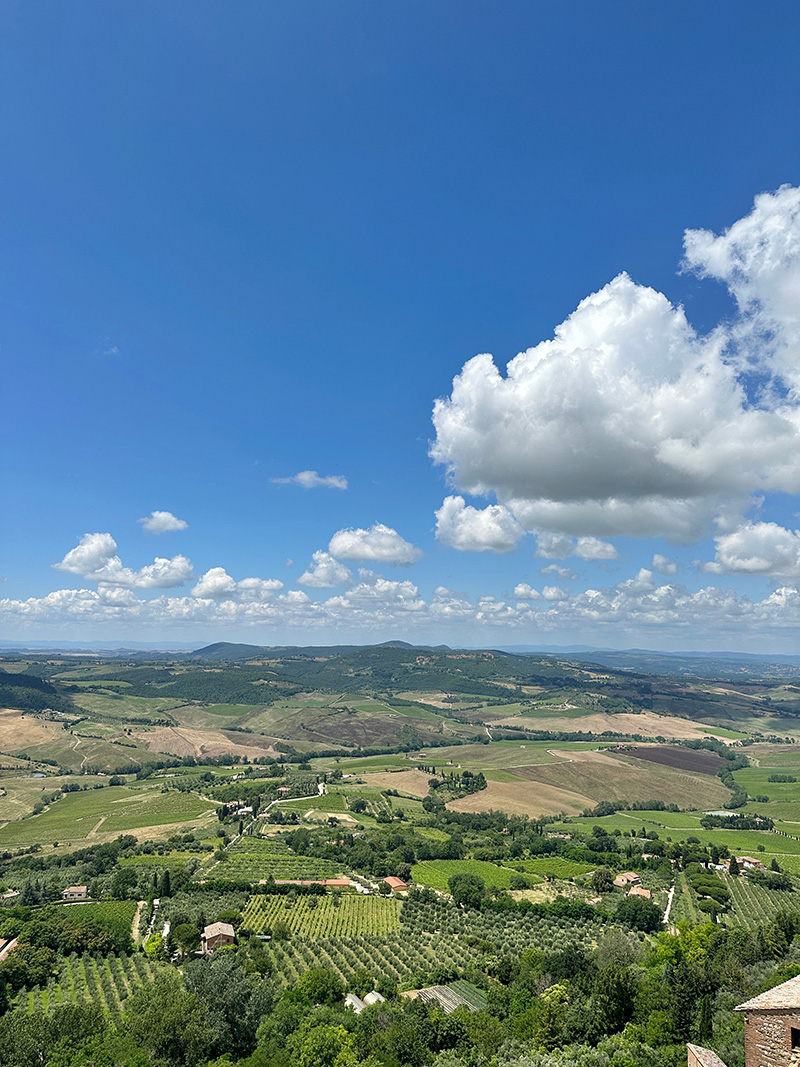
    We first walked up the hills to the Piazza Grande and found a great little outdoor pizza and gelato restaurant. Then we walked up to the top of the Montepulciano Tower. This was probably a highlight of the whole trip! We climbed lots of towers during the 2 weeks we were in Italy, and the view from the top of this tower was the most stunning of all. So much so that I made a painting of the quilt-like landscape!

    Montepulciano, Italy with Art Bar and family

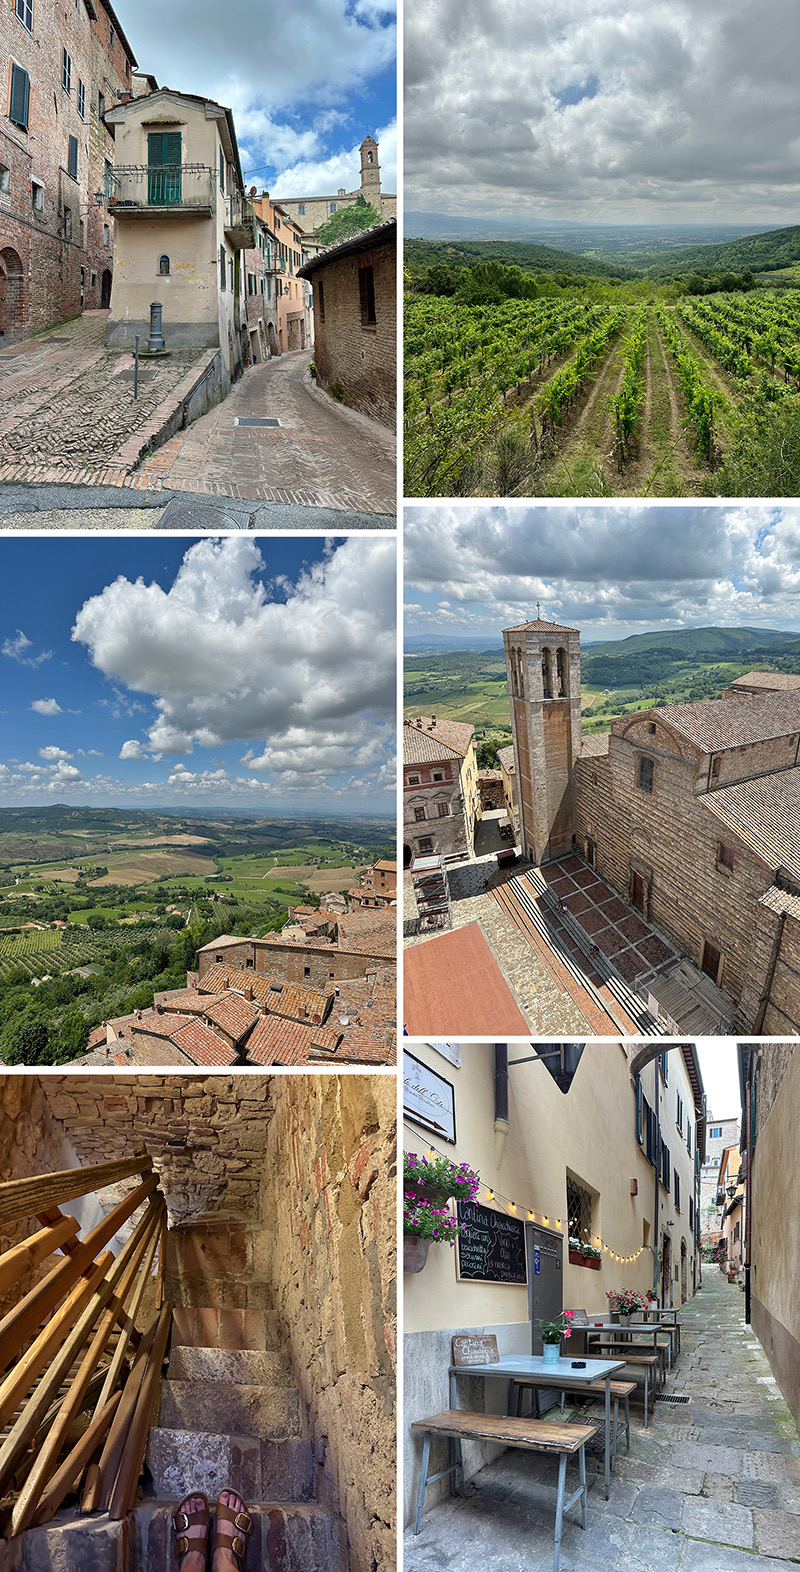
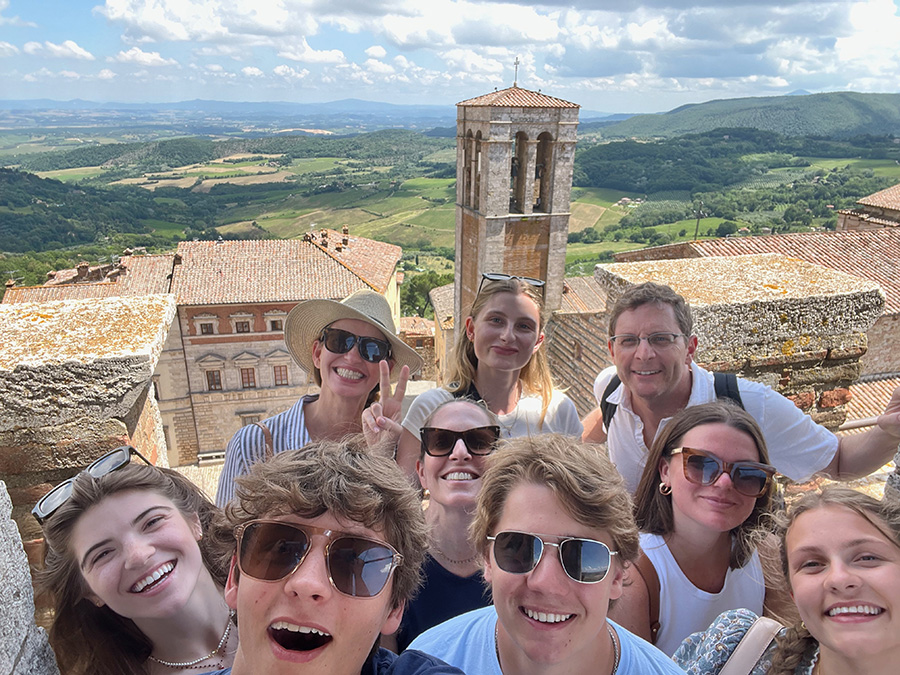
    We took a selfie of all of us at the top (oh, and we added my sister-in-law, so we were now nine!), and the joy on our faces is so evident and real. Two in the group were afraid of heights, but it wasn’t too scary climbing up. I wouldn’t recommend it for anyone whose mobility is compromised as the steps get taller and the space narrower towards the top. Highly recommend this captivating little town for shopping, too. We found our favorite leather bag store, and hat store, too.
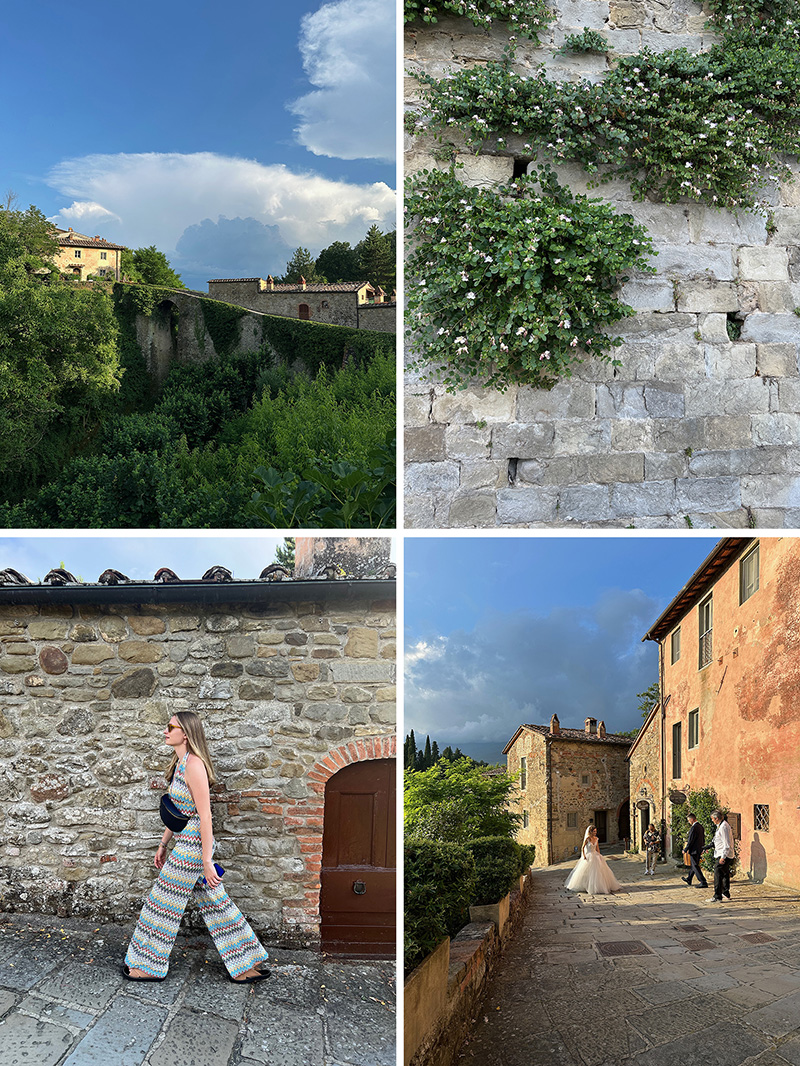
    Photo op on top of the tower in Montepulciano, Italy

    Il Borro

    Borro is a town only about 20 minutes from the villa, and Il Borro is the luxury resort that was built there. It might actually be the whole town, I’m not sure. It was so quaint and gorgeous, and as we were talking about what a perfect spot it would be for a wedding, a bride appeared on cue! There was a curious but strange Pinocchio museum, the cutest dachshund puppy named Otto, and a delicious (but expensive) meal at the resort. A perfect end to our rest-day at home.
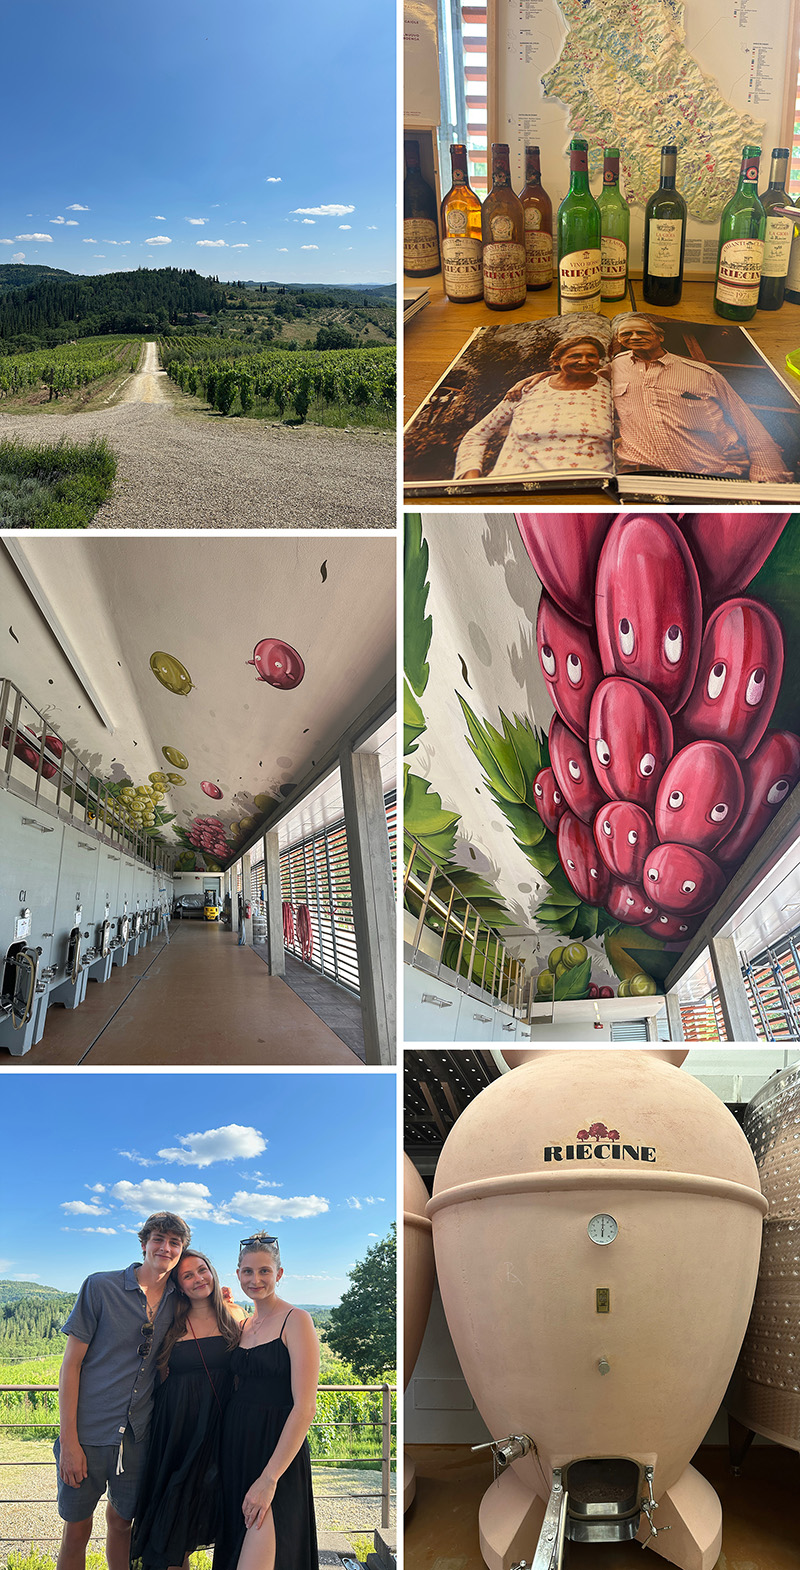
    Il Borro in Tuscany, Italy

    Riecine

    This was our first vineyard tour! Riecine (pronounced ree-AY-cheh-nay) was about an hour away from our villa. The building where they produced the wine was a new-ish, modern structure that had the coolest murals painted by a local artist, Marco Zedone. We tasted all of their red wines, and their new rose wine that was one of the best we’ve ever had. Not too sweet. Did you know that rosé wine is made from red grapes that just don’t sit for very long, so they are a very light red? We love learning new things.
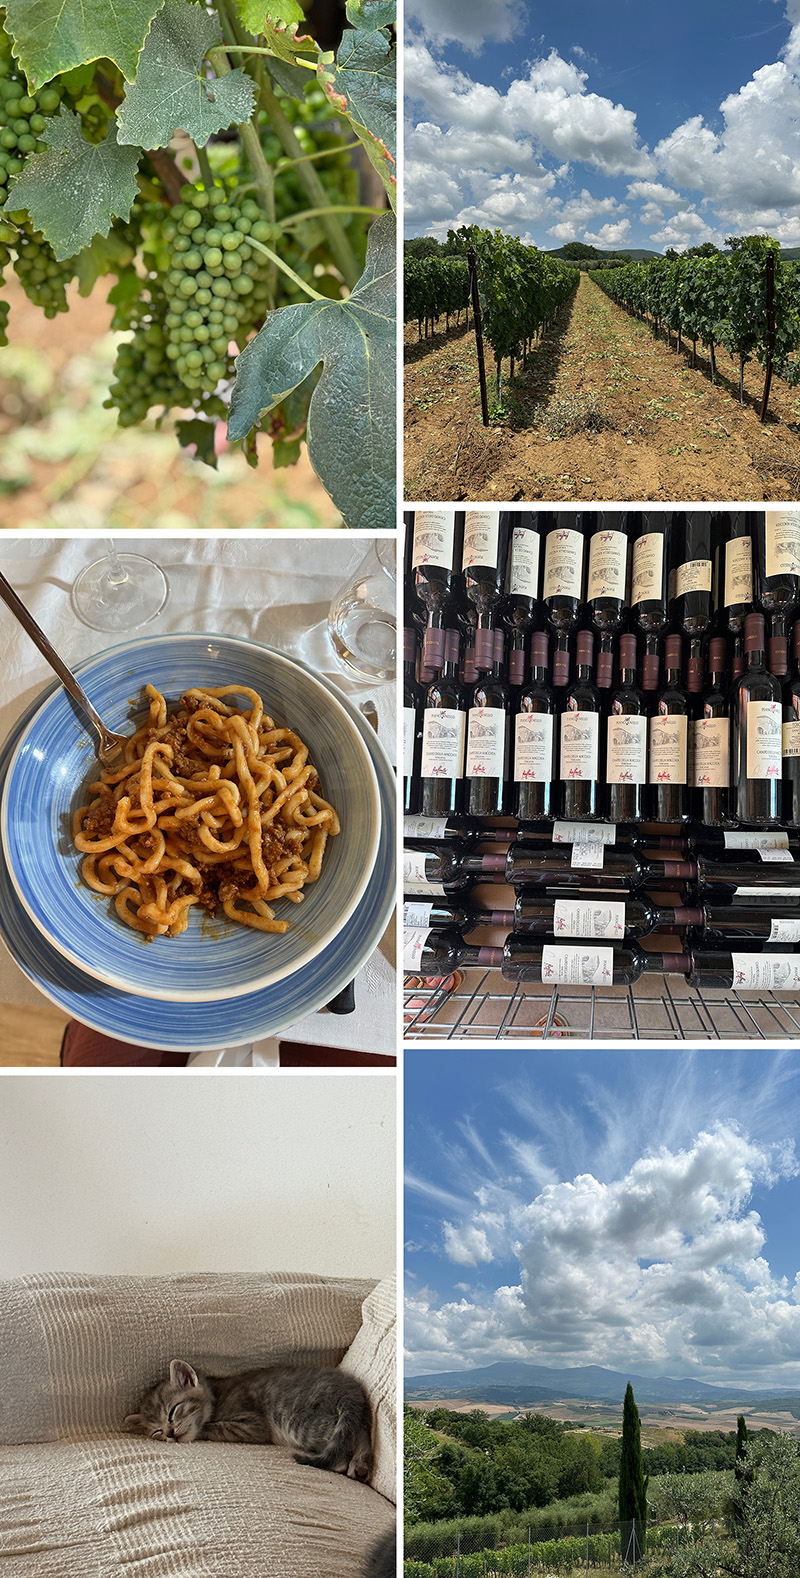
    Riecine vineyard in Tuscany, Italy

    Piancornello

    A few days later, we visited another red wine vineyard. Piancornello (pronounced Pee-awn-kor-NELL-o) is all organic (they don’t use any chemicals) and does not do tours, it’s just a family home and we were invited through a friend. On the downside, it was a 2-hour ride on a bus (blech, some of us got car sick because the roads are so windy), but on the upside, we got a home-cooked meal and a tour of 50-year-old grape vines! Oh, and a room full of kittens. Yup, it was a lot for the senses something for everyone. Ava loved the kittens, Nate discovered his pici cacio e pepe obsession, and everyone adored the grandma and grandpa who cooked us one of the best meals we had the whole trip. Did you know that young grapes are all green at first, and then turn color around late August? Both of the two vineyards we visited said that they pick the grapes sometime in early October, and the decision happens quickly. The pickers have to wait on hand and be called basically at a moment’s notice. Seeing how much work goes into just one bottle of wine was very eye-opening. It’s an art, and a labor of love.
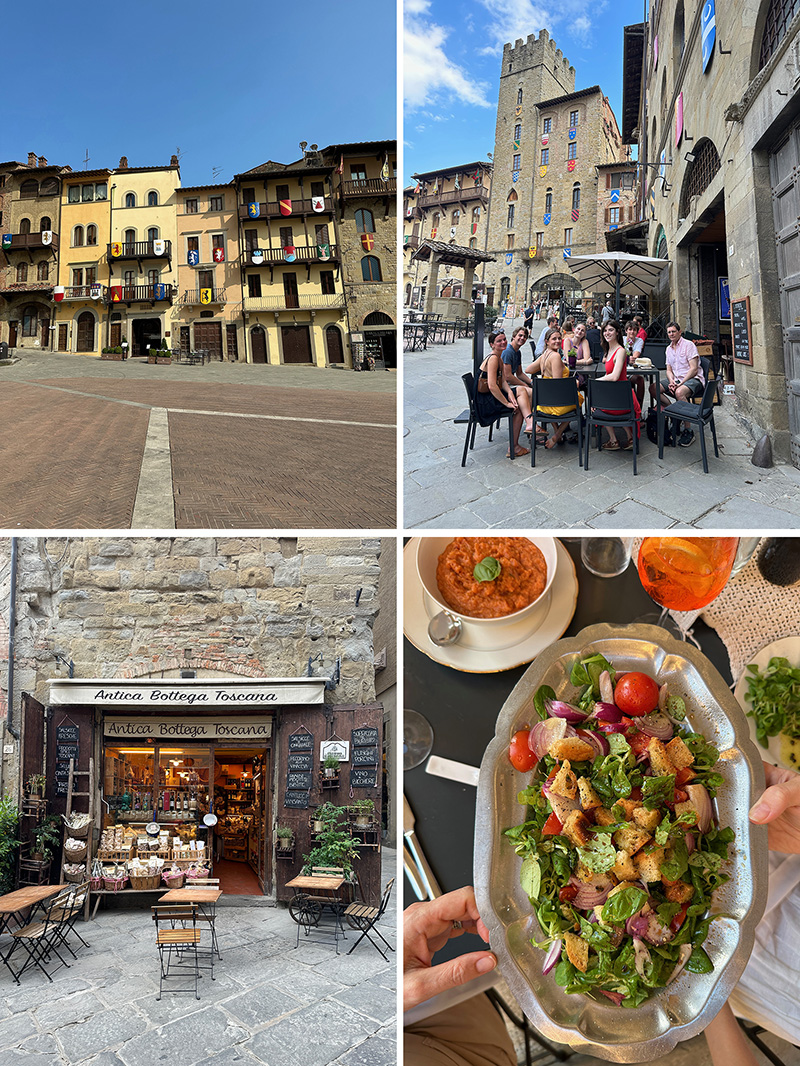
    Piancornello vineyard in Tuscany, Italy

    Arezzo

    We loved this little town/city close to home! We never made it to Siena, but have been told that Arezzo is very similar (and some like it even better because there is more to do). We went to Arezzo three different times. We saw the beautiful frescoes by Giorgio Vasari, explored the famous shopping street, Corso Italia, and had several meals on the medieval Piazza Grande with all their coat of arms insignias hanging everywhere. Fun fact, did you know that parts of the movie Life is Beautiful were filmed here? Also, it was just about the only time we saw a salad on a menu. Note to readers: Italians don’t really do salads. We are big salad eaters and definitely missed our fresh greens.
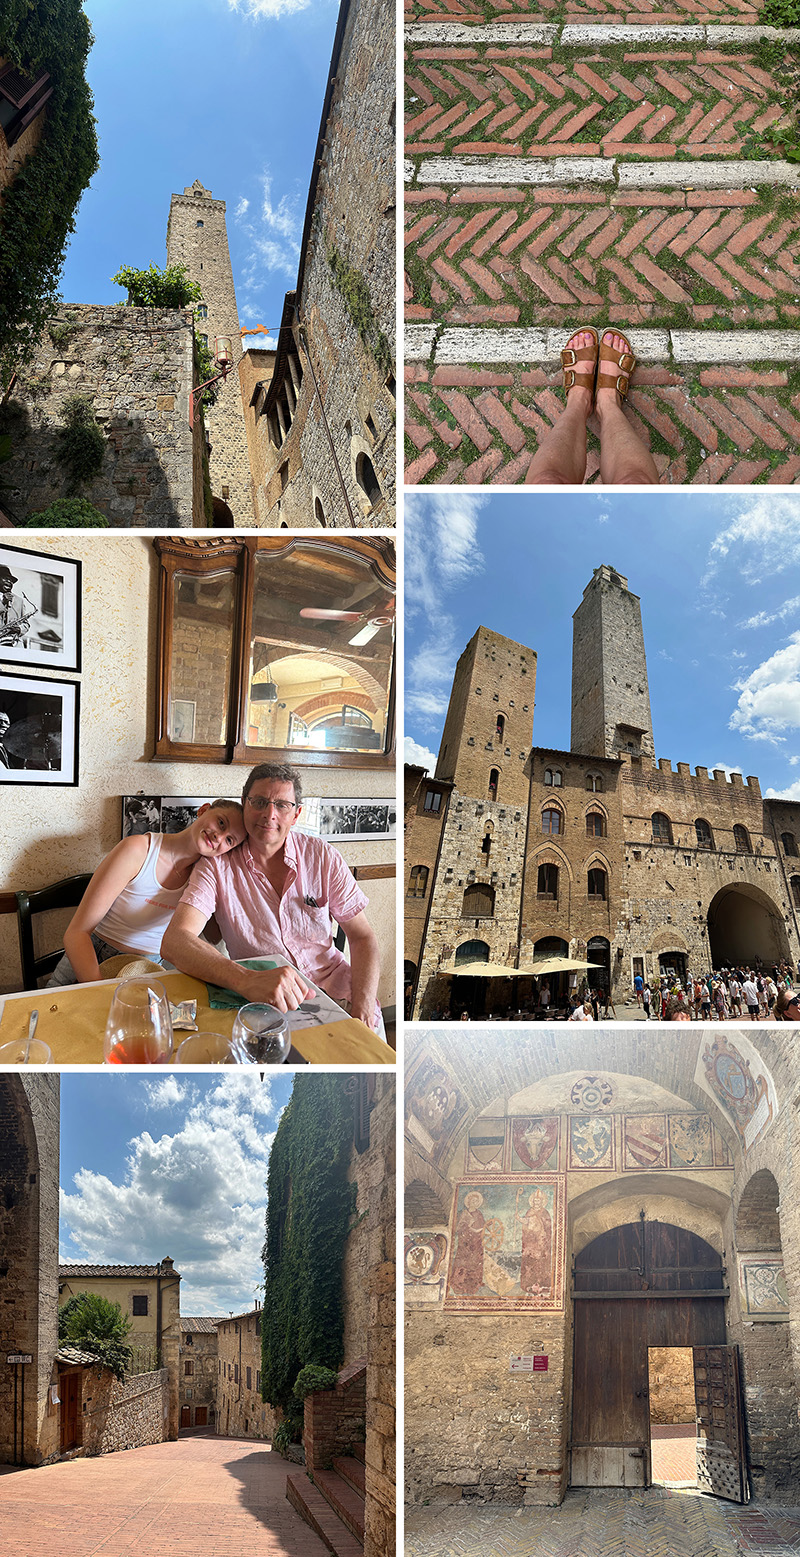
    Art Bar explores Arezzo, Italy

    San Gimignano

    We finally said goodbye to the villa and to our houseguests on day nine and packed our car to travel west towards the Mediterranean. On our way, we stopped in San Gimignano, the town of towers. This walled city was so cool, but it was really crowded with busloads of tourists. We actually were able to find off-the-path roads, though, and we even found a restaurant with a free table that was jazz-themed. Our server was an artist whose paintings were hanging in between the black-and-white photographs. There is also this really cool miniature model of the city that was displayed in a hidden shop. We learned that the towers were not used for any purpose in battle, it was just a contest of riches – who could build the tallest tower! It was actually a perfect last place to visit before traveling to the coast. The contrast from old, monochromatic stone structures to colorful, limestone houses in Lucca!

    Art Bar explores San Gimignano, Italy

    Lucca

    Ahh, Lucca. We loved this walled city so very much. Driving west towards the Mediterranean, we noticed the topography changing from hilly to more flat. It was about a 2 hour drive from San Gimignano, and we only had one car at this point which was packed with way too much luggage, so everyone was cranky. We passed some mountains that looked like big, white chunks were taken out of them. We learned later that Lucca is near Carrara, famous for their white marble, so we passed some of their quarries and caves! I wish we had known beforehand and had stopped to take a tour, but it was so cool nonetheless.

    Plaze del Anfiteatro at night in Lucca, Italy

    Arriving in Lucca is very magical. There is this giant wall around the city, so big that it is also a park where residents and vacationers can go for a run, ride their bikes, walk their dogs, and look down at the city’s streets and colorful buildings. You drive through a big gate to enter, and then as a tourist, you have to park your car in one of the parking garages around the exterior. We rolled our luggage to our AirBnb apartment, which was not far, and were pleasantly surprised that it had air conditioning! It was in a perfect location, and we immediately went out to walk around and explore.

    Art Bar explores Lucca, Italy

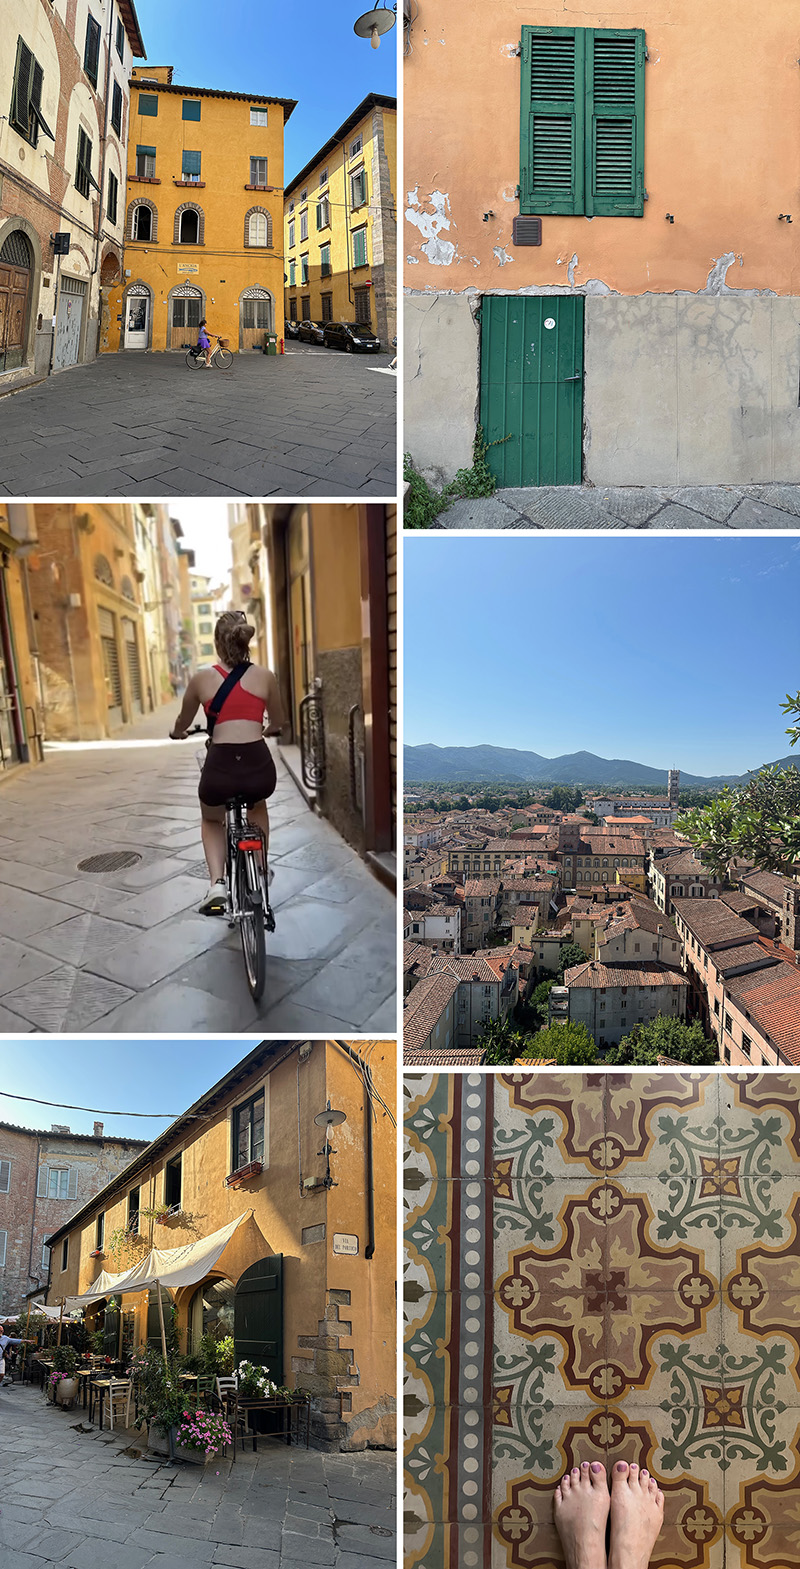
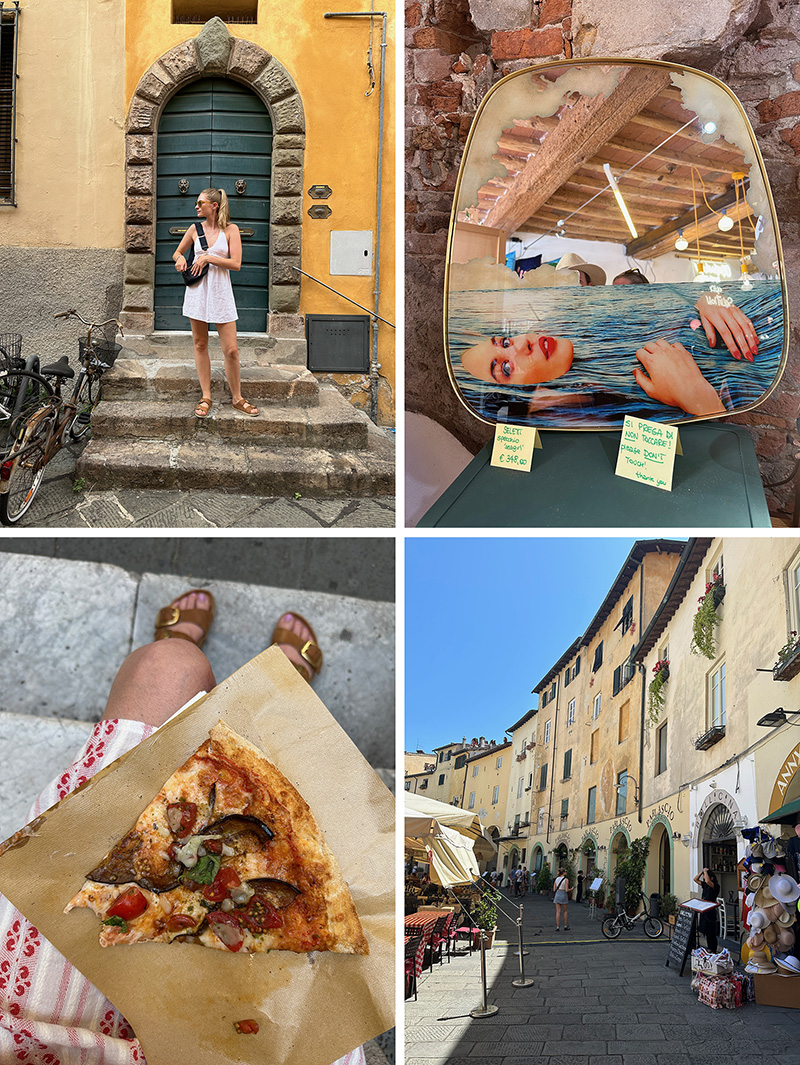
    The streets are all cobblestone with very few cars. You can walk around the whole city in less than an hour, and every turn you make onto a new street brings a new color or texture or cute shop. We climbed the Torre Guinigi which has trees at the top and another impressive view of the terra cotta roofs and the wall in the distance. We visited the most amazing oval Piazza dell’Anfiteatro many times as it was filled with restaurants and shops and at night it looks and feels like you’re on a movie set with the lights and colors and sounds. We found our favorite pizza of the whole trip (and maybe ever) at Dante e Gentucca. If you ever go, get a slice and sit on the church steps across from the shop. Did you know Puccini was born in Lucca? They have a Puccini concert every night in the church across from the pizzeria! We also found our favorite vintage shop called Mi Casa with a mirror I wanted so badly, but it was too expensive to ship. There is the Lucca Summer Music Festival which happened to feature Bob Dylan when we were there. I see a destination concert in our future.
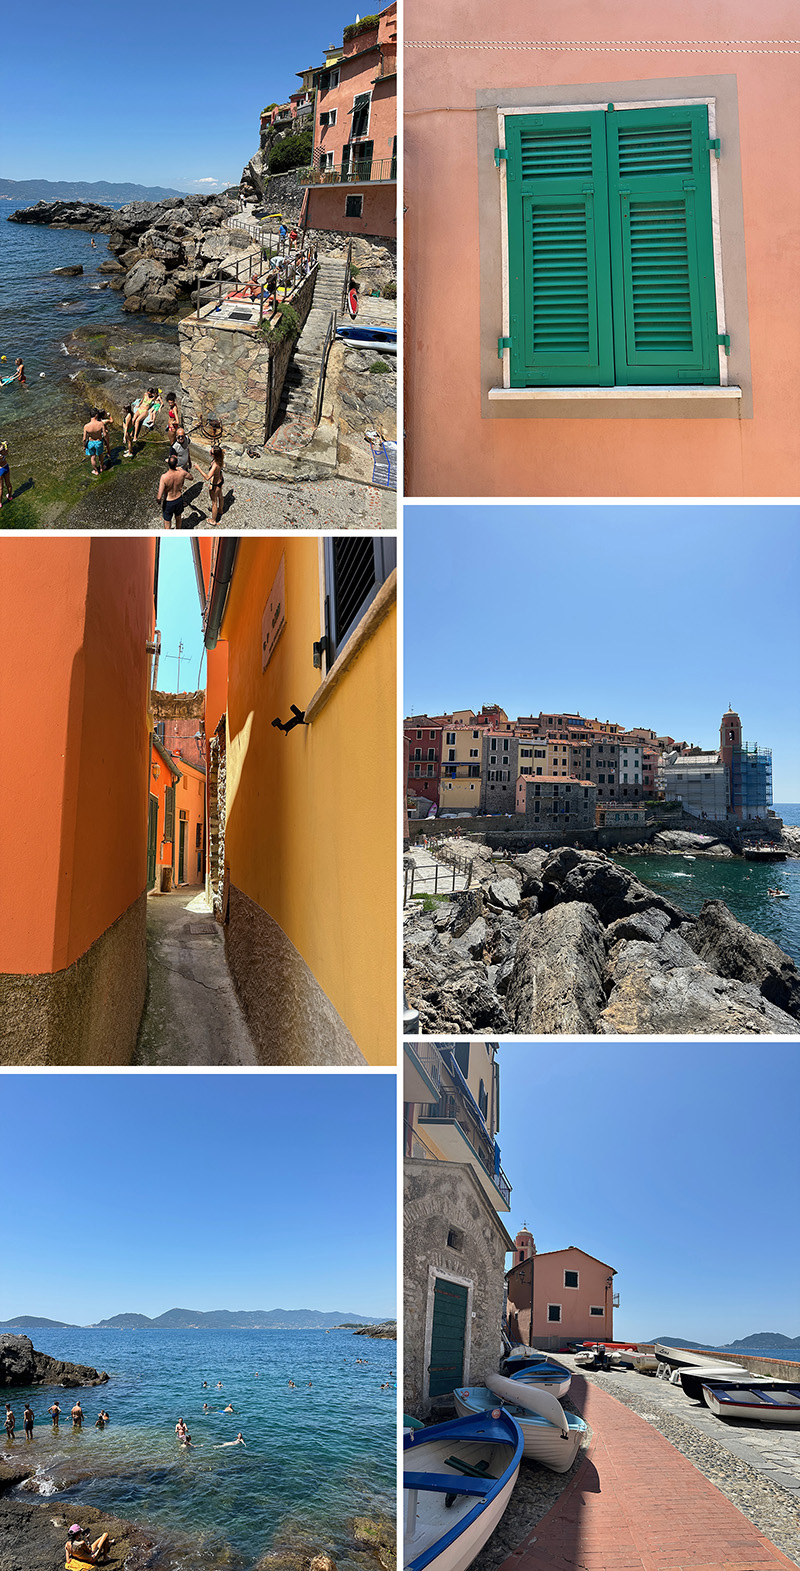
    Art Bar explores Lucca, Italy

    Tellaro

    On our third day in Lucca, we took a 40-minute drive to the coast to a town called Tellaro. Our original plan was to drive to Cinque Terre and walk the five towns. But it was 94 degrees Fahrenheit by now, and it was a Saturday, so the property manager of our apartment, Manuel who was incredibly helpful, said that he did not recommend in any way to go to Cinque Terre. He said you will hate it. If it was me, I would have gone anyway. I mean, when would I ever be this near to a place I have dreamed about visiting for a decade (and might have planned the trip around)? But it was five of us, and the other four considered it a warning and I didn’t have the energy to convince them otherwise. Manuel suggested instead that we drive to a non-touristy, locals-only beach town that he promised would be just like any of the towns in Cinque Terre but without the crowds. That is how we ended up in Tellaro.

    Art Bar explores Tellaro, the Tuscan beach town

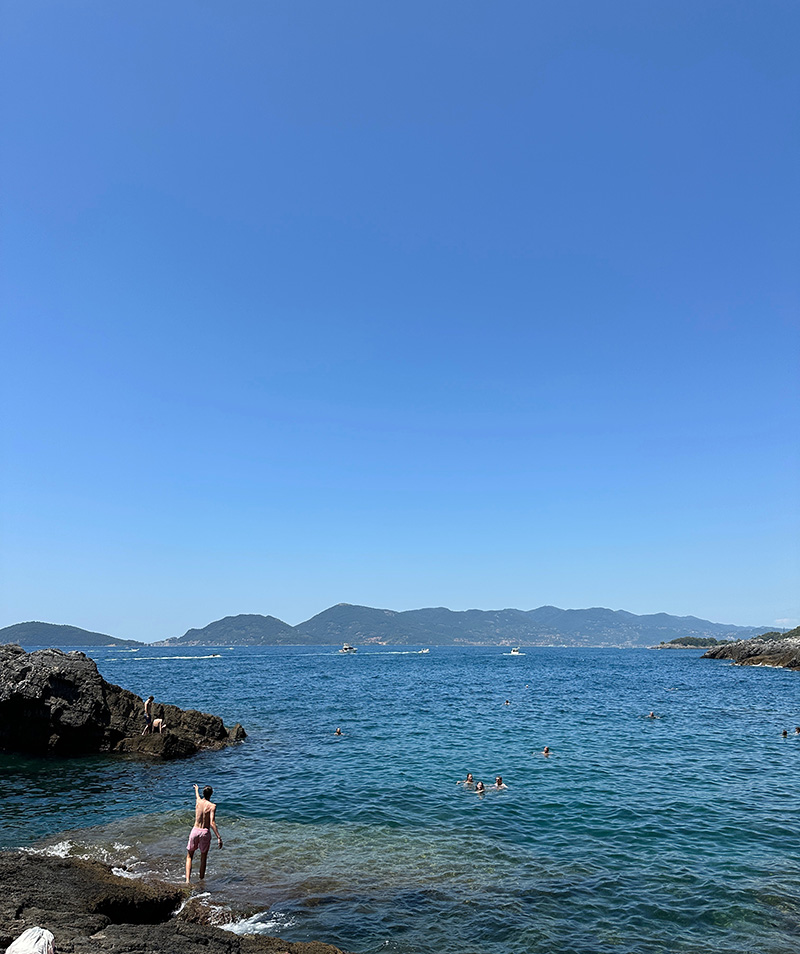
    It turned out to be one of our best and most memorable experiences. And Manuel was right, not a tourist in sight, other than us. Parking was a bit of an issue, but once we found a spot, we walked down the one street all the way to the bottom and found the ocean. There was a rock quarry with a shallow walk-in that was good for families with little kids, and then we walked a little further along the path and found big rocks where people laid out towels and carefully (the rocks were slippy) crept into the water. Turns out this spot was called Gro. There was a gorgeous metal sign, but I forgot to take a photo. Grace and Nate climbed up even bigger rocks and jumped off. The Mediterranean was absolutely gorgeous, from the color to the temperature to the vibe. Just heavenly. Do I wish we had seen Cinque Terre? Yes. But I don’t regret our choice, and now I will just have to go back!
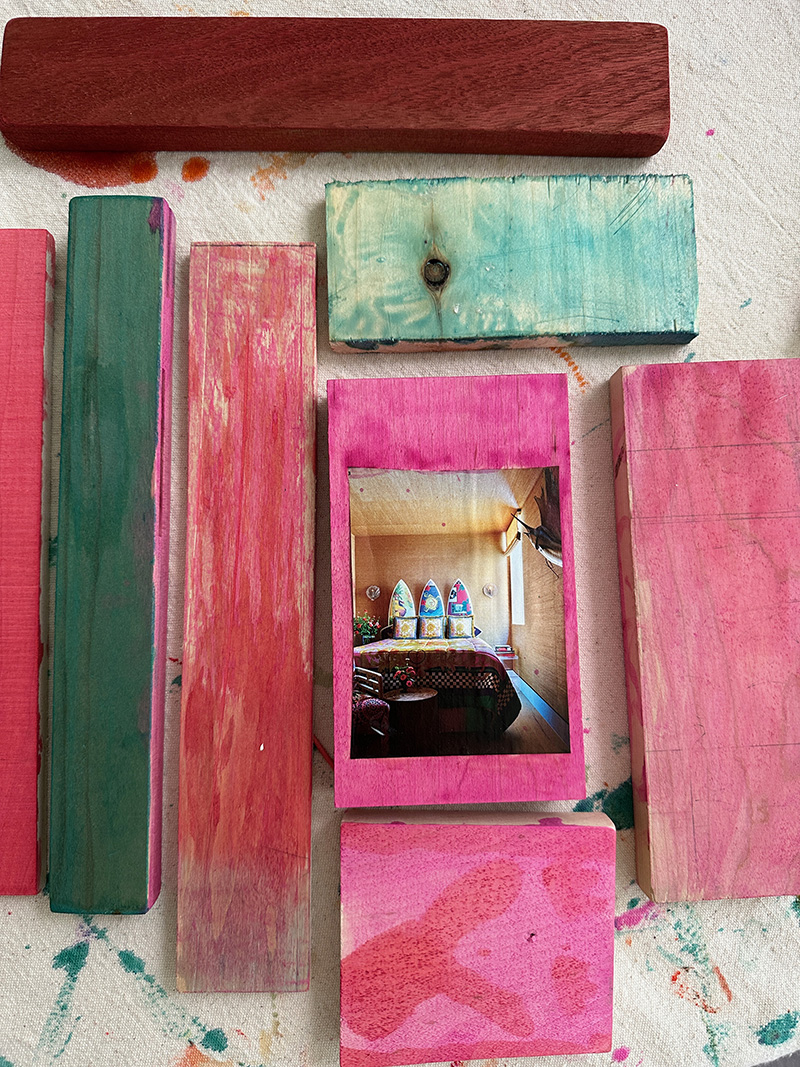
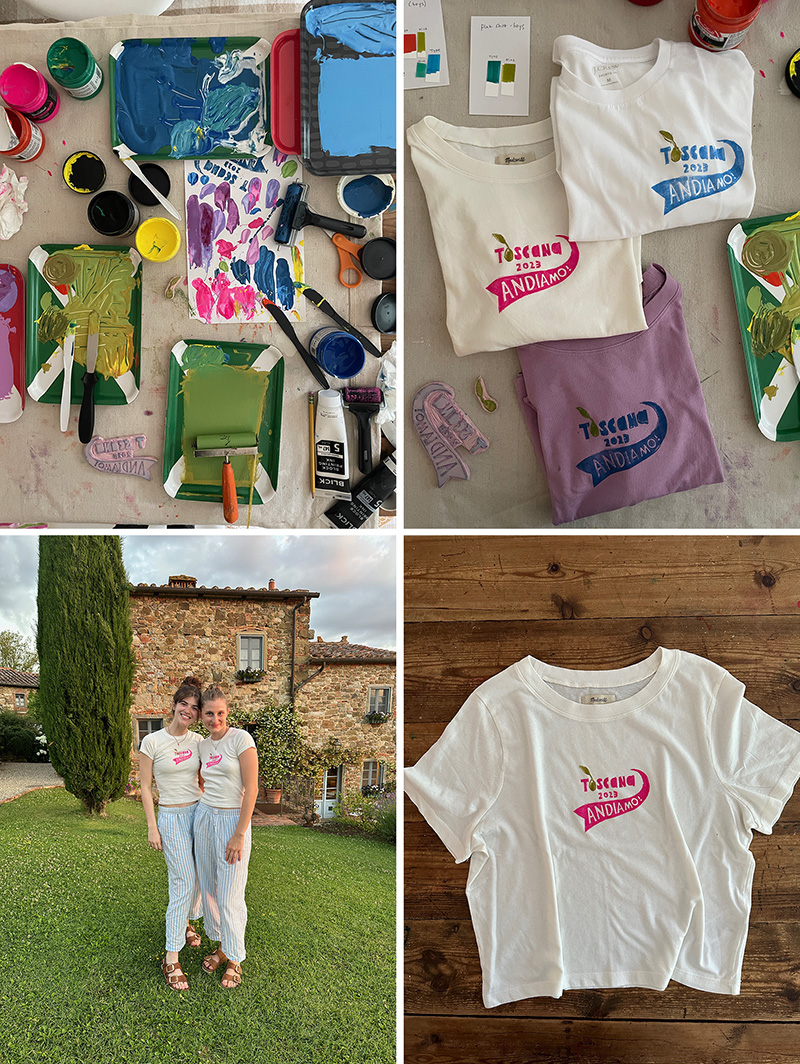
    Art Bar explores Tellaro, the Tuscan beach town

    T-shirt Printing

    I hand-cut a rubber stamp and printed t-shirts for everyone on the trip (see my video here on Instagram). It was actually a fairly unsuccessful printing project. I should have used linoleum, but instead used rubber because I had it on my shelf, but it was too soft and didn’t hold the ink well. Someday I will try it again and write a whole post about it. But for now, here are some photos of the process and us wearing them!

    Handmade t-shirts for our trip to Tuscany!

    That’s a wrap on our amazing Italy trip! I will be back to add in my color palette collages which I am still working on. Let me know if this post inspired you to travel to any of these places!

    xo, Bar

    – – – – – – – – – – – – – – – – – – – –

    Did you like this post? Here are some more places we have traveled as a family:


    Source link

  • Eco-Expressions: Drop-In Letters and Art-Making Workshops with Michele Lorusso

    Eco-Expressions: Drop-In Letters and Art-Making Workshops with Michele Lorusso


    Eco-Expressions: Drop-In Letters and Art-Making Workshops with Michele Lorusso

    jascencio

    Wed, 04/09/2025 – 11:15

    Join artist-in-residence Michele Lorusso for drop-in activities including letters to the world in the future, environmental chats, and hands-on art-making workshops inspired by the exhibition Nature on Notice: Contemporary Art and Ecology.

    All ages are welcome to participate. All programs provided with bilingual translation in Spanish.

    Short Title
    Eco-Expressions May 3

    Event type

    Policies/Notes

    Charles White Elementary School

    2401 Wilshire Blvd., Los Angeles, CA 90057

    Location (Building)
    Charles White Elementary School

    Primary image
    Photo courtesy of Michele Lorusso

    Date
    Sat, 05/03/2025 – 13:30
    -Sat, 05/03/2025 – 16:00
    Mobile tile settings
    Image tile format
    Exhibition Format

    Tile type
    Image Tile

    Hide on mobile
    Off

    On-sale time
    Mon, 11/25/2024 – 15:21

    Event audience

    Ticketing button label
    Free

    Credit line – Left column

    All education and outreach programs at LACMA are underwritten by the LACMA Education Fund and are supported in part by the Judy and Bernard Briskin Family Foundation, The Rosalinde and Arthur Gilbert Foundation, the William Randolph Hearst Endowment Fund for Arts Education, Alfred E. Mann Charities, The Ralph M. Parsons Foundation, Gloria Ricci Lothrop, the Flora L. Thornton Foundation, U.S. Bank, and The Yabuki Family Foundation.

    Credit line – Right column

    Photo courtesy of Michele Lorusso

    Ticket price

    Free

    Event Tier
    Tier 3

    Module
    Enable “Add to Calendar” button
    On


    Source link

  • Egg Carton Mushrooms – ARTBAR

    Egg Carton Mushrooms – ARTBAR


    On New Year’s Eve day I was scrolling through Instagram and saw this post for @ingthings whereby she shared some little mountains she knit for friends that were coming over because in Austria, it’s tradition to give little good luck trinkets for the new year. Well, that was the spark I needed to make a little craft table for our friends coming over for NYE — it was time to make lucky egg carton mushrooms!

    Make mushrooms from egg cartons and acrylic paints.

    I’ve always wanted to make these and lord knows I have enough egg cartons, thanks to my repurpose-everything nature (I am not a hoarder, I am not a hoarder). Let me show you how easy these are to make!

    See the video on my Instagram post.

    Make mushrooms from egg cartons and acrylic paints.

    [ I am a participant in affiliate programs designed to provide a means for bloggers to earn small fees at no cost to you by linking to Amazon.com and affiliated sites. ]

    Supplies needed for Egg Carton Mushrooms:

    ~ Egg cartons (I used 3 to make 36 mushrooms)

    ~ Xacto knife

    ~ Scissors

    ~ Hot glue gun

    ~ Rigatoni and/or Corks

    ~ Acrylic paints

    ~ Brushes

    Cut the egg carton cups with an Xacto knife to make mushrooms.

    Cut the egg carton cups with an Xacto knife to make mushrooms.

    How to make Egg Carton Mushrooms:

    1. First, cut the peaks off of the egg cartons using the exact knife. These will become the stems, or they can become the mushrooms (or trees as my kids called them). You won’t have enough of these peaks for all the stems which is why I also used rigatoni and corks.

    2. Cut up all the cups and trim them down.

    Paint the tops of the egg carton mushrooms white with acrylic paint.

    3. Paint the tops white. This is optional, but egg cartons are made from paper pulp and are spongy so they absorb the first layer. I just wanted the colors to be really bright, but you can skip this step if you don’t mind colors being a little more muted (not really by much). Tell your guests who may have never mixed colors before to add a little white so that the color is more creamy and opaque.

    Add the stems to the egg carton mushrooms, you can use rigatoni and corks, too.

    4. Hot glue all the tops to the stems.

    Set out the egg carton mushrooms with acrylic paints for a community or family craft day.

    5. Set them out with paints and palettes or paper plates, glasses of water and paper towel for dabbing.

    TIP: I also printed out some colorful mushroom photos and left them on the table for inspiration. I wanted to spark people’s imaginations that they don’t all need to be red!

    Make mushrooms from egg cartons and acrylic paints.

    Make mushrooms from egg cartons and acrylic paints.

    Make mushrooms from egg cartons and acrylic paints.

    We had a few takers on NYE but then my own kids really got into them on New Year’s Day and even the following weekend. Since they are teens and young adults now, of course they made it into a competition “which one will mom like better” which was hilarious and amazing and the best way to start 2024. My heart is full.

    Share your mushrooms with me on Instagram if you make them!

    xo Bar

    – – – – – – – – – – – – – – – – – – – –

    Did you like this post? Here are some more repurposed DIY ideas:


    Source link

  • Eco-Expressions: Drop-In Letters and Art-Making Workshops with Michele Lorusso

    Eco-Expressions: Drop-In Letters and Art-Making Workshops with Michele Lorusso


    Eco-Expressions: Drop-In Letters and Art-Making Workshops with Michele Lorusso

    jascencio

    Wed, 04/09/2025 – 11:16

    Join artist-in-residence Michele Lorusso for drop-in activities including letters to the world in the future, environmental chats, and hands-on art-making workshops inspired by the exhibition Nature on Notice: Contemporary Art and Ecology.

    All ages are welcome to participate. All programs provided with bilingual translation in Spanish.

    Short Title
    Eco-Expressions May 17

    Event type

    Policies/Notes

    Charles White Elementary School

    2401 Wilshire Blvd., Los Angeles, CA 90057

    Location (Building)
    Charles White Elementary School

    Primary image
    Photo courtesy of Michele Lorusso

    Date
    Sat, 05/17/2025 – 13:30
    -Sat, 05/17/2025 – 16:00
    Mobile tile settings
    Image tile format
    Exhibition Format

    Tile type
    Image Tile

    Hide on mobile
    Off

    On-sale time
    Mon, 11/25/2024 – 15:21

    Event audience

    Ticketing button label
    Free

    Credit line – Left column

    All education and outreach programs at LACMA are underwritten by the LACMA Education Fund and are supported in part by the Judy and Bernard Briskin Family Foundation, The Rosalinde and Arthur Gilbert Foundation, the William Randolph Hearst Endowment Fund for Arts Education, Alfred E. Mann Charities, The Ralph M. Parsons Foundation, Gloria Ricci Lothrop, the Flora L. Thornton Foundation, U.S. Bank, and The Yabuki Family Foundation.

    Credit line – Right column

    Photo courtesy of Michele Lorusso

    Ticket price

    Free

    Event Tier
    Tier 3

    Module
    Enable “Add to Calendar” button
    On


    Source link

  • Mixed-Media Exploration with Wood – ARTBAR

    Mixed-Media Exploration with Wood – ARTBAR


    Hello! It’s been a while. I have been working so much on The Creativity Project that it’s been hard to find the time to write over here on Art Bar. But I have things to share! As you know, I have been facilitating open-studio classes at our local library over the past year (I’ve written about them and you can scroll to the bottom for links), and I have grown and learned so much from those experiences. I really want to write a book (not really but sort of) about setting up open-ended community art events that appeal to multi-ages and cultivate a new mindset around what childhood art experiences can (and should) look like. Including parents in these library events has been such an important part of the process because that’s really where the work needs to be done. Changing grownup mindsets to giving children the freedom to make their own choices, and seeing them as artists who are capable of having good ideas and playing with materials on their own — even if they end up abandoning what they start or simply participate by observing. Just giving children room to be who they are and develop confidence knowing that grownups trust their choices (easier said than done because grownups are used to making choices for their children). This is actually a lot of the same work that Shannon and I do at TCP — mindset shifts for teachers in prioritizing creativity and giving children opportunities for authentic choice-making.

    Children make sculptures with wood, glue, magazines, and other collage materials and dry them on a rack.

    In September I brought this approach to a local early childhood program to work with 5-7yr olds in their beautiful art barn. Today I’m sharing about the day I brought wood scraps, magazine clippings, and a collection of other materials that children could use along with the wood (all inspired by my brilliant friend Samara at Purple Twig from this post and this event). I offered this experience twice — once at the library, too — and each time was a little different. I’ll tell you about the school experience first, then the library.  But first, the materials.

    A table set up for open-ended exploration with wood, liquid watercolor, collage, and glue.

    [ I am a participant in affiliate programs designed to provide a means for bloggers to earn small fees at no cost to you by linking to Amazon.com and affiliated sites. ]

    Materials for mixed-media exploration with wood:

    ~ Wood scraps (collected from local high school wood shop)

    ~ Elmer’s glue (next time I will use wood glue)

    ~ Liquid watercolor

    ~ Jars and brushes

    ~ Oil pastels

    ~ Scissors

    ~ Magazine clippings (I used mostly home and garden magazines to spark architecture, design, and landscape ideas)

    ~ A collection of wooden cabinet handles (I had about 40 from my old cabinets, they were used up pretty quickly)

    ~ Smaller collage materials to build with like: bottle tops, corks, cardboard pieces, egg carton pieces

    ~ Other collage material: buttons, puzzle pieces

    ~ Yarn pieces cut into about 18-inch lengths (I love to add a soft element when working with lots of hard materials so children can get a variety of textures)

    A table set up for open-ended exploration with wood, liquid watercolor, collage, and glue.

    Setting out materials for mixed-media exploration with wood:

    I put a lot of thought into which materials will work best together and spark enough interest without feeling overwhelming. There was only so much I could fit on these small tables because four children had to also sit there and have enough space to work. This school has a wonderful art teacher who suggested on this day that we create a buffet for all of the materials so children could “shop” for what they want. I loved this idea, and the children did too! I put a small selection of things on the table to start, but most of the materials were set out on the buffet and replenished. You can see the buffet on the far end of the space by the window in the 2nd picture down from the top (two above here), and you can also see the plastic box on the floor which was full of wood pieces to choose from. I had another box of wood pieces that I used to refill as the children worked.

    Children build and create with wood, liquid watercolor, collage, and glue.

    Preparing for a mixed-media wood exploration

    Wood: At this school I see 60 children in 4 groups and they each have half an hour, so I need a lot of materials plus extras just in case a child has a very big idea they want to execute. I don’t want to limit anyone’s ideas. I prepared one big wood base for each child. Some of the “big” bases were just a long strip and if I did this again I would make sure I had a bigger rectangle for everyone. Some children really wanted to build their structure up and the small bases made their structures unstable which was a little frustrating. I think if we had used wood glue it would have helped. I then prepped another 300 pieces (sanded them) about 5 per child. I wagered that some children would use many and some would use one or two since I was also offering so many other materials to play around with. As it turned out, I had only about 20 small pieces left so I was relieved my bet paid off.

    Children build and create with wood, liquid watercolor, collage, and glue.

    Paint: Liquid watercolor is the best to use with wood. I usually limit the palette to warms or cools so that they can be layered on top of each other and not get mucky, but on this day we ran out of time so we just poured a few colors into palettes and set out a jar of water. If I did this again I would have prepped some jars beforehand and put brushes in the jars. It would have saved some space and a little of the mess.

    Overhead view of a child building and creating with wood, liquid watercolor, collage, and glue.

    Child used soft yarn to compliment his wood structure.

    Compatible materials: I have a pretty extensive collection of  recycled and collected materials. I ask my community on our local Facebook page all the time if I’m looking for something specific and they always come through. I actually asked for home and architecture magazines and now I have an entire milk crate worth to choose from. The magazine where I found all the best images for this project is Dwell. I also cut up some maps which I collect whenever I can find them. Recently my son and I visited UVM when looking at colleges and they had a whole map display in their student center with maps of Vermont and all of the ski mountains. So just keep your eyes open when you are traveling.

    Children used soft yarns and magazine clippings to embellish and compliment their wood structures.

    Observations: While I did spend one minute before each group telling them about the materials that I brought in and all of the possible ways in which they could be used (wood can be painted, glued, collaged; make sure to use a sturdy base when building up; there is no wrong way to use the materials it’s really up to you and your ideas) I don’t normally spend time introducing materials in this way. When I am just there once a month, and for only 25 minutes for each group, I don’t want to waste any time and I trust that the children (ages 5-7) will all have their own unique ideas about how to use the materials. But the art teacher does it this way, and asked me to please spend a minute on the rug introducing everything. There is nothing wrong with this and in fact, if I had a class that I saw every day, I might occasionally spend some time talking about materials in this way. But in my practice, I see myself as more of a facilitator, not a teacher. Not only do I want to be careful about influencing them, I am also just curious and excited to see the children’s ideas because without a doubt their ideas are always better than my own. These experiences are as much a learning time for me as they are for them. And I find that the best way to get to know children and their interests and to foster a safe space that reflects each child and their lived experience is by simply letting them play and getting down on their level to listen to their stories and ideas. If they need help I am there to lend a hand. But they are the artists and I really don’t want to limit them in any way.

    A wood structure made by a 7-yr old using corks, buttons, tops, and magazine clippings.

    Child cutting magazine clippings to add to her painted wood collage.

    Looking at these photos, you can see the wide variations of ideas and execution. Every one of those 60 children was experiencing flow. The time went by in a heartbeat — they could have all worked for an hour — and they felt very proud and excited about their pieces. And I felt so inspired, too! These children were very capable and many of them built quite elaborate structures with many pieces (you will see this contrast with the day I offered these same materials at the library). They often walked around and looked at each other’s creations and became inspired to add more to theirs. They loved shopping at the buffet which also was a place where children talked about materials and how they were going to use them. I overheard children say they were building a stage for the Rockettes, a pirate ship, a motion sensor, a video game, a vacuum, and an obstacle course. Many of them were making something for their mom. One child who spent his time covering single wood pieces with magazine images so that he had about 6 or 7 separate pieces said that they were for his mom because she loves beautiful things. It’s hard to imagine these stories, innovations, and iterations happening if the children had been guided through a project.

    A table set up for children to make art with wood pieces, magazine clippings, collage materials, glue, and liquid watercolor.

    Mixed-media exploration with wood at the library:

    Bringing these materials and setting them up for my community library event went a little bit differently. First of all, it’s a two-hour timeframe and I usually have about 20-30 children coming through, so a lot less materials and a much slower pace. Children can range from age 2 to teen, but usually they are between 3-10. I make a very basic sign because children are with their parents and parents usually want to know what they are supposed to do. I keep it very open-ended and I hope that the parents are going to let their children take the lead. What I do love though is when parents are also making their own art beside their child.

    Child painting wood pieces with liquid watercolor on a table set up with other collage material and oil pastels.

    Painted wood structure with glued puzzle pieces on a table with other materials.

    Mixed-media wood structure made by a young child using puzzle pieces, sand paper, and magazine clippings.

    Wood structure made by a child using liquid watercolor on a table with other materials like magazine clippings and oil pastels.

    A mixed-media painted wood collage with puzzle pieces lying on a table.

    Children did a lot less building and more painting and collating. They also left their work to wander to other tables and then came back to add more when they saw a new material on the table. I love the child who found the sandpaper in the bin of wood pieces and used that in her bathroom collage. The painted wooden pieces below were all left behind, and I have the surfboard headboard pieces propped up on my bookshelf.

    Painted wood pieces, on that has a magazine clipping glued on top, lying on a table.

    I believe that anyone can gather materials and set them out for children in an open-ended way. You don’t have to feel like you need to be “creative” or “artsy” to do this, you just need to believe that this time for creative exploration and discovery is vital in childhood.  My wish is that all art in early childhood, from preschool through early elementary, only offer open-ended, process art experiences. They develop so much confidence, and it’s so exciting to see what children can imagine and build, how they share their ideas with others and collaborate, build empathy, find their voice, and grow into future innovators who think about how they can make the world a better place.

    xx, Bar

    – – – – – – – – – – – – – – – – – – – –

    Did you like this post? Here are 3 more open-ended exploration ideas:


    Source link

  • Eco-Expressions: Drop-In Letters and Art-Making Workshops with Michele Lorusso

    Eco-Expressions: Drop-In Letters and Art-Making Workshops with Michele Lorusso


    Eco-Expressions: Drop-In Letters and Art-Making Workshops with Michele Lorusso

    jascencio

    Wed, 04/09/2025 – 11:16

    Join artist-in-residence Michele Lorusso for drop-in activities including letters to the world in the future, environmental chats, and hands-on art-making workshops inspired by the exhibition Nature on Notice: Contemporary Art and Ecology.

    All ages are welcome to participate. All programs provided with bilingual translation in Spanish.

    Short Title
    Eco-Expressions Jun 21

    Event type

    Policies/Notes

    Charles White Elementary School

    2401 Wilshire Blvd., Los Angeles, CA 90057

    Location (Building)
    Charles White Elementary School

    Primary image
    Photo courtesy of Michele Lorusso

    Date
    Sat, 06/21/2025 – 13:30
    -Sat, 06/21/2025 – 16:00
    Mobile tile settings
    Image tile format
    Exhibition Format

    Tile type
    Image Tile

    Hide on mobile
    Off

    On-sale time
    Mon, 11/25/2024 – 15:21

    Event audience

    Ticketing button label
    Free

    Credit line – Left column

    All education and outreach programs at LACMA are underwritten by the LACMA Education Fund and are supported in part by the Judy and Bernard Briskin Family Foundation, The Rosalinde and Arthur Gilbert Foundation, the William Randolph Hearst Endowment Fund for Arts Education, Alfred E. Mann Charities, The Ralph M. Parsons Foundation, Gloria Ricci Lothrop, the Flora L. Thornton Foundation, U.S. Bank, and The Yabuki Family Foundation.

    Credit line – Right column

    Photo courtesy of Michele Lorusso

    Ticket price

    Free

    Event Tier
    Tier 3

    Module
    Enable “Add to Calendar” button
    On


    Source link