Dennis Blatchley is a ceramic artist living and making in Cornwall, United Kingdom. Dennis makes a wide range of slipcast terracotta tableware with a distinct matt finish. Dennis’ work comes in a choice of colours, that can be ‘mixed and matched’ to create a variety of exciting colour combinations.
The preferred printing supplier for potters everywhere! SmallDogPrints.com
What makes this attempt different from the past?
It is certainly different because I have the support of my partner. I wouldn’t be able to do it if she didn’t have a steady job, if we couldn’t afford to possibly lose money. It’s all in the end about the capital that had to go into making the work.
What does a making day look like for you? What does it mean for you to make your garden shed area work for you?
I get up in the morning, I put on my wellies, I go into my shed and put on what is a terrible little heater, it doesn’t really give out any heat. I think it’s psychosomatic and makes it feel like there’s some heat. And I don’t have running water in there so I have to get various buckets of water, I put on some music, I clear the space, and I start making some pots.
How often are you able to fire your kiln?
Probably on average every couple of weeks.
You are a growing business. How do you keep track of your customers?
I don’t and I should. And that is something I need to set up. I need to have a mailing list and I don’t at the moment. People contact me mainly through Instagram.
What is the next piece that you would like to develop?
At the moment I am trying to work on what’s essentially just a large bowl with a lid. It’s quite big, like a large salad bowl with a lid but it’s proving very problematic. The biggest problem I have with my work is warping. I fire my earthenware clay to quite a high temperature and so any sort of discrepancy in thickness it really punishes me for. So that’s the goal next year hopefully, if I can pull that off I will be pleased.
What is one thing you love about having a small workspace?
Oh well, the turn over. The fact that I can fire my kiln every couple of weeks. I mean opening the kiln, putting stuff in the kiln, and firing pots is basically what I love. It’s the drama. Making pots is a mini drama. Every pot I make, it’s a little drama. I’m trying to make that pot even if I have made that shape many times before, I am trying to make the best version of that shape every single time and then I stick it in the kiln and every time I am hoping it is going to be the very best version of it. Having a small kiln, that’s the joy of it. I fire a lot. I am opening the kiln a lot. I’m getting stuff out a lot, assessing it, feeling good or bad about it depending on how things have gone and then moving on. So that is the pleasure of having a small space and a small kiln.
If you have students with special needs in your art room, they may come to class with a paraprofessional, teacher assistant, or a “one-on-one.” Sometimes, it can be a little vague on what their role is and how to work together. However, when you welcome instructional assistants into your art room and cultivate a great working relationship with them, there are many benefits. Students with special needs will blossom, you’ll spark a love for art in the paraprofessional, and you will be more efficient at your job.
Foster positive relationships with paraprofessionals in the art room with these three ideas and then, dive into some frequently asked questions.
1. Make paraprofessionals feel important—because they are important!
Paraprofessionals are often the experts on our students in special education. They are with these students for most of the day and can answer questions about their skill level, interests, or even behavioral triggers. Ask for input for both the “in the moment” problem solving and the long-term “getting to know” the student. They can have the missing puzzle piece if you’ve tried everything and nothing’s working… or, you want to take a shortcut and go straight to what’s worked before!
Another way to make them feel valued and respected is to collaborate on the “fun art stuff” too. Talk to them about the neat things they or their student are doing. Be cognizant that you balance bringing up problems and commands with positivity and encouragement. One way to do this is a simple “thank you” at the end of each period. Acknowledge their effort with specific tasks (no matter how small!) to let them know you appreciate them showing up and being an active participant. Another way to show you are grateful is to provide coffee, water, or treats.
2. Help yourself by helping them.
A lot of people are uncomfortable with art because they feel like they’re “bad at art.” This is evident in the familiar response, “I can’t even draw a stick figure!” Also, many paraprofessionals don’t want to “mess up” a student’s project. Remember these sentiments when building relationships with your paraprofessionals. Although they are adults there to provide support to students, they can also be an extra art student. When you equip them to be more comfortable in the art room, they will be a positive catalyst for your students.
One simple way to mitigate anxiety is to communicate clear expectations for the whole year and for each class period. Tell them what the students will be doing for the day and what the paraprofessional’s expectations are during this time. Just as you would for a student, provide specific instructions in more than one format, and don’t assume they already know what to do.
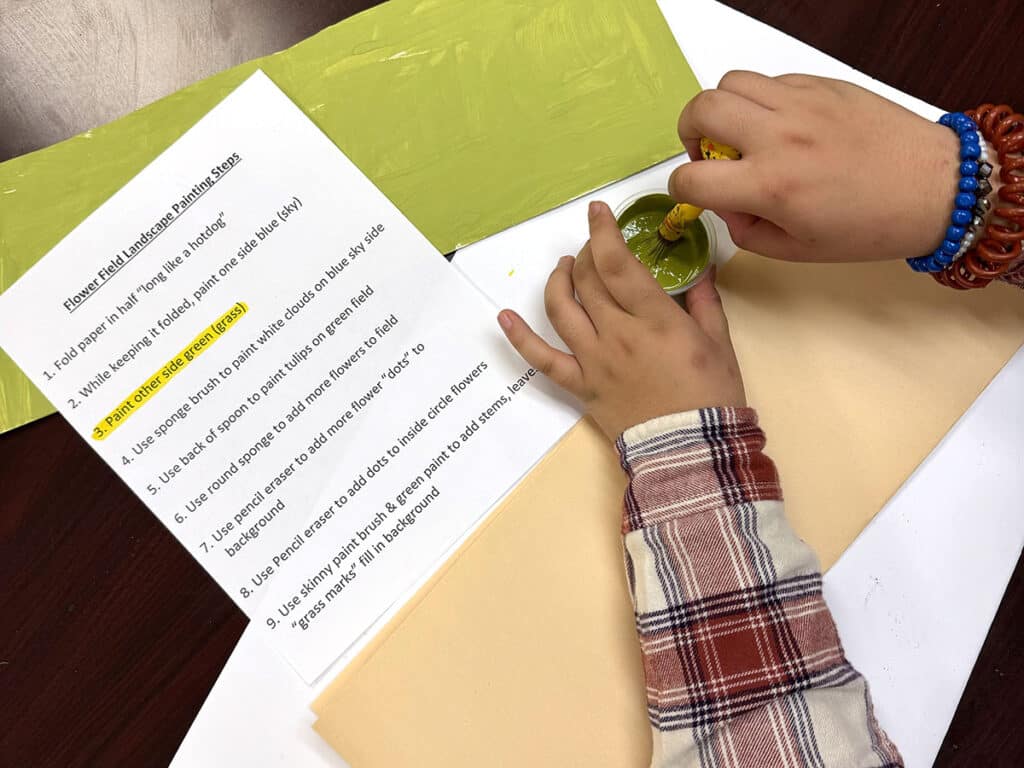
A quick way to provide expectations is to print out a simplified, bulleted, step-by-step list of each action item for the lesson. You can also print the whole lesson and highlight what the students need to accomplish on that particular day. It’s very helpful to have photos showing each step because sometimes a finished art project can be visually overwhelming. If you don’t have the time to compile step-by-step instructions with photos, check out FLEX Curriculum. FLEX is a standards-aligned curriculum that includes detailed step-by-step project instructions with photos and student-facing videos and resources.
3. Give paraprofessionals their own art project.
It can be wonderful when you have an eager and artistically-minded paraprofessional working with your students in the art room. However, sometimes they can be too eager to make art for the student. They are focused on having the project look “perfect” instead of indicative of the student’s true performance.
One way to mitigate this is to preemptively leave out extra supplies and give the paraprofessionals permission to create their own piece of art next to their students. As long as the students are getting the attention and assistance they need, many paraprofessionals will appreciate the thought. They usually enjoy the opportunity to sneak in a little creative outlet during their day!
If you’re short on supplies and worried about not having enough, many paraprofessionals can be invaluable support in helping you garner donations and recycled materials. Give them a list of what you’re looking for and chances are, they’ll work hard to collect boxes and bottles from other classrooms throughout the day. This creates many opportunities for them to feel like a contributing member of your classroom community!
Let’s answer your most frequently asked questions about paraprofessionals!
What if a paraprofessional doesn’t show up?
It can be frustrating when a designated instructional aid doesn’t show up for your art class with their students. If you have a good relationship with them, ask them about it the next time you see them. They may have had an emergency or didn’t think it was a big deal. It’s a great time to remind them of their importance in the art room and how vital they are to maintaining a smoothly run classroom.
However, what if this happened multiple times already? Email the lead special education teacher to gather thoughts and ask for guidance. The lead teacher often has a solid relationship with them since they work closely all day. The email will also create a paper trail documenting their absences.
What if the paraprofessional does too much or too little of their student’s art project?
If the paraprofessional is doing too much of a student’s project, provide enough supplies so they can make their own. If they’re not helping enough, pull them aside before class to reset expectations. Show them examples of what you need them to do and give them a quick list of written instructions. An example of a reminder expectation can sound like, “I really value your extra set of hands and eyes. Please sit at the same table with students, phone-free so you can be readily available to assist.”
What if the paraprofessional frequently leaves or disappears?
As aforementioned, pull the paraprofessional aside to reset expectations. Remind them that they are an integral and important member of your class and it can be disruptive for students if they don’t have a steady source of support. Your chat can sound like, “I noticed you stepped out the other day. I’d really appreciate it if you remained here during class. I really rely on the support you bring because you know [insert student’s name] the best.” If the behavior persists, email the lead special education teacher for advice and follow their guidance.
Bonus Tip
If you’ve already had a friendly chat to reset expectations and tried emailing the lead special education teacher, you can also seek out the guidelines used in the paraprofessional’s training. This can reiterate that you, the art teacher, aren’t the one “coming up with” the rules and that they are a part of the job requirements.
Building positive relationships with paraprofessionals in the art room is essential for fostering a collaborative and supportive learning environment. Not only does it model these skills for your students but it streamlines instructional tasks, strengthens classroom management, and bolsters individualized student support. Plus, when teachers and assistants work harmoniously together, they boost each other’s morale. Make your art room a welcoming and appreciative spot for paraprofessionals with the tips above so they’ll look forward to your class and spread a vigor for art to your students!
What’s one thing you do to make paraprofessionals feel welcome and included in your classroom?
How do you navigate challenging situations with paraprofessionals in the art room?
Magazine articles and podcasts are opinions of professional education contributors and do not necessarily represent the position of the Art of Education University (AOEU) or its academic offerings. Contributors use terms in the way they are most often talked about in the scope of their educational experiences.
What you don’t know about Ancient Delphi, God Apollo, Oracle, Myths, History, Architecture & Art
You can take a deep dive into ancient Greek history by virtually visiting Delphi, the cult center with its gods, oracles, art, architecture, and myths.
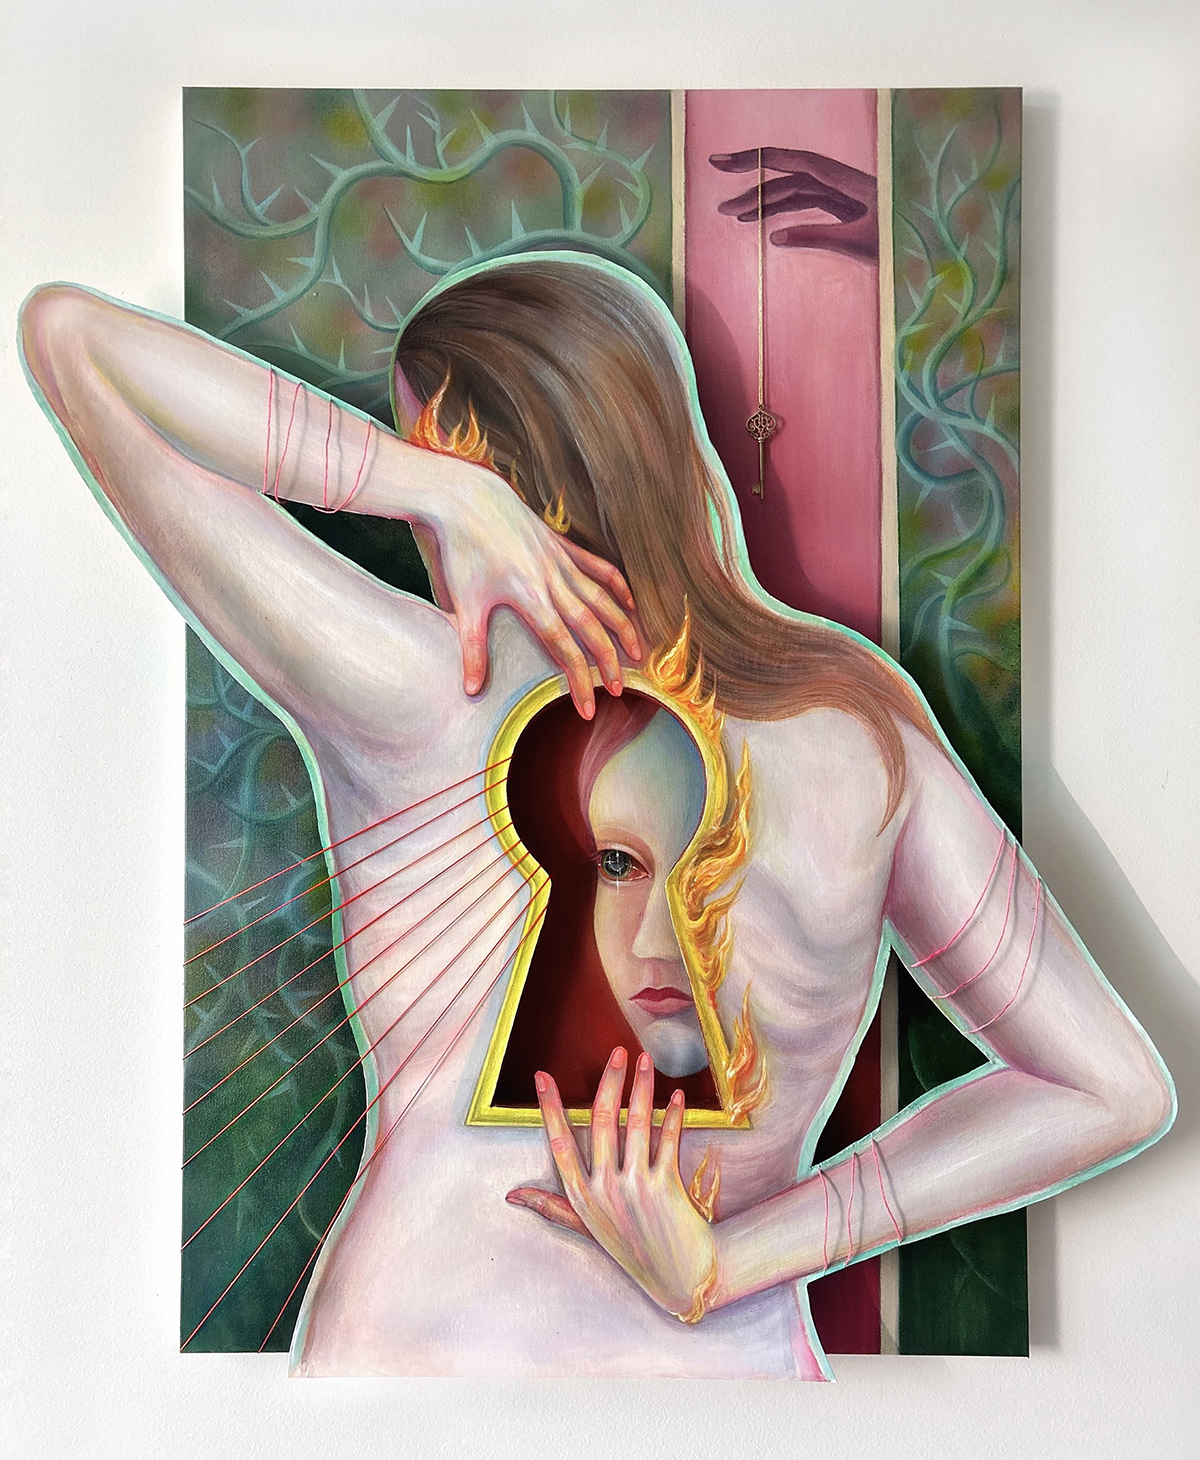
A selection of work by New York City-based illustrator and artist Leyla Cui. Exploring the fluidity of female identity, Cui’s work weaves memory, intimacy, and self-perception into surreal narratives. Through fragmented figures and shifting forms, she examines the body as a vessel of desire, trauma, and transformation. Hair, skin, and touch become symbols of memory, evoking tensions between visibility and erasure. Cui moves beyond traditional representation, challenging fixed perceptions and expanding the emotional depth of storytelling. By giving form to the unspoken, she creates a space where femininity is both intimate and infinite, resonating with the silent yet persistent voices of history and self-discovery.
Printmaking is a powerful process in the art room. It offers students hands-on, engaging artmaking experiences and teaches creative problem-solving and experimentation. The many methods of printmaking make it accessible for all students, classrooms, and budgets. However, this is also what can make printmaking so intimidating! Art teachers just like you in The Art of Ed Community asked their burning printmaking questions and we’re here to deliver practical solutions.
Let’s answer your top five most frequently asked questions about printmaking in the K-12 art room!
1. “I’m not comfortable teaching printmaking. Where do I start?”
Printmaking can be an overwhelming medium—there are so many forms, lots of tools and equipment, and several stages in the printmaking process. It can feel like a lot to teach on top of classroom management, ideation, assessment, and more. The great news about printmaking is that there is a process for everyone at every comfort and skill level!
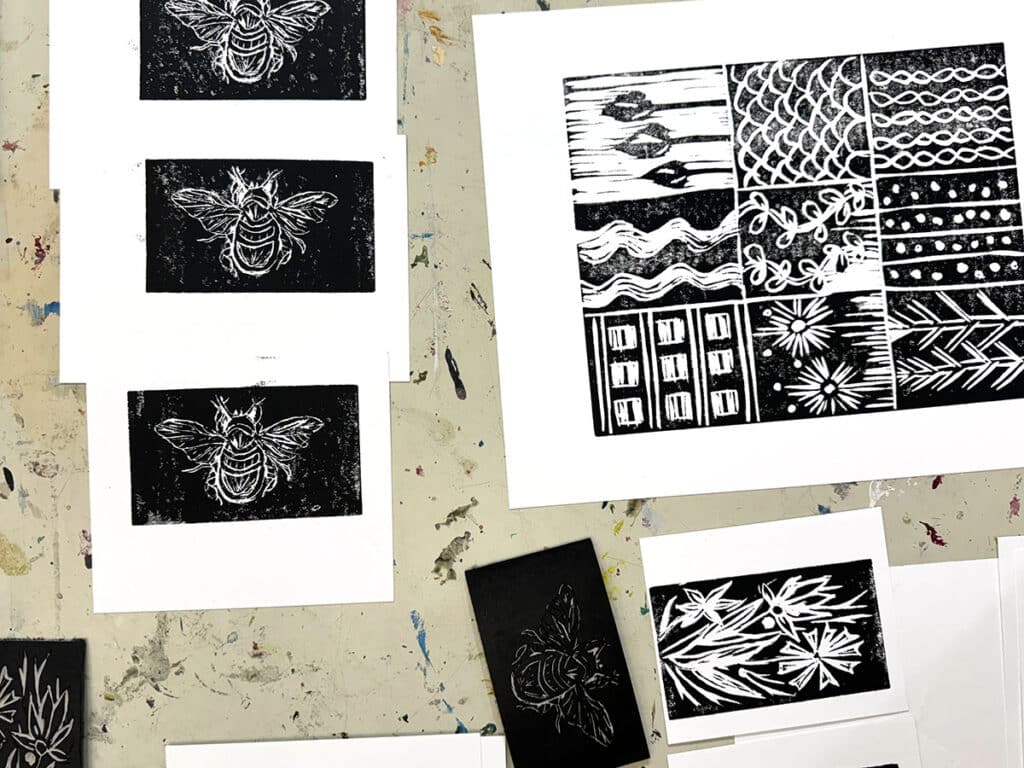
Start with simple techniques and processes like foam tray printing or stamping. These two methods are great entry points and are a good segue into block printing. They do not require any fancy printmaking tools and you probably already have the supplies you need in your closet. Boost your confidence by incorporating mediums you love! For example, if you love drawing, painting, or mixed media, try monoprinting or collagraphy.
Another tip is to experiment first. Try exploring foam tray printing or stamping on your own for fun. Then, host a laidback Art Night event at your home with friends or at school with colleagues to practice teaching a mini-lesson. This can help you troubleshoot any considerations before you bring it to your students.
Embrace imperfection! Printmaking is all about trial and error and the process. Don’t think you need to know everything about printmaking before diving in! Invite students into the creative process and show them how to learn from mistakes and discoveries.
2. “I studied printmaking, but I still avoid teaching it. Why?”
Even if you are comfortable with printmaking in your own artmaking, bringing it to students can be a whole different ball game. Printmaking can seem messy and intimidating if you have large classes and limited studio space. With a little intentional planning, printmaking can be a smooth process that is engaging for all of your students.
Just like you’d scaffold a difficult skill with your students, scaffold the lesson and process for your instruction. Break down the printmaking process into small steps. Teach each step as an individual lesson and move on when the class as a whole is ready. For example, spend one class sketching ideas and then the next carving. When you get to “Printing Day,” set up student-led stations with clear roles to reduce chaos. Let the first round of printmaking be an experiment to see how everything works before diving in again to make more fully realized and final prints.
Perhaps you love printmaking so much that you don’t know where to start because you want to bring every form to your students! This is a wonderful “problem” to have. Instead of overloading your students with every possibility, pick one very simple process and let your passion trickle down to your students. Once they’re hooked, you will be unstoppable together!
3. “How do I teach printmaking on a tight (or nonexistent) budget?”
Certain types of printmaking can be on the pricier side and take up the bulk of your valuable art budget. For instance, lithography traditionally uses heavy blocks of limestone and requires a heavy-duty printing press with lots of studio space. Etching can also use expensive and toxic chemicals that aren’t school-friendly. However, there are many hacks and alternatives to make printmaking accessible to your students!
Here are some budget-friendly printmaking ideas perfect for the K-12 art room:
4. “I want to try block printing, but I’m worried about students cutting themselves!”
Prioritizing student safety is a part of having excellent classroom management in the art room. Many items used for carving or incising designs, like linoleum cutters or etching tools, are very sharp. Paired with the force and pressure required for carving and many students’ poor hand strength and coordination, you may have cause for concern. With proper instruction, supervision, and limits, you can execute a printmaking lesson with zero injuries!
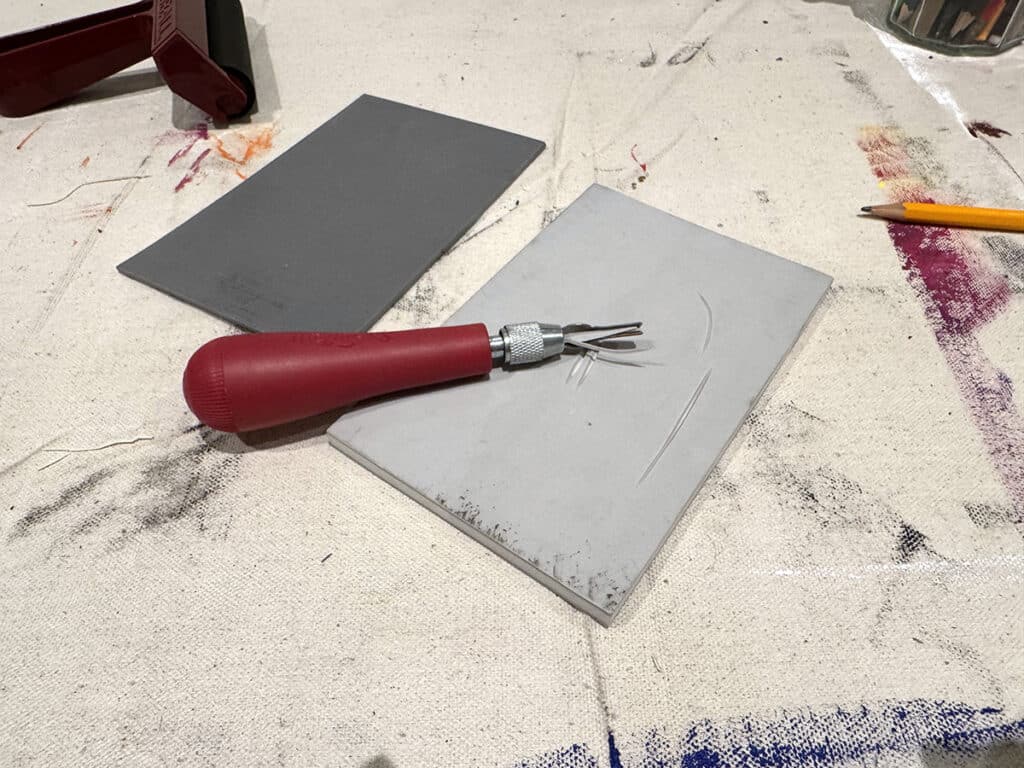
Start by teaching students about the tools and equipment they will be using. Assume nothing and explain and show everything to ensure everyone is on the same page. Explain what each item is for and how to properly use it. Verbalize and demonstrate safe-cutting techniques, such as carrying sharps pointed toward the ground, cutting away from the body and helper hand, and using a bench hook or scrap board to stabilize the block. Do several exercise drills to get students in the habit of how to behave with, hold, and use these exciting tools!
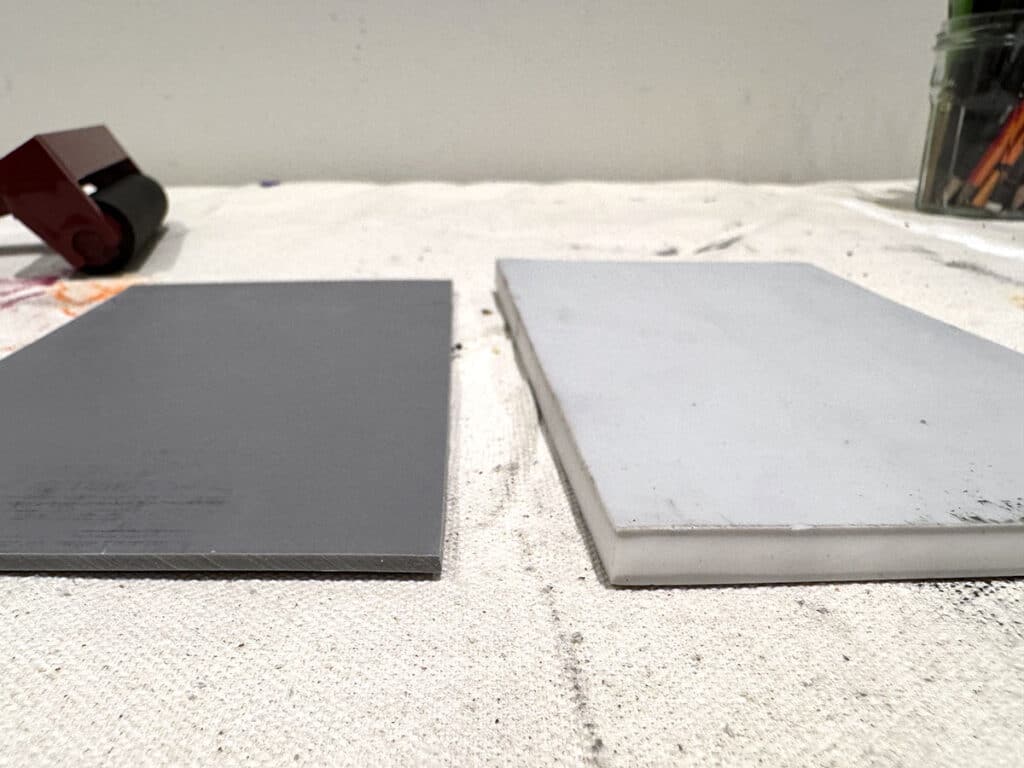
Another tip is to start with soft-cut materials, such as rubber blocks or foam, instead of traditional linoleum. These require less pressure to carve and often, duller tools. You can also practice the motions of carving with plastic tools and clay slabs before graduating to printmaking materials. These are all great alternatives for younger printmakers.
5. “How do I keep printmaking from becoming a total mess in my art room?”
Art teachers spend hours and hours maintaining the art room. There are tons of materials, tools, and projects before adding printmaking to the mix. Plus, printing ink seems to multiply on hands, tables, clothes, and sometimes even the floor! In the chaos of a “Printing Day,” students may not follow cleanup instructions and leave the sink full of inky brayers. Avoid the mess and take a few simple steps to prepare for cleanup before class even starts.
Take a look at these quick steps to avoid the mess:
Set up printmaking zones. Designate separate areas for drawing, carving, inking and printing, and drying to keep messes contained.
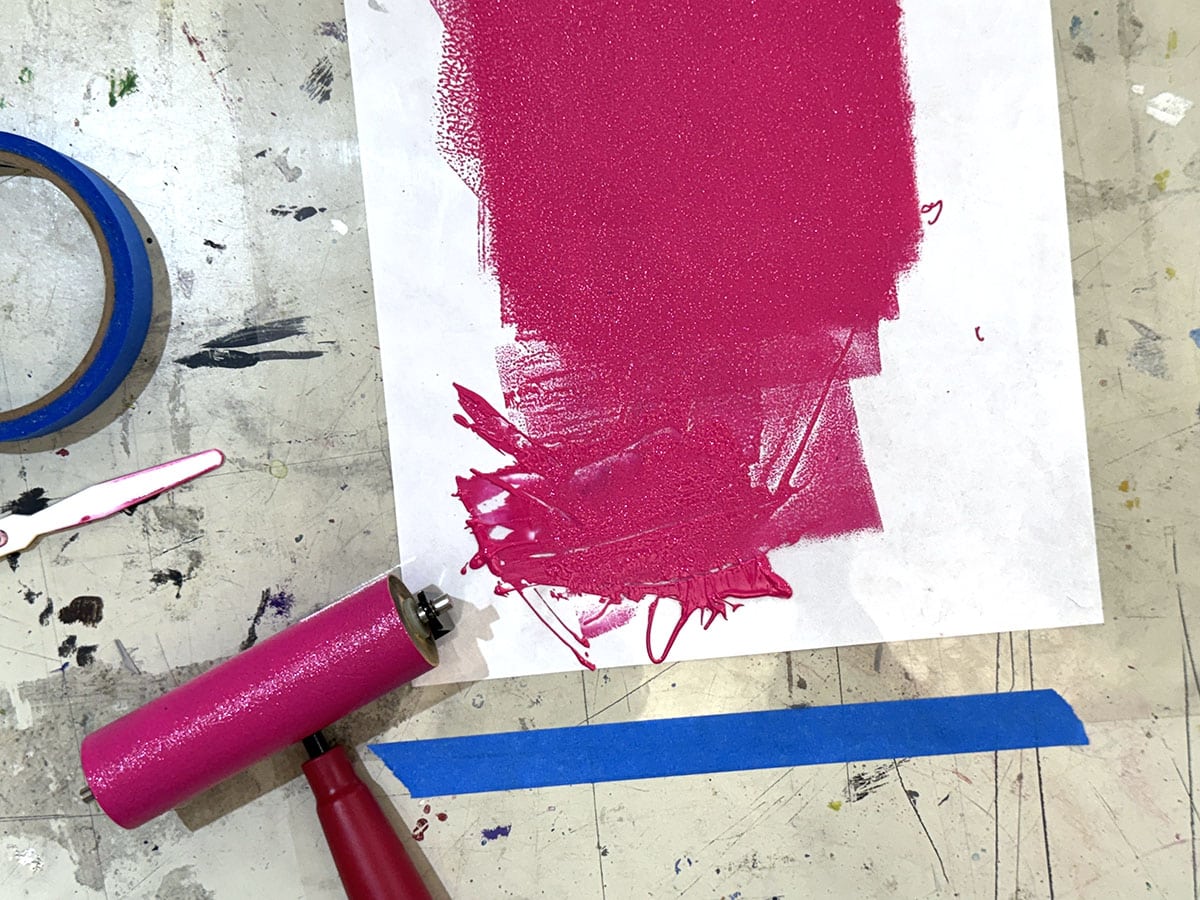
Use minimal ink. Show students how much they need and how to roll it out into a thin, even layer. You can even pre-portion ink into small cups so they don’t overuse and waste it.
Assign cleanup roles. Build ownership in the studio by putting students in charge of wiping tables, cleaning brayers, and organizing prints. This will free you up to supervise the class and the classroom as a whole.
Provide wipes and scrap paper. Baby wipes—store-bought or DIY—will be your best friend during printing to minimize the spread of ink! Use large scrap paper as “trays” or small scraps as “tweezers” to transport paper and prints without tiny fingerprints.
Grab a lot of newsprint. Order a bulk pack of newsprint or ask your local newspaper for scrap newsprint. Use this to blot prints to absorb excess ink. This reduces smudging and dry time.
Whether you’re new to printmaking or a seasoned expert, you can absolutely teach printmaking to your students! Printmaking may feel overwhelming, but it’s one of the most rewarding processes to teach. The key is to start simple so you will gain confidence and hook your students! From there, try some of the hacks and tips above to keep it budget-friendly and mess-free. Turn your most frequently asked questions about printmaking into your most frequently asked for art lesson!
What’s your biggest classroom printmaking challenge that we can help with?
Magazine articles and podcasts are opinions of professional education contributors and do not necessarily represent the position of the Art of Education University (AOEU) or its academic offerings. Contributors use terms in the way they are most often talked about in the scope of their educational experiences.
Michael Bridges is a potter living in Chicago, Illinois. Michael is a hand builder that identifies as a wheel thrower. Skulls, jack-o-lanterns, and spookiness are right at home in Michael’s work.
The preferred printing supplier for potters everywhere! SmallDogPrints.com
How do you fire your work?
I work with as many different firing processes as I can. Soda fire, earthenware. 04. sculptural, I do a little bit of cone 6 as well.
How much time to do you invest into each piece?
Too much. (laughter) I work on it until it’s done. Sometimes that’s an hour, sometimes that’s four or five full days.
Your work has very child-like features although I know you are a skilled potter. How much effort are you putting in to make sure it’s not too refined.
Learning how to walk away from a piece is harder than making something look perfect. In my opinion. It’s taken me years to learn when to let it go.
Do you sell your work year round?
I do sell year round, often by appointment or email or direct contact. In terms of online sales I generally put most of my work online towards the end of the year in October, November, December. And that allows me the freedom earlier in the year to explore new ideas. So I don’t have that pressure of constantly having to sell.
Is there a piece that you would like to make but your skill levels don’t quite reach?
I would really like to work large. That’s a big want is to work five, six feet tall. Life size. I don’t have the facilities for it now but that is the vision at some point is to make life-size work.
What is your favorite holiday?
Hmm. Favorite holiday. I am going to have to think on it. As a side note I grew up working on all holidays. I worked in a vacation town so I never took holidays, I worked through every holiday. And then in the bakery industry I also worked through the holidays. So I kind of hate holidays for that reason. (laughter) So that’s a tough question. So I am an antiholiday guy. I guess I am going to have to go with Halloween. It’s the one where you get to dress up , that’s probably the closest that I’ve had to enjoying a holiday would be Halloween.
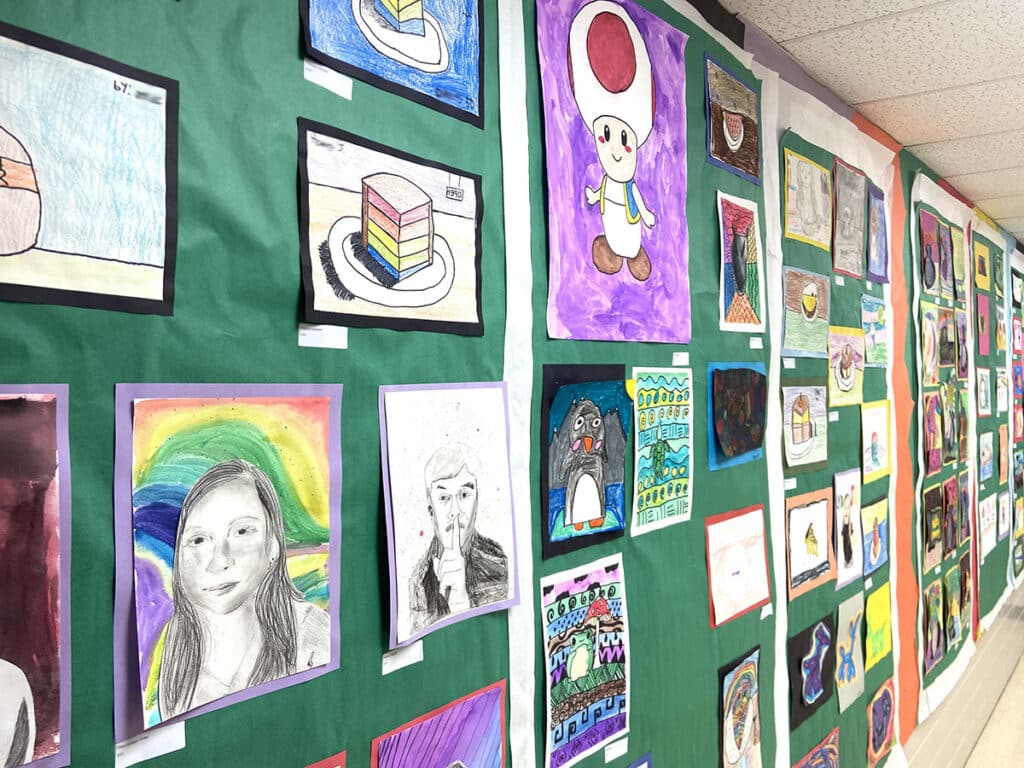
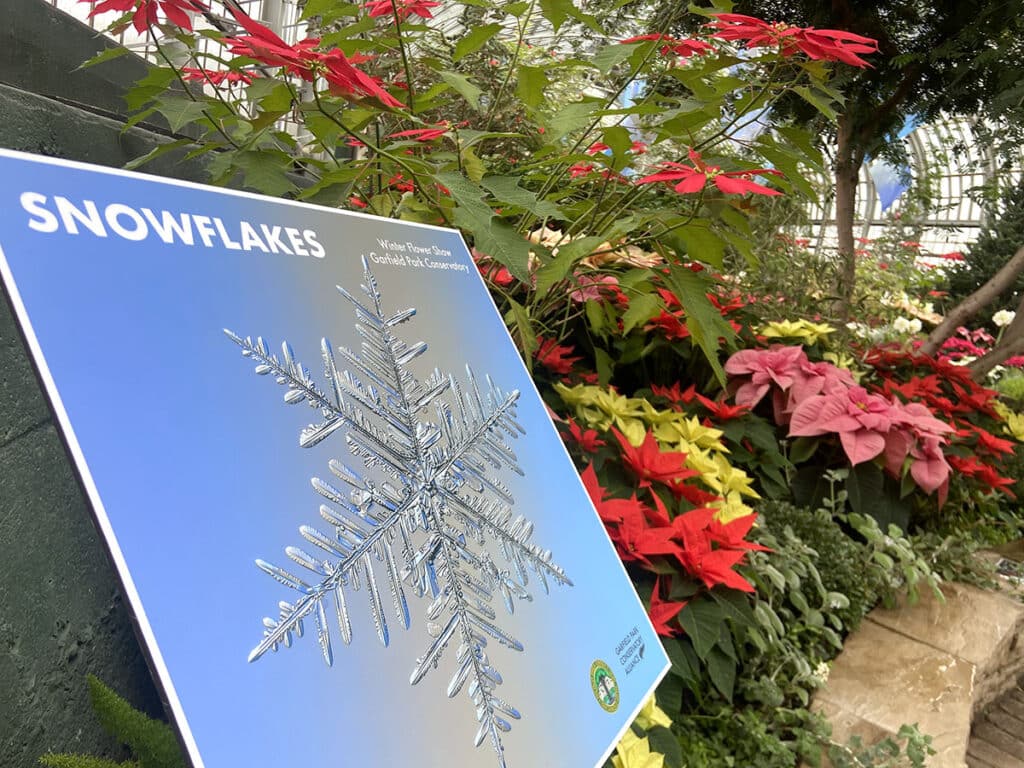
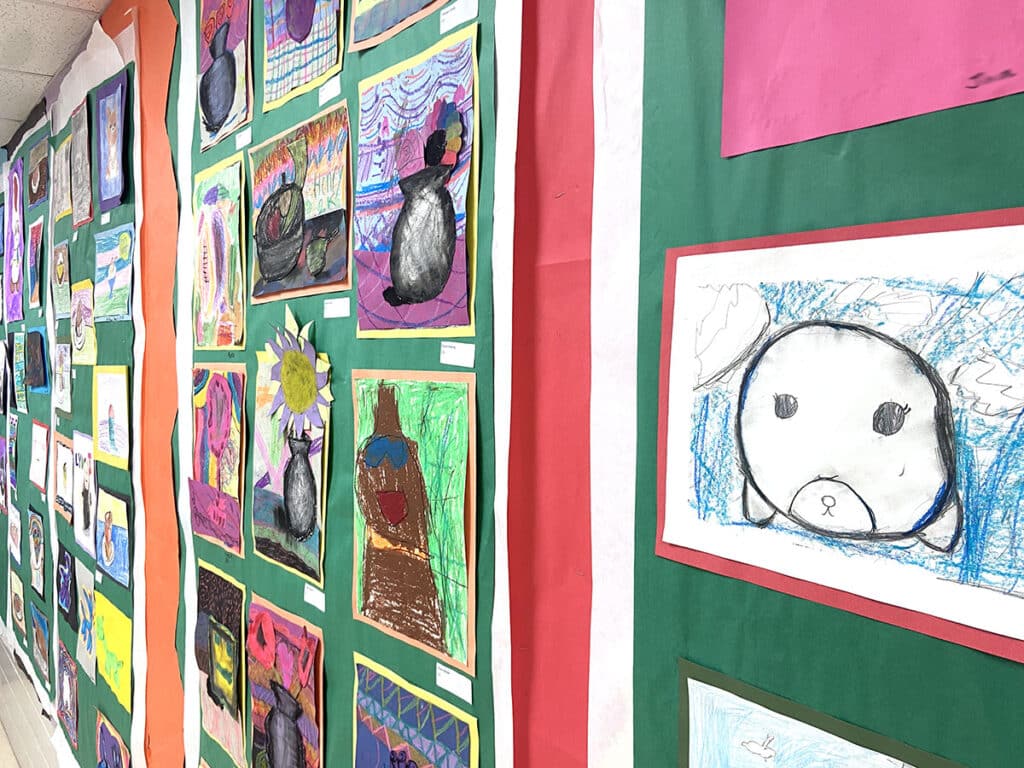
Choosing a unique art show venue outside of your school creates a novel and exciting experience for your young artists. It also expands the audience for your students’ work and exposes your program to a wider segment of the community, including potential supporters and stakeholders. Partnering with community organizations and having your art show outside of your school makes the culmination of all of their hard work special and makes your students feel like professional artists.
Reap the benefits of hosting your art show at a fresh location in the community!
Hosting your art show in the halls of your school is usually the easier option. However, stepping outside of your school campus bubble can truly benefit your students and your art program. Aside from the positives listed above, hosting your art show at a community venue brings other people to help hang and take down your show. The business or organization will likely also promote your show. For families and students, it connects the visual arts with tangible careers in the community. Let’s take a look at nine unique locations to consider for your next art show!
1. District Administration Building
Place student artwork directly in the path of district decision-makers. Those with the power to influence budgets and approve new courses will experience the impact of your art program firsthand. This daily exposure to the creativity and skills fostered in your classroom can powerfully advocate for the value of art education.
2. City Hall
Showcase your students’ artwork in your local government building so the broader community will see the importance of your art program. Students will take pride in having their work displayed in a prestigious location. A gallery night will allow families and students to personally meet their city’s officials.
3. Local Park
Hold your art show amidst nature’s beauty in a local park. The Impressionists loved creating en plein air but outdoor spaces can be wonderful for viewing art as well. Take advantage of natural light to enhance the artwork. Families will enjoy the relaxed, outdoor setting, and the open space allows for larger crowds.
4. Community Art League
Many art leagues have a dedicated gallery space. Your students will benefit from professional hanging systems and lighting. This collaboration connects your school and students with experienced artists. Nothing motivates students to up their game like telling them accomplished artists will be examining their work!
5. Community College
Hosting your art show at the community college exposes them to a post-secondary environment. Many community college art departments have a small gallery space but there are usually plenty of other larger lobby spaces available too. Nearby classrooms or studio spaces work perfectly for workshops, demonstrations, or blacklight galleries. As students see their best work hanging prominently in an institution of higher learning, they will naturally envision themselves continuing their education and thriving in college.
6. Library
Literacy isn’t just for Language Arts! Visual arts is all about visual literacy and a partnership with your local library is a natural connection. After all, every great art room has a library, and your local library should have a space for student art. The library offers a quiet, studious environment that encourages close examination of artwork. This public space attracts a diverse crowd with lots of community events, ensuring a steady flow of visitors. Libraries also do a really good job of advertising their events, guaranteeing built-in publicity for your students.
7. Historic Buildings
Choose a historic building or site for a truly unique backdrop. This adds a sense of grandeur and importance to the student artwork. Many buildings rent out their space and property on weekends for events such as weddings. However, they are often available during the week.
8. Local Museum
Partnering with a local museum elevates your art show to a professional level. This venue provides top-notch display facilities and climate control to protect the artwork. This location lends credibility and prestige to your students’ work. Think outside of the box and reach out to any type of museum—not just an art museum! The type of museum you partner with can also dictate your art show theme.
9. Feeder Schools
Vertical alignment and partnerships across grade levels can be tremendously beneficial for everyone. When older students show their work in an elementary or middle school, the younger students see quality work that they will want to make one day. The older students will feel a surge of pride as they showcase their work in their old stomping grounds. When you display elementary artwork at the high school, it lightens the mood and can help older students remember the earnest joy of creating. This builds a stronger art program across the district and shows students that art is a lifelong journey.
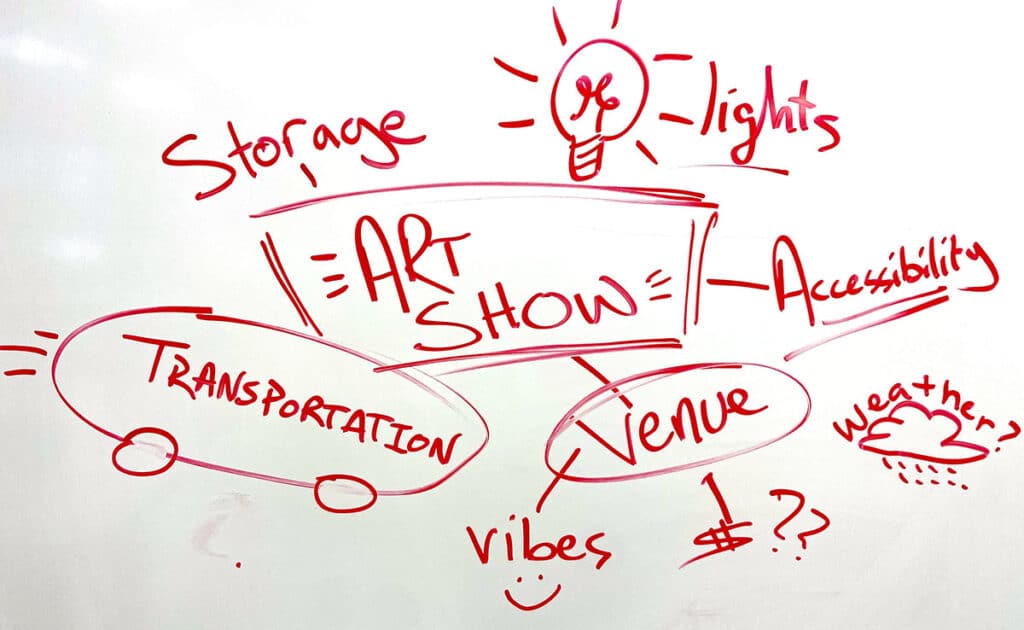
Stay focused on practical art show considerations.
Choosing an unconventional venue for your art show is exciting, but demands careful planning. Fortunately, there are many people, often who work at the location you are partnering with, who are more than willing to help you plan and execute!
Here are some things to consider as you choose and plan your venue:
For outdoor locations, do you have an inclement weather plan?
Do you have access to restrooms and ample parking?
Do you have clear signage to find the event?
Are you allowed to offer refreshments in the space?
What are the associated costs, including furniture rentals, refreshments, prizes, and transportation?
How far in advance can you set up, and how much time do you have for takedown?
How will you safely transport, display, and light the artwork?
Let your community help you with your art show.
Putting together an epic art show seems overwhelming. It is okay to ask for help and advice from colleagues. The Art of Ed Community is a tremendous resource with immeasurable collective wisdom. Delegate as many tasks as possible to your Art Club, students, colleagues, and friends. Get a peek behind the scenes of how Sarah Krajewski and Jenn Russell put on their art shows. Gain their best Art Show Secrets to help you put on your best art show yet!
Turning your unconventional art show vision into reality requires a bit more consideration and planning. However, the benefits are always worth it! Hosting your art show off-campus increases the visibility of your students’ artwork, your art program, and the value of art education as a whole. Look into partnering with a historic site, your city hall, the local library, or a feeder school to curate a truly memorable and impactful art show experience for families, students, administrators, and other community members.
Tell us! Have you ever hosted an art show outside of your school?
Magazine articles and podcasts are opinions of professional education contributors and do not necessarily represent the position of the Art of Education University (AOEU) or its academic offerings. Contributors use terms in the way they are most often talked about in the scope of their educational experiences.
When touched, the hypersensitive makahiya plant folds its minuscule leaflets inward, protecting itself from any potential threat.
Florence Solis draws on this defensive response in an ethereal collection of portraits. Beginning with digital collages that meld figures and delicate, organic ornaments, the Filipino-Canadian artist translates the imagined forms to the canvas. Shrouded in dainty, beaded veils or entwined with botanicals, each protagonist appears bound and concealed, their bodies and faces obscured by hair or grass.
“Sirena” (2025), acrylic on canvas, 30 x 24 inches
As Solis sees it, the figures may be restricted, but they’re also able to find strength and transformation. “Filipino women, much like the makahiya, have been taught to yield, to soften, to take up less space,” she says. “And yet, beneath this quietness lies an undeniable force—one that persists, adapts, and reclaims space in its own way.”
Working in saturated, often single-color palettes, Solis renders figures who appear to harness magical powers. She references Filipino folklore and the belief in the power of the everyday to lead to the divine, painting women rooted in tradition and myth, yet determined to see their transformation through.
The vivid portraits shown here will be on view at EXPO CHICAGO this week with The Mission Projects. Find more from Solis on Instagram.
“Sa Lupa (On Ground)” (2025), acrylic on canvas, 30 x 24 inches“Totem” (2025), acrylic on canvas, 30 x 24 inches“Makahiya VIII” (2025), acrylic on canvas, 20 x 16 inches“Makahiya VII” (2025), acrylic on canvas, 48 x 36 inches“Alay (Offering)” (2025), acrylic on canvas, 48 x 36 inches
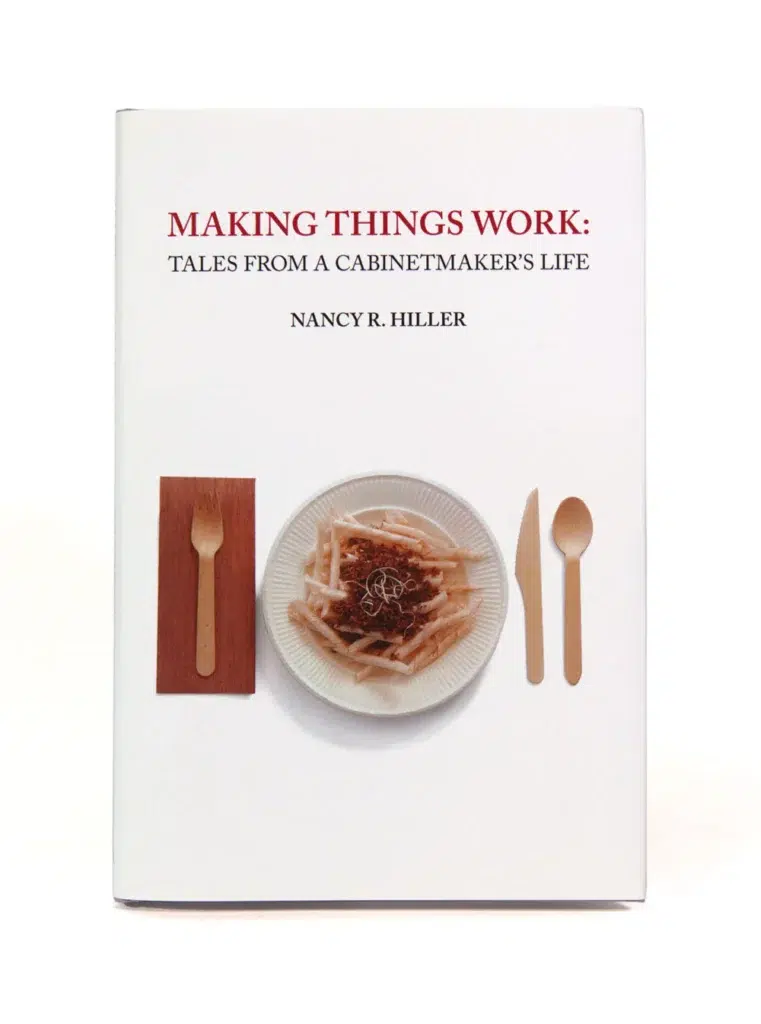
The following is excerpted from Nancy R. Hiller’s “Making Things Work: Tales from A Cabinetmaker’s Life.” Hiller’s funny and occasionally delightfully crass stories tell of her years as a professional cabinetmaker who relished both the highs and the lows of the job.
“How much time do you spend in the shop, and how much in writing?” asked a friend of a friend who’d waved me over to sit with him at a holiday party. He’d noticed my bio in the list of contributors to an area magazine and knew I’d written a couple of books.
“I pretty much write in my spare time,” I said. “Mainly on weekends, if work in the shop doesn’t require my presence there. The books in effect pay nothing. The magazines at least pay something, but it’s not enough to cover my overhead and operating expenses, let alone live on.”
When I really cranked out articles for the local magazine where this acquaintance had seen my bio, I could make about $15 an hour. But this calculus relates to net income, not the gross revenue required to maintain a business – and certainly not my cabinetmaking business. It doesn’t matter whether I’m writing, sleeping, or working billable hours; a host of fixed and related expenses still have to be paid.
“Oh, please,” he said dismissively. “What kind of overhead and operating expenses do you have? You work from home and have no employees.”
I was taken aback. Why did he think he knew anything about my business? We scarcely knew each other. Did he think I was posturing as a professional while secretly just “crafting” in my garage?
“You know,” he added, rolling his eyes. “I used to do what you do.” He’d mentioned once that he had worked briefly as a carpenter during what he called his hippie youth; as part of this personal exploration he’d tried his hand at cabinetmaking before concluding that, while he loved the work itself, doing it for a living involved more tedium and less creative freedom than he could bear. Some years later he got a job as assistant art director at a major magazine and worked his way up to a well-paid position, from which he had recently retired. He pushed his chair back from the table and walked away without giving me a chance to respond.“
“Tosser,” I said under my breath as he sought out someone else to use as sounding board for his oversized ego. Then again, I realized, I had no idea how I would have responded had he stayed. If he really was that ignorant of the costs involved in operating a microenterprise – aboveboard, mind you, not under the table – a meaningful, non-defensive response would take some time for me to articulate, not to mention a willingness on his part to listen.
I grabbed his unused napkin and pulled a pen out of my bag. The numbers were fresh in my head; I’d spent the previous weekend going through the year’s accounts to get a jump on tax preparation.
“Overhead and operating expenses, 2014,” I wrote at the top of the napkin. That pompous jerk was not going to get away so easily. Between bites of salad Ilisted the categories I could remember, adding a few explanatory notes:
• “Business insurance (coverage of shop building and contents, liability, goods in transit, etc.) • Equipment rental (e.g., trailers for delivering large jobs) • Health insurance. (Many people whose health insurance premiums are subsidized by their employer have NO CLUE what it costs. Mine is $506 a month for so-called “wellness coverage,” i.e. I have to pay for almost everything out of pocket, and with a $6,000 deductible. My husband and I are both self-employed, so we each pay through the nose.) • Permits (e.g., for parking in our highly regulated city) • Accountant’s fees • Mileage
At this point I realized I had lapsed into completely irrational behavior. He would never read such a list, not to mention the parenthetical notes, which were likely to grow in length now that I was getting warmed up. But perhaps the sheer number of items listed would at least impress on him that I run a business with real-world operating expenses. So I continued writing.
• Packing & shipping • Website-related expenses • Office supplies & printing • Subscriptions to trade publications • Disposal of non-recyclable, non-compostable shop & jobsite waste • Phone & internet at shop • Dues to professional organizations • Shop utilities (electricity & water; the insurance industry now pretty much refuses to cover woodworking shops that are heated by means of a woodstove, and there is no way I’m going to run a business like this one without insurance) • Repair & maintenance of equipment; replacement blades, cutters, etc. • Bank charges (e.g., the cost of checks) for business account • Business travel expenses; I do sometimes teach, speak, & deliver furniture out of state. (These are not vacations, like those publishing-world boondoggles you brag about at cocktail parties.They are bona fide working trips.) • Business tangible property tax • Professional photography for the portfolio, when I can afford it • Taxes related to payroll: state unemployment tax, Medicare & Social Security matching taxes, etc. Years ago, my accountant advised me to organize my business as a Subchapter-S corporation instead of continuing as a self-employed proprietor.”
My hand was cramping, so I put down the pen and took a sip of cabernet. The cheese board at this bash was always a vision of abundance. I added a wedge of crumbly aged cheddar and some crackers to my plate – along with the wine, a perfect combination. By this time I had completely covered the napkin on both sides, but I sensed that I was far from finished. Grabbing a couple more napkins from the buffet, I got back to work.
“All of the above (and more) must be covered before I pay myself a penny. And this is not including investment in new tools, machinery, etc., which amounts to thousands of dollars. In 2014 the above expenses came to just over $20,000. I don’t know…maybe that’s chump change to you. Not to me.”
“And yes, my shop is behind my house. But I no longer live in the house. I had to move out during the recession, which absolutely gutted my business. During the worst year, my gross sales (i.e.,including materials) were $17,000. I slashed the overhead and everything else to the bone. I relied on my credit card to pay lots of bills, a debt that took the following two years to pay off. I’m incredibly lucky that my boyfriend at the time – now my husband – invited me to move in with him; at least that way I no longer had to pay for all my living expenses on one decimated income.”
“That year from hell, I obviously could not even pay myself minimum wageafter covering the overheads. You’re probably wondering why I didn’t just go out and get a couple of jobs – you know, bagging groceries, cleaning toilets at the office supply store. (BTW, there were none of those jobs available. Because recession.) Believe me, I thought about it. One friend, a nationally recognized furniture artisan, confided that he was seriously contemplating a job flipping burgers because he wasn’t getting orders. Another put his business in a holding pattern and relied on his wife to support him (he was lucky she could). But I calculated that doing spec pieces and writing would be a worthwhile investment in future business opportunities, even if I had to rely on my credit card to make that investment. Thank God my bet paid off.”
“I have been renting my house out to cover the mortgage & property taxes. You probably think this means I have Even. More. Income. But no. Renting the house increased the monthly payment because I no longer qualified for the homestead tax exemption. Also, insurance rates for a rented property are quite a bit higher than for one that’s owner-occupied. So the income from rent just barely covers the monthly payment. But at least I still have my shop, for which I am profoundly grateful.”
“Don’t get me wrong. I could, in fact, make more money if I only worked in the shop seven days a week and didn’t do the writing. But going back and forth between these kinds of work is critical to my sanity.”
“All of which is to say that yes, I do have overheads and operating expenses.”
I folded the napkins in half, put them in my pocket, and made my way through the crowded room over to the dessert table. I was balancing a slice of chocolate hazelnut torte on a cake knife when I spotted him spooning tiramisu seductively into the mouth of a woman who looked young enough to be his daughter. I stood there holding the torte on the knife while she closed her lips around the spoon and shut her eyes with an expression of orgasmic delight. Once she had recovered I walked over and tapped him on the shoulder. “Rafi,”I said, pulling the napkins out of my pocket, “I have something for you.” I unfolded them and laid them on the table in front of him.
“OK,” he said distractedly as he scooped up another spoonful for his friend, who seemed to be incapable of feeding herself even though she was old enough to drink wine. “Thanks.”
I happened to pass their table on my way out a half-hour later. The napkins were just where I’d placed them, but crumpled now, the ink smudged into a dark blue blur. Seeing me roll my eyes, a man at the next table said, “I don’t know what was written on those napkins, but it sure must have been funny. The guy sitting there was reading it to his daughter – or was she his girlfriend? – and at one point she laughed so hard she spat out a mouthful of pudding. Geez, what a sticky mess.”
One thing that makes art teachers so amazing is that we are self-proclaimed forever students who embrace learning. Continuing your education is appealing! It’s a chance to feed your brain, interact with others on the same wavelength, revitalize your teaching strategies, and grow as a researcher. It gives you a chance to challenge yourself to go further than you ever thought you could. On the other hand, it can be costly to continue learning; it can seem unattainable on a teacher’s budget. It may leave you wondering, “How can I afford a master’s degree?”
Explore five ways you can afford to pay for a master’s degree!
Let’s take a look at five practical ways you can afford to continue learning. And don’t worry—it won’t be to stop buying a cup of coffee or adding guacamole to your burrito bowl. As you read, remember that none of these suggestions live in isolation. You may be able to pair tuition reimbursement or scholarships with paying as you go to lower the cost of your degree.
1. Use district professional development funds.
Many K-12 schools have tuition reimbursement programs, so they may already cover part of your continuing education. These programs are often not widely advertised, so you’ll have to seek them out. Research your district contract, talk to your union representative, and source information from fellow colleagues. Take the time to understand exactly how the funding works in your district and what limits apply. A few key things to note are deadlines, reimbursement, and payment policies with purchase orders.
Insider Tip:
District funds go quickly! Have your paperwork polished and ready to submit before the application window opens.
Money is available through school scholarships, state education programs, cultural associations, and grants. Sometimes, you can find money available through your district’s parent-teacher association or other local community organizations. No matter what options you discover, take the time to apply! Any opportunity that offsets part of your tuition is worth your energy.
Insider Tip:
Scholarship and grant applications can take time, but a tuition break is worth the extra effort to get and stay organized! Prepare your resume/CV, letters of recommendation, and references so they’re ready to go when an opportunity becomes available.
3. Leverage salary lane changes.
Research your district’s salary schedule to clearly understand how earning your master’s degree will affect your net salary over time. Some districts offer smaller pay increases for incremental steps between degrees, such as a BA +12 and BA +30 credit hours. If you time it right, you can use this increased salary to fund your degree—you won’t feel a thing because this salary increase is not part of your existing budget yet.
Insider Tip:
Pay attention to deadlines and work backward. You don’t want to miss a salary increase for an entire year by a few days. Ensure you have the credits you need beforehand from the issuing institution. Allot at least one month between the course end date and the day you need to submit official transcripts.
4. Pay out-of-pocket in small increments.
Let’s talk budgeting! Consider items you can cut out or cut back on to help you hit your monthly tuition target. Taking a detailed look at your spending will identify where every dollar goes. Then, create a process to reallocate certain buckets of money toward your tuition. At The Art of Education University, you can make small payments toward your coursework so you’ll have tuition paid in full by the start date. Remember that this is a short-term adjustment. The goal is a completed degree, a potential raise, and more financial freedom!
Insider Tip:
Cut out the extra cost of guac on your burrito bowl—just kidding! Look for windfalls, like tax refunds or a month when you get an extra paycheck. Set that money aside specifically for your degree.
5. Determine the right pace.
Pacing your coursework is one way to spread out your degree’s monthly or annual cost. Look for a program that you can tailor to meet your specific needs, compared to a strict, regimented course of learning. At The Art of Education University, take classes when it is convenient for you, your schedule, and your finances. Some students prioritize a faster pace to reach their end goal, while others spread their degree over four or five years to pay out-of-pocket as they go.
Insider Tip:
As you look at schools, ask specific questions about course pacing, course availability, and any requirements around staying on a particular timeline. Some programs require you to take courses continuously or progress with a cohort of classmates.
No matter where you are in your teaching career, the best time to invest in yourself is now.
Determining when to pursue and earn your master’s degree is personal. So many factors can determine what the “best” time is. Look at your season of life, how much time you have to dedicate, how much time you want to dedicate, and what your ultimate goal is. However, if we are talking strictly about earning potential and the return on your investment, there’s one clear answer—and I’m betting it won’t surprise you. The sooner you navigate the logistics of a master’s degree, the sooner you can increase your earning and learning potential!
Share a professional goal you have as an art teacher.
What’s holding you back from pursuing a master’s degree?
To chat about how to afford a master’s degree with other art teachers, join us in The Art of Ed Community!
Magazine articles and podcasts are opinions of professional education contributors and do not necessarily represent the position of the Art of Education University (AOEU) or its academic offerings. Contributors use terms in the way they are most often talked about in the scope of their educational experiences.