برچسب: Room

  • Organize It! Easy Paper Systems for Any Art Room

    Organize It! Easy Paper Systems for Any Art Room


    Paper overflows in every art room—giant sheets, colorful scraps, old artwork, specialty textures, drawing paper, and more. It multiplies overnight where it doesn’t belong and vanishes when you need it for a lesson. Organize paper and get ahead of the clutter with simple systems that empower students, run themselves, and reduce waste.

    Let’s take a peek at easy systems to organize paper in your art room!

    flat files to organize paper

    Add specific and detailed labels.

    Paper storage doesn’t need to be elaborate or expensive—it just needs to be clear. The most effective systems are so intuitive that students don’t have to ask what goes where. This starts with bold, direct labeling. Instead of writing “Drawing Paper,” try specific labels like “Scraps: Use Me First!” or “9×12 Black Construction Paper.”

    Here are three small shifts that make a big difference:

    1. Keep common paper accessible with open shelving and open bins.
    2. Pair scrap bins with fresh paper to encourage reuse.
    3. Add images to your labels to assist younger artists and multilingual learners.

    Create an intentional scrap bin.

    Scrap paper is both a blessing and a burden. When left unmanaged, it turns into a mess of torn bits, weird sizes, and frustration. But with the right setup, scraps can become creative gold.

    Make a “Use Me First!” scrap bin right next to the fresh paper station. This subtle placement reminds students to check it out before grabbing new materials. If you have space, sort scraps by color scheme or material type using clear plastic drawers, a spread of baskets, or a hanging over-the-door pocket organizer.

    https://www.youtube.com/watch?v=g28uc4LJsF8

    Here’s how to encourage your students to use the scrap bin:

    • Reward creativity that comes from reuse.
    • Challenge students to use a certain number of scraps in an artwork.
    • Create a “Scrap Challenge Day” where everyone transforms scraps into masterpieces.
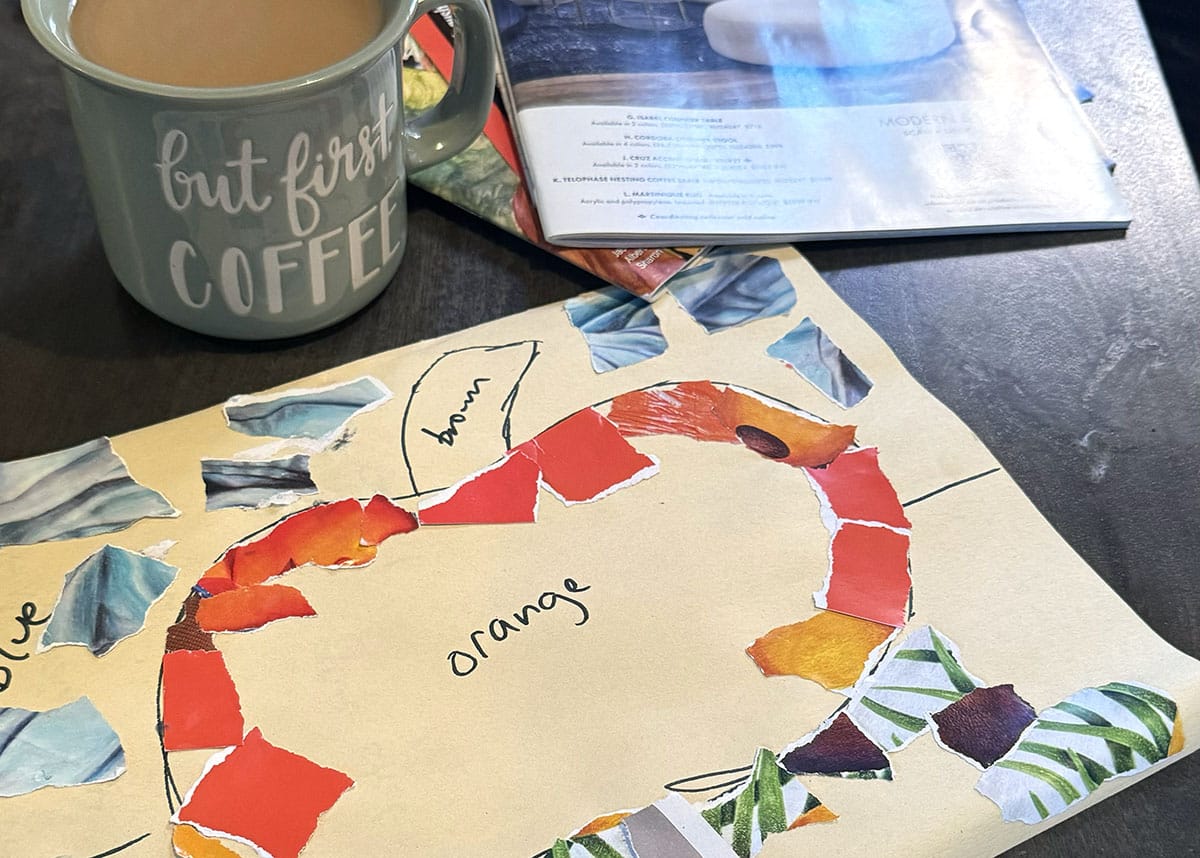
    • Introduce a collage unit.

    Try envelopes for small “next time” scraps.

    Speaking of scraps, what about those scraps students claimed for their art project but didn’t have a chance to use yet? At the beginning of the year, give students an envelope with a metal clasp to glue into the inside cover of their sketchbooks. This is the perfect spot to store paper scraps like small collage pieces they want to save for next time! Plus, the clasp allows students to close it securely so items don’t fall out.

    Use vertical space for large paper.

    Large paper is especially tricky if you don’t have flat files. It’s often too floppy to stack, too wide to fit in regular drawers, and too precious to crumple. If you’re comfortable rolling paper, store rolls in tall laundry hampers or gift wrap bins. Many of these items also have wheels, which is handy because paper can get quite heavy!

    For specialty paper you don’t use often, keep it in the cardboard packaging it came in. Label the edge of the box and slide it into a vertical space, such as between cabinets. If you have a variety of specialty papers, keep them neatly stacked with binder clips or paper clips on each side. Put them into a large portfolio, label the portfolio, and slide it into a vertical space.

    portfolios

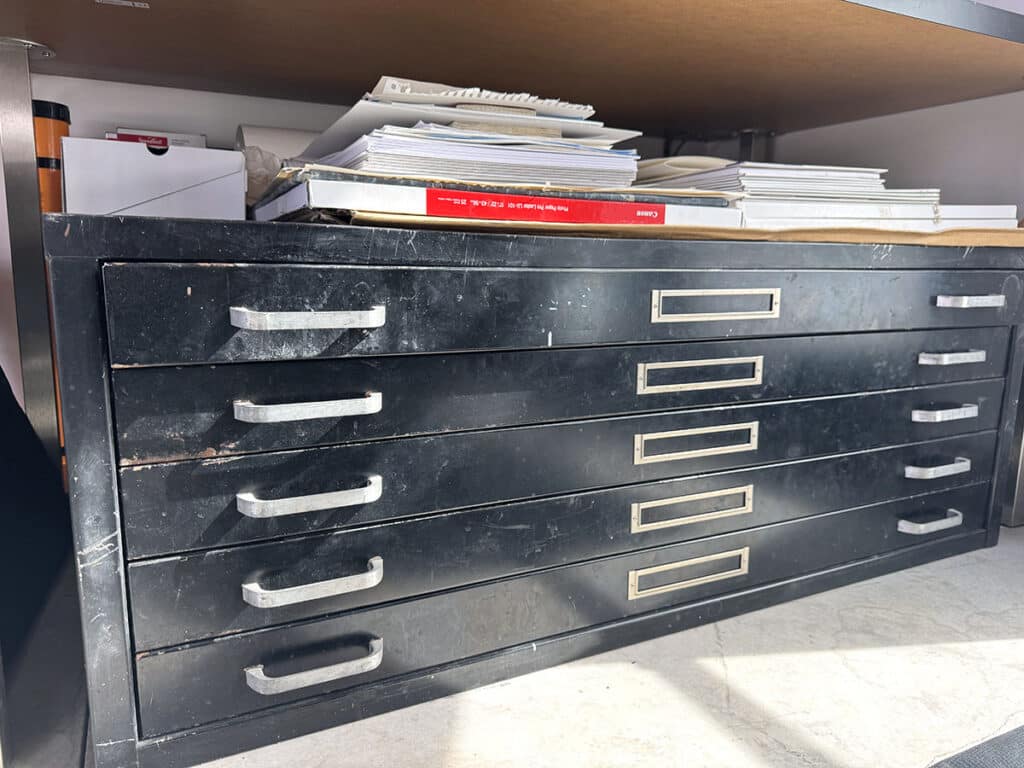
    Sort flat files with trays and bright labels.

    Flat files are a dream if you have one, and a black hole when they get clogged. Assign a weekly “Paper Captain” to organize the papers. Giving students this responsibility encourages studio ownership and waste reduction.

    If you are storing smaller papers in a large flat file, use drawer organizers such as expandable dividers or paper trays to keep everything sorted and contained. If you’re storing larger papers, use binder clips or paper clips on multiple edges with large, bright labels. The labels can be as simple as a piece of fluorescent construction paper folded in half around a stack of watercolor paper that says in marker, “9×12 120 lb Watercolor Paper.” This way, when large stacks slide around, you can easily find the label and what you need!

    open flat files

    Repurpose kitchen items for your art on a cart.

    If you’re teaching in multiple rooms or need flexibility, rolling carts can be a lifesaver—but only if they’re well-organized. Try expandable racks to keep wet papers separated and baking trays for pre-cut papers, just like in the video below!

    https://www.youtube.com/watch?v=Va6hOytGhoI

    Here are some other kitchen hacks to organize paper:

    • Use a metal bakeware organizer to stack fresh paper or completed projects.
    • Organize papers in hanging file folders in a plastic file box.
    • Keep small papers in accordion folders.
    • Grab cardboard or plastic magazine file holders to contain paper.
    • Glue labeled samples of each kind of paper to a clipboard for students to reference, so they don’t dig through your cart.
    • Throw small scraps in clear gallon storage bags and clip or hook them onto your cart.

    Implement the “One Sheet Rule.”

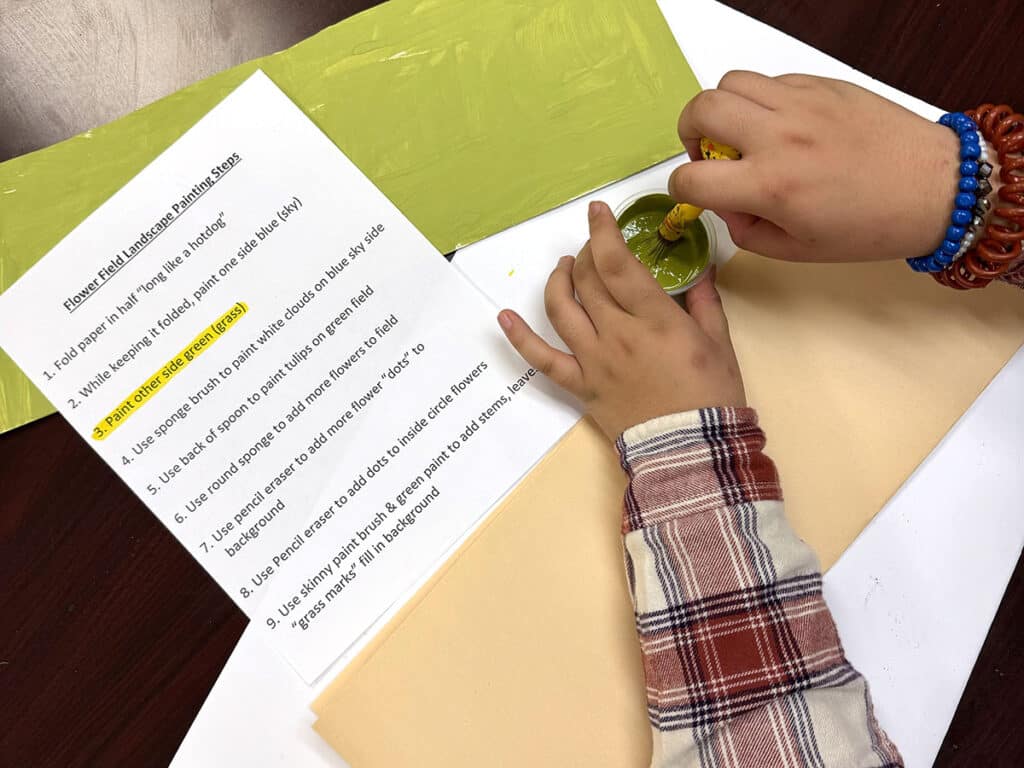
    One of the fastest ways to run out of paper is letting students take as much as they want and start over as many times as they want. Give each student one sheet of paper and put away the rest. If they “mess up,” encourage them to embrace imperfection and figure out a way to incorporate the “mistake” into the final art. Introduce this policy at the beginning of the year to build a culture of creative problem solving!

    To support sustainability and creative thinking, keep an “Oops Box” nearby. This is where slightly damaged paper can live another life as collage material, texture sheets, or sketchbook covers.

    piles of paper

    When your paper system works, you feel it. The art room flows better, students know where things go, and everyone respects paper instead of wasting or forgetting it. Best of all, you’re no longer spending precious prep time digging and sorting through paper instead of planning the next exciting project. Let’s spend more time making with paper and less time managing it!

    What’s the best paper organization system you use in your art room?

    Share a hack for keeping paper scraps tidy!

    To chat about how to organize paper with other art teachers, join us in The Art of Ed Community!

    Magazine articles and podcasts are opinions of professional education contributors and do not necessarily represent the position of the Art of Education University (AOEU) or its academic offerings. Contributors use terms in the way they are most often talked about in the scope of their educational experiences.


    Source link

  • 3 Ways to Cultivate Successful Relationships with Paraprofessionals in the Art Room

    3 Ways to Cultivate Successful Relationships with Paraprofessionals in the Art Room


    If you have students with special needs in your art room, they may come to class with a paraprofessional, teacher assistant, or a “one-on-one.” Sometimes, it can be a little vague on what their role is and how to work together. However, when you welcome instructional assistants into your art room and cultivate a great working relationship with them, there are many benefits. Students with special needs will blossom, you’ll spark a love for art in the paraprofessional, and you will be more efficient at your job.

    Foster positive relationships with paraprofessionals in the art room with these three ideas and then, dive into some frequently asked questions.

    1. Make paraprofessionals feel important—because they are important!

    Paraprofessionals are often the experts on our students in special education. They are with these students for most of the day and can answer questions about their skill level, interests, or even behavioral triggers. Ask for input for both the “in the moment” problem solving and the long-term “getting to know” the student. They can have the missing puzzle piece if you’ve tried everything and nothing’s working… or, you want to take a shortcut and go straight to what’s worked before!

    Another way to make them feel valued and respected is to collaborate on the “fun art stuff” too. Talk to them about the neat things they or their student are doing. Be cognizant that you balance bringing up problems and commands with positivity and encouragement. One way to do this is a simple “thank you” at the end of each period. Acknowledge their effort with specific tasks (no matter how small!) to let them know you appreciate them showing up and being an active participant. Another way to show you are grateful is to provide coffee, water, or treats.

    coffee cup

    2. Help yourself by helping them.

    A lot of people are uncomfortable with art because they feel like they’re “bad at art.” This is evident in the familiar response, “I can’t even draw a stick figure!” Also, many paraprofessionals don’t want to “mess up” a student’s project. Remember these sentiments when building relationships with your paraprofessionals. Although they are adults there to provide support to students, they can also be an extra art student. When you equip them to be more comfortable in the art room, they will be a positive catalyst for your students.

    One simple way to mitigate anxiety is to communicate clear expectations for the whole year and for each class period. Tell them what the students will be doing for the day and what the paraprofessional’s expectations are during this time. Just as you would for a student, provide specific instructions in more than one format, and don’t assume they already know what to do.

    A quick way to provide expectations is to print out a simplified, bulleted, step-by-step list of each action item for the lesson. You can also print the whole lesson and highlight what the students need to accomplish on that particular day. It’s very helpful to have photos showing each step because sometimes a finished art project can be visually overwhelming. If you don’t have the time to compile step-by-step instructions with photos, check out FLEX Curriculum. FLEX is a standards-aligned curriculum that includes detailed step-by-step project instructions with photos and student-facing videos and resources.

    step-by-step photos

    3. Give paraprofessionals their own art project.

    It can be wonderful when you have an eager and artistically-minded paraprofessional working with your students in the art room. However, sometimes they can be too eager to make art for the student. They are focused on having the project look “perfect” instead of indicative of the student’s true performance.

    One way to mitigate this is to preemptively leave out extra supplies and give the paraprofessionals permission to create their own piece of art next to their students. As long as the students are getting the attention and assistance they need, many paraprofessionals will appreciate the thought. They usually enjoy the opportunity to sneak in a little creative outlet during their day!

    If you’re short on supplies and worried about not having enough, many paraprofessionals can be invaluable support in helping you garner donations and recycled materials. Give them a list of what you’re looking for and chances are, they’ll work hard to collect boxes and bottles from other classrooms throughout the day. This creates many opportunities for them to feel like a contributing member of your classroom community!

    art supplies

    Let’s answer your most frequently asked questions about paraprofessionals!

    What if a paraprofessional doesn’t show up?

    It can be frustrating when a designated instructional aid doesn’t show up for your art class with their students. If you have a good relationship with them, ask them about it the next time you see them. They may have had an emergency or didn’t think it was a big deal. It’s a great time to remind them of their importance in the art room and how vital they are to maintaining a smoothly run classroom.

    However, what if this happened multiple times already? Email the lead special education teacher to gather thoughts and ask for guidance. The lead teacher often has a solid relationship with them since they work closely all day. The email will also create a paper trail documenting their absences.

    What if the paraprofessional does too much or too little of their student’s art project?

    If the paraprofessional is doing too much of a student’s project, provide enough supplies so they can make their own. If they’re not helping enough, pull them aside before class to reset expectations. Show them examples of what you need them to do and give them a quick list of written instructions. An example of a reminder expectation can sound like, “I really value your extra set of hands and eyes. Please sit at the same table with students, phone-free so you can be readily available to assist.

    What if the paraprofessional frequently leaves or disappears?

    As aforementioned, pull the paraprofessional aside to reset expectations. Remind them that they are an integral and important member of your class and it can be disruptive for students if they don’t have a steady source of support. Your chat can sound like, “I noticed you stepped out the other day. I’d really appreciate it if you remained here during class. I really rely on the support you bring because you know [insert student’s name] the best.” If the behavior persists, email the lead special education teacher for advice and follow their guidance.

    Bonus Tip

    If you’ve already had a friendly chat to reset expectations and tried emailing the lead special education teacher, you can also seek out the guidelines used in the paraprofessional’s training. This can reiterate that you, the art teacher, aren’t the one “coming up with” the rules and that they are a part of the job requirements.

    Building positive relationships with paraprofessionals in the art room is essential for fostering a collaborative and supportive learning environment. Not only does it model these skills for your students but it streamlines instructional tasks, strengthens classroom management, and bolsters individualized student support. Plus, when teachers and assistants work harmoniously together, they boost each other’s morale. Make your art room a welcoming and appreciative spot for paraprofessionals with the tips above so they’ll look forward to your class and spread a vigor for art to your students!

    What’s one thing you do to make paraprofessionals feel welcome and included in your classroom?

    How do you navigate challenging situations with paraprofessionals in the art room?

    To continue the conversation, join us in The Art of Ed Community!

    Magazine articles and podcasts are opinions of professional education contributors and do not necessarily represent the position of the Art of Education University (AOEU) or its academic offerings. Contributors use terms in the way they are most often talked about in the scope of their educational experiences.


    Source link

  • The Top 5 FAQs About Printmaking in the Art Room

    The Top 5 FAQs About Printmaking in the Art Room


    Printmaking is a powerful process in the art room. It offers students hands-on, engaging artmaking experiences and teaches creative problem-solving and experimentation. The many methods of printmaking make it accessible for all students, classrooms, and budgets. However, this is also what can make printmaking so intimidating! Art teachers just like you in The Art of Ed Community asked their burning printmaking questions and we’re here to deliver practical solutions.

    Let’s answer your top five most frequently asked questions about printmaking in the K-12 art room!

    spread of prints

    1. “I’m not comfortable teaching printmaking. Where do I start?”

    Printmaking can be an overwhelming medium—there are so many forms, lots of tools and equipment, and several stages in the printmaking process. It can feel like a lot to teach on top of classroom management, ideation, assessment, and more. The great news about printmaking is that there is a process for everyone at every comfort and skill level!

    Start with simple techniques and processes like foam tray printing or stamping. These two methods are great entry points and are a good segue into block printing. They do not require any fancy printmaking tools and you probably already have the supplies you need in your closet. Boost your confidence by incorporating mediums you love! For example, if you love drawing, painting, or mixed media, try monoprinting or collagraphy.

    Another tip is to experiment first. Try exploring foam tray printing or stamping on your own for fun. Then, host a laidback Art Night event at your home with friends or at school with colleagues to practice teaching a mini-lesson. This can help you troubleshoot any considerations before you bring it to your students.

    Embrace imperfection! Printmaking is all about trial and error and the process. Don’t think you need to know everything about printmaking before diving in! Invite students into the creative process and show them how to learn from mistakes and discoveries.

    linocut plate and carving tool

    2. “I studied printmaking, but I still avoid teaching it. Why?”

    Even if you are comfortable with printmaking in your own artmaking, bringing it to students can be a whole different ball game. Printmaking can seem messy and intimidating if you have large classes and limited studio space. With a little intentional planning, printmaking can be a smooth process that is engaging for all of your students.

    Just like you’d scaffold a difficult skill with your students, scaffold the lesson and process for your instruction. Break down the printmaking process into small steps. Teach each step as an individual lesson and move on when the class as a whole is ready. For example, spend one class sketching ideas and then the next carving. When you get to “Printing Day,” set up student-led stations with clear roles to reduce chaos. Let the first round of printmaking be an experiment to see how everything works before diving in again to make more fully realized and final prints.

    Perhaps you love printmaking so much that you don’t know where to start because you want to bring every form to your students! This is a wonderful “problem” to have. Instead of overloading your students with every possibility, pick one very simple process and let your passion trickle down to your students. Once they’re hooked, you will be unstoppable together!

    pink ink on paper and brayer

    3. “How do I teach printmaking on a tight (or nonexistent) budget?”

    Certain types of printmaking can be on the pricier side and take up the bulk of your valuable art budget. For instance, lithography traditionally uses heavy blocks of limestone and requires a heavy-duty printing press with lots of studio space. Etching can also use expensive and toxic chemicals that aren’t school-friendly. However, there are many hacks and alternatives to make printmaking accessible to your students!

    Here are some budget-friendly printmaking ideas perfect for the K-12 art room:

    carved plate with black ink

    4. “I want to try block printing, but I’m worried about students cutting themselves!”

    Prioritizing student safety is a part of having excellent classroom management in the art room. Many items used for carving or incising designs, like linoleum cutters or etching tools, are very sharp. Paired with the force and pressure required for carving and many students’ poor hand strength and coordination, you may have cause for concern. With proper instruction, supervision, and limits, you can execute a printmaking lesson with zero injuries!

    Start by teaching students about the tools and equipment they will be using. Assume nothing and explain and show everything to ensure everyone is on the same page. Explain what each item is for and how to properly use it. Verbalize and demonstrate safe-cutting techniques, such as carrying sharps pointed toward the ground, cutting away from the body and helper hand, and using a bench hook or scrap board to stabilize the block. Do several exercise drills to get students in the habit of how to behave with, hold, and use these exciting tools!

    Another tip is to start with soft-cut materials, such as rubber blocks or foam, instead of traditional linoleum. These require less pressure to carve and often, duller tools. You can also practice the motions of carving with plastic tools and clay slabs before graduating to printmaking materials. These are all great alternatives for younger printmakers.

    two types of printing plates

    5. “How do I keep printmaking from becoming a total mess in my art room?”

    Art teachers spend hours and hours maintaining the art room. There are tons of materials, tools, and projects before adding printmaking to the mix. Plus, printing ink seems to multiply on hands, tables, clothes, and sometimes even the floor! In the chaos of a “Printing Day,” students may not follow cleanup instructions and leave the sink full of inky brayers. Avoid the mess and take a few simple steps to prepare for cleanup before class even starts.

    Take a look at these quick steps to avoid the mess:

    • Set up printmaking zones.
      Designate separate areas for drawing, carving, inking and printing, and drying to keep messes contained.
    • Use minimal ink.
      Show students how much they need and how to roll it out into a thin, even layer. You can even pre-portion ink into small cups so they don’t overuse and waste it.
    • Assign cleanup roles.
      Build ownership in the studio by putting students in charge of wiping tables, cleaning brayers, and organizing prints. This will free you up to supervise the class and the classroom as a whole.
    • Provide wipes and scrap paper.
      Baby wipes—store-bought or DIY—will be your best friend during printing to minimize the spread of ink! Use large scrap paper as “trays” or small scraps as “tweezers” to transport paper and prints without tiny fingerprints.
    • Grab a lot of newsprint.
      Order a bulk pack of newsprint or ask your local newspaper for scrap newsprint. Use this to blot prints to absorb excess ink. This reduces smudging and dry time.

    pink ink on paper and brayer

    Whether you’re new to printmaking or a seasoned expert, you can absolutely teach printmaking to your students! Printmaking may feel overwhelming, but it’s one of the most rewarding processes to teach. The key is to start simple so you will gain confidence and hook your students! From there, try some of the hacks and tips above to keep it budget-friendly and mess-free. Turn your most frequently asked questions about printmaking into your most frequently asked for art lesson!

    What’s your biggest classroom printmaking challenge that we can help with? 

    To chat about printmaking with other art teachers, join us in The Art of Ed Community!

    Magazine articles and podcasts are opinions of professional education contributors and do not necessarily represent the position of the Art of Education University (AOEU) or its academic offerings. Contributors use terms in the way they are most often talked about in the scope of their educational experiences.


    Source link

  • How to Transform Your Art Room with Zones to Simplify Your Life

    How to Transform Your Art Room with Zones to Simplify Your Life


    Managing a busy art room can be overwhelming, especially when juggling multiple student needs, materials, and projects at the same time. One of the most effective ways to bring order to the creative chaos is to set up art zones. Whether you’re working with elementary students or high school artists, designing clear, purposeful zones in your art room will help with classroom management, student independence, and workflow efficiency.

    Let’s explore how art zones in the art room can revolutionize your teaching and create a more organized, engaging space for students to explore their creativity.

    paint bottles

    What are art zones?

    Art zones are specific areas within your art room that serve a dedicated purpose. Instead of a one-size-fits-all setup, divide your classroom into areas to guide students through different aspects of the creative process. Students will be able to navigate the studio more independently as artists. Plus, it will free you up to provide meaningful instruction instead of constantly directing traffic. 

    Let’s take a look at six art room zones:

    1. Material Zone
      Keep supplies accessible with a Supply Shack, open shelving with labeled bins, “grab and go” caddies for daily essentials, or a checkout system for specialty items.
    2. Creation Zone
      This is your students’ space for making art and is the heart of the art room! Consider flexible seating options, further zones by media, and easy access to reference materials and resources.
    3. Cleanup Zone
      Transform cleanup into the smoothest part of your class routine and boost student ownership. Maintain order with a sink or handwashing area and clearly marked bins for trash, recycling, and reusable scraps. Make tossing trash fun with a basketball hoop!
    4. Artwork Zone
      Have clear systems and locations to store completed and in-progress works. Not only does this keep tracking student work more efficient and organized, but it protects work from getting damaged or lost.
    5. Reflection Zone
      Encourage thoughtful artmaking with a spot to slow down. Include sketchbooks and artist statement prompts. For a twist on the “reflection” theme, include mirrors for self-portrait studies!
    6. Early Finishers Zone
      Include extension activities for both elementary and secondary, like drawing prompts or a rotating collection of art books and magazines.

    art teacher in classroom

    How do I set up effective art zones?

    Creating art zones doesn’t have to be a complete classroom overhaul. Start small and redesign one key area that needs improvement. As you start implementing your zone, adjust based on student needs. You can always add a new zone each year!

    Ask yourself these questions to determine what zone you should focus on first:

    • What questions do students ask me the most?
    • What routine is consistently not hitting home for most students?
    • Where and when in my classroom is there a bottleneck of traffic?

    Then, consider these questions to navigate design and setup:

    • What big furniture items can I move/swap and which do I need to work with?
    • How can I ensure each component is easy to identify and clearly labeled?
    • What is the best way to visually separate this zone from others?

    Use these questions to guide how you teach and reinforce zone expectations:

    • What’s the most engaging way to tour the zone with students?
    • How can I model how to move through and use the zone as I teach?
    • What is specific encouragement I can give to reinforce correct zone usage?
    • What signage or anchor charts can I add for helpful reminders?
    • What are classroom jobs I can assign to maintain the zone?

    paintbrushes and cups in the sink

    What are some common challenges I may face setting up and implementing art zones?

    Even the best systems take time to perfect! That said, there are a few tips to avoid common art zone pitfalls. For example, you’ll have students that ignore the zones and ask for help anyway. If this is a widespread class issue, pause and regroup. Reteach the zone’s purpose and how to use it with the entire class. Model it and have students practice it together, much like a fire drill! If this is specific to one student, have a brief discussion to determine where the disconnect may be. 

    Another potential struggle may be that your zone gets messy—particularly the Cleanup Zone. Get ahead of the clutter and delegate cleanup jobs to foster leadership. Leave enough time at the end of class to clean and double-check before the bell rings. Use a fun animated timer or cleanup song to keep the energy up!

    Lastly, you may notice that your Early Finishers Zone is a distraction. Students may rush through their work to go play or they’re not engaged with the options. Ensure you keep artwork expectations high with clear rubrics. Provide structured choices and rotate the activities so there’s always a fresh selection.

    Discover more ways to make the most of your classroom space with the Rethinking Art Room Space Pack in PRO Learning. Watch these quick videos to find out why classroom space is so important and how to create and alter your existing space on a budget.

    You probably already have designated areas in your art room. Level up your classroom management with intentional zones to increase engagement and efficiency. When you spend less time on cleanup, missing artwork, or locating supplies, students will have more energy to focus on creating, communicating, and camaraderie! With clear zones, they’ll also gain confidence, independence, and a greater sense of responsibility.

    What art zone will you implement in your studio first?

    To chat about art room zones with other art teachers, join us in The Art of Ed Community!

    Magazine articles and podcasts are opinions of professional education contributors and do not necessarily represent the position of the Art of Education University (AOEU) or its academic offerings. Contributors use terms in the way they are most often talked about in the scope of their educational experiences.


    Source link

  • “Waiting Room” by Tristan Martinez

    “Waiting Room” by Tristan Martinez


    Artist Tristan Martinez recently released a new photo book, published by Friend Editions. “Waiting Room” is a celebration of transitional moments and experiences which may be otherwise overlooked. Martinez describes the work as “the feeling of being on the cusp of a moment, just as something is about to happen or just after something has happened.” Tristan Martinez is a New York-based artist from LA, rooted in Lower Manhattan skateboard scene.


    Source link